Professional photographer leading workshops and tours. I use Canon cameras but I'm familiar with all the other brands. Love photography birds and nature. Love talking about photography and gear.
I’m completing my “final” travel equipment which is the do-it-all lens for my R7. I picked up the R7 recently by selling several of my way-to-heavy EF lens (ended up with a gift card of $250 bonus in addition to the R7). Now I need to get the RF lens.
Have you heard any comparisons between the Sigma and Tamron. I’m looking through B&H, Adorama and DPReview which are my go to’s.
With the EF versions, I had ended up preferring the Tamron. It didn’t last as long as a Canon lens, but I didn’t treat it as gently getting in and out of the buses. ~~~ Terry
I love the R7. It’s a really nice camera with a lot of great features.
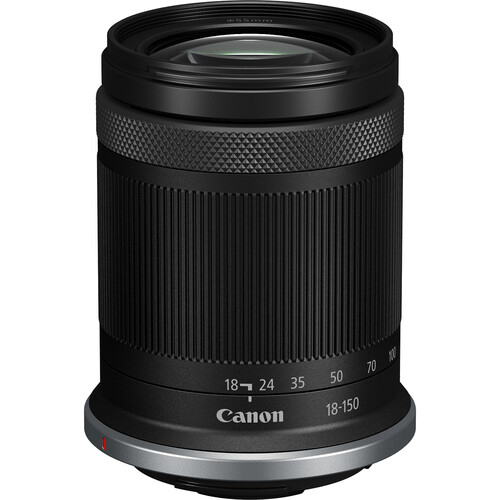
I’d get the RF-S lenses before the Tamron or Sigma. I’ve used the RF-S 24-105mm and was impressed. Same with the 100-400mm. The RF-S 18-150mm might be what you want. Take a look.
I’d recommend the Canon lenses first because of the complex electronics. Yes, I know Tamron and Sigma are “just as good” but Canon is always going to be better.
That said, you’re looking for a lens with a lot of range. I use two lenses where you’re looking for one that does it all.
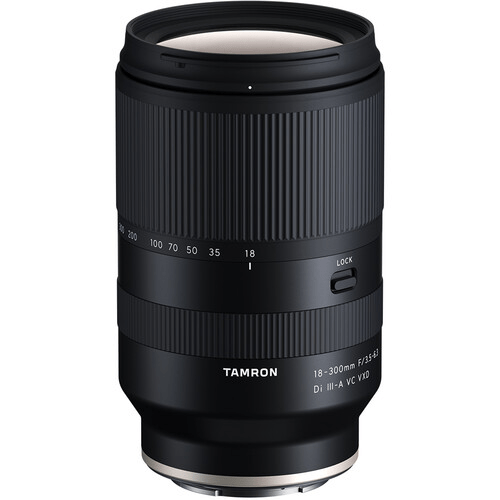
Tamron 18-300mm is $629. It has a 29-480mm equivalent view. That means the wide is not really very wide. You’d use this more for the reach or for things that were further away. Minimum focusing distance is 6 inches so that’s not bad. Weighs 21.9 ounces. I’m curious how long it gets when you zoom out to 300mm?
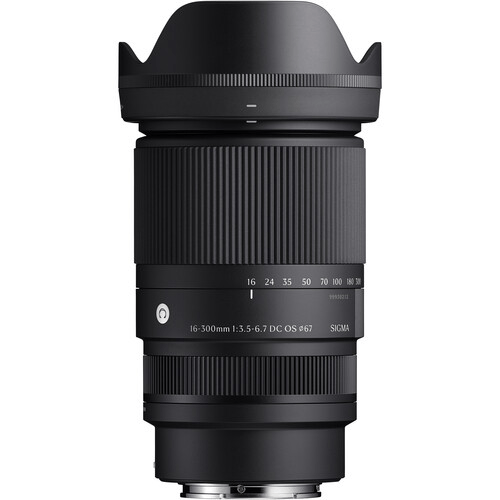
Sigma 16-300mm is $694. It has 24-450mm equivalent view. That means the wide is enough to photograph the interior of a room. More to my liking that the 29mm view in the Tamron. Not as much reach as the Tamron but I’d take the extra width over the extra reach. Minimum focusing distance is 3.44 feet. Weight is 21.7 oz.
So in conclusion, these lenses are pretty compatible. I think you can’t go wrong with either. I’d use the added width of the Sigma more on the photo tours. A 24mm view is great for interiors. The other is a bit narrow for my tastes.
Durability is an issue. I’ve heard people say the Tamron didn’t last as long as they wanted. I used to own a Tamron so I guess I was listening for that feedback. I’ve never owned a Sigma so haven’t listened for feedback on that one.
I hope this helps.
Any readers have experience with either lens? Can you provide feedback? Your actual experience with one of these lenses could help.
Below is a recap of the Strabo Photo Tour Collection trip to Greenland in September 2025. We’ll do this trip again in September 2027 if you’re interested in joining us.
We flew round trip out of Newark. Some flew to Iceland first and then to Greenland.
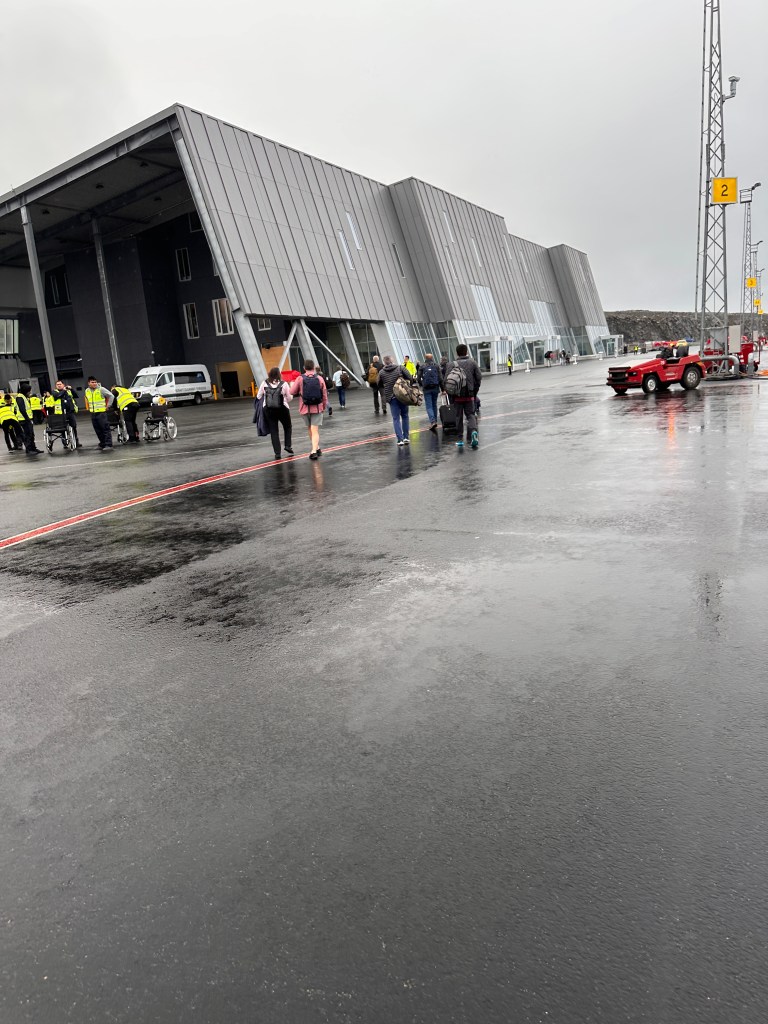
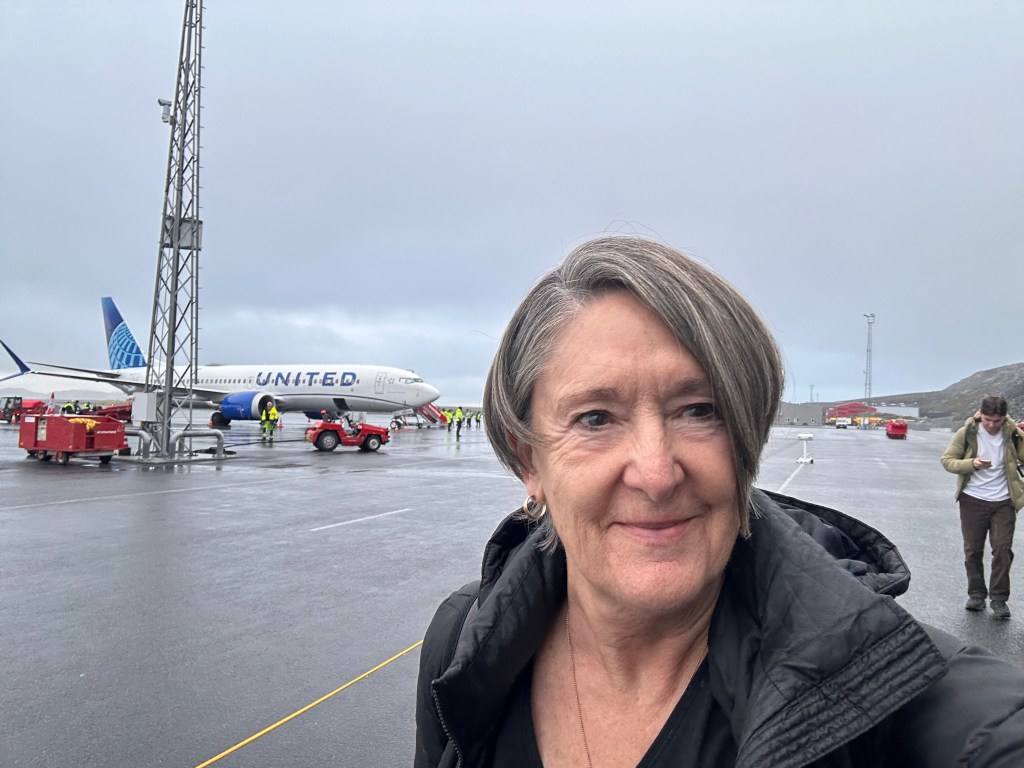
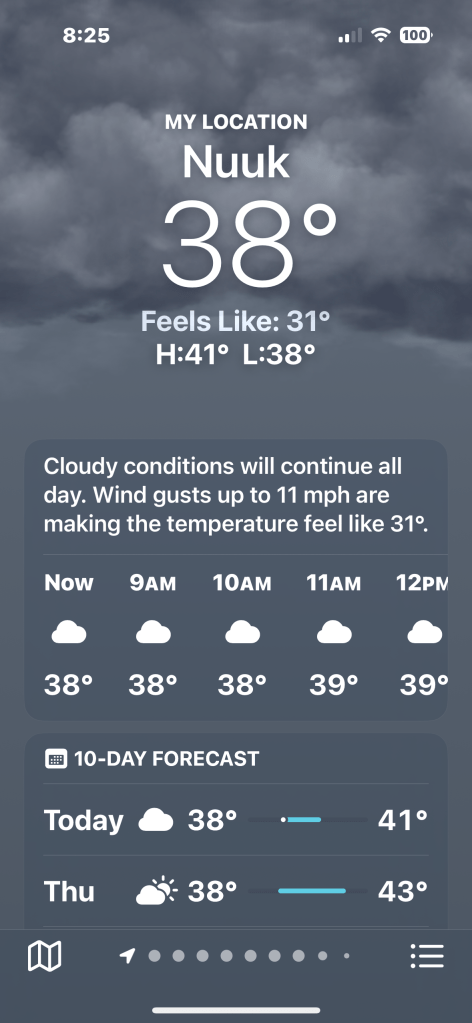
Arrival in Nuuk at 6:45pm. Travel time was 4 hours and 15 minutes. Meal on the plane but that was lunch. Pack your puffy jacket where you can get to it. There’s a walk across the tarmac and it is cold.
Terminal is a gray, modern facility built against the rocks. Efficient and easy to get around. (Click one of the photos below for a slide show. The images will show full-frame.)
Arrived at Hotel Egede. Modern and efficient. My room had two single beds, desk, and couch. Nice amount of room. No fridges in the rooms. Coffee makers, though.
Our first day in Nuuk, we walked to the Nuuk Cathedral and Hans Egede statue. Church was closed but we stayed there for an hour. I explored the graveyard behind the church. Climb to the statue was easy but could be difficult. The terrain is large round rocks with a bit of moss and dirt between. A cruise ship was in port so we had 20 or 30 people around us doing the climb and exploring. (Click one of the photos below for a slide show. The images will show full-frame.)
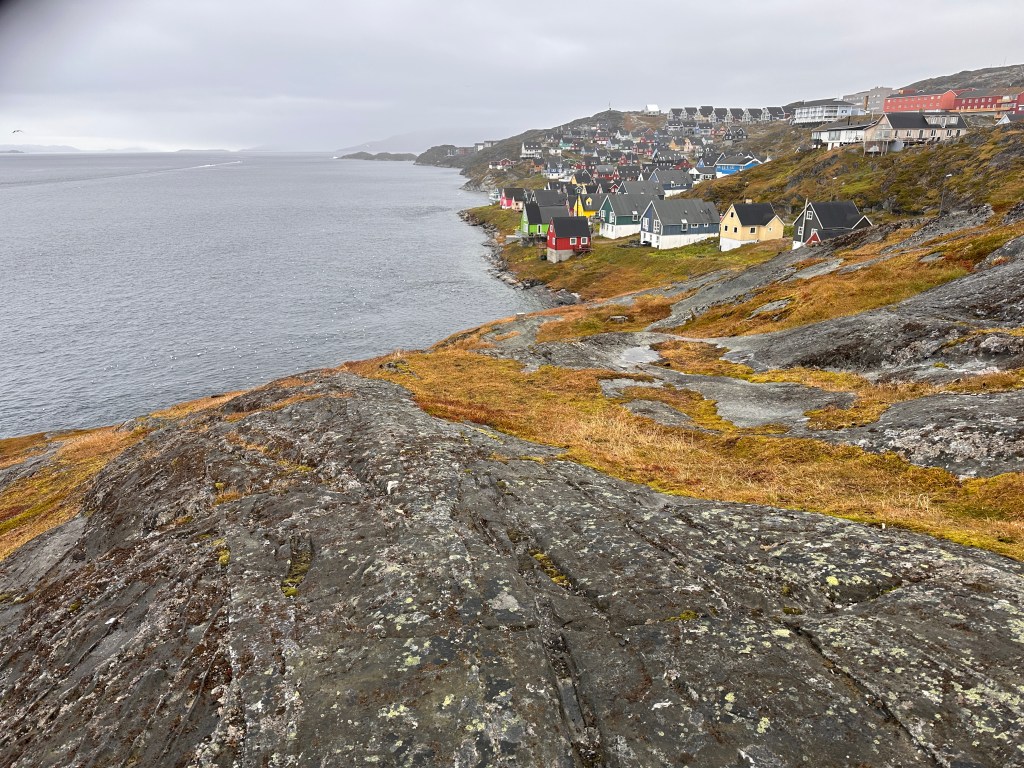
We walked toward the shoreline and up a street to Myggadalen or the Pano Viewpoint. Ocean to the left and colorful houses to the right. Cold, slippery, and rainy.
Backtracked to the Old Colonial Harbor and the “Lady of the Sea” statue along the shoreline. The tide was in so we didn’t see much of the statue. The group agreed to return at low tide so we could photograph the statue.
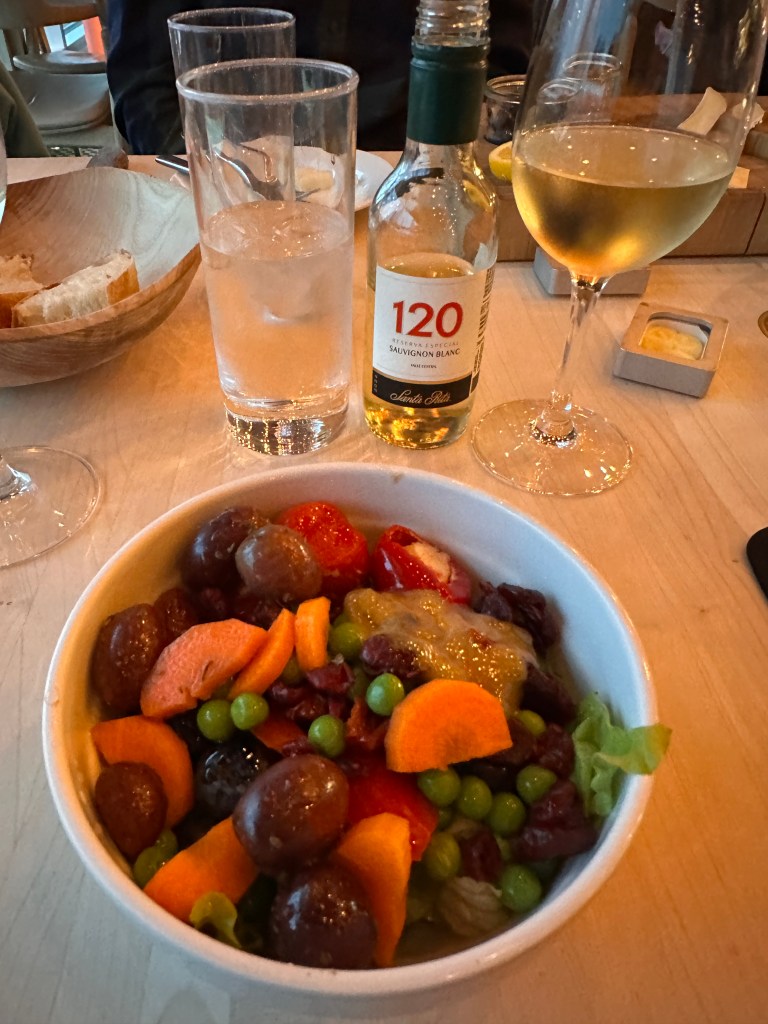
We wandered, photographed and then stopped for coffee and bathroom. Found a little place near the Nuuk Local Museum and the ferry dock where we’d depart the following day. Coffee, pastries, and ice cream were very good.
Continued our walk to the boardwalk that follows the shoreline to the south. The group spread out and enjoyed the photography.
The walk continued around the old, industrial housing blocks. Then past a school and back to the road with the Hotel Egede. We decided on Café LoLo for lunch.
Back to the hotel and then the grocery store for lunch on Thursday. Fun to walk the isles and see what they eat. I found flat bread (30K), cheese (30K), and an apple. Turned out to be perfect for me for two days. There are no refrigerators in the hotel rooms, so sandwiches were out. Several went over at 7am the following morning to buy their sandwiches.
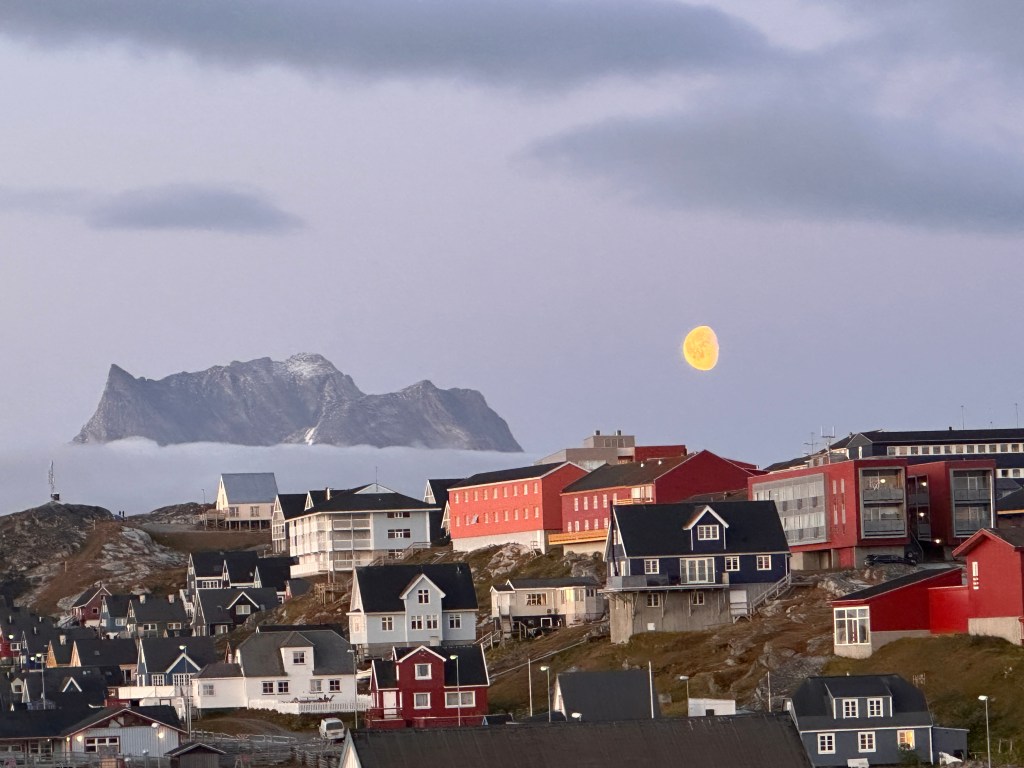
Left the hotel at 9pm for possible northern lights at the church and statue. Stayed out until 11pm when it was just too cold to stand anymore. Very nice half moon coming up at twilight. Walked back to the hotel.
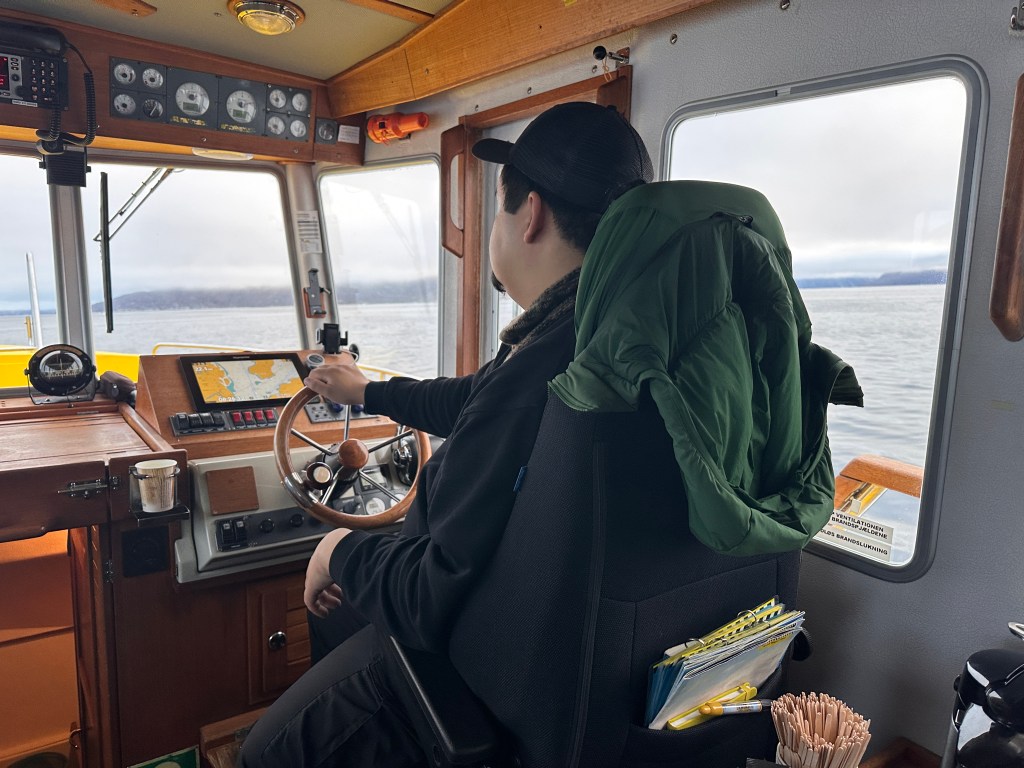
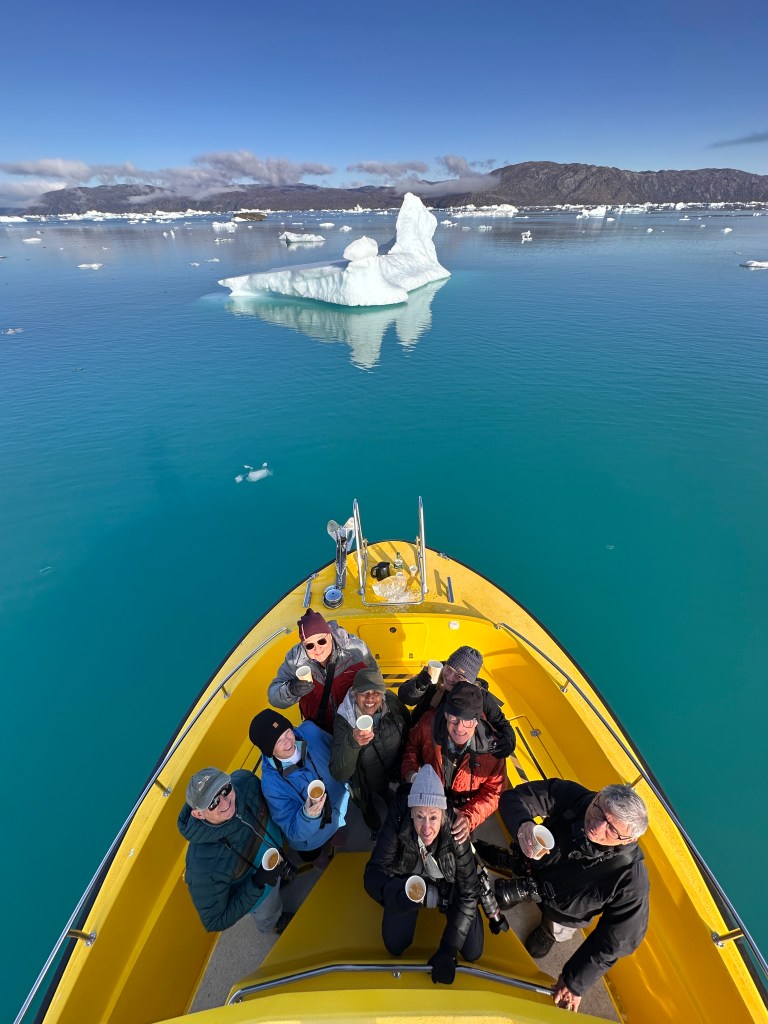
Thursday, Sept 11, we met in the lobby at 8:15am for a private excursion up the fjord to the icebergs. Our captain and Sebastian, our English-speaking guide, were both native Greenlanders.
Both were amazing to be with. Sabastian answered all our questions. He once lived in the abandoned settlement an hour from Nuuk. He was also a photographer so pointed to things that were interesting. (Click one of the photos below for a slide show. The images will show full-frame.)
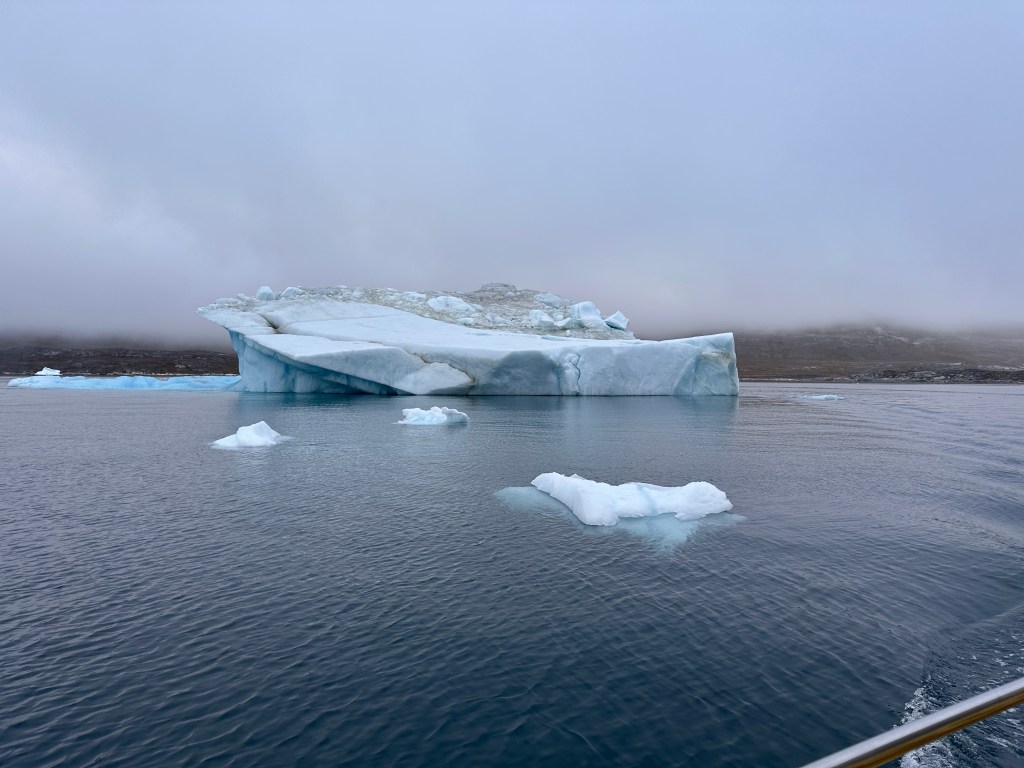
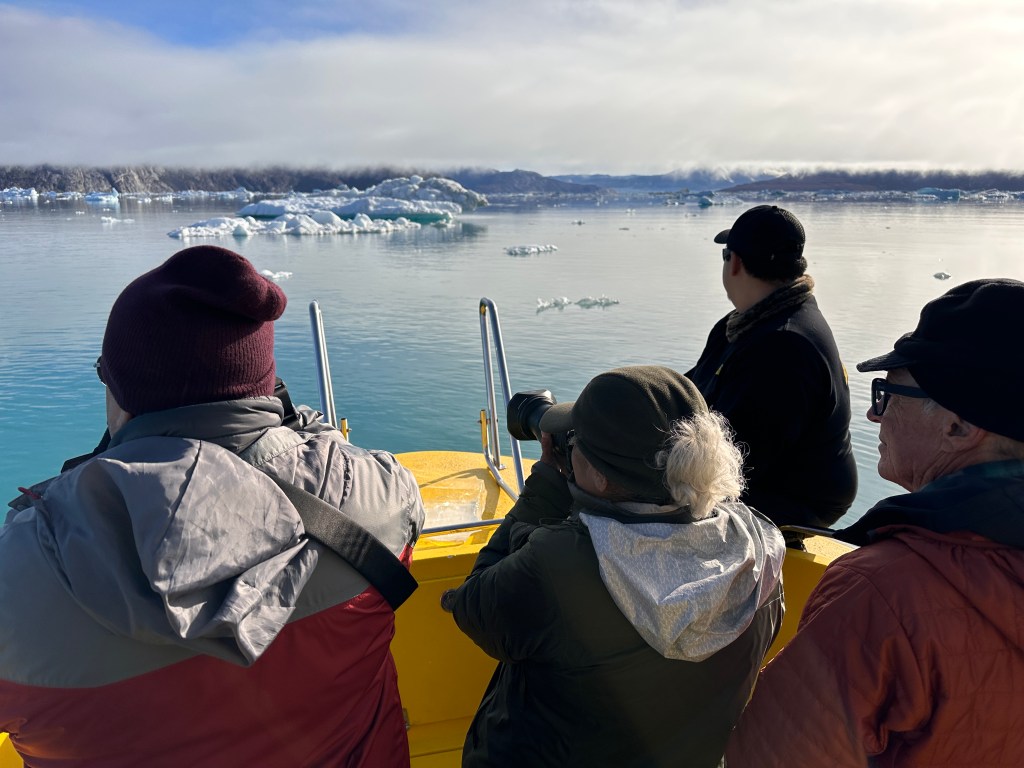
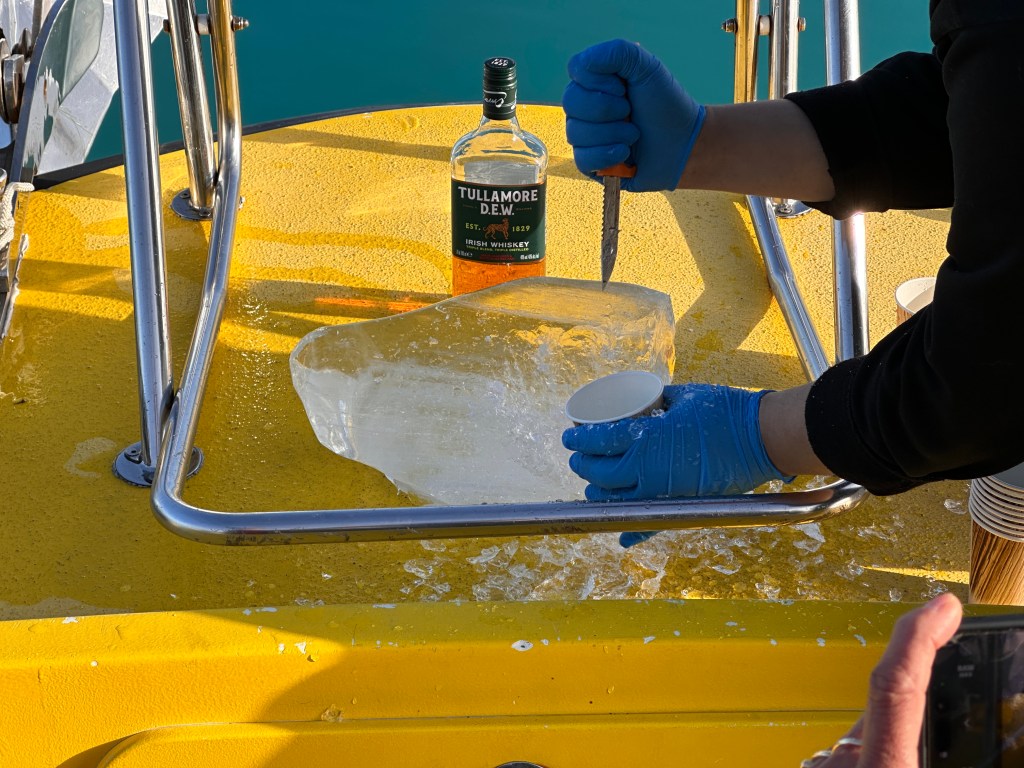
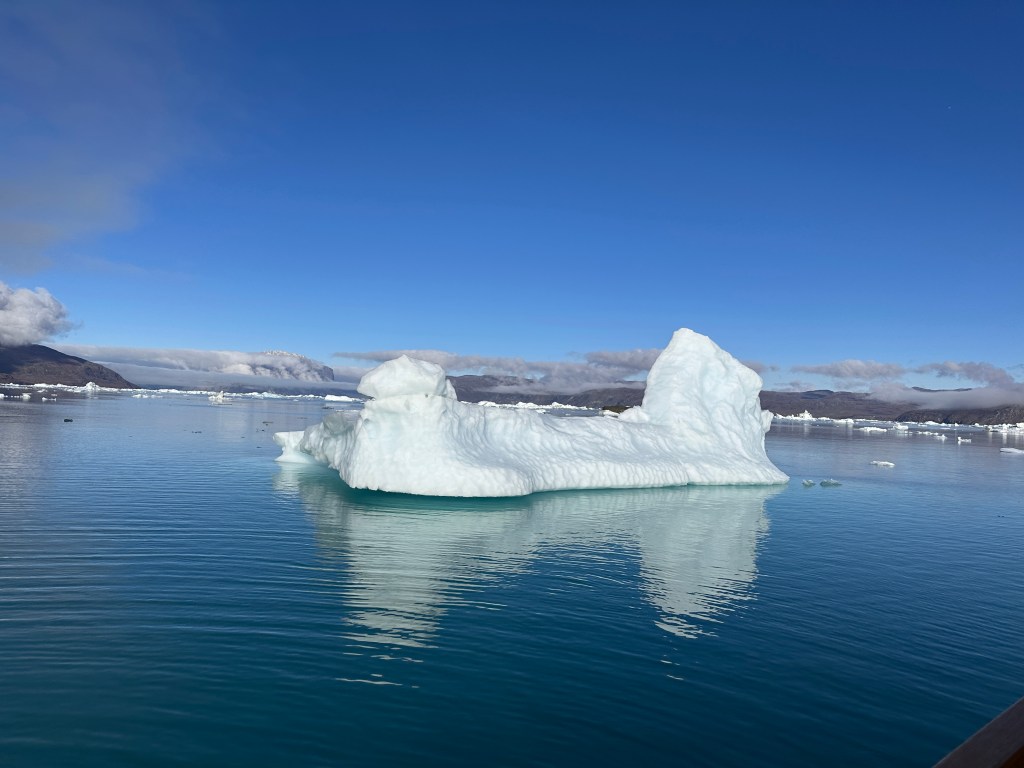
The sun came out when got to the base of the glacier, probably Ilulialik, and the captain killed the engine. That gave us a chance to enjoy the quiet and photograph the icebergs. The captain grabbed a piece of clear ice with his net, rinsed it off, and then let it dry in the sun. Then he chipped it into cups and poured a bit of whisky over the ice. We saluted, celebrated, took photos, and enjoyed the drink. I just ate the ice, which was very hard, since I’m not a fan of whisky.
Icebergs in a quiet fjord.
We returned to Nuuk and arrived around 2pm. Dinner at one of the restaurants in town.
Walk after dark to maybe see the northern lights over town.
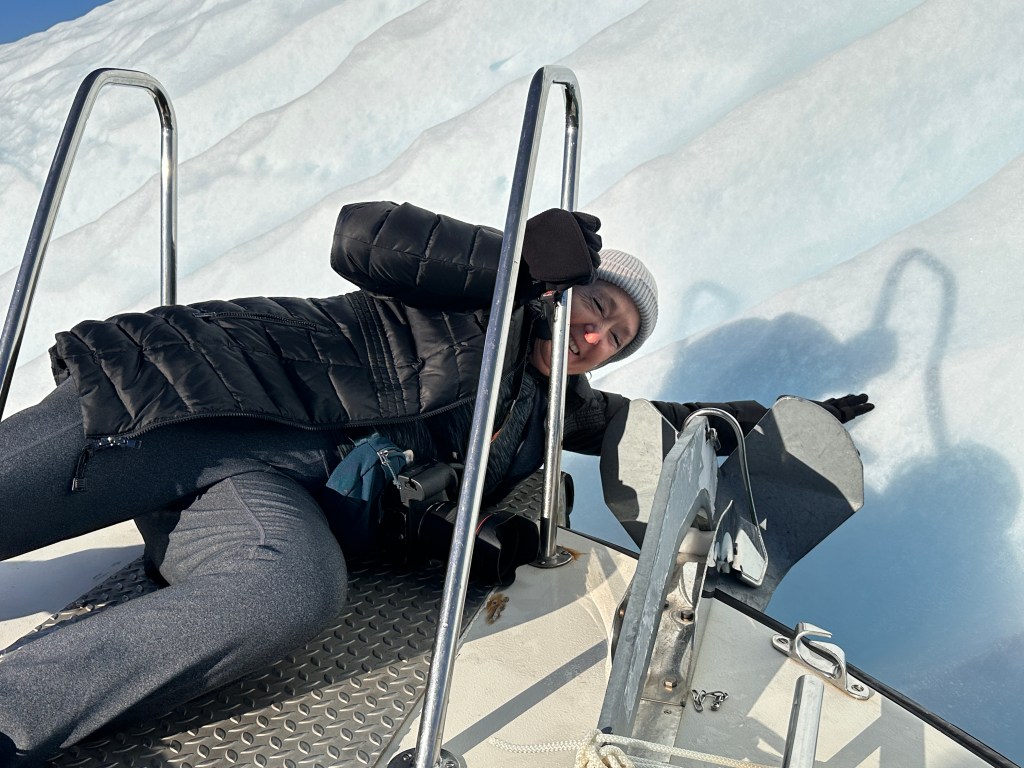
Friday, Sept 12th was our journey to glamping at Kangiussaq. Overnight luggage was stored below. Boat was full so no room for camera bags in the passenger compartment.
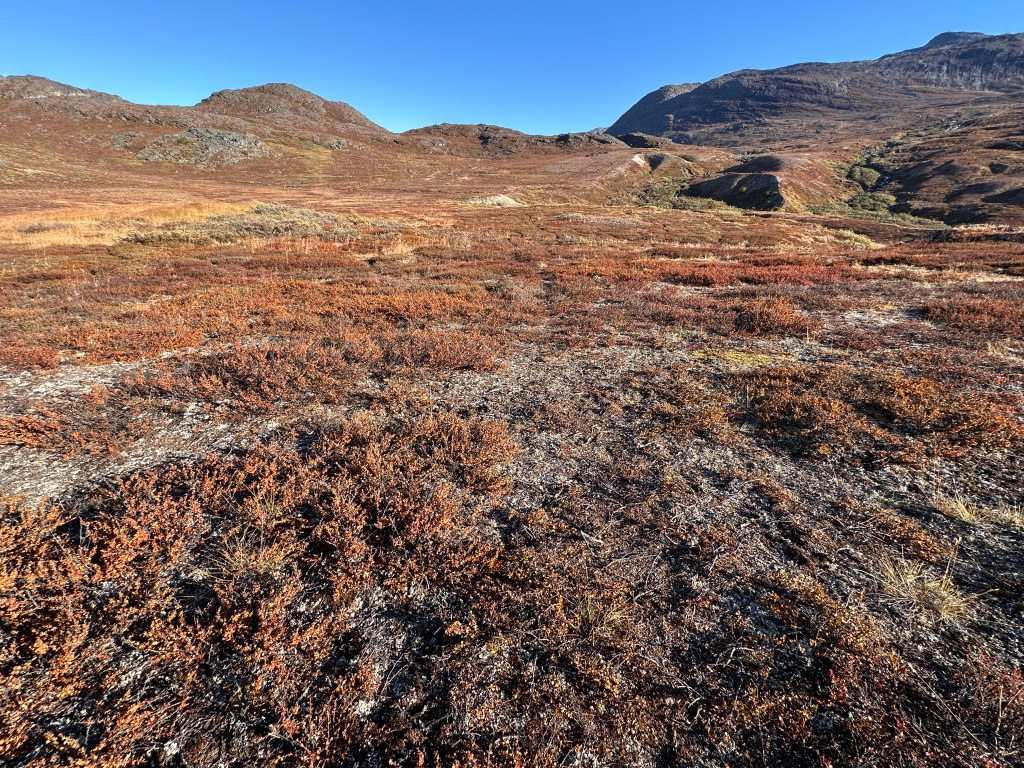
Arrived at the glamping site at 12pm. The boat captain circled an iceberg so we could all touch it. We took pictures of each other with our hand on the iceberg. ATV came down for luggage. Some hiked directly over the hills to the dining tent. It was steep. Others walked the road that the ATV used.
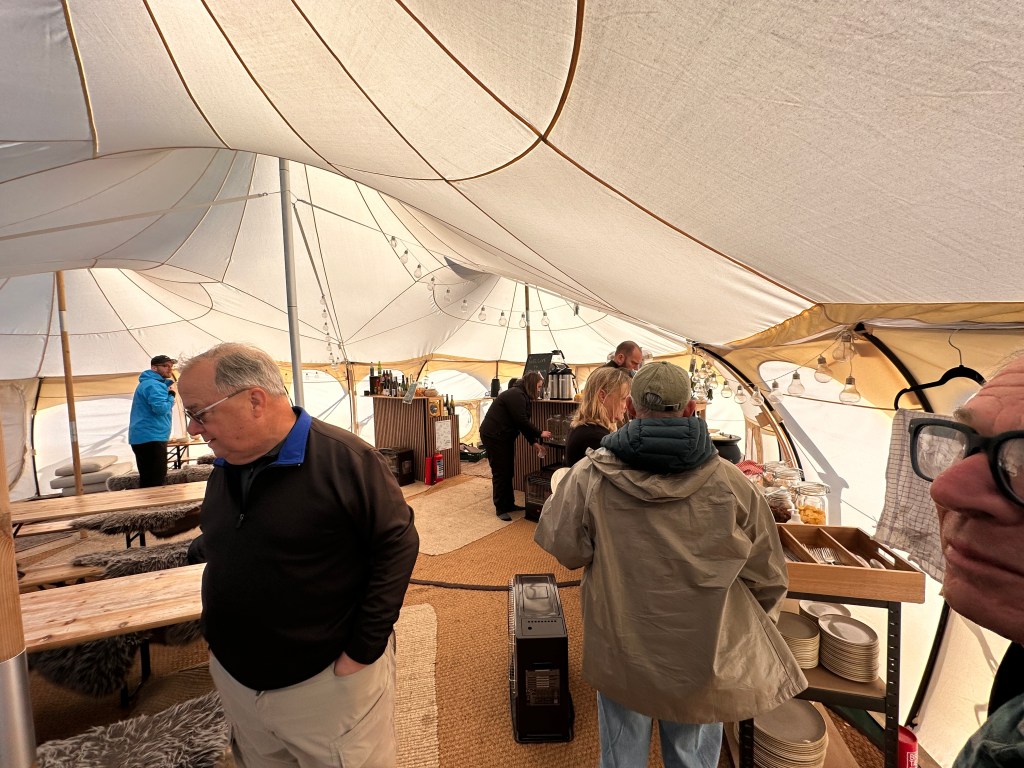
We gathered in the dining tent for a lunch of cheese and cold cut sandwiches. After settling in, some went hiking with a guide to see a lake on top of the mountains.
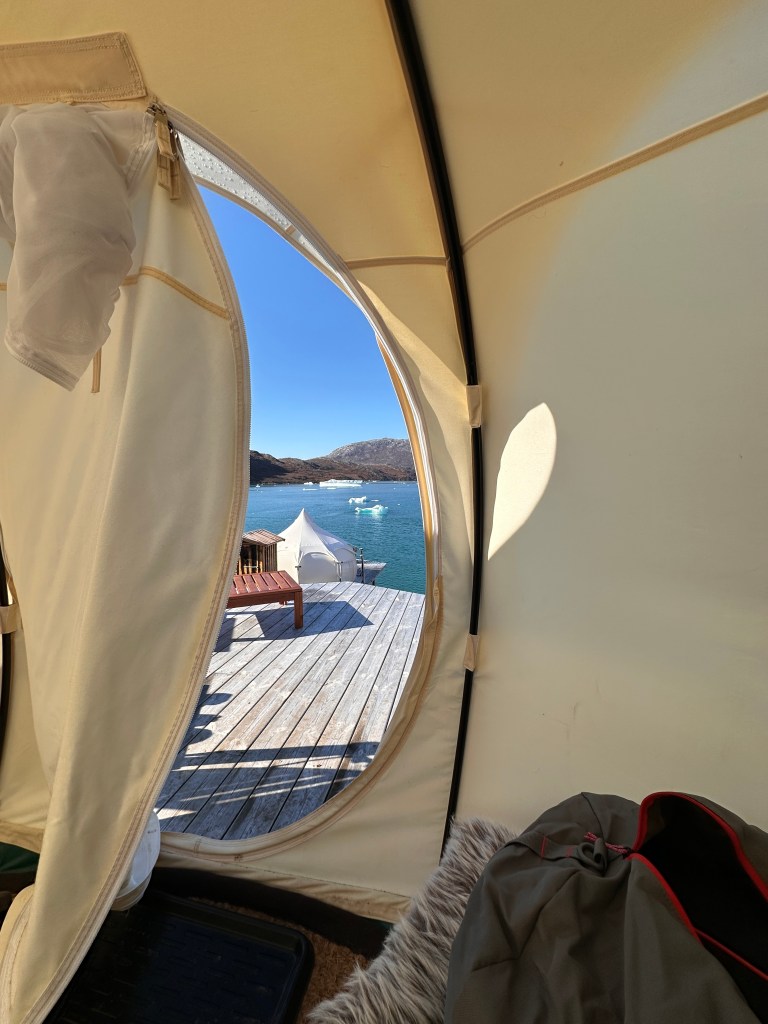
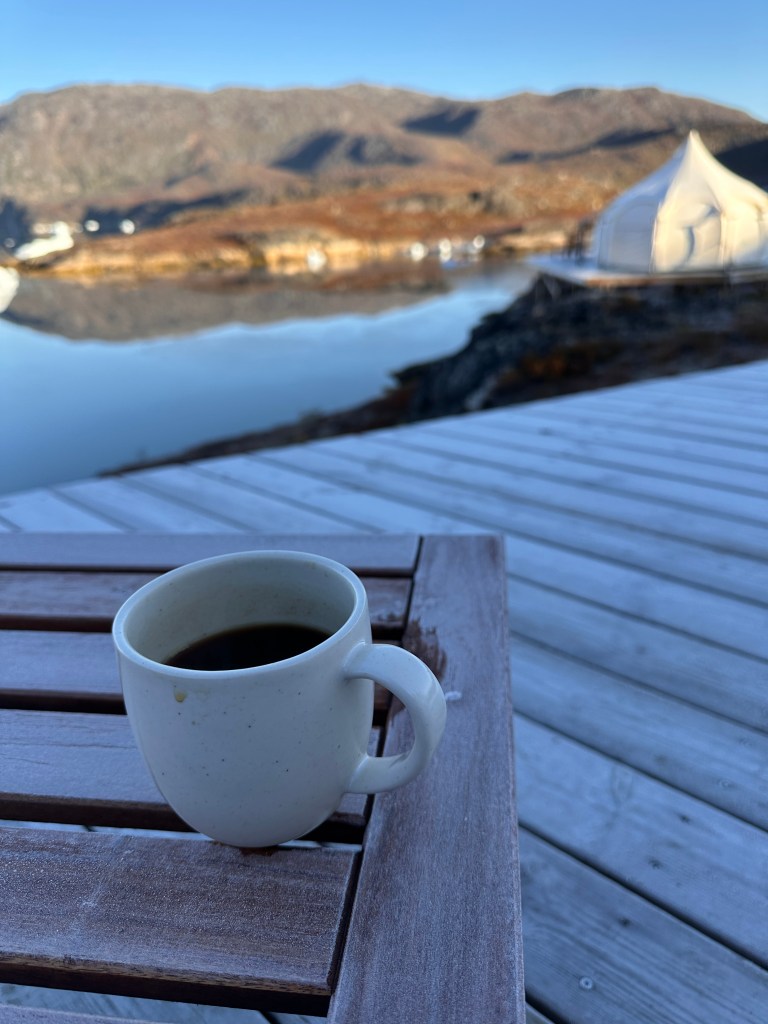
Sleeping Tents have a kerosene heater that’s turned on at night. Twin beds on very comfortable mattresses. Each had a fluffy down comforter and pillow. There were a couple of pieces of furniture around the tent such as a shelf and small stool for dressing. (Click one of the photos below for a slide show. The images will show full-frame.)
Dinner of muskox stew over pasta and tomato sauce over pasta for the vegetarians.
We were so lucky. It was clear when we arrived and the forecast was for a clear night. After dinner, we reviewed the instructions for the camera settings. Everyone got their tripods ready and attached to their cameras. We then divided the night so each person would set their alarm clock for a specific time.
I got the 11:00pm time slot. The camp staff said the northern lights would be around 2am. When I looked out my tent at 11:00, there was a streak of light right across the sky. The white cloud effect and not the green light. I knew what it was so started hollering at the group. Everyone cooperated with an “I’m awake” so I knew we were all awake and ready to photograph.
I walked from tent to tent to get some kinks worked out. Folks were nervous and cold so brains weren’t clicking on all cylinders.
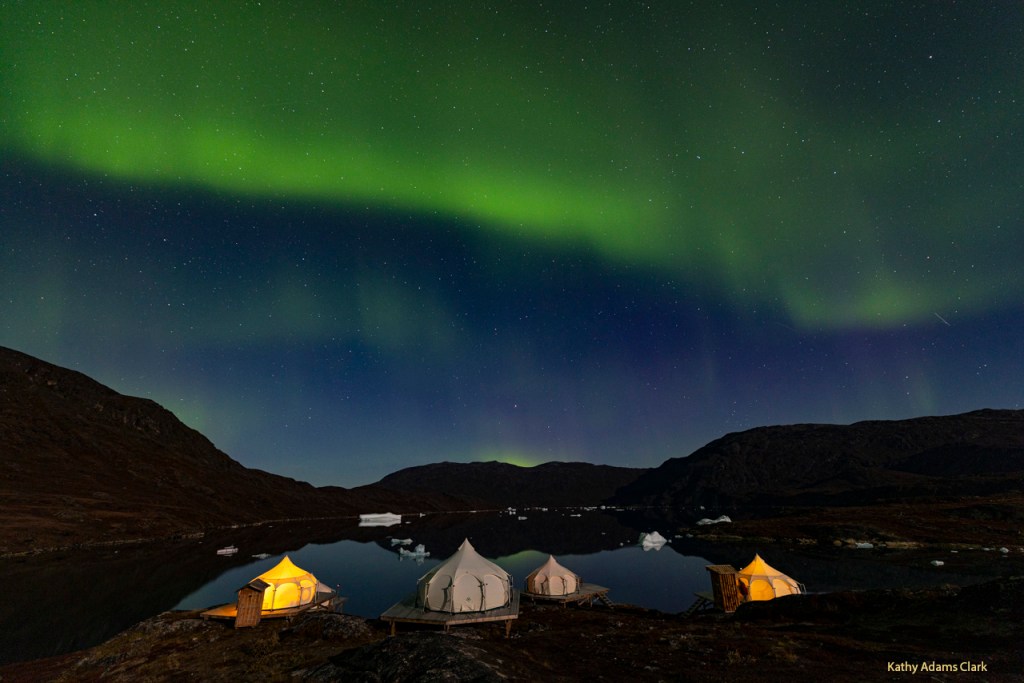
We all got great shots but the couple in the back tent got the greatest shot! All the tents in the foreground with not distortion in the tents. (Click one of the photos below for a slide show. The images will show full-frame.)
Morning of Septembrer 13 was so cold. There was frost on the ground everywhere. Getting washed up in from of the heater was miserable. It was cold.
Breakfast in the dining tent. There was cheese and cold cuts on bread. One bread was made with left over rice. It was a sort of spoon bread with great flavor. We made lunch from the breakfast spread.
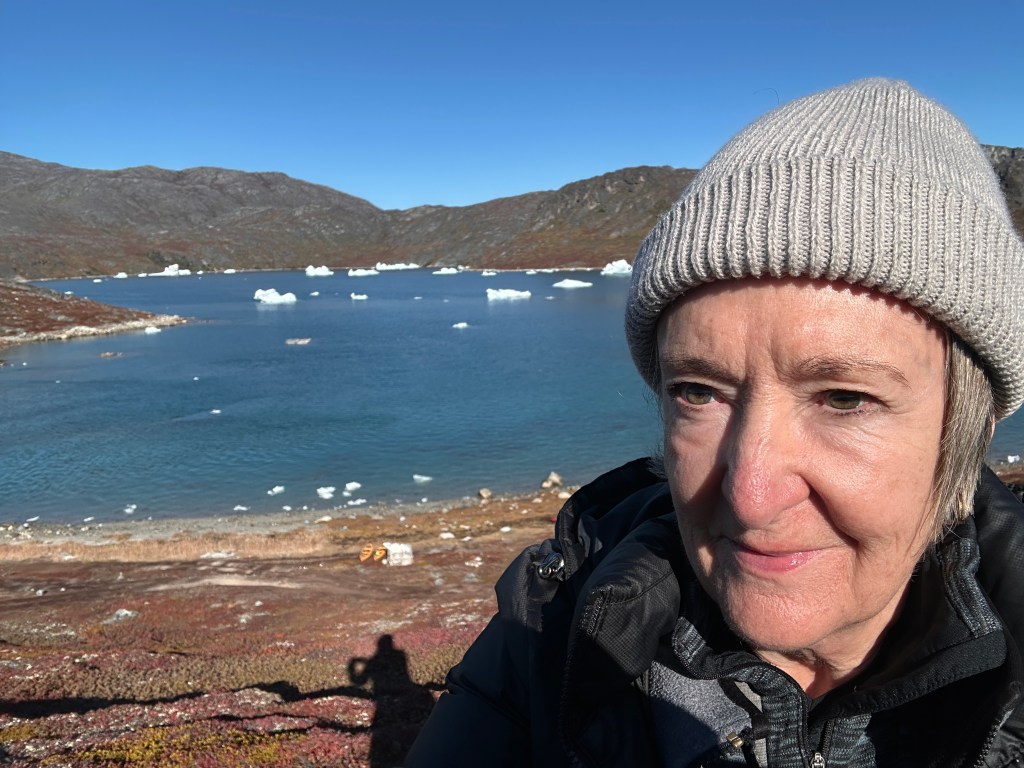
Everyone was super happy because they got photos of the northern lights. Very upbeat attitude. I did bit of hiking on my own. We photographed the kayakers as they made their way around the island in the center of the inlet. We talked and visited with the staff. Everyone answered our questions.
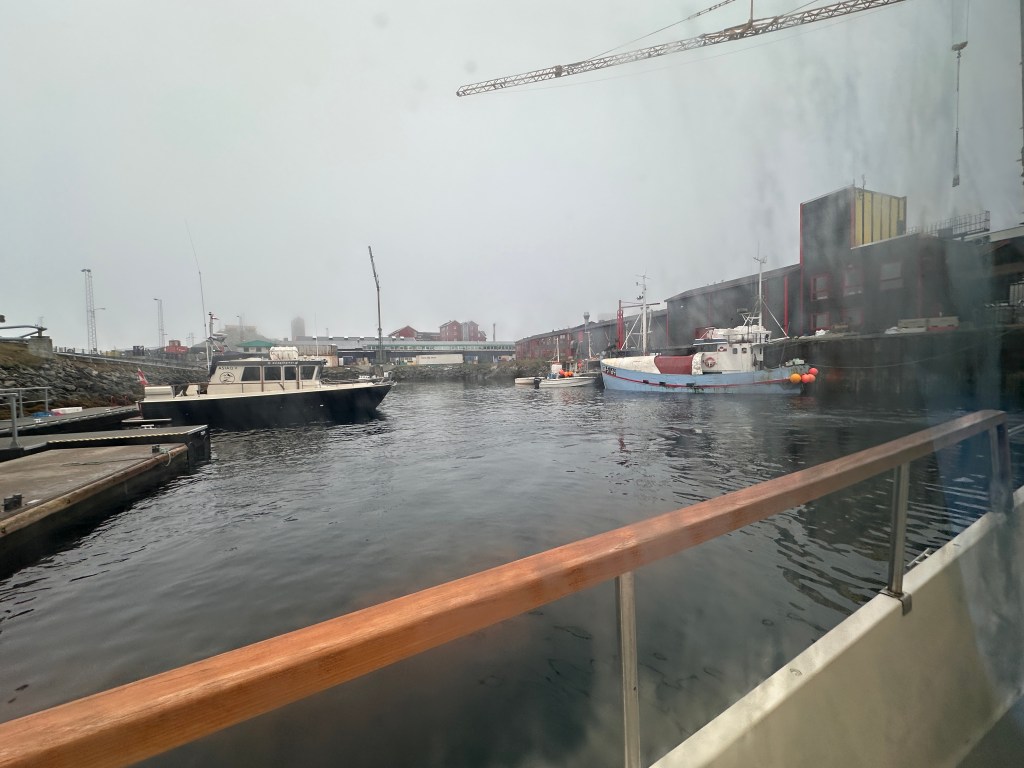
Out of tents by 10:00am. Waiting for the boat to arrive at 11:30. Departure at 12pm. Back at the Nuuk harbor at 2pm.
Sunday, September 14, we got to the airport and checked in by 7:00am. Vouchers from the hotel for breakfast. Departed right on time for Newark. NOTE FOR THE FUTURE: Leave heavy coat out for the walk across the tarmac.
Frequently people ask me how to move their photos from the SD card to their hard drive. Variations include “how to copy photos from memory stick to computer”, “how to move photos from CF card to hard drive”, etc. The basic idea is taking the photos off the camera’s card and putting them on the computer’s hard drive.
Step 1: Plug your card into the computer using a card reader or the slot in your computer. SUGGESTION: Buy a card reader that plugs into your computer. Different cameras use different cards. A card reader might have five slots for different types of cards. These gadgets are always handy to have.
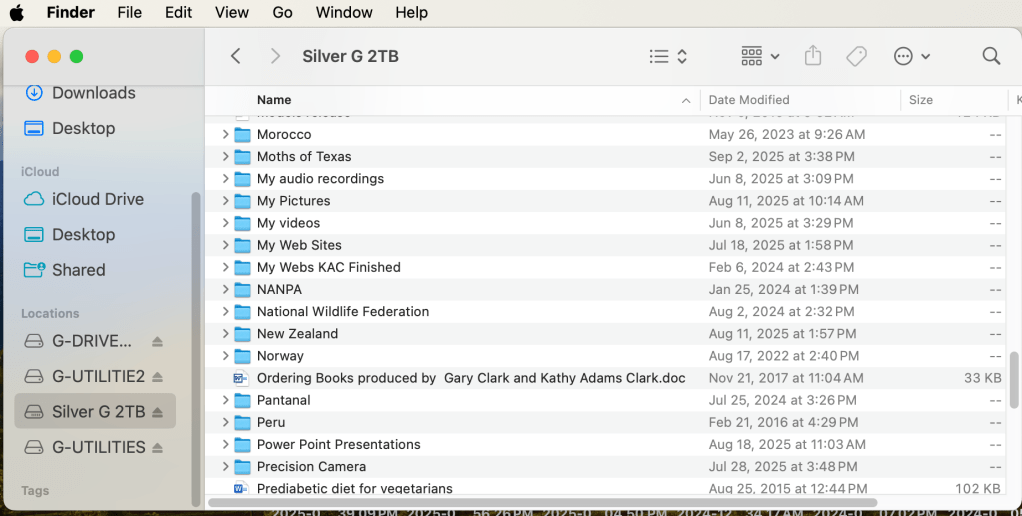
Step 2: Once your card is plugged into your computer you’ll get an icon that looks like this on your desktop.
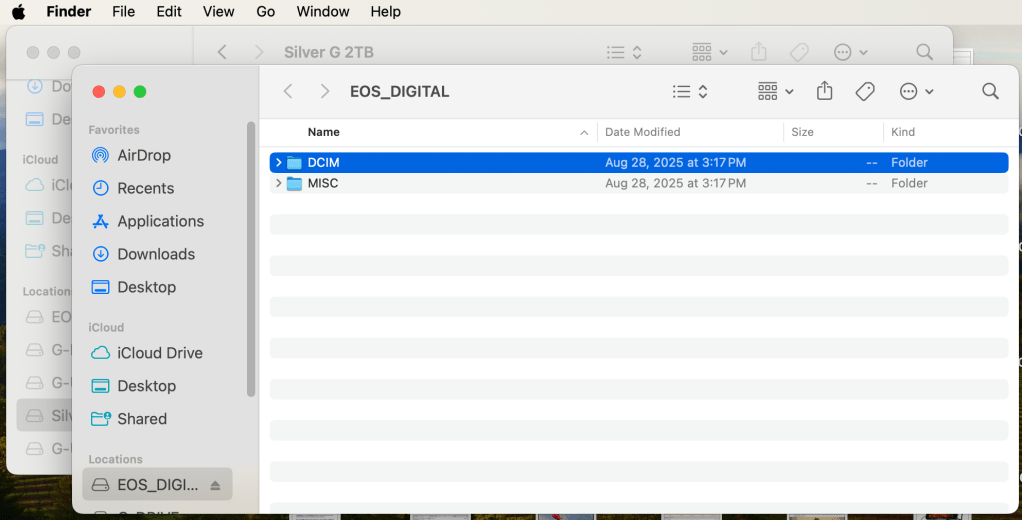
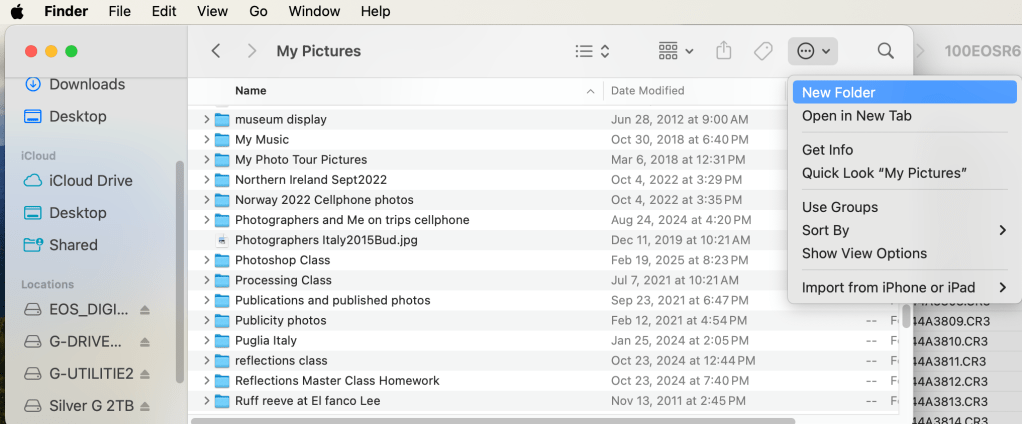
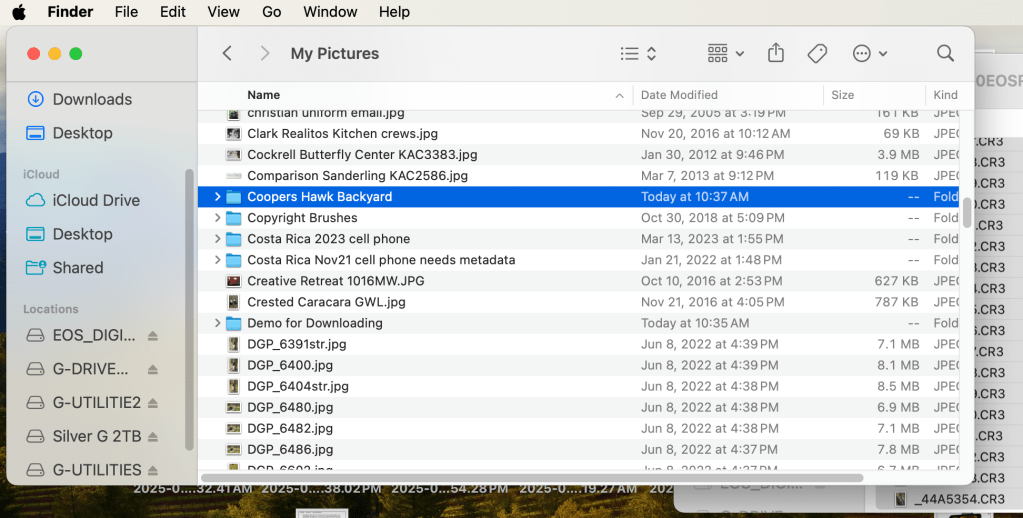
Open a Finder window. Click on the Hard Drive destination for the photos. I have a folder called “My Picture” on my Hard Drive. That’s where I put all my pictures.Open a second Finder window. (Right click on Finder and select “New Finder Window”.) Double click on the EOS_Digital and you’ll see a DCIM folder. Nikon, Sony, Fuji, Olympus will call the card something else but everyone has a DCIM folder. Double click on the DCIM folder to open it. Double click on the folder containing your photos. In the example above, Canon calls the folder 100EOSR6. You’ll see your photos. The example above is in List view. Notice the date I took the photo is under Date Modified. A correct date and time in your camera will give the correct information here. Select the photos you’d like to move or copy. They will be highlighted in blue. (Note shown here)Click on your first Finder window. (Click up by the words My Pictures to do this.) Click the icon show above and select New Folder. We’re going to make a new folder for your photos. Name the folder something that makes sense to you. Use the date, location, subject, etc. Once you’ve made the folder, double click to open it.
Click on the folder you made for the photos. With the folder open, click on the second Finder window. The photos you selected earlier will turn blue. Click and drag the photos into the new folder. If click and drag is hard for you, use copy and paste. Those are found in the Edit menu at the top left.
I hope this helps. Post any questions below. Yes, I know there are other ways to do this. This blog illustrates my method.
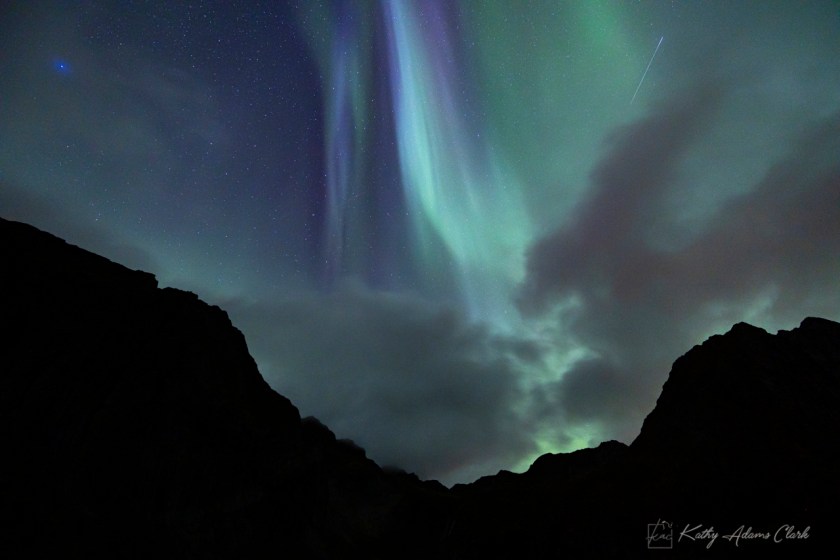
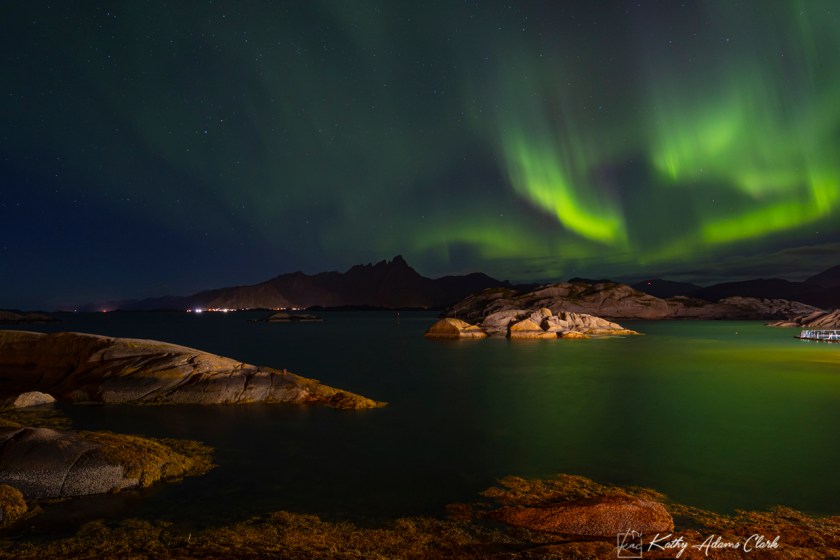
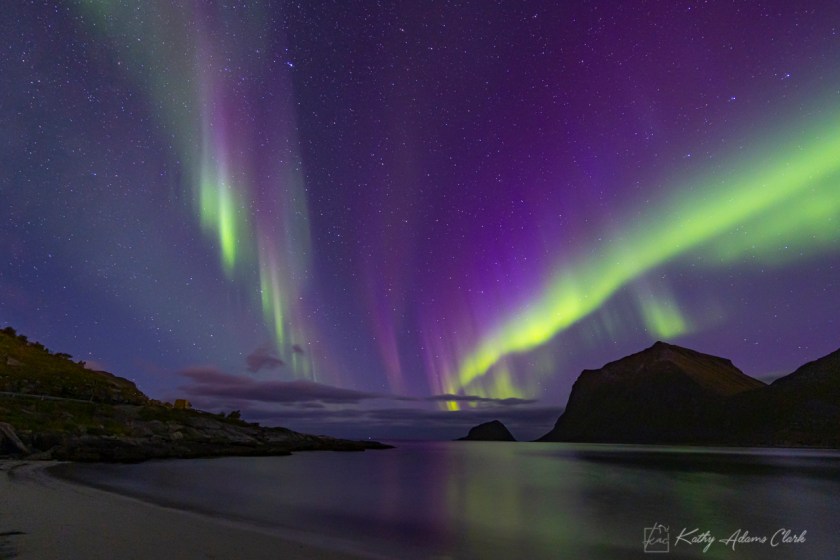
The days are getting shorter in the northern hemisphere so it’s time to start thinking about photographing Northern Lights or Aurora Borealis.
How to photograph Northern Lights :
Shutter Priority Mode: Shutter speed about 20” second, ISO Auto. This should give you a wide-open aperture with an ISO in the 800 to 1600 range.
Alternative with Manual Mode – 20” shutter, wide open aperture in the 1.4, 2.8, or 3.5 range, ISO 800 to 1600 to balance the light meter. NOTE: this will change as the lights dance across the sky so watch the light meter. Only change the ISO to balance the light meter.
Long Exposure Noise Reduction OFF.
Camera on tripod.
Shutter release attached to camera. My preference is the Vello Shutterboss II wired.
Focus 1/3 of the way into the scene. Turn off Auto Focus. Watch your focus during shooting.
Set Focus Peaking if you’d like. It works very well in the dark.
Mirrorless cameras have a focusing scale viewable on the back screen.
Usually there’s a line that you put in the middle of the infinity symbol.
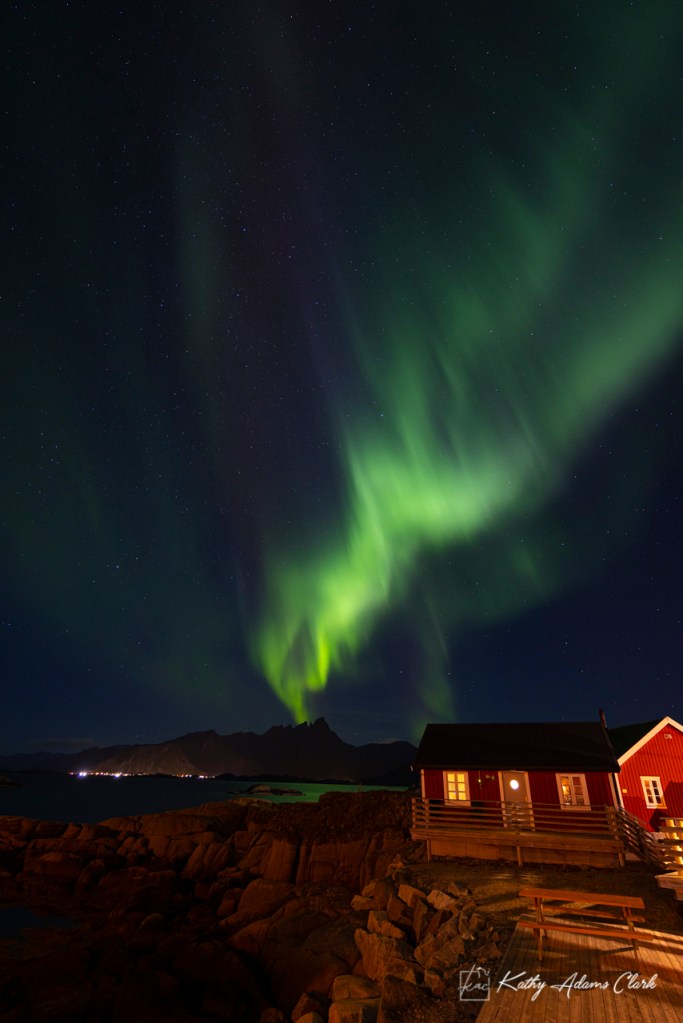
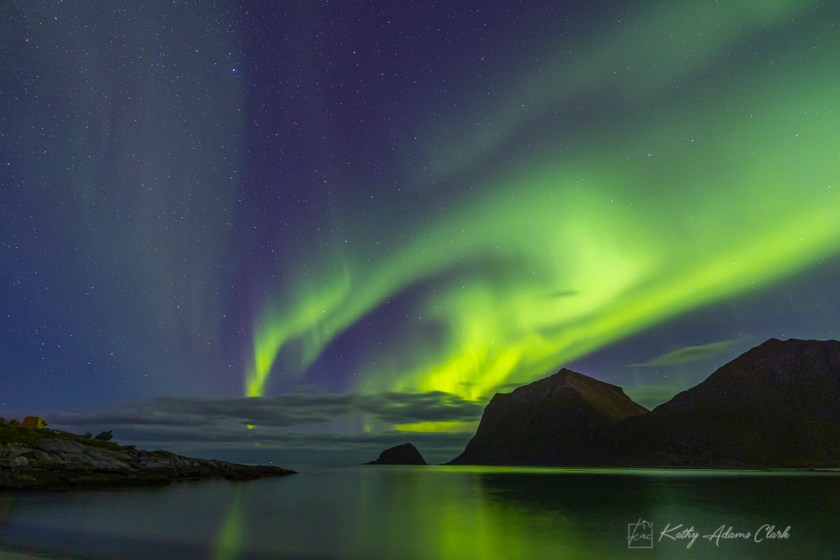
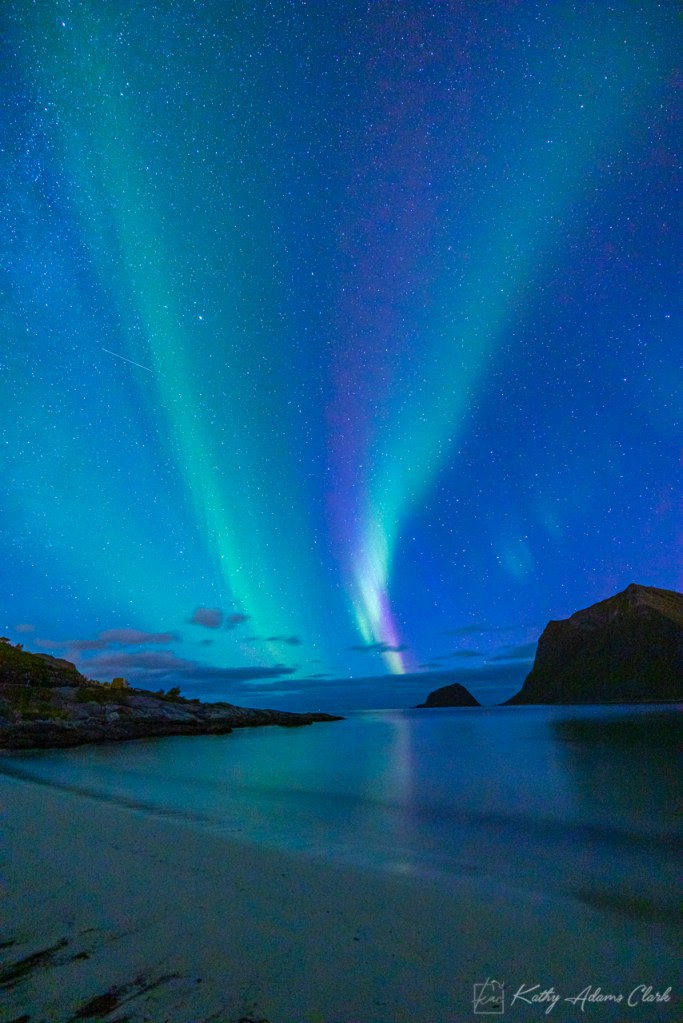
Compose so there’s an interesting foreground. Reflections in the water are nice.
Check the first photos to make sure the stars are pinpoints of light. Double-check the edges. We don’t want streaks on the stars. If the stars are not pinpoints of light, make the shutter speed faster. My lens likes 13” seconds.
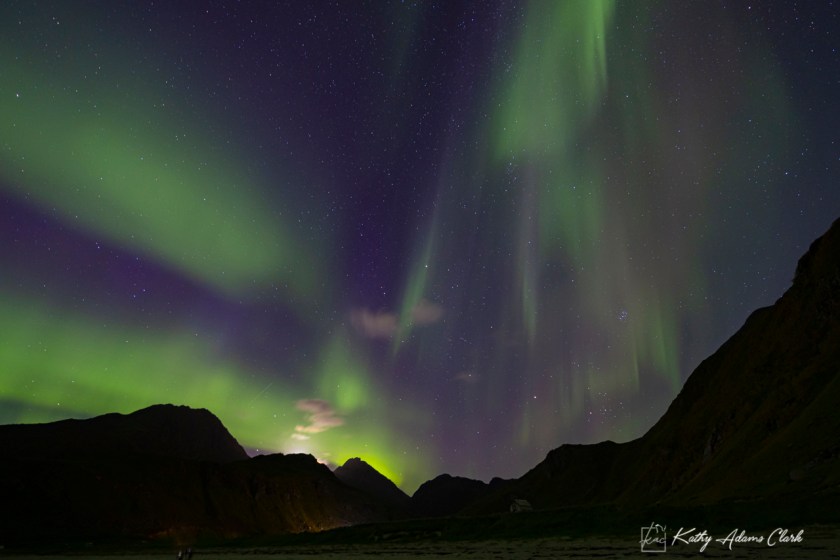
When the lights are “dancing” across the sky, a faster shutter speed is needed to get defined streaks of color.
Green is the only color you’ll see with your naked eye. The reds, blues, and purples look like hazy clouds. We see those colors on the finished photo.
– I got the set-up to take moth pics on my back porch (like they were using at Bracken cave that night). I got the extension tubes you suggested and they work great. At home I can sit in one of my deck chairs and put a spotlight between my legs and shine it on the moth for lighting.
Someone mentioned a ring light that goes around the lens that provides light. I have the Canon EOS R7. Would that work on my camera and if so which would you recommend? If I am at an event like that night at Bracken I will need a light source attached to my camera in some capacity.
My Answer: So glad that you like the extension tubes. They are a wonder to have!!
You can use the flashlight to illuminate the moths. You can use a flash like the Canon EL-5 ($329).
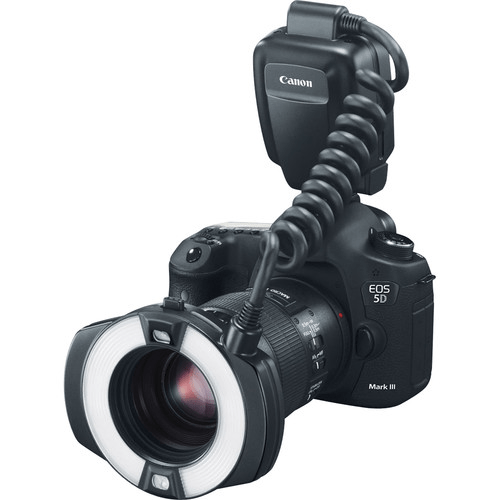
There’s also the Macro Ring Light MR-14EX II ($589) that fits on the front of the lens. This gives a more uniform light since the light is coming from the front of the lens versus the top of the camera. (See example below)
Godox has a ring light, also. It runs $289. I’ve never used it but the Godox flashes seem to be pretty compatible with Canon cameras.
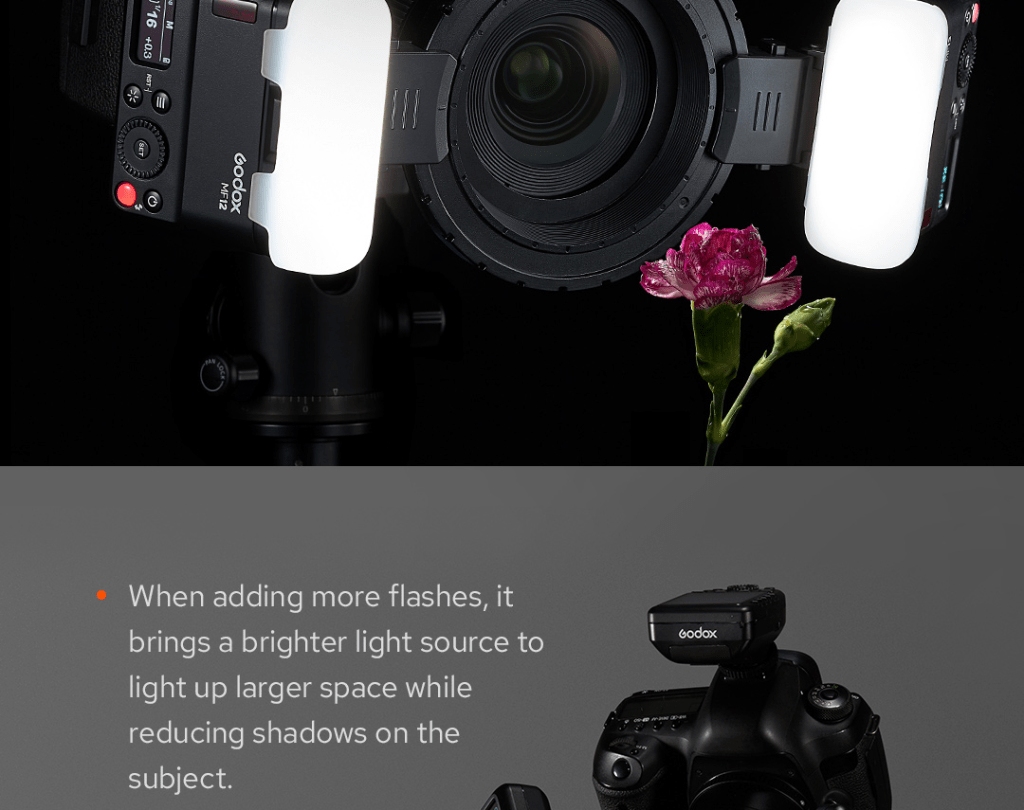
There’s also the two light systems. Godox has the MF12-K2 Macro Flash Kit for $249. There are two tiny flashes on the font of the lens. This allows you to angle the individual flashes for more natural lighting. Canon has a similar system, Macro Twin Lite MT-26EX-RT but it runs $1079.
So there’s flashlight illumination method. The ring light or the two macro flash kits. Each has its positives and negatives.
I hope that helps. Post questions or experiences with these products below.
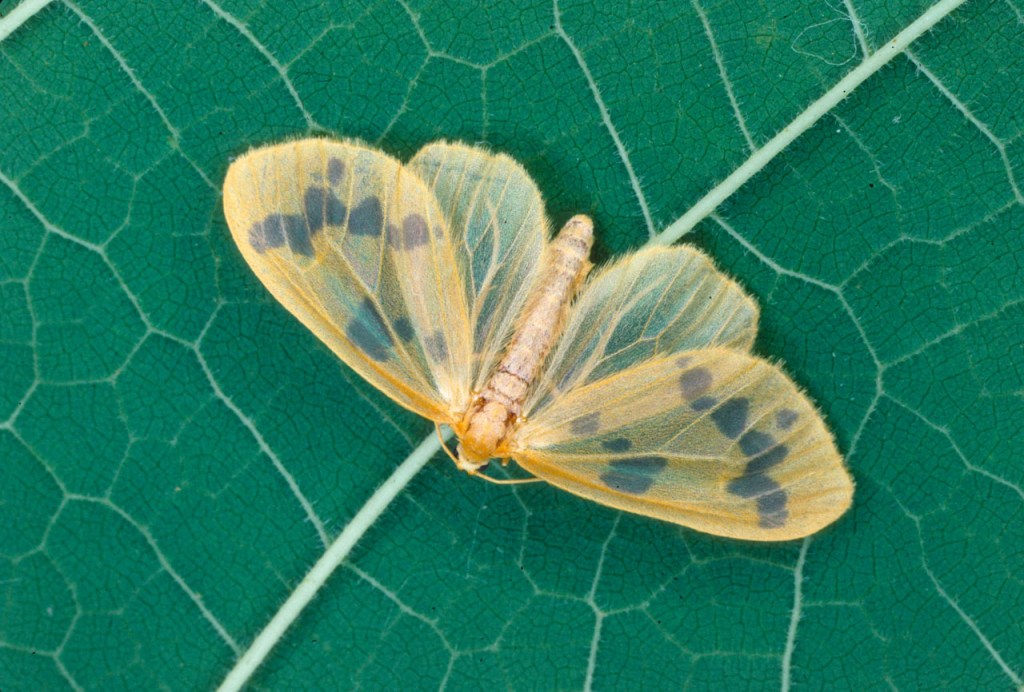
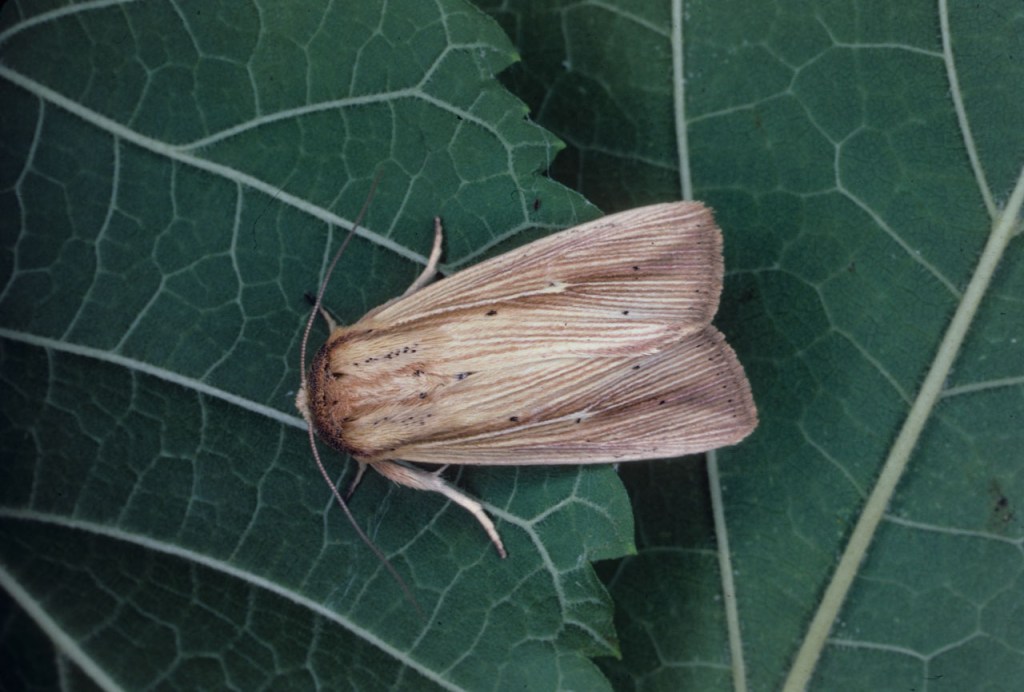
Moths photographed by John Tveten using a basic ring flash. The Book of Texas Moths from Texas A&M University Press by Gary Clark and Kathy Adams Clark with photographs by John Tveten.
Join me for my Macro Photography: Master Class Online Nov 11, 18, 25, and Dec 2, 2025 7-8:50pm central Register
I took your Mastering the Manual class in June, and you mentioned that you would be open to making lens suggestions via email. I’ve been researching, and I’m still at a loss. I would appreciate any suggestions you have.
I’m a complete beginner (the manual mode class was terrific!).
I have a Canon R-10 with two lenses: 18-45mm (standard kit lens) and 55-210mm f5-7.1
Two primary areas where I’d like to use my Canon (rather than my iPhone camera).
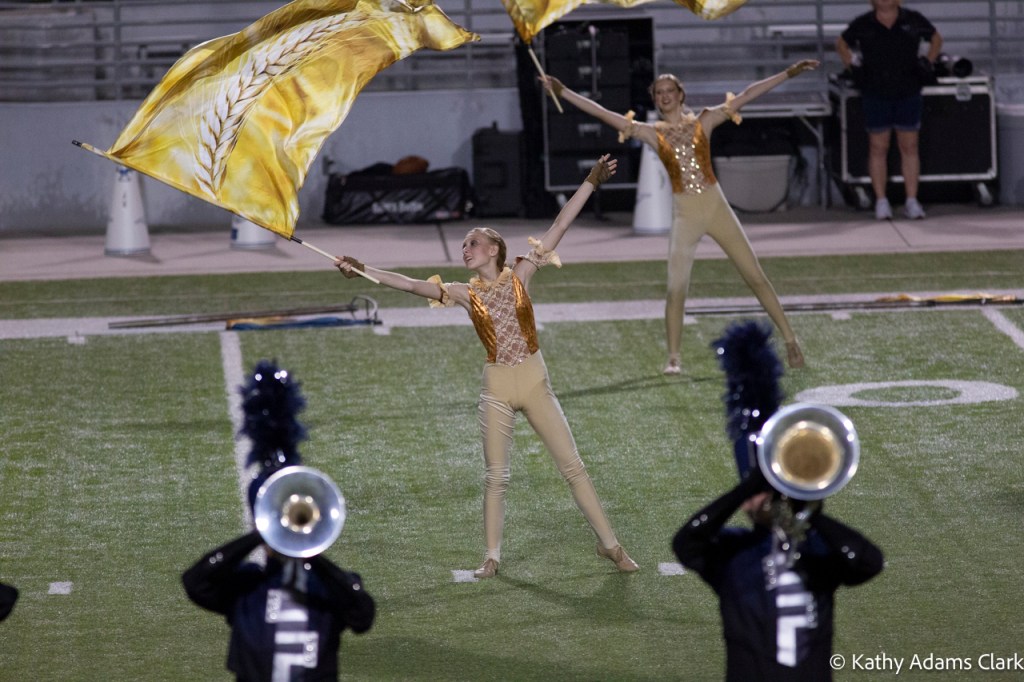
– High School Marching Band – shooting often in evenings or in gymnasiums/stadiums in low light, quick movement. I’d love to focus on the kids (with bleachers and backgrounds blurred out) and catch movement of the Band and Guard. I’m also doing a lot of candids (up-close of kids’ faces) in the stands for social media content.
– Work – I work for a nonprofit in communications. We just use our iPhones for most things, but I’d love to start adding better photos with my camera. A lot of group shots of people (mostly indoors, occasional outdoors). We also do a couple of big events in the evening indoors with low light.
Other band photographers are telling me I need the Canon RF 70-200mm f2.8. I’m seeing a range of pricing from $2800 to $4,000 for that kind of lens. At my level of photography and my camera, I’m not ready to make that kind of financial investment.
I know from the manual mode class I need a lens with a larger f-stop. Any f2.8 lens that are more reasonably priced that would work for a beginner in the two scenarios above? Ideally, I’d like to spend less than $1,500.
I appreciate any guidance. I’m not sure I’m ready for the Lens class you teach at Precision, but if it’s offered in the future, I hope to register. — Erica
My Answer: Let’s get real on your lens choice.
Canon is putting out a series of moderately priced lenses for the R10 and R7 cameras.
The RF100-400mm f/5.6-8 IS is only $700. That would be great for your band photos.
The RF 24-105mm f4-7.1 is reasonable, too. Only $429.
These two lenses would put you in great standing with your camera. I’ve used both. They are not your top of the line Canon lenses but they are VERY good.
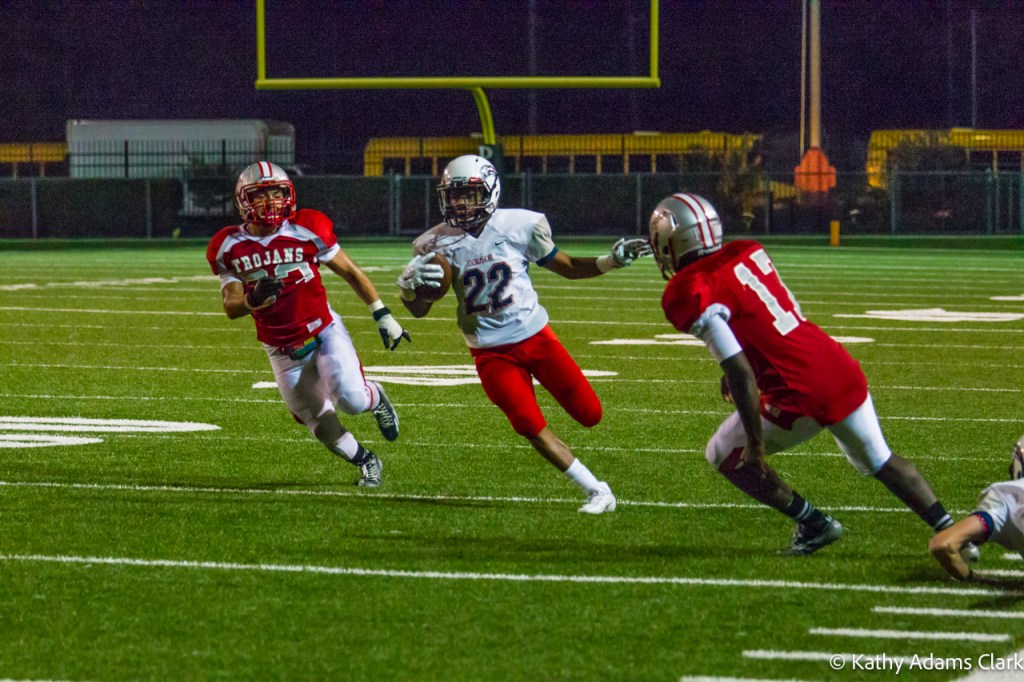
Photographed with an fstop of 5.6
Your R10 has nice high ISO so you don’t need the 2.8 lenses. Those were needed when we didn’t have exceptional high ISO or software to process high ISO.
The reality, too, is you’re never going to blur the background from the bleachers. You need to be down on the field to do that. You can blur the background, though, for your candids of the students in the bleachers during the game. Either lens will do a great job.
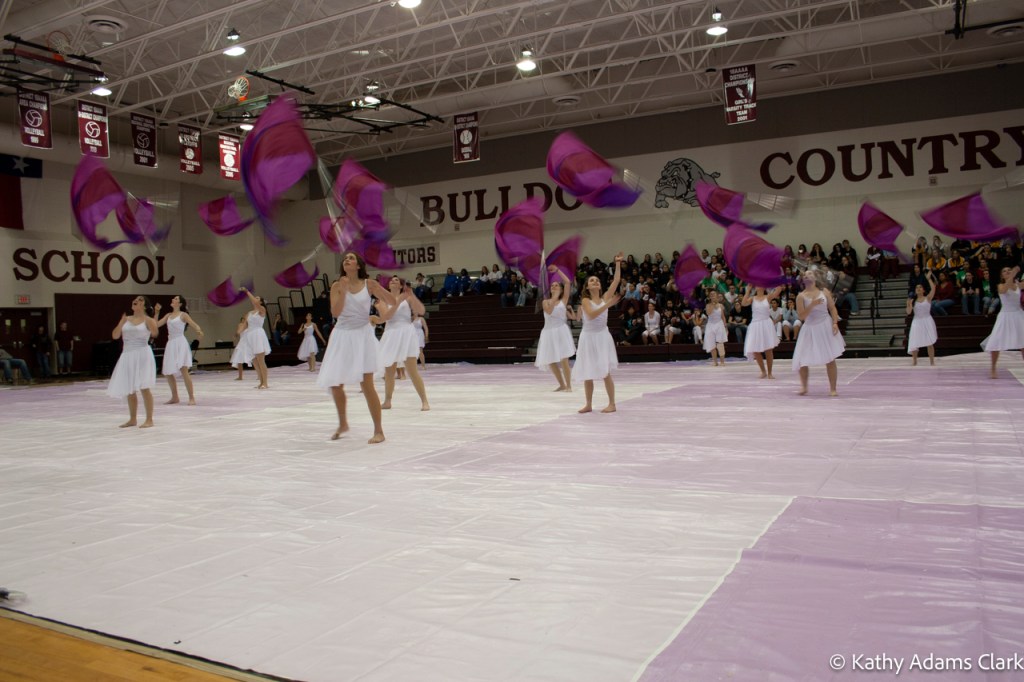
In all the photos below, I used a fstop of 5.6.
f5.6 indoors with auto ISOf5.6 from the stands in the stadium with f5.6From the stands at f5.6 and auto ISO
“Which class should I attend? You offer so many different topics!”
We use the same principles of photography regardless of the subject.
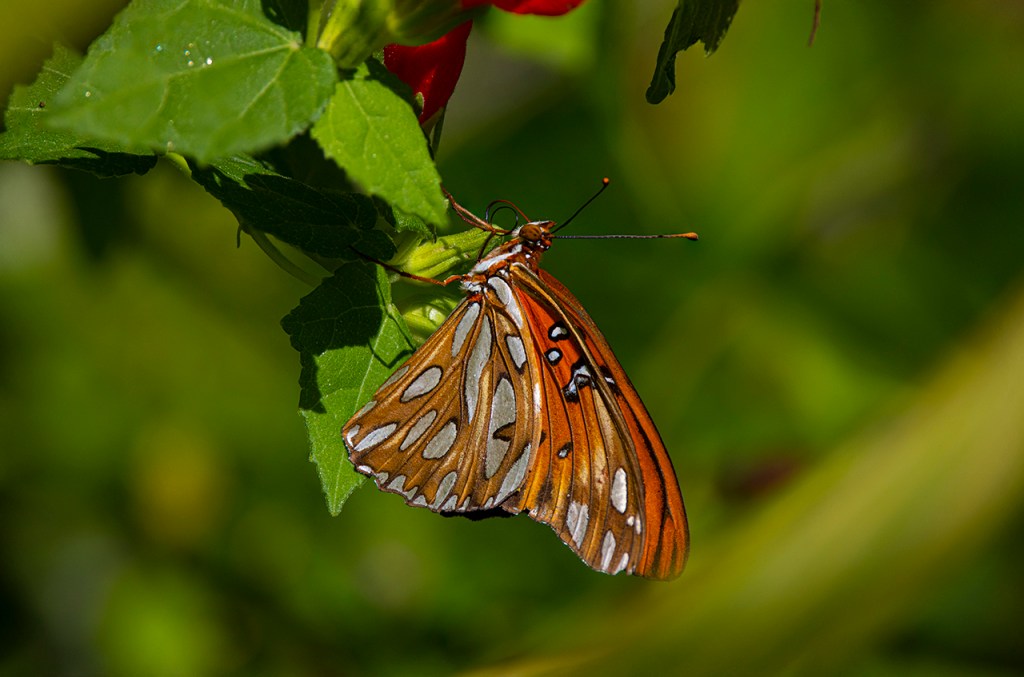
When we photograph dragonflies or butterflies, need the same adjustment of shutter speed to stop their motion. I use the same settings for either critter.
During a recent Butterfly Photography class, we photographed more dragonflies than butterflies. That’s just what we encountered. Participants learned how to use Shutter Priority and Auto ISO to stop the subject we found. They also learned about moving their focus points around to focus on the subjects. Also, how to change their focus setting based on where the subject was in the vegetation.
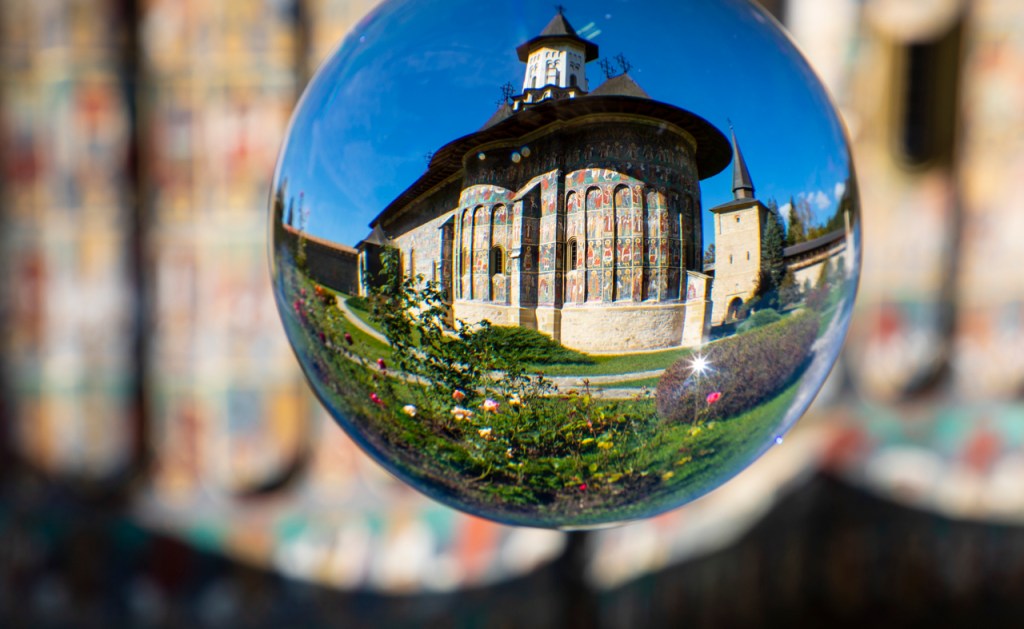
Crystal Ball Photography is an indoor class. That will cover f/stop, shutter speed, and ISO but more for static subjects. This class will emphasize how to use the crystal ball to see things in a different way. More creative than the first two classes. Also, this is an indoor class so it has a slower pace.
Crystal ball, Sucevita Monastery, Sucevita, Romania
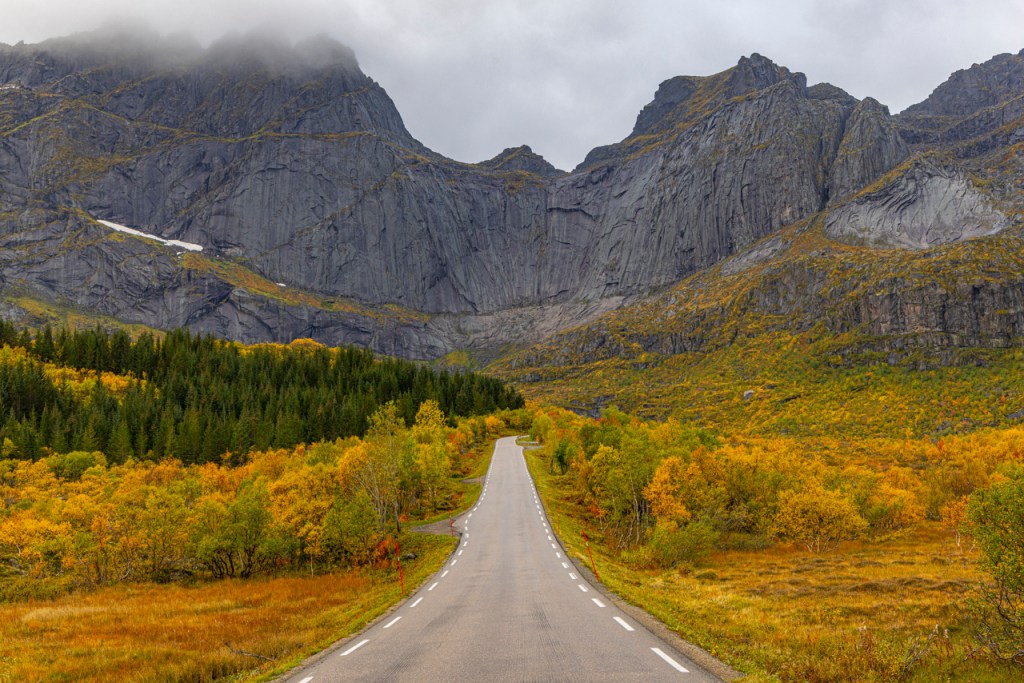
Landscape Photography is more about that big, static thing in front of you. It’s not about stopping the action so much as which lens or filter is right for the moment. There are also a lot of processing tricks that are needed when photographing landscapes.
Any aspect of photography teaches you something different that feeds into the whole. When you take a class in one thing, you learn something that applies to something else.
“All things must pass None of life’s strings can last So I must be on my way And face another day” George Harrison
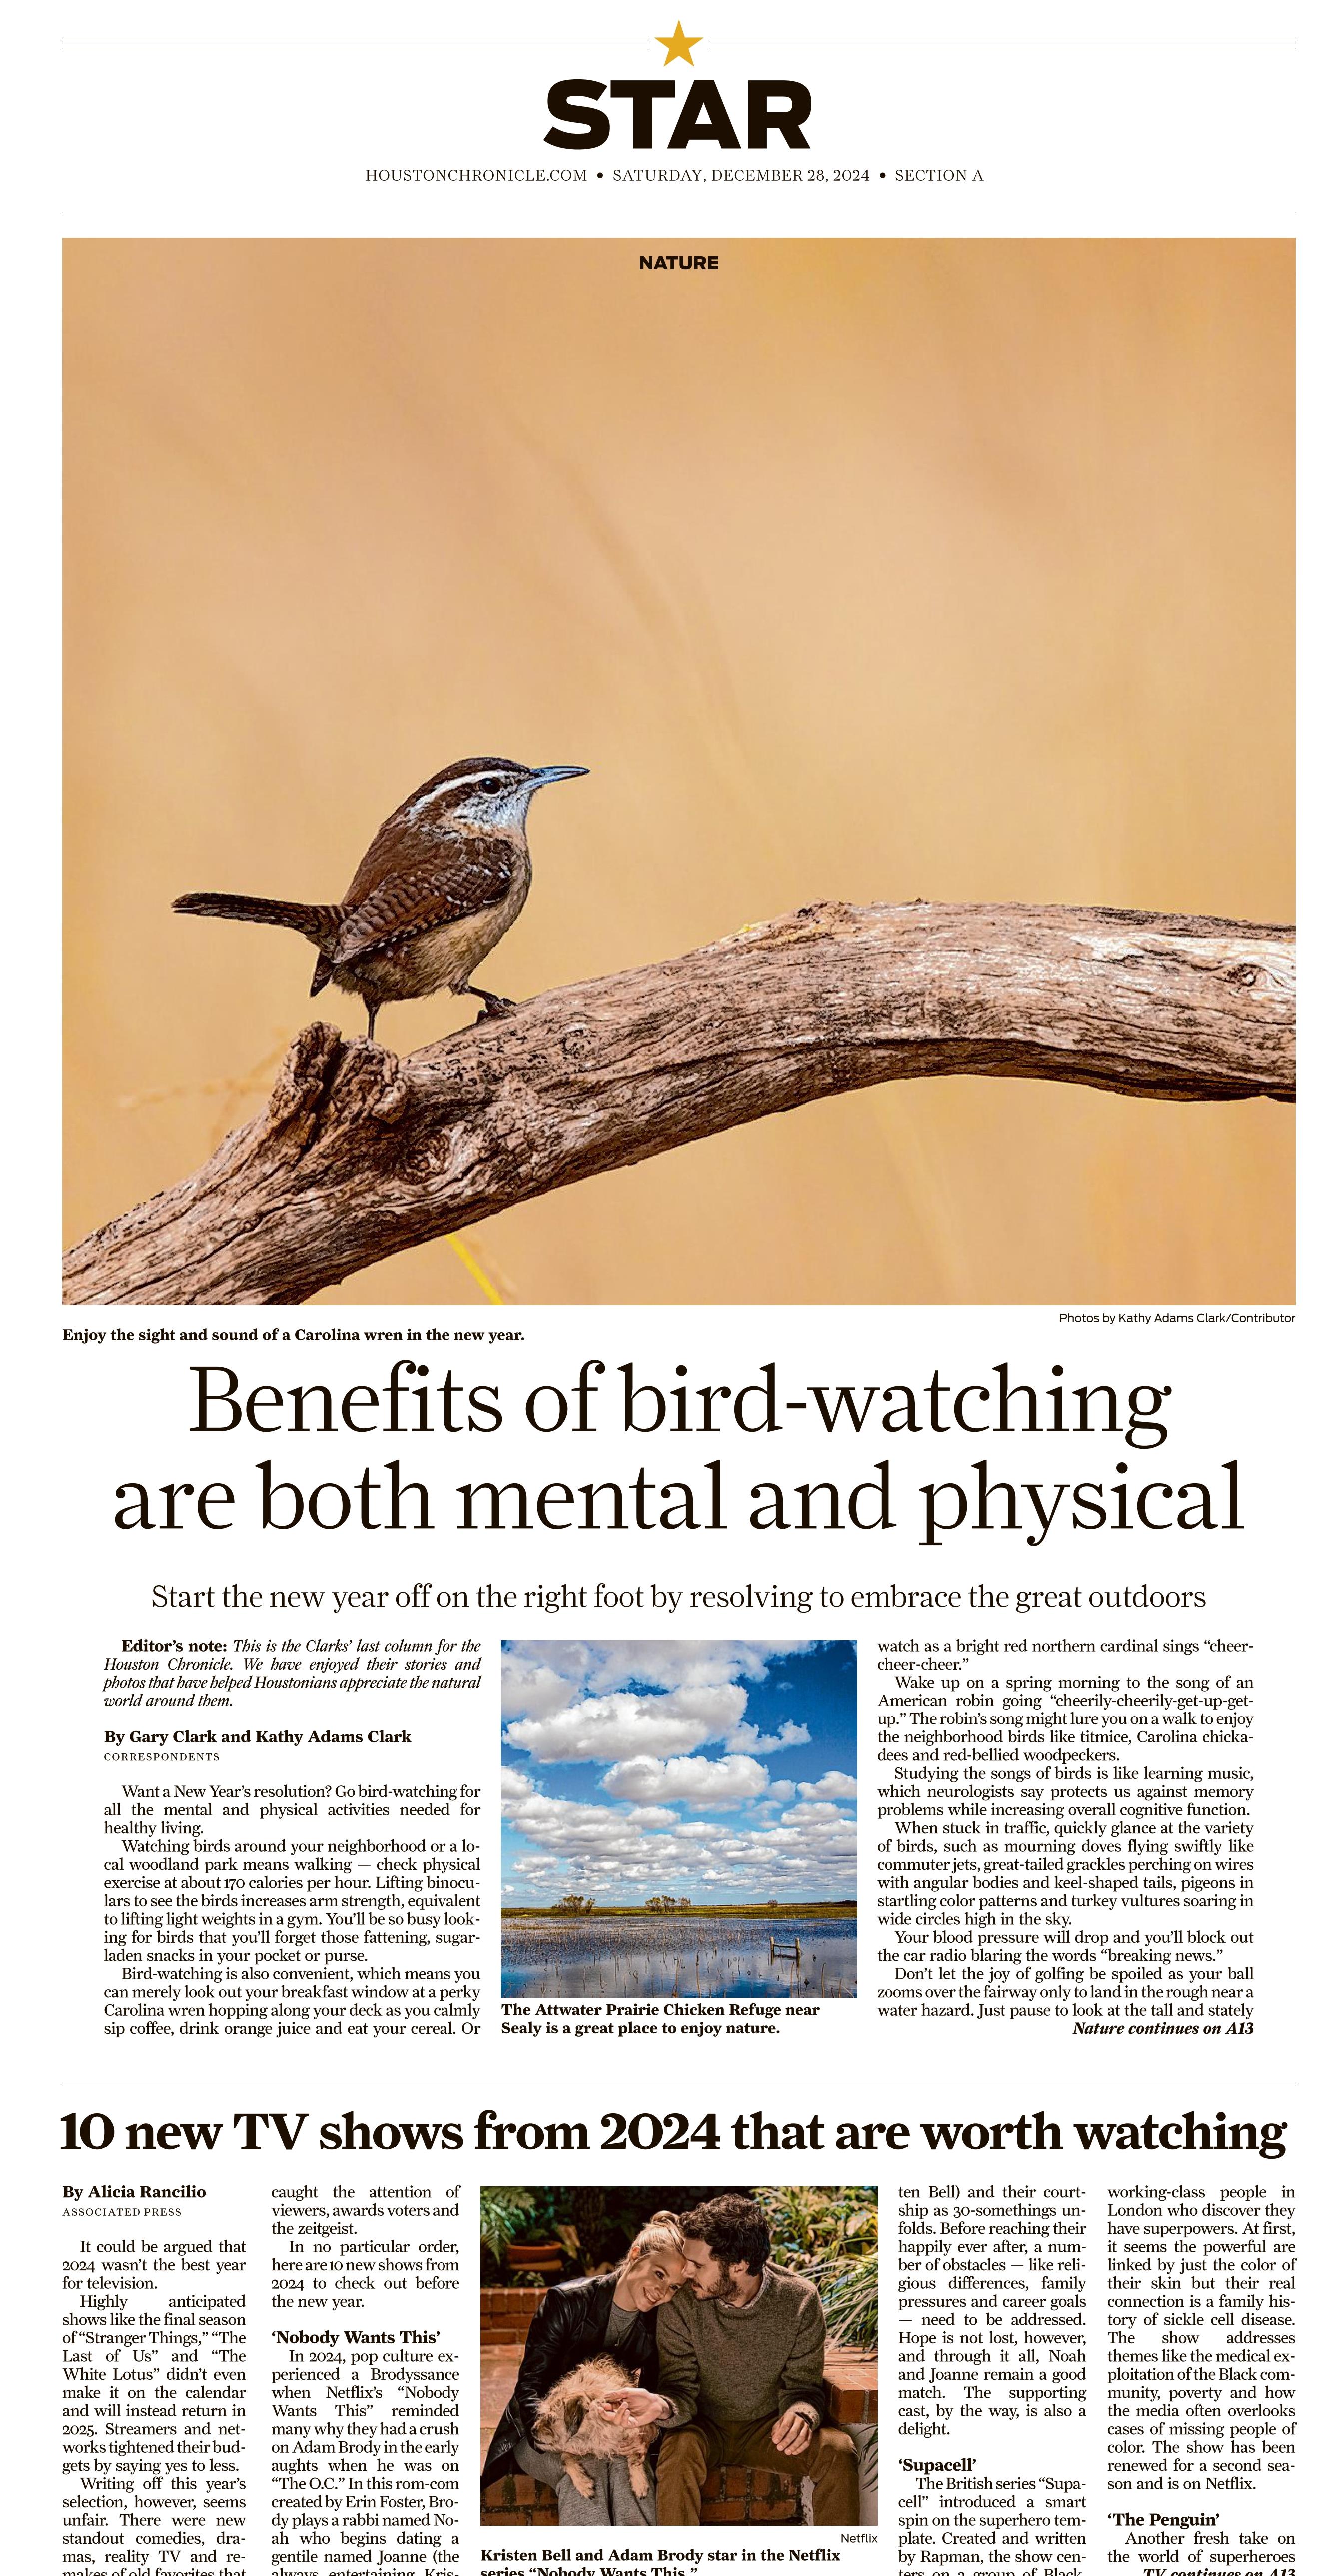
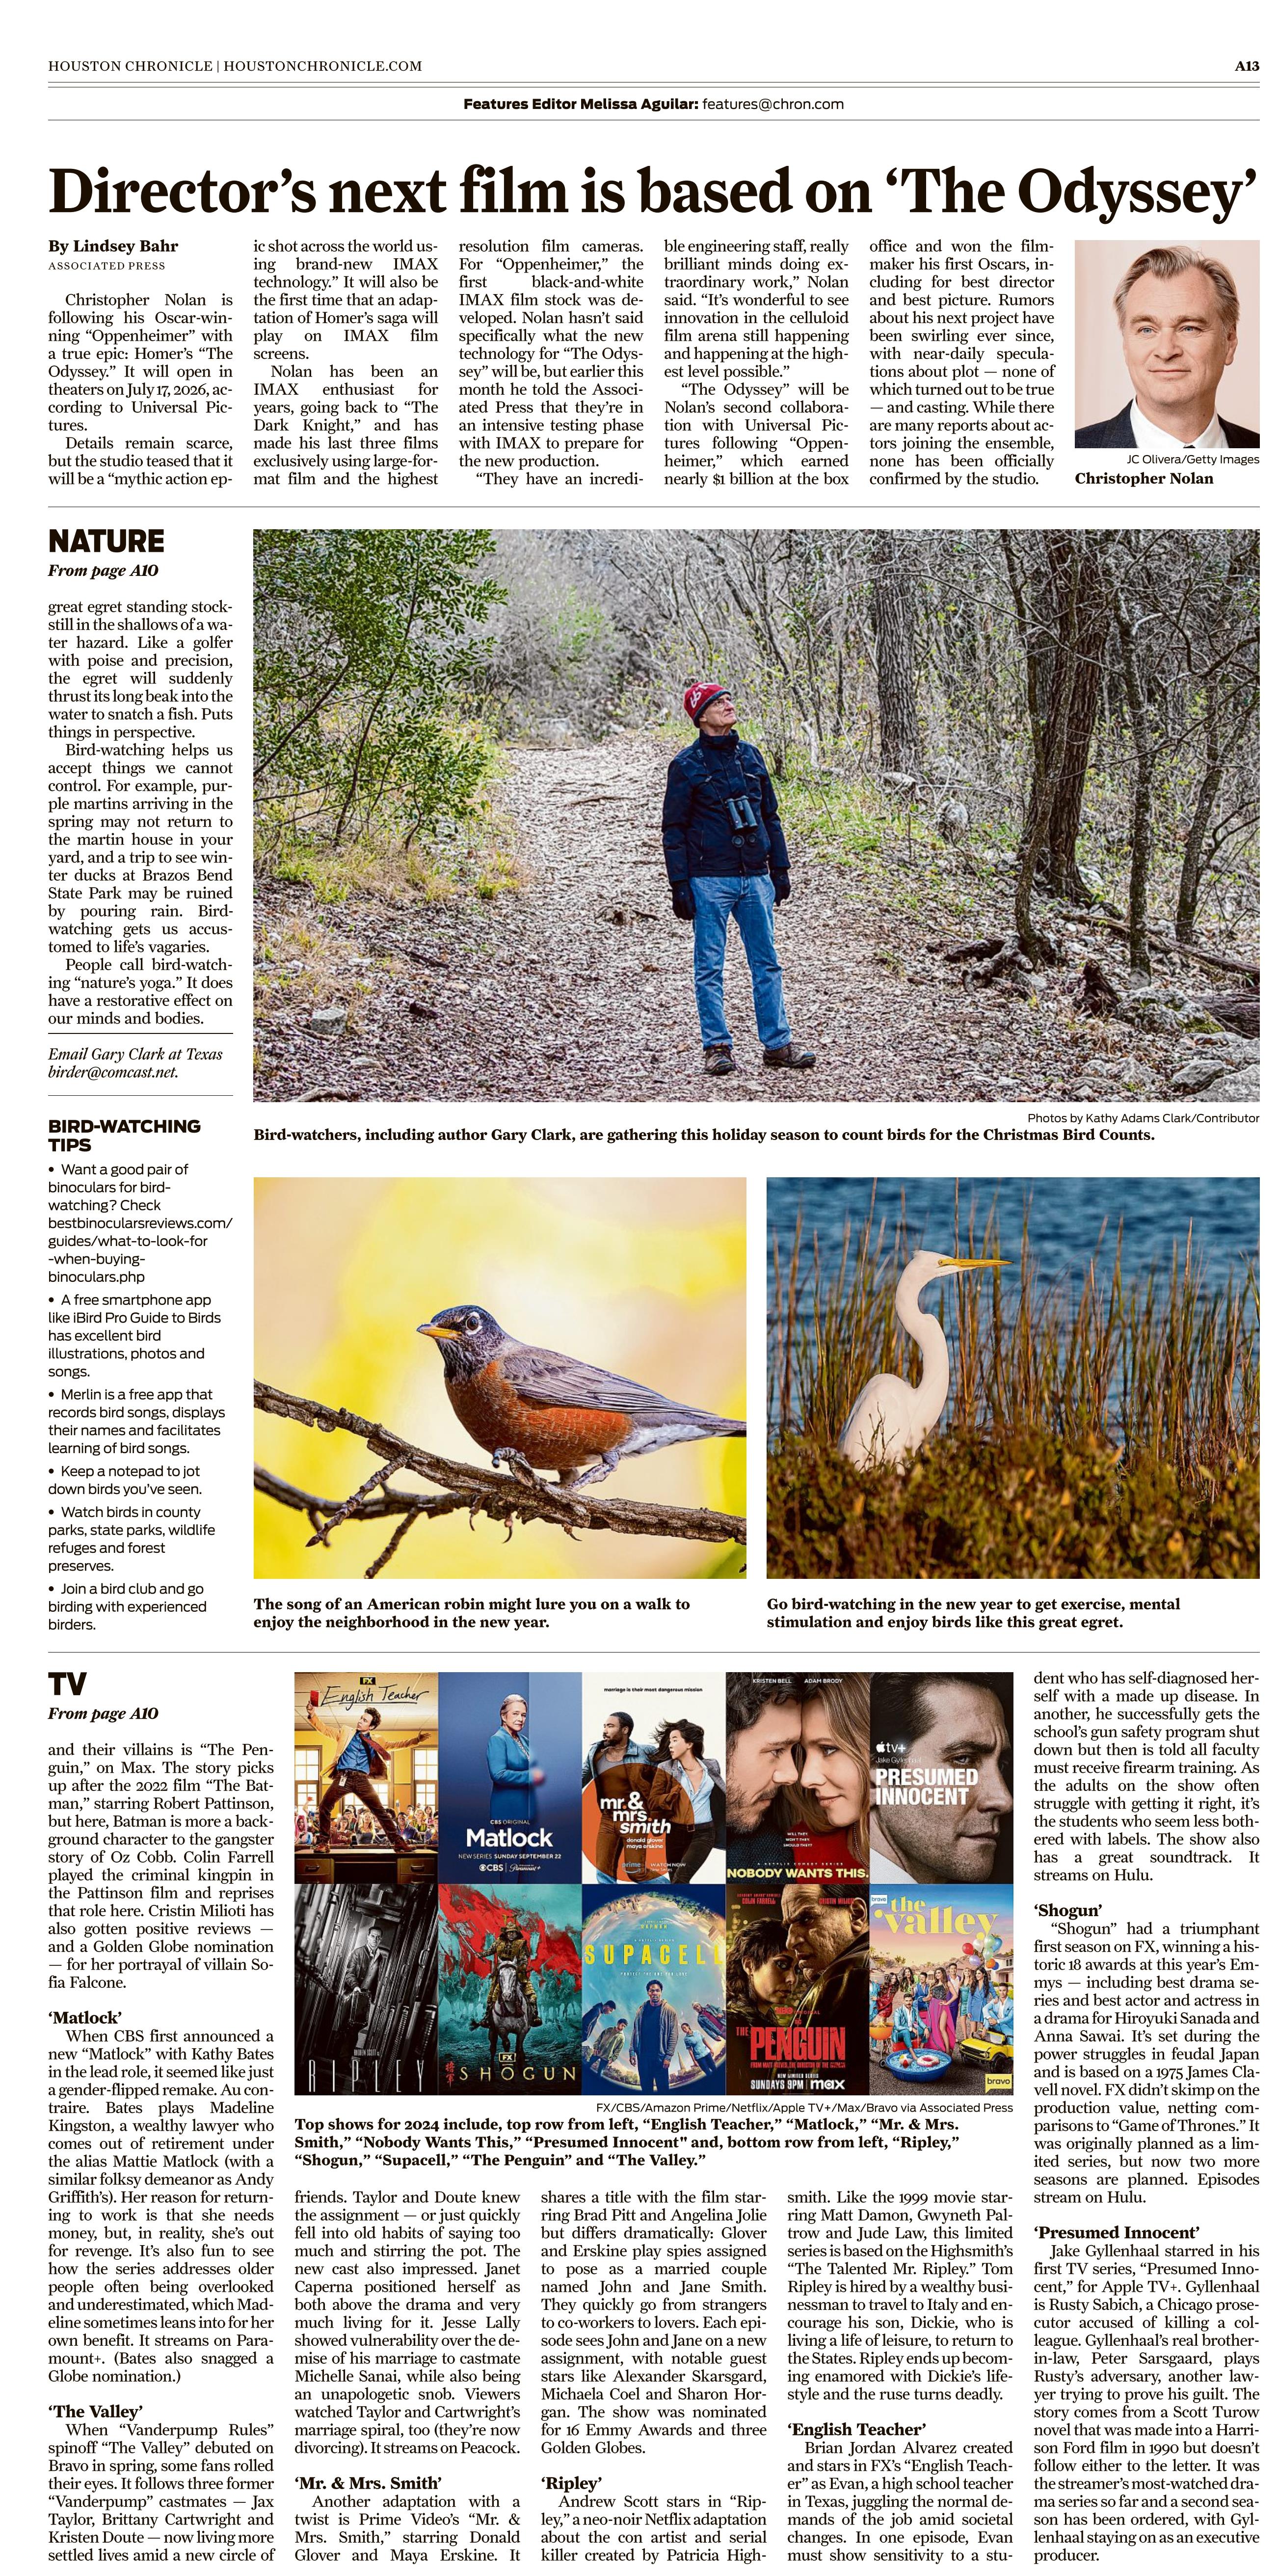
This morning, December 28, 2024, we saw our last Nature column in the Houston Chronicle.
The Nature column has been a major part of our lives for the past 25 years. Gary Clark wrote his lovely stories about backyard birds, rare birds, and birds in far away lands. He wrote about squirrels, rabbits, coyotes, alligators, frogs and so much more. Each column was a blend of art, literature, science, and history. Readers were often treated to a splash of the Bible and occasionally a bit of chess. Gary’s columns we not simply about nature. They were about life around us.
I tried to keep up by illustrating Gary’s column with my photos. The first column on April 1, 1999 was illustrated with scanned slides of John and Gloria Tveten, our predecessors. The photo editor at that time asked if I could not only scan the slides but could I upload them with a new software called FTP. The Chronicle was moving into the digital world and I learned everything I needed to keep up in a week.
We were still using film in 1999. If Gary wanted to write about a rare bird then I had to get a photo worthy of publication and hope/pray that the slide would be good. My local photo processor needed 48 hours to process slides back then so there was a lot of waiting and hoping.
When Gary interviewed someone famous like David Sibley, Sid Dunkle, or Chandler Robinson, I had to hope the photos came out. Same with a rare bird or unusual behavior.
I embraced digital cameras when the photos reached 8MB or publication quality. My first Nikon F100 and then Canon D10 were game changers for me and all those photographing for newspapers. If a photo did come out, it was my fault, and luckily I could reshoot the subject.
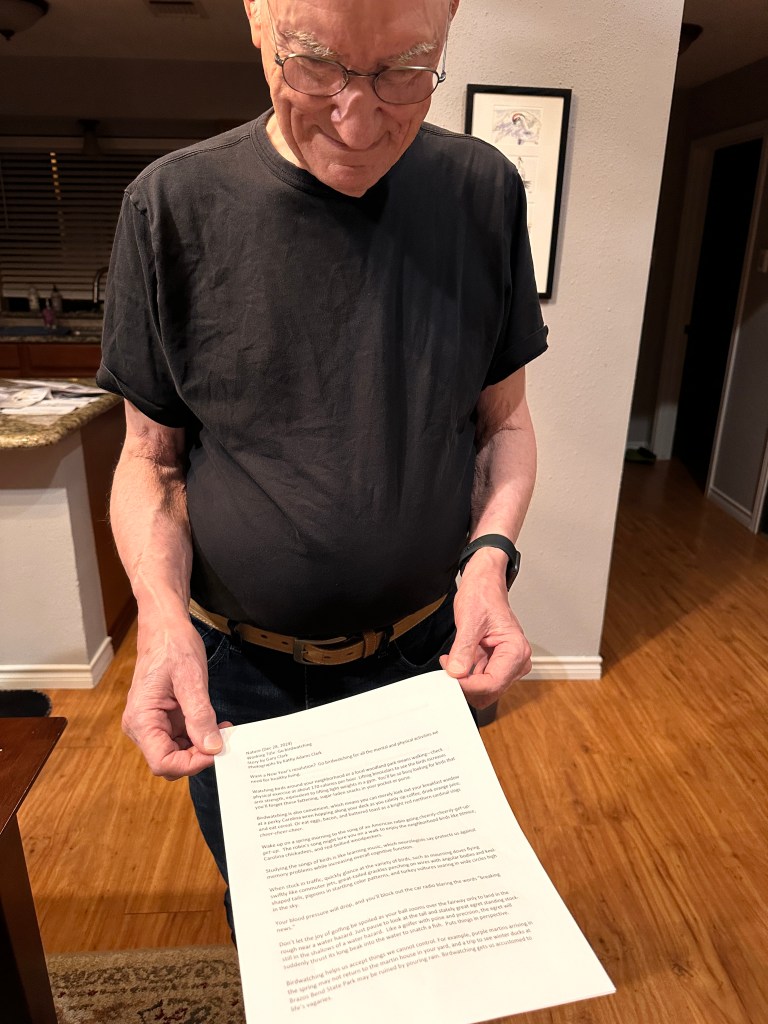
I’m proud to say that Gary never missed a weekly deadline. He always submitted a column despite surgeries, bike accidents, and weather delays. During Hurricane Ike, he wrote the column in a Starbucks that had an internet connection. He wrote from his hospital bed after a major bike accident. After hand surgery, he learned how to use voice activated typing. I remember one time when he dictated the column to someone at the Chronicle from a payphone in the desert. Yep, payphone, shorthand, and dictation skills came in handy to get the column in on time.
But writing a weekly column for a major big city newspaper has come to an end. Thanks to our editors Melissa Aguilar, Jody Schmal, and photo editor Jill Karnicki. Along the way, we’ve worked with Betty Luman, Molly Glentzer, Diane Cowen, Elizabeth Pudwill, and Catherine McIntosh plus others whose names escape me at the moment.
Thanks to all of you for being loyal readers. Gary and I will miss your comments and questions. Thanks, too, to everyone who gave us a quote, agreed to be interviewed, welcomed us to your yard for a rare bird, or shared your adventures with us.
Thanks, finally, to the editors at the Houston Chronicle. We wrote a nature column for 25 years. The Tvetens wrote their nature column for 24 years. That is nearly 50 years of bringing nature to readers. Way to go!
Left: Gary’s last column before upload. Right: My last photo preparing to go.
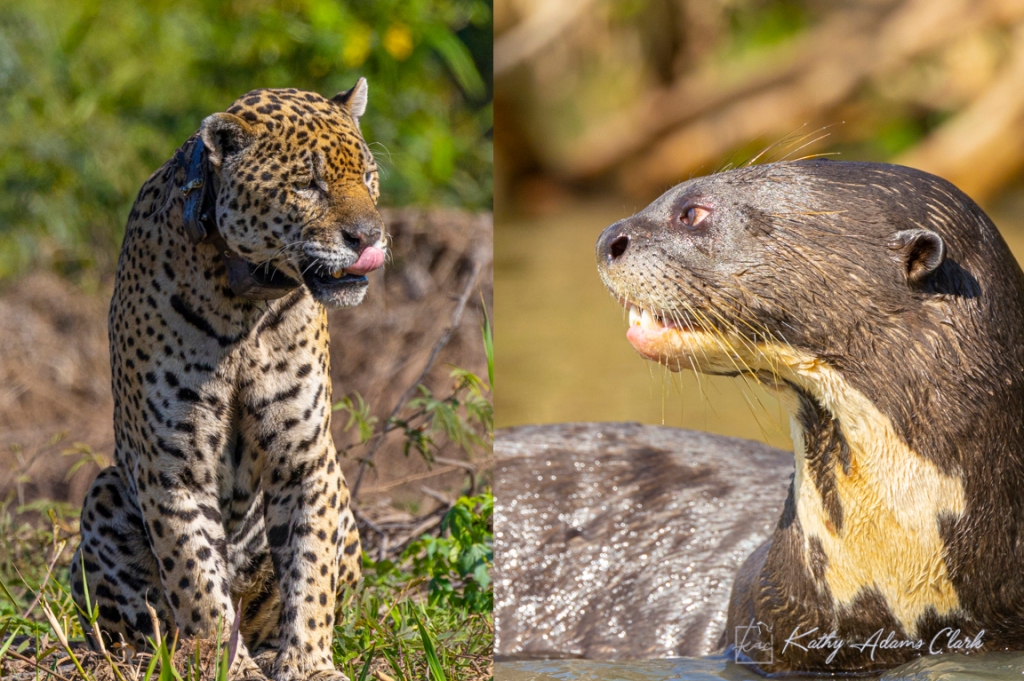
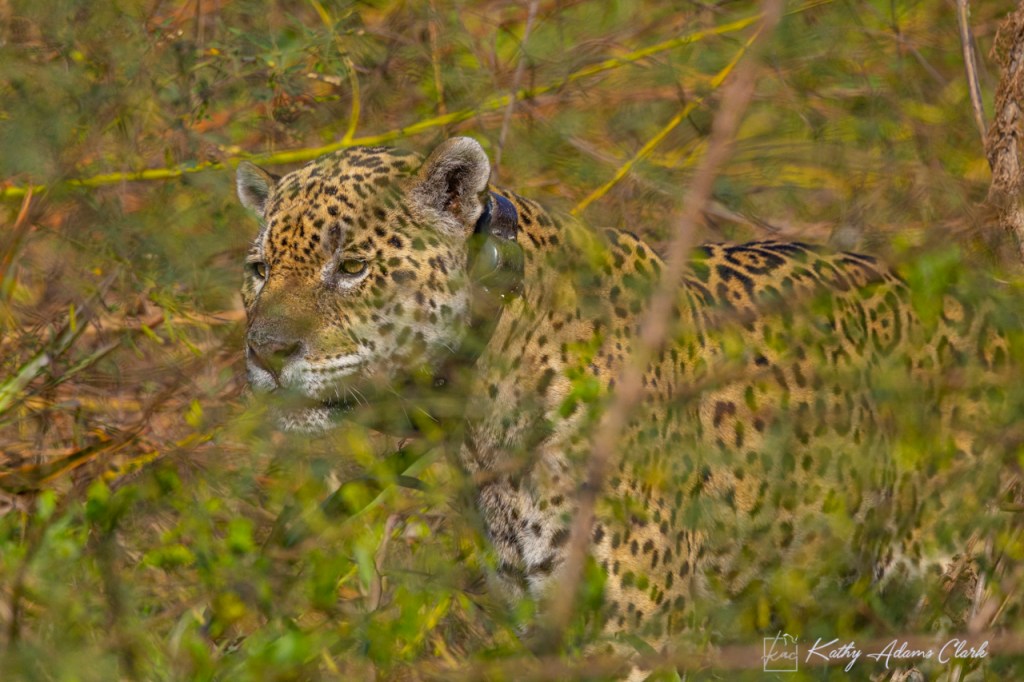
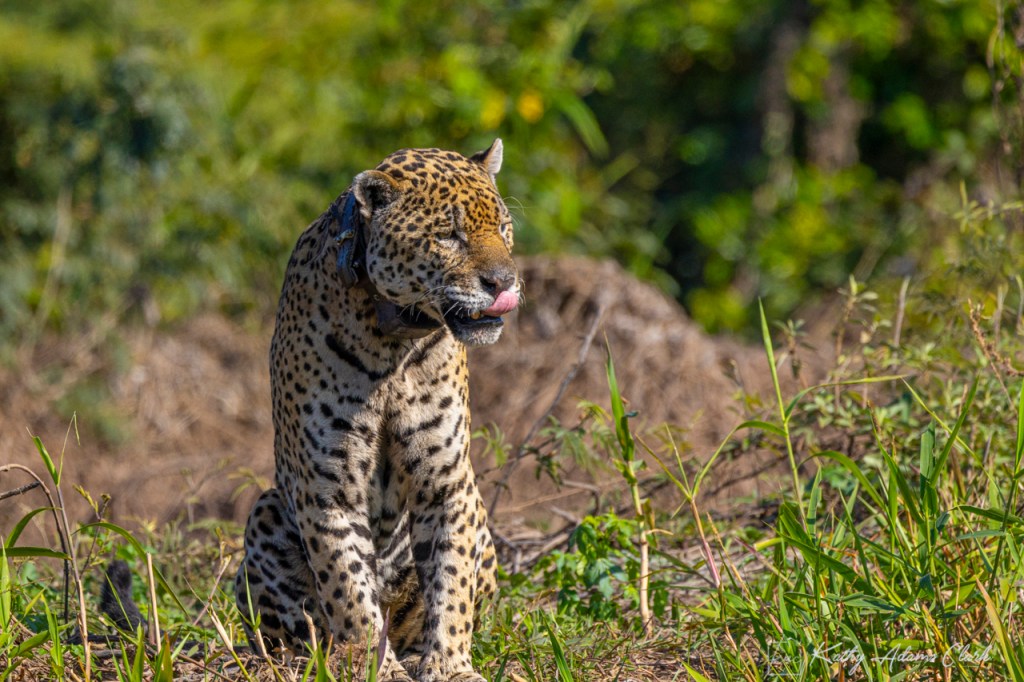
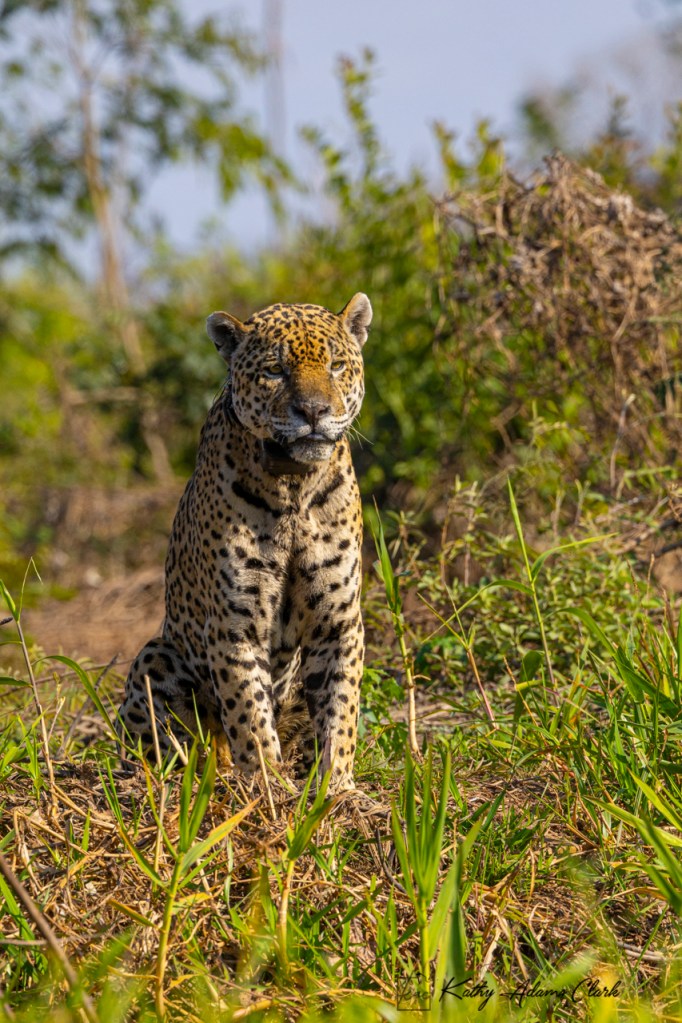
We were in the Pantanal of Brazil photographing jaguars, birds, and other critters in July of 2024. Our main target was jaguars since one can see more jaguars in Pantanal than any other place in the world.
On our last day, we encountered a jaguar that locals had named Nels. He’s a handsome fellow with a huge collar. The collar is because he was rescued from wildfires in a previous year, rehabbed, and then released into the wild.
We found Nels on the Rio Cuiaba near the Three Brothers Rivers. Nels was minding his own business but was hunting for a snack of a caiman or maybe a fat, juicy capybara.
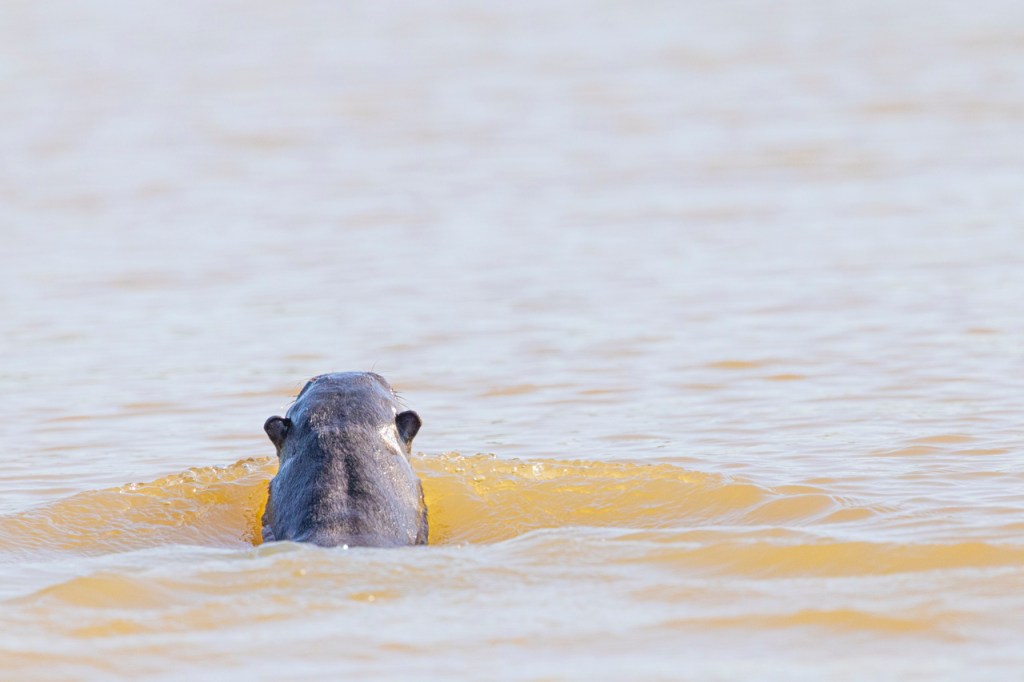
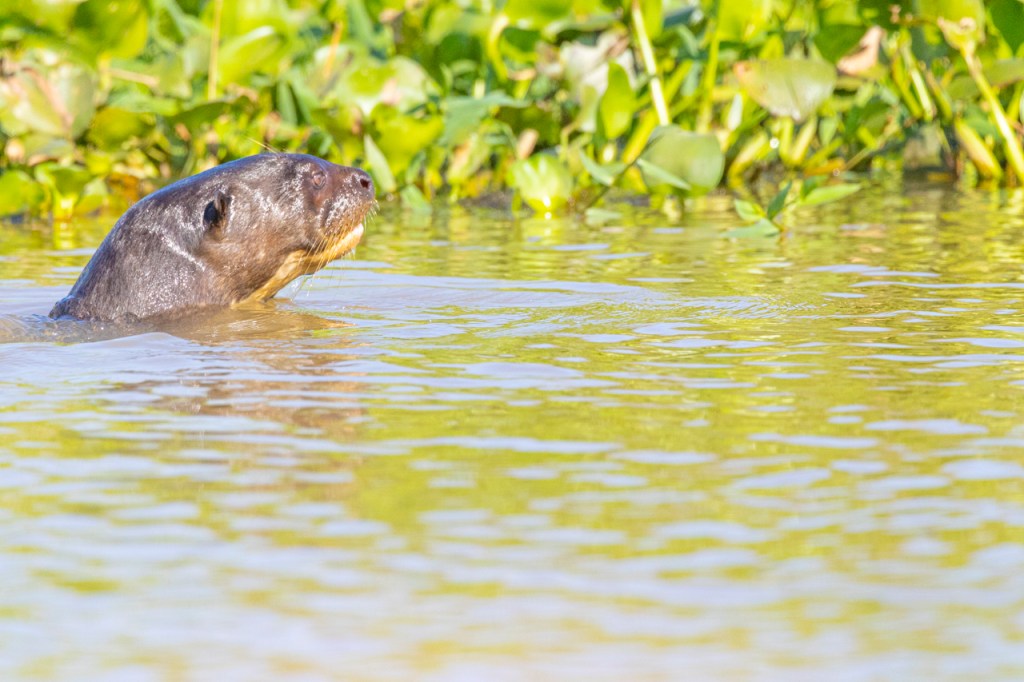
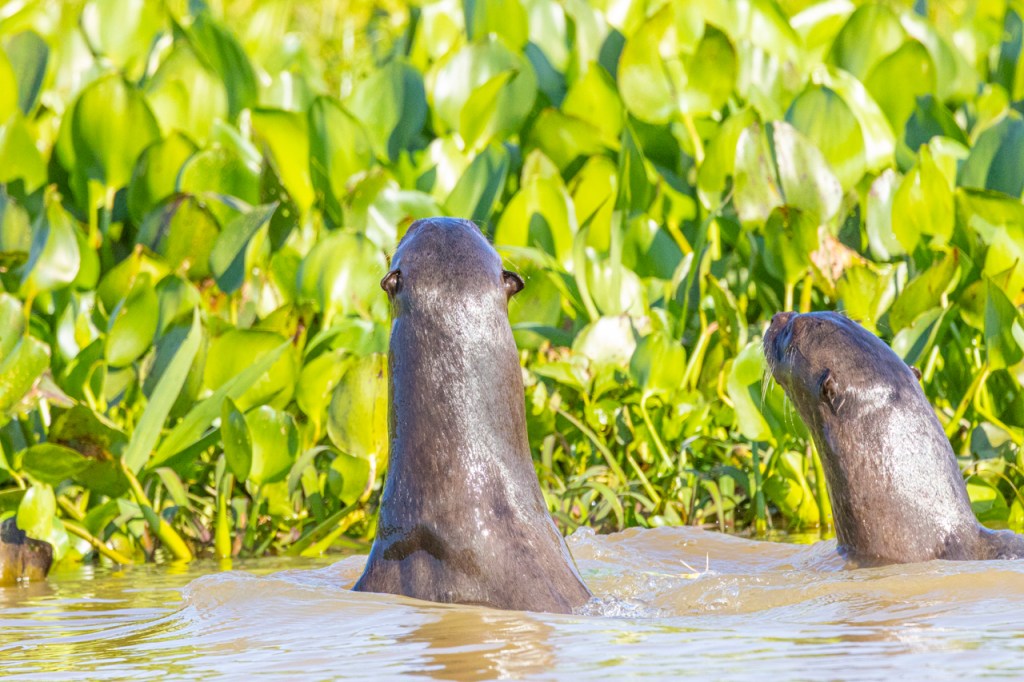
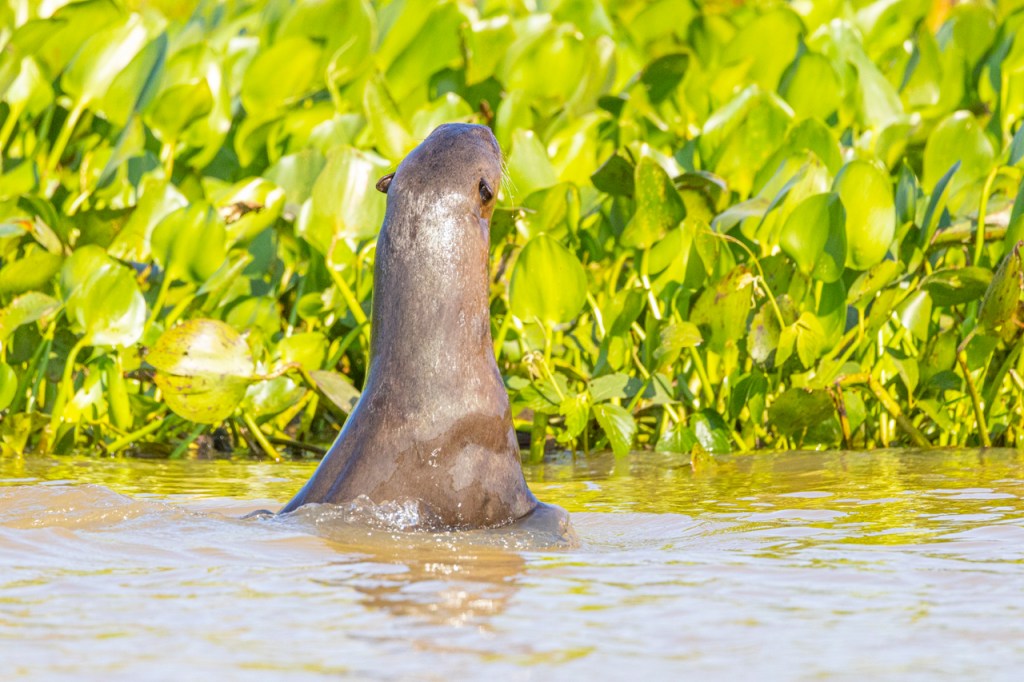
We photographed and watched Nels for maybe 20-minutes and then heard this screeching sound off to the right. My guide, Raul Guarnizo, said the sound was great otters coming to attack the jaguar. Click for Giant Otter sounds.
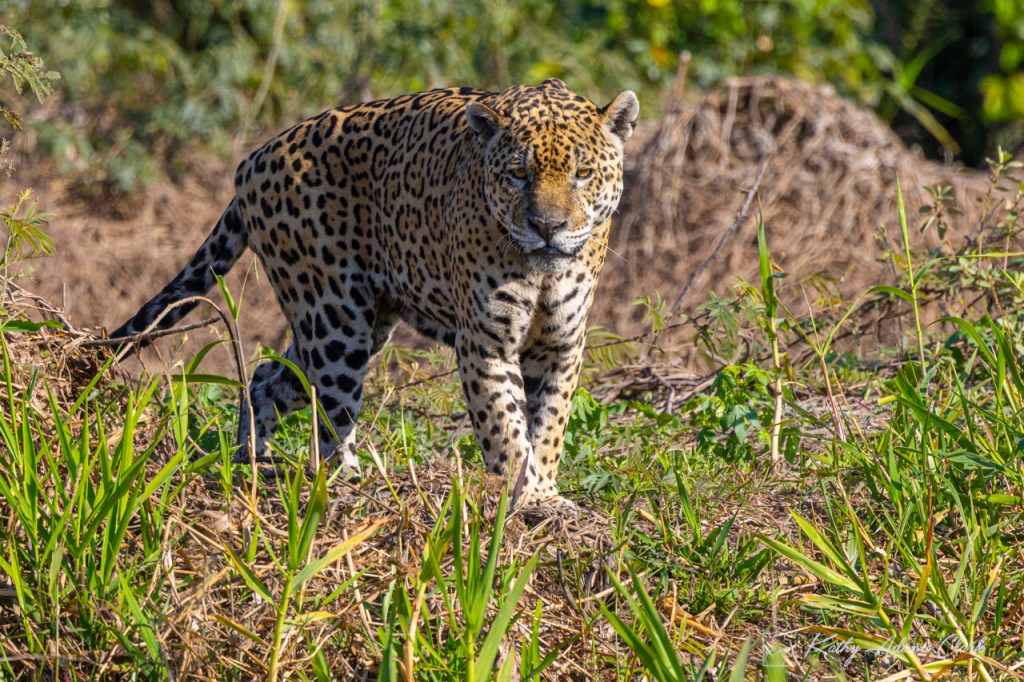
Jaguar versus Giant Otters sounds like a kid’s futbol match. Let’s see how this plays out.
Jaguar versus Giant Otters
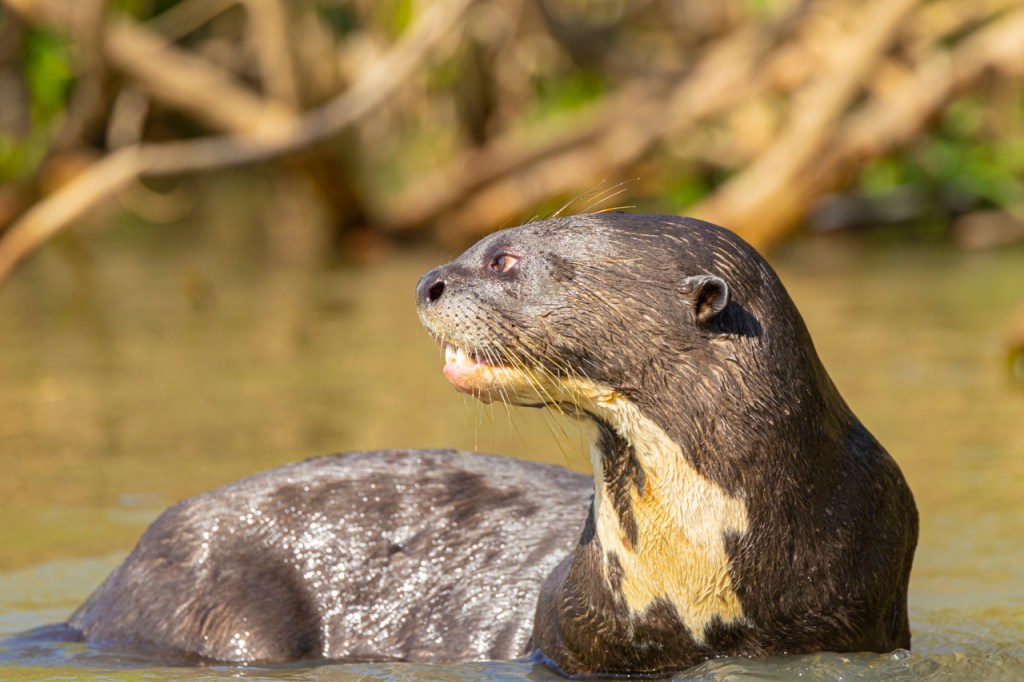
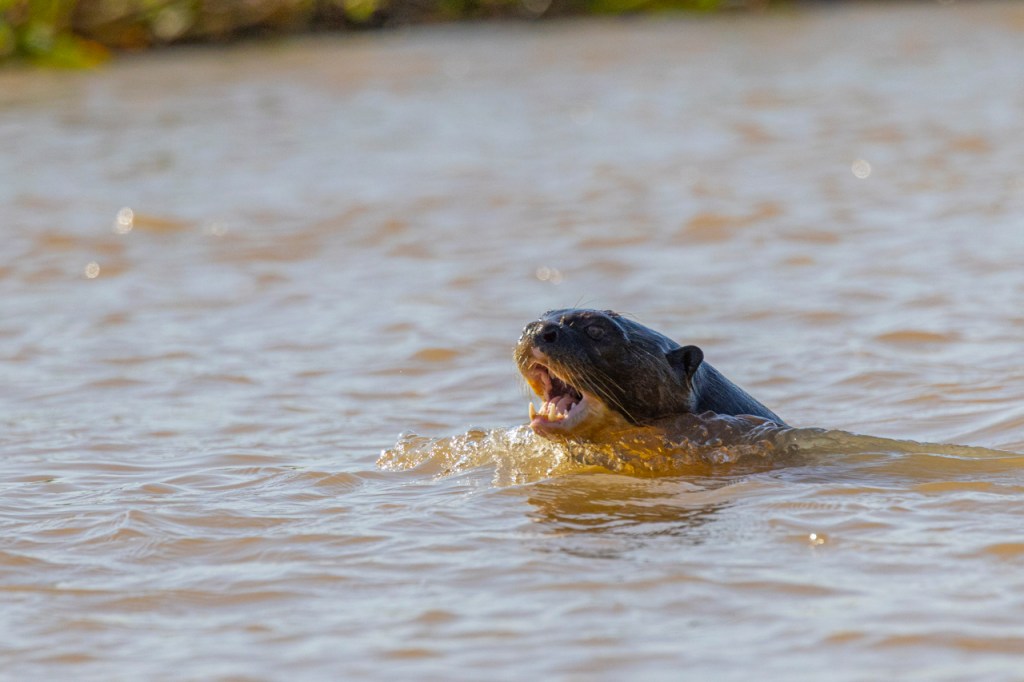
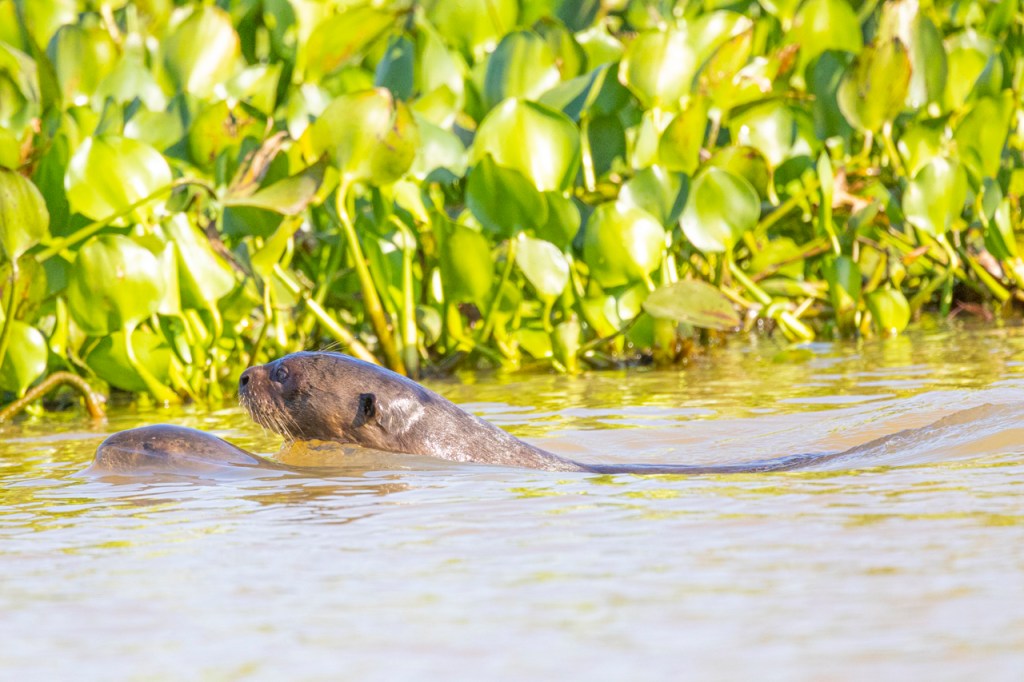
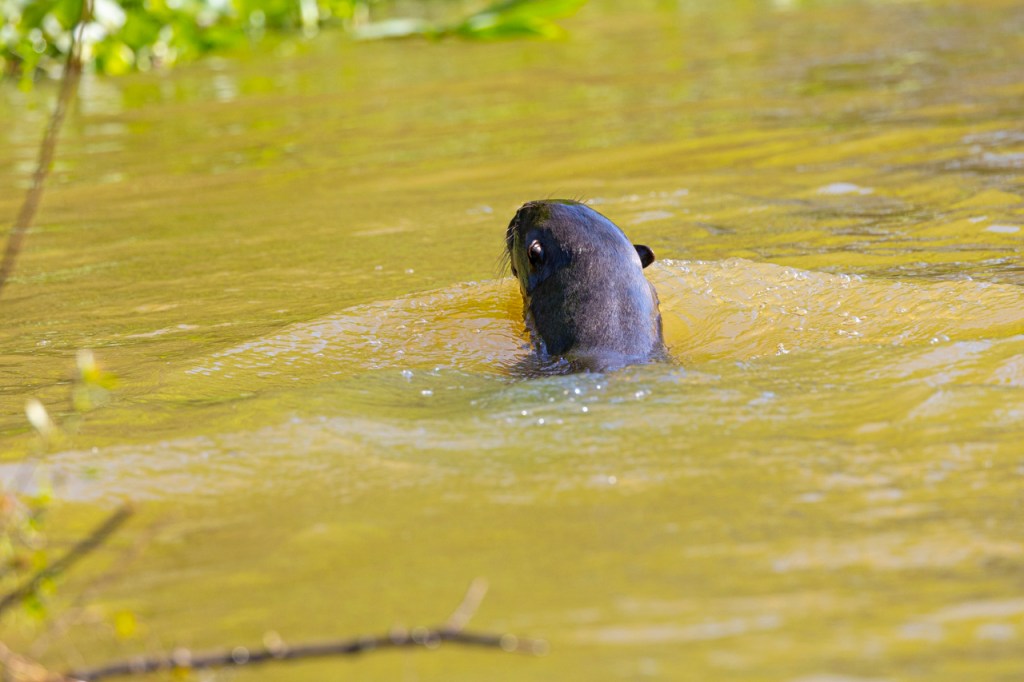
Here’s the jaguar named Nels minding his own business in the Pantanal of Brazil. Jaguar Nels comes out into the open. Giant otter sees the Jaguar and goes on the alert.The giant otter starts bellowing. “I’m coming for you Jaguar! You’re in my territory, dude! Get out!” That’s what it sounded like to me. Here’s the reality, though. Click to hear giant otter sounds.Giant otter makes the turn in the river and swims right toward the Jaguar. “I’m coming for you, Jaguar!!”Jaguar Nels comes out in the open and looks around. Giant otter comes up to the shore. “I’m coming for you, Mr. Jaguar!”Giant otter yells, “I’ve got my buddy, Jaguar. We’re coming for you!!”Giant otter and his buddy start popping up and down. “We see you, Mr. Jaguar!!” The entire time they are hollering. Click here to listen to Giant Otter chatter.Jaguar Nels appears to say “Bring it on, Mr. Otter. I’m ready for you!!”Giant otter seems to lose interest. One last, “I see you, Mr. Jaguar. Get out of here!”Giant otter heads on down the river. He has more important things to do.
So that’s it! One defiant jaguar and two feisty giant otters.
What fun trying to figure out what’s going on in the animal world.
Thanks for reading! I appreciate your support. I hope you appreciate my humor.