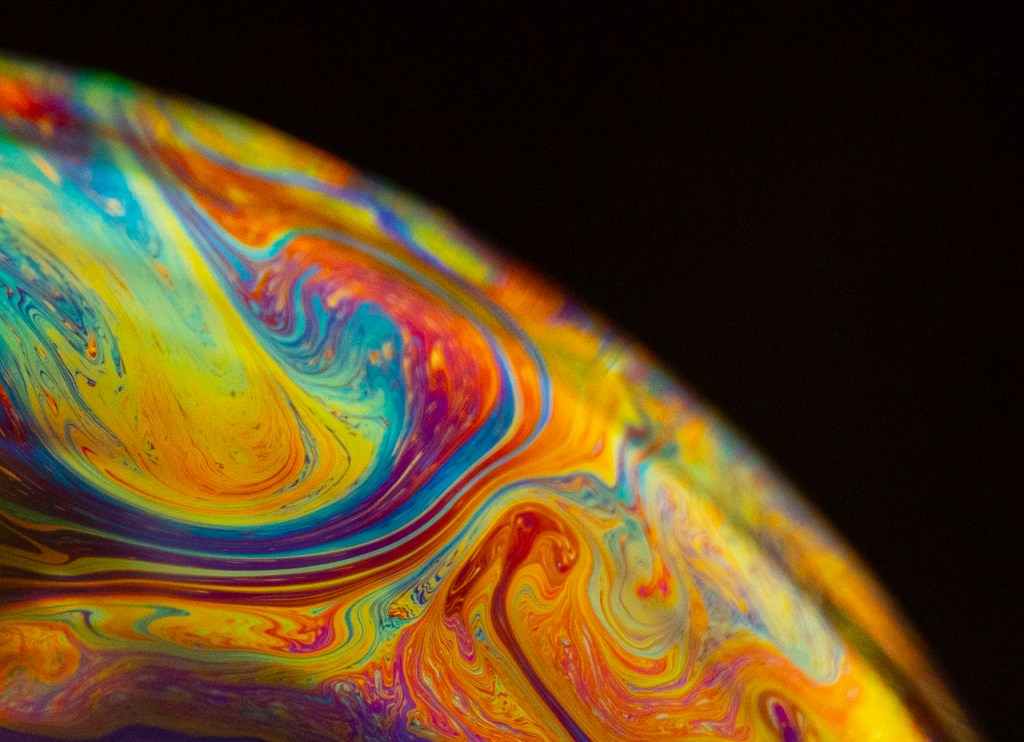
We learn so much about photography when we play. The photo above is a simple bubble but the view is magical.
Here’s what you need to create this photo.
1/8 of a cup of water, 1/8 of a cup of dish liquid, 2 tablespoons of glycerin, small dish, long straw. Lightly mix the three liquids in a small dish. Lightly mix is the key.
Put the dish on a black background.
Camera on a tripod with a lens focused to minimum distance. I used a Canon R5 with a 24-105mm lens. Shutter release is helpul but off-camera flash is the magic. Camera in the Manual mode, f/16, 1/200th of a second shutter speed, ISO 500, flash at ETTL. This means that your flash is going to do the work since the camera’s light meter won’t be balanced.
Put the straw in the liquid and slowly blow. Your goal is to create one bubble. If you blow fast, you get lots of little bubbles. One bubble and slowly blow to make that bubble bigger and bigger. The bubble will stay for one or two minutes thanks to the liquid solution.
Things that will drive you crazy are (1) reflections from overhead lights, (2) reflections from nearby windows, (3) reflection from the flash.
My advice is to “work it” to get rid of all those reflections. Turn off the lights, set-up away from a window, and hold the flash to the side. If you have a softbox handy or diffuser handy, then use those.
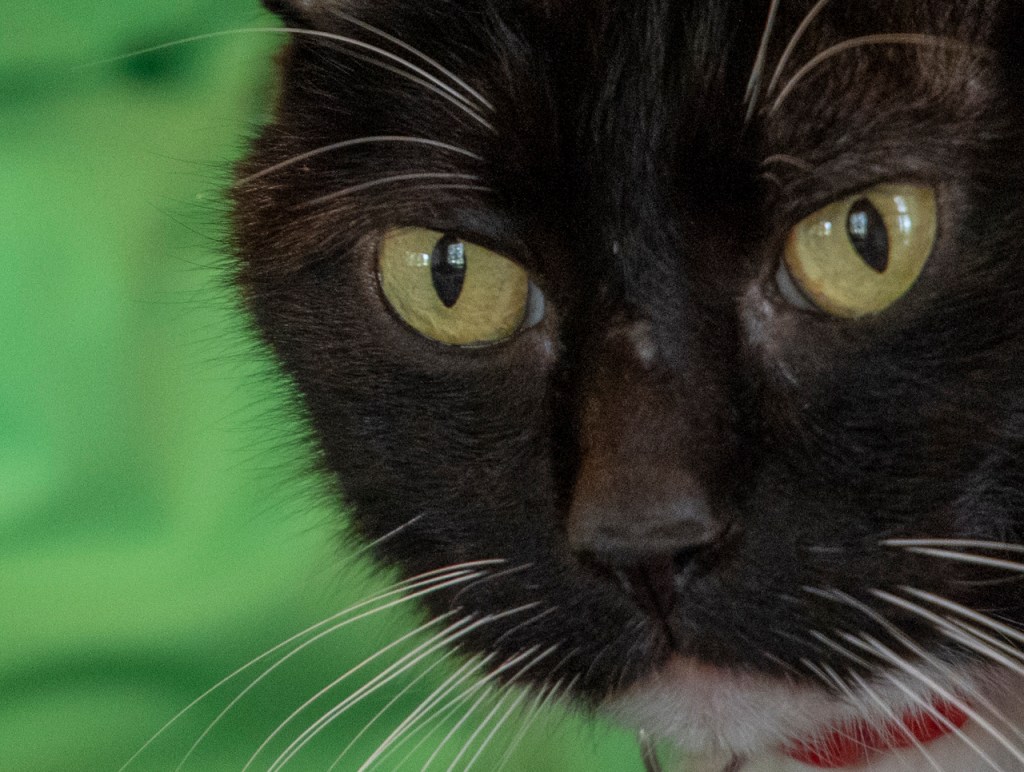
Canon R5 photo taken at 1/40 of a second shutter speed, f/4, ISO 1600, hand held. See below for 100% enlargement.
A RAW file that is a whooping 51MB to 54MB! That’s huge.
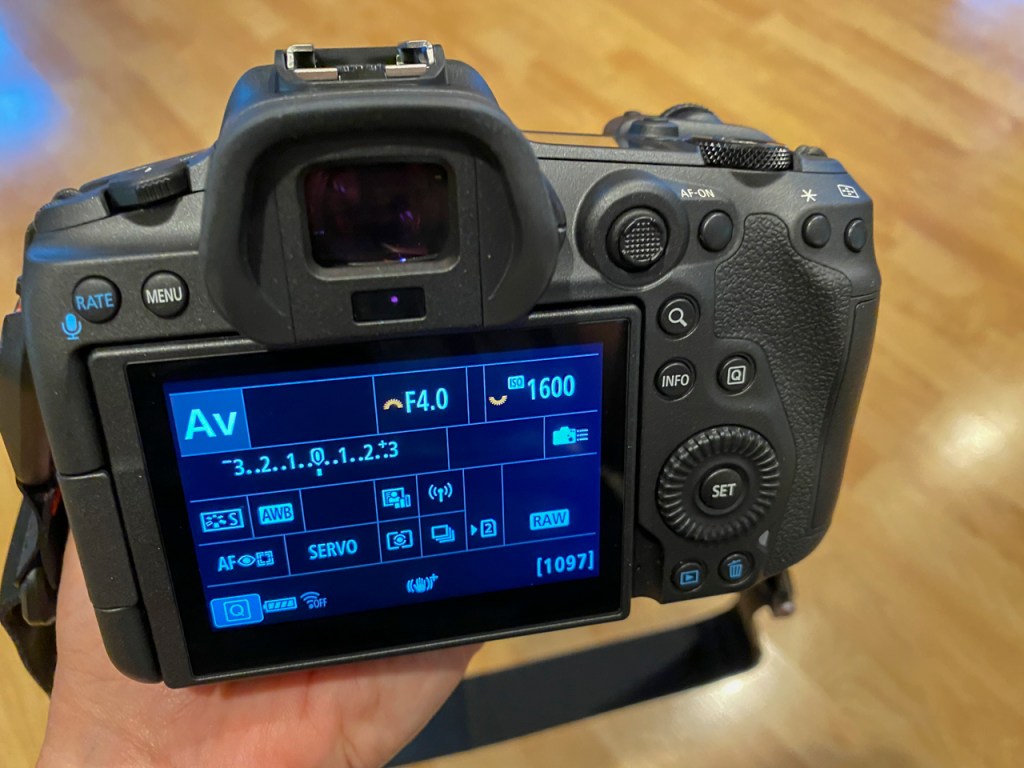
Let Me Concentrate on the Body:
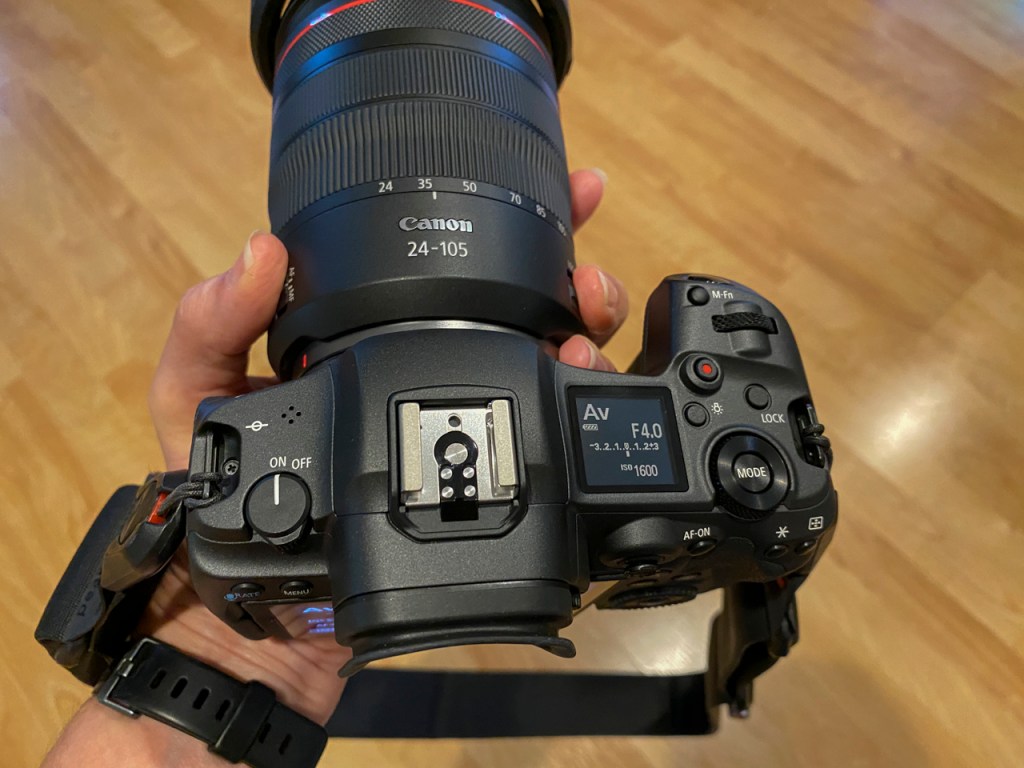
On/Off switch is on the top left. Perfect placement for left thumb activation.
View finder is incredibly bright.
With meter balanced, I love that the viewfinder lightens and darkens as the camera is pointed at lighter and darker areas.
If you are too close to focus on your subject, there are tiny, thin orange lines along each corner of the viewfinder. Those lines turn white when the subject is close enough to focus on.
Focus indicator boxes are blue in Servo and green when the camera is set to One Shot. I don’t often shoot in One Shot but this is a nice visual reminder for those who move between the two auto focus modes.
The icons for front dial or back dial are visible through the viewfinder. These are visible as well on the back of the camera if using live view.
M-Fn button on the top right front just like in the 5D Mark IV. Push the M-Fn button, and you can quickly change ISO, white balance, drive, focus, or exposure compensation. Click the M-Fn button with the tip of your finger, lean the finger over, and rotate the quick dial on the front. Simple to change often used items. All this can be seen through the viewfinder without taking your eye off the subject.
M-Fn button and other controls on the top of the Canon R5.
ISO is also adjustable with the back Quick Control Dial 2. I loved the ISO button on the 5D Mark IV and the 1DX. It was so easy to access. The adjustment via the Quick Control Dial 2 looks just as easy. Remember, we can also change ISO with M-Fn button.
Menu layout is exactly the same as we’ve seen on Canon cameras from the Rebel to the 5D Mark IV to the D1X. There are 30 menu items plus the green My Menu favorite.
Multi-controller button (little toggle joy stick) on the back is like the one on other Canon cameras. Lots of functions depending on what you’re doing with the camera. Convenient for my thumb on the back of the camera.
The rear focus button is right next to the multi-controller. Ergonomically, this is the right position for my hand.
The top display panel has basic information when shooting. Mode, battery level, f/stop, ISO, shutter speed, ISO are all there on top. Press the Illumination Button, though, and lots of icons appear. One glance and I can see AF mode, drive mode, white balance, release mode, meter mode, picture style, and recording card. Icons, of course, because the space is small but everything I need to know when shooting.
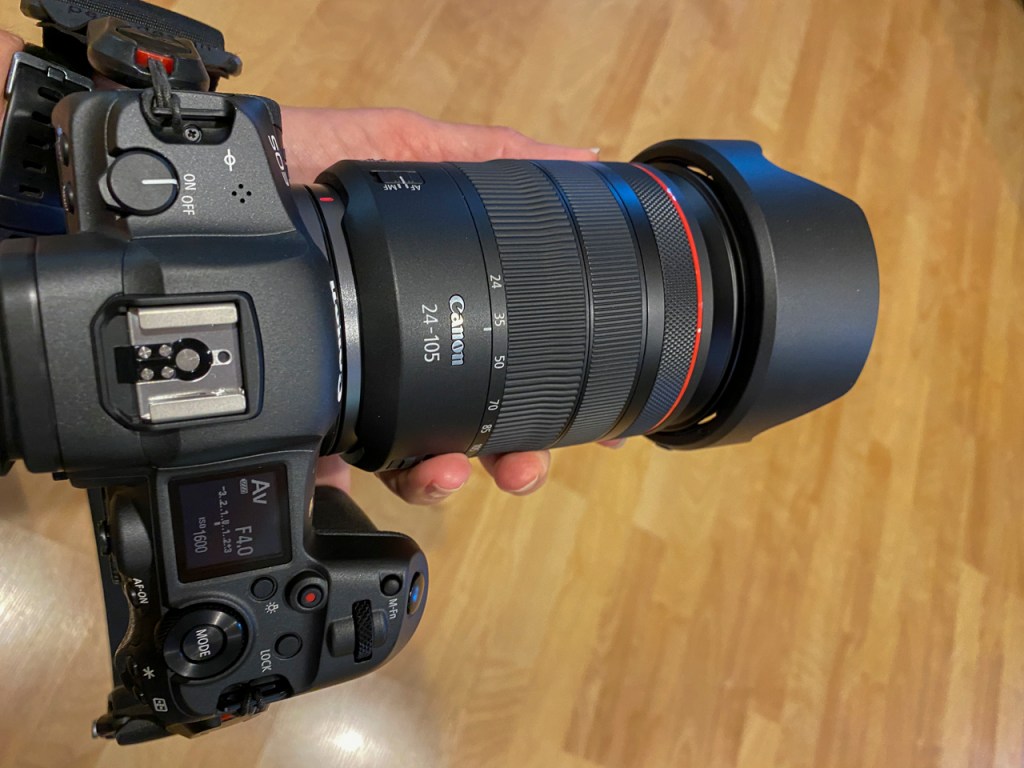
There’s a new “Control Ring” on the front of RF lenses. Rotate it and nothing happens. Rotate it while holding the shutter button half-way down and I can change the exposure compensation. Of course, the Control Ring is customizable.
Control ring on the front of the 24-105mm RF lens
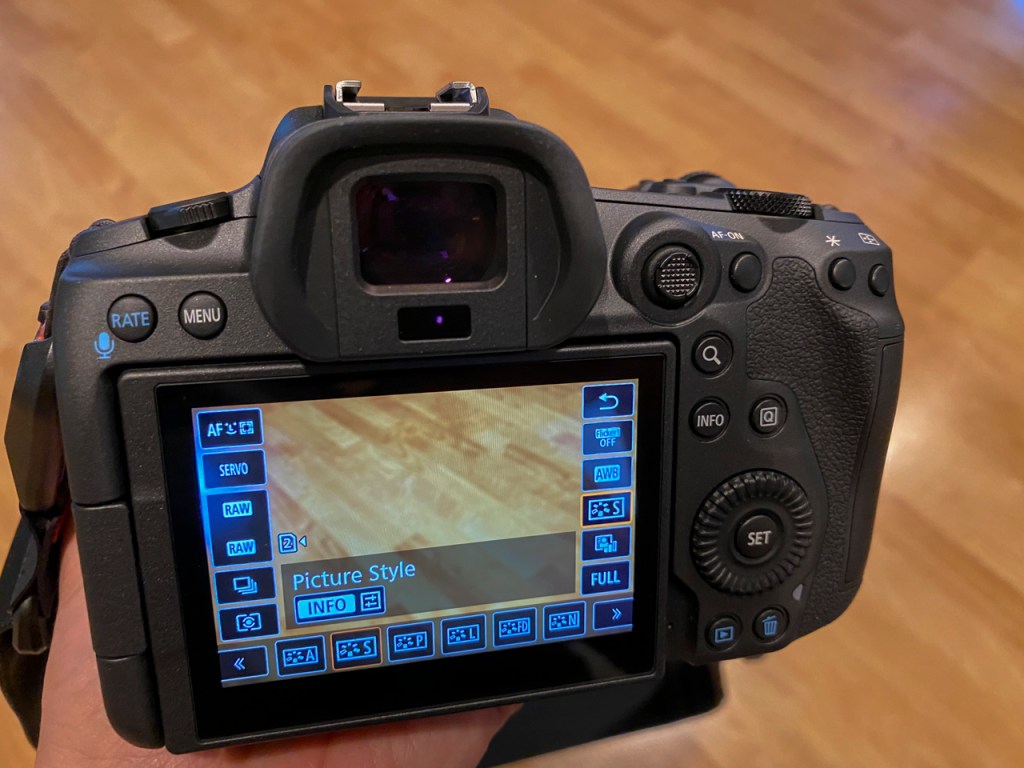
The INFO button on the back of the camera has moved to the right of the rear display screen. Easy to access with your right thumb. Press the INFO button once for classic display screen, press again for live-view screen, press again for live-view with icons, press again for live-view with level and histogram, press again for uncluttered clean screen for live-view.
Classic display screen that’s familiar to those using Canon Rebel, 7D, 5D, and 1D models.
In one of those live-view screens, press the Q button and all the common icons show on the back of the camera for easy changing.
Live view screen with icons accessible by the Q button.
Touch screen on the back of the camera is activated with the Q button, too.
Video is activated with the touch of a button. Push the red button with your shutter finger and video is on. This is a great improvement over the twist lever and push on the Canon 1Dx and the Canon 5D Mark IV.
The R5 has in-body image stabilization. We’ve seen this in other mirrorless cameras but it’s a first most Canon cameras. This means we can hand-hold the camera and shot at lower shutter speeds. See below — I enlarge the file to 100% using 1/40th of a second shutter speed and ISO 1600.
100% enlargement at ISO 1600 and 1/40 shutter speed hand held. Should be grainy and blurry but it’s not.
Thanks to Hunt’s Photo & Video for getting this camera and lens to me. I know equipment is in short supply so my sincere thanks.
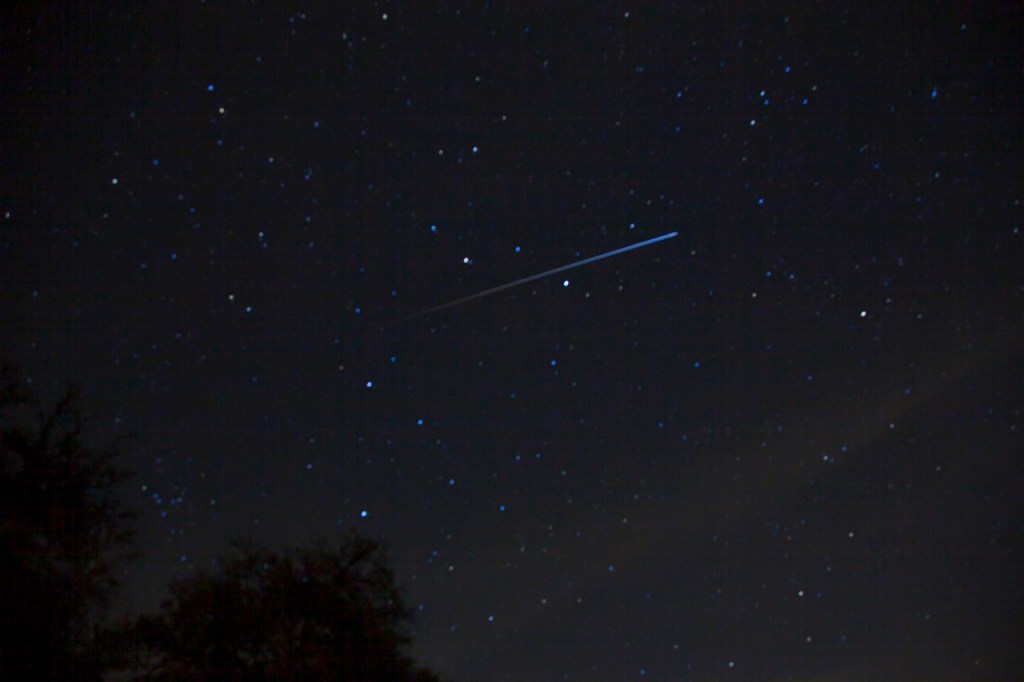
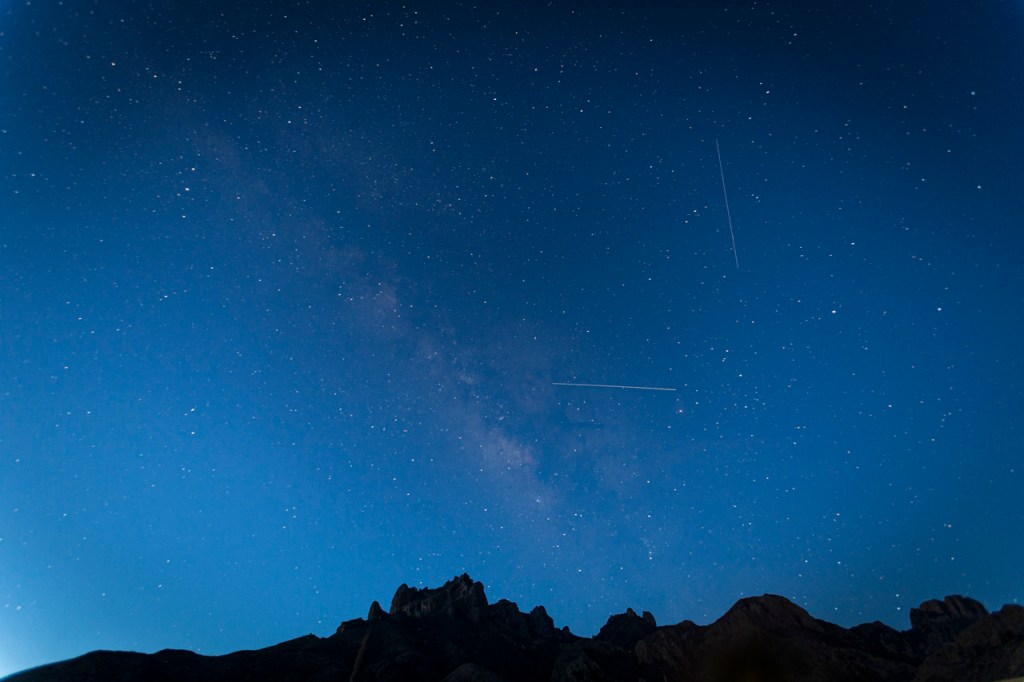
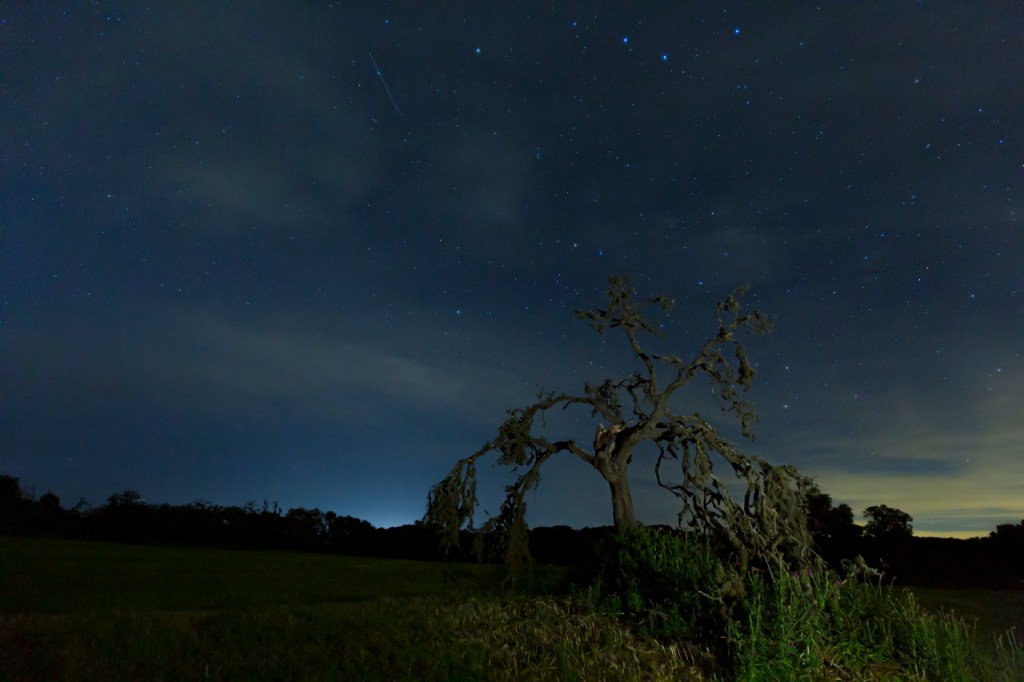
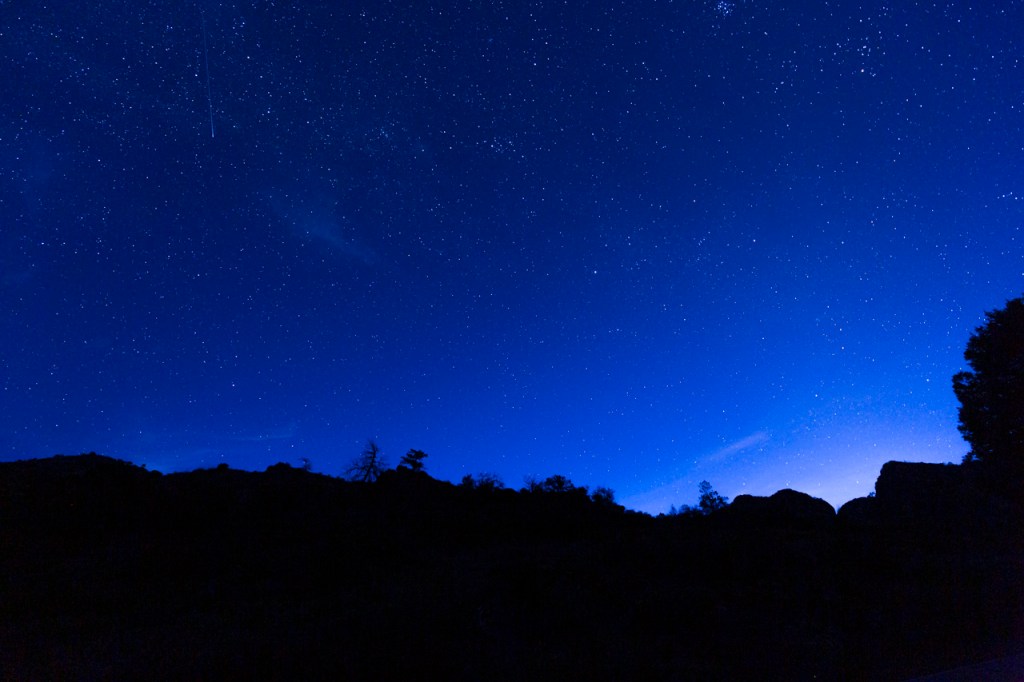
The Perseid meteor shower takes place in 2020 between July 17 and August 24th. The peak numbers of meteors can be seen August 11-13th as the earth moves through the debris of the Swift-Tuttle comet. It’s possible to see up to 50 meteors an hour during the Perseids.
Personally, I’ve been jinxed by cloud cover, bright skies, etc., during this meteor shower but I’m going out one more time to watch and photograph.
Basic things to know and keep in mind:
The meteors come from the NE but you’ll capture longer streaks if the camera is positioned a bit more toward the west.
The moon comes up a bit after midnight during the peak so it will light the sky and foreground. Use that to your advantage.
Camera setting are important. Get things right.
Camera in the Manual Mode
Wide-open aperture so f/2.8 or f/1.4
Shutter speed set so you get pinpoint stars based on your lens. The formula is 500/(mm of lens x crop factor). Remembering basic arithmetic, that would be 500/16 for a 10mm lens on a camera with a 1.6 cropped sensor or 31 seconds. I know your eyes just glazed over, I’m sorry, but if you do that wrong you’ll be 80 seconds. Same formula for a 14mm lens on a full-frame sensor camera would be 500/14=35 seconds. Do a test, though. I use 20 seconds with my 14mm lens so the stars at the edge of the frame don’t streak. There’s an example below so you can see what I mean.
ISO in the 800, 1600, or 2000 range. Take test shots and monitor. Once the moon rises in the sky, you might need to lower the ISO.
Camera on a sturdy tripod.
Focus on infinity. Canon lenses focus on infinity when the tiny white lines on the barrel of the lens are aligned. Nikon and other lenses focus on infinity when the line is aligned with the middle of the infinity symbol. Test this during the day to see if it hold true for your lens. Test again at night by enlarging one of your photos to make sure the stars are tightly focused.
Shutter release in the locked position will take photo after photo for hours. Your reflexes are not fast enough to catch the meteors. Let the shutter release do the work for you. Delete the photos that don’t have a meteor.
Turn off long-exposure noise reduction.
Make sure your batteries are charged and you have several batteries.
Make sure your memory card is clean when you start because you’re going to take a lot of photos during the night.
Remember to have your reading glasses if you need them to set your camera.
Remember to have a head lamp or flashlight. A red filter is good for your eyes but it’s hard to remove that red light from your photo if needed. I use a regular flashlight that’s not super bright.
Bring a chair so you can sit down and relax.
Nice, bright meteor overhead but the camera wasn’t focused. Jinxed!!Two meteors in the pre-dawn sky with the Milky Way.Nice pinpoint stars in the sky with a tiny meteor at upper center. Light from nearby towns on the horizon.Meteor from the Perseid shower in the pre-dawn sky. Notice that the stars toward the edge of the frame are nice and sharp.Comparison of two images. Left shows streaked stars toward the edge of the frame. Shutter speed was too slow. Right shows nice pinpoint stars along the edge of the frame. Shutter speed was right for the lens.
Adobe updates Photoshop, Bridge, Adobe Camera Raw, and Lightroom periodically. Most of the time the updates are small and occasionally they are big and monumental.
We got a big update recently with Adobe Bridge 2020 and Camera Raw 12.3. It’s always fun to see what new, major changes are under the hood.
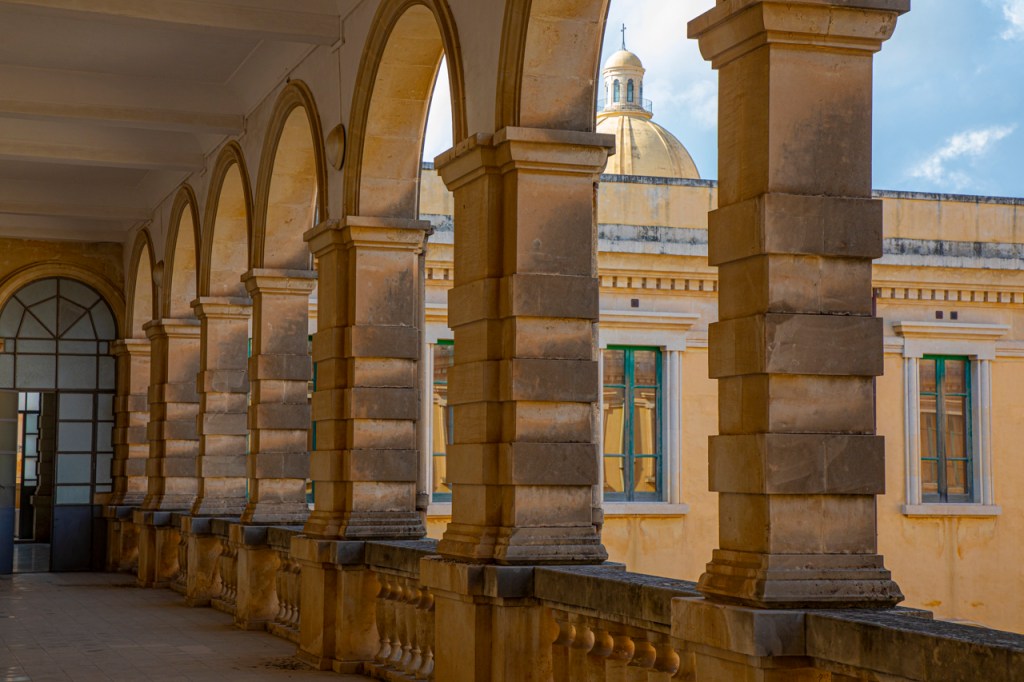
I was processing photos today and thought I’d see if Adobe’s HDR had been improved when compared with Aurora from Skylum or Nik’s HDR.
Over the years, Adobe’s HDR hasn’t been very good compared with Nik’s or Aurora. Adobe Camera Raw 12.3 is almost where it needs to be but still not quite.
Here’s my test:
Noto, Sicily, Italy, photographed with the sky and highlights perfectly exposed. The shadows were brought out with the shadow slider in Adobe Camera Raw 12.3. Noto, Sicily; Italy. Same scene but a blend of seven images. The images were photographed at 3-stops under, 2-stops under, 1-stop under, perfectly exposed, 1-stop over, 2-stops over, and 3-stops over exposed. The images were blended in NIK Efex Pro 2 HDR software.Noto, Sicily; Italy. The same seven images are above. The images were blended in Skylum’s Aurora HDR 2017 software.
I like the RAW image but also like the Nik HDR image.