Adobe updates Photoshop, Bridge, Adobe Camera Raw, and Lightroom periodically. Most of the time the updates are small and occasionally they are big and monumental.
We got a big update recently with Adobe Bridge 2020 and Camera Raw 12.3. It’s always fun to see what new, major changes are under the hood.
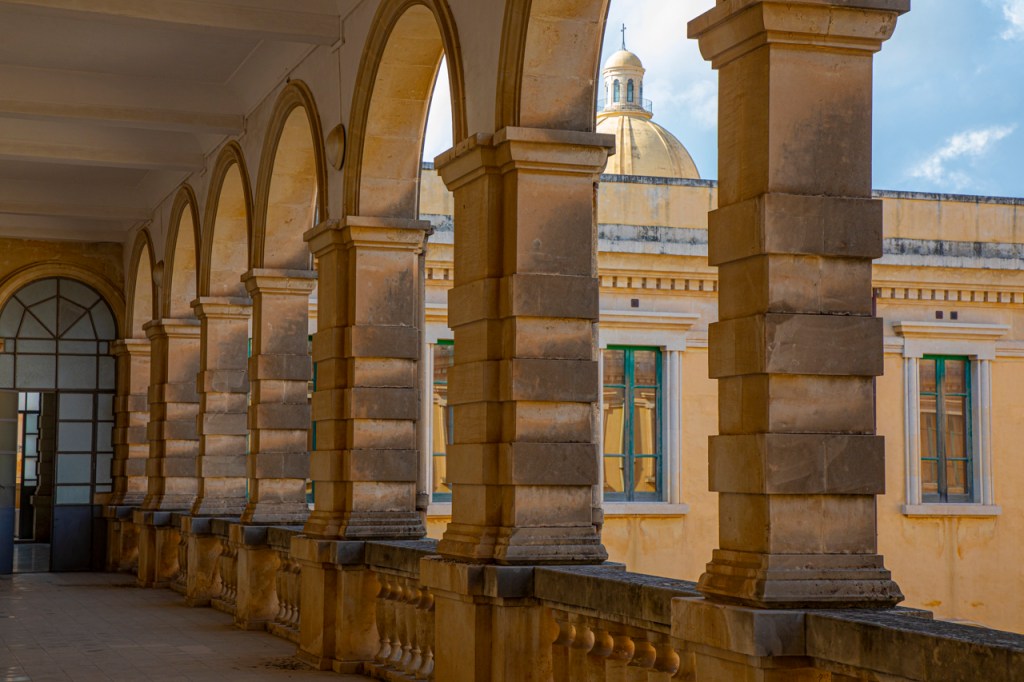
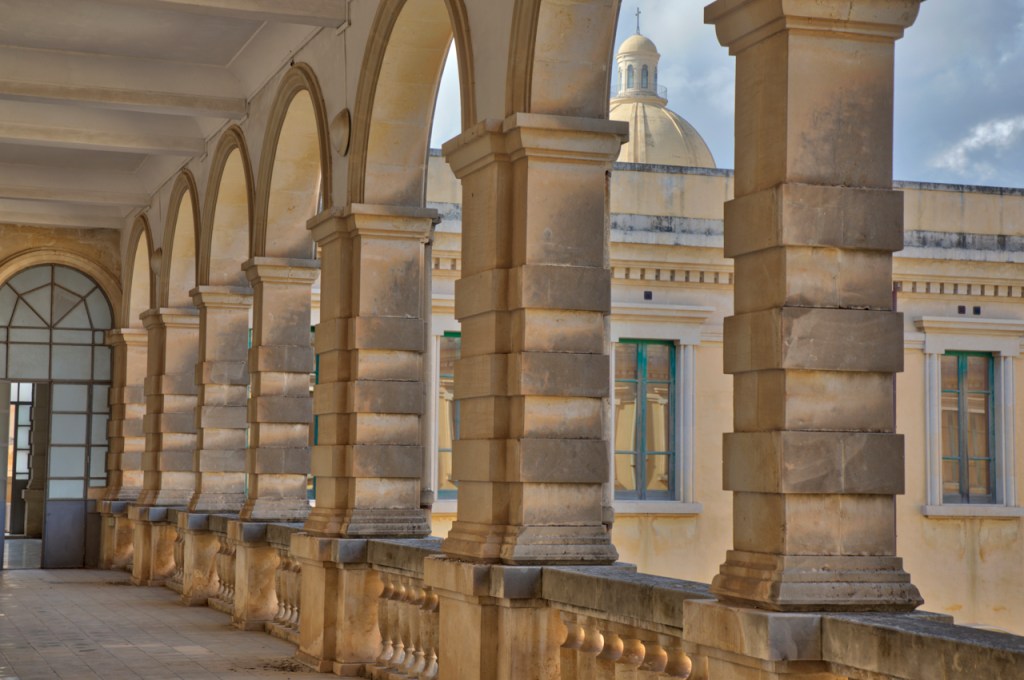
I was processing photos today and thought I’d see if Adobe’s HDR had been improved when compared with Aurora from Skylum or Nik’s HDR.
Over the years, Adobe’s HDR hasn’t been very good compared with Nik’s or Aurora. Adobe Camera Raw 12.3 is almost where it needs to be but still not quite.
Here’s my test:
Noto, Sicily, Italy, photographed with the sky and highlights perfectly exposed. The shadows were brought out with the shadow slider in Adobe Camera Raw 12.3. Noto, Sicily; Italy. Same scene but a blend of seven images. The images were photographed at 3-stops under, 2-stops under, 1-stop under, perfectly exposed, 1-stop over, 2-stops over, and 3-stops over exposed. The images were blended in NIK Efex Pro 2 HDR software.Noto, Sicily; Italy. The same seven images are above. The images were blended in Skylum’s Aurora HDR 2017 software.
I like the RAW image but also like the Nik HDR image.
The photography world is awash with presets. Companies like Luminar and Nik offer great presets. I’m a big fan and use presets from both companies.
Yet, I think photographers need to learn how to use presets.
Just because you can use a preset, doesn’t mean you should use a preset. We used to say the same about the saturation slider, by the way. Just because the slider goes all the way to the right, doesn’t mean you should move it all the way to the right.
What’s a preset? Presets are “pre-made” formulas for processing an image. The various sliders in a software are “pre-set” to give a specific look. Presets are a bit like using the Auto mode on your camera. Auto mode is okay but it’s better when you really learn how to use the camera.
I’ve used presets for years to process HDR image. It was simple to scroll through the presets in Photomatix back in the old days to get the HDR look I wanted. Critics were screaming “HDR looks so fake!” because photographers were overdoing the presets in Photomatix.
HDR looked great, though, if the processing was in moderation. A photo editor once asked me to send “more of those dreamy-looking photos” for a project. Those “dreamy photos” were HDR images with moderate processing.
Today we have presets from big companies, small companies, and individuals. A photographer recently told me that he only uses Pentax presets because that’s how Pentax files are designed to be processed. Turns out someone has made presets and is marketing them to Pentax users.
I recently watched a photographer accept gushing praise for an image that I know was processed with a preset. The processing wasn’t that great. To the uneducated eye, though, the photographer appeared to be on location at the exact right magical moment when the light was perfect. Nope! The magic came from a preset.
Photos entered in a recent contest were passed over by the judges because the presets were so exaggerated. These were possible winning images but the processing was too much. The photographer needs to learn where, when, and how to use presets.
I’m not suggesting that presets go away. I’m suggesting photographers learn how to process. We should understand what’s going on with the software and use it when and where it’s needed. Exaggerate all you want but tone it down when it’s appropriate.
Below I’ll show you my photos that are reasonably processed and then exaggerated with presets.
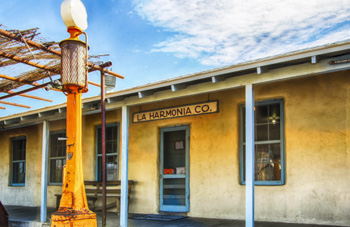
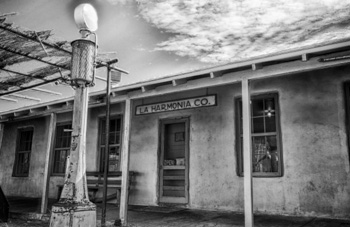
La Harmonia Store, Big Bend National Park, processed with presets in Nik HDR Efex
La Harmonia Store, Big Bend National Park, processed with another preset in Nik HDR Efex
La Harmonia Store, Big Bend National Park, processed with a different preset in Nik HDR Efex
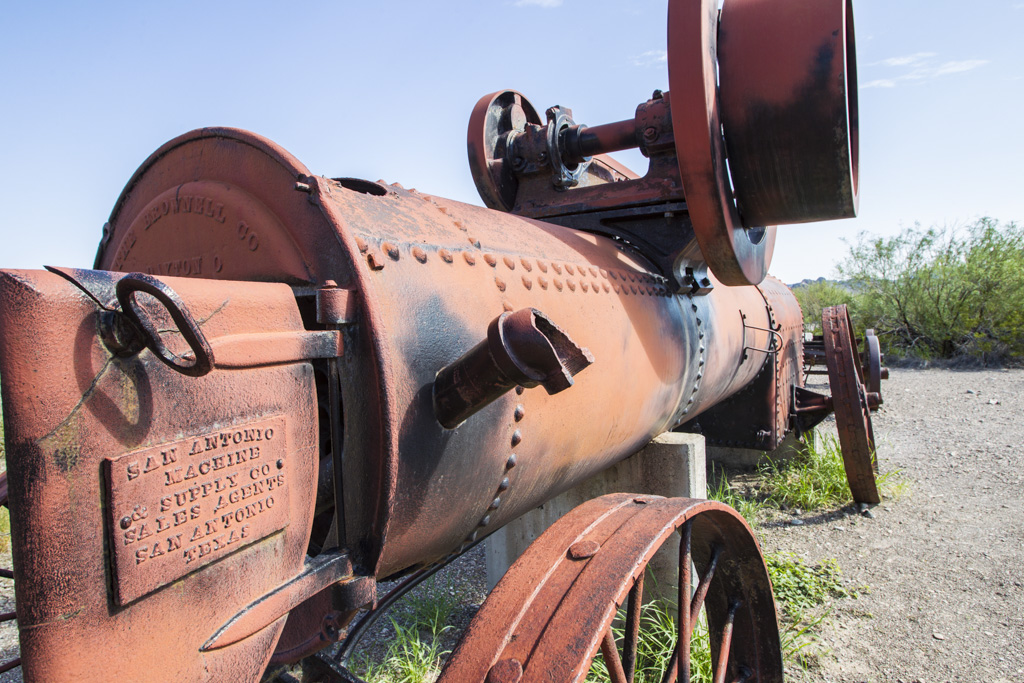
Old equipment in Big Bend National Park simply processed in Adobe Camera Raw
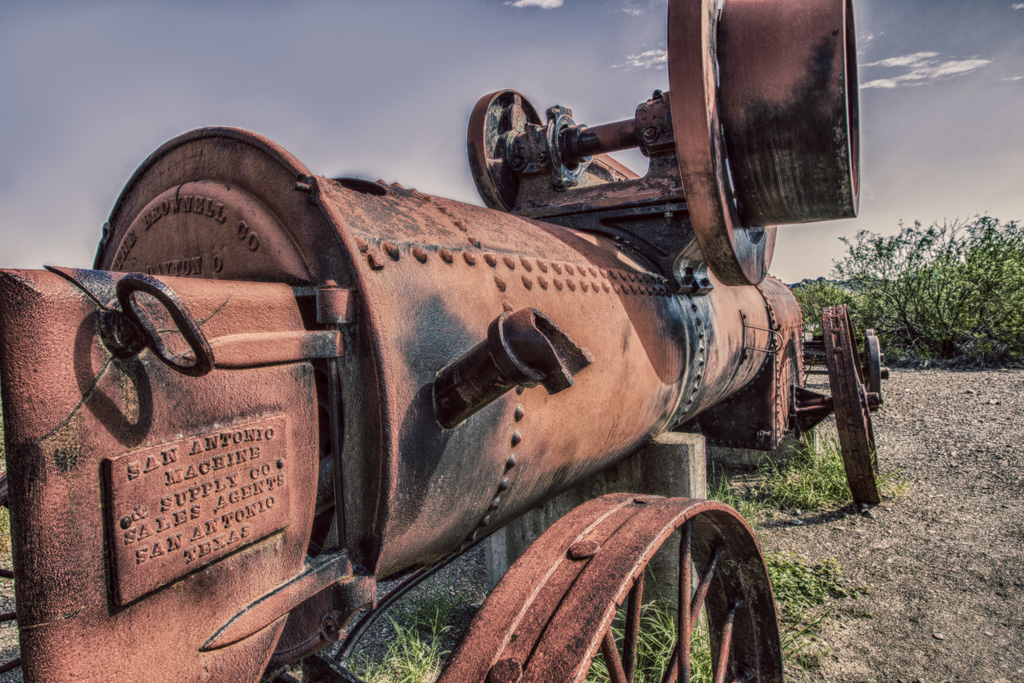
Old equipment in Big Bend National Park processed in Nik HDR Efex
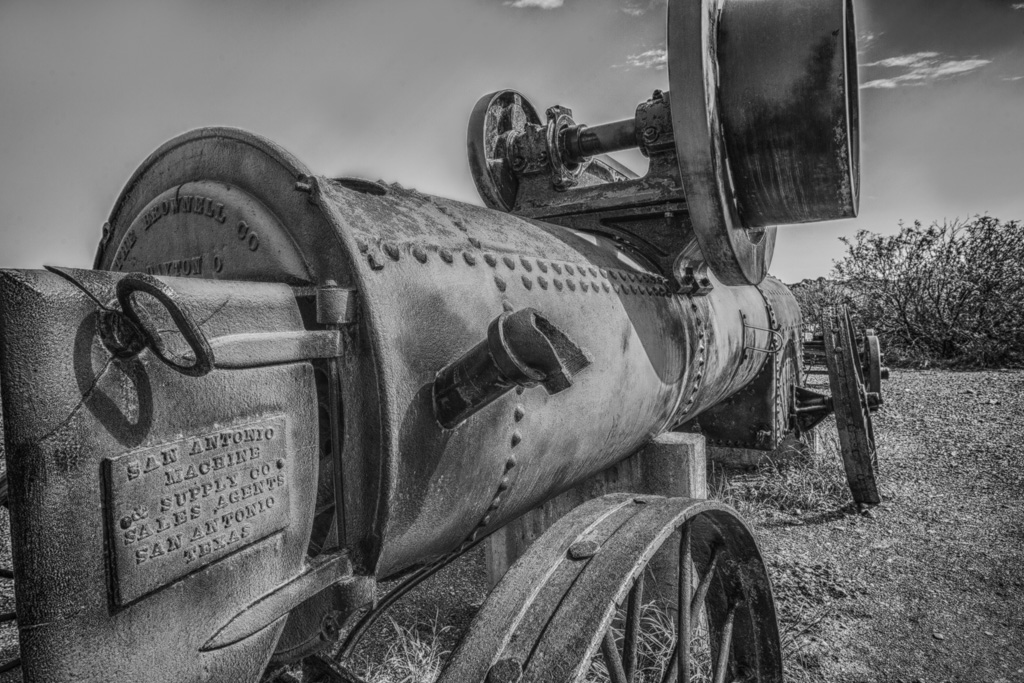
Old equipment in Big Bend National Park processed in Nik Silver Efex
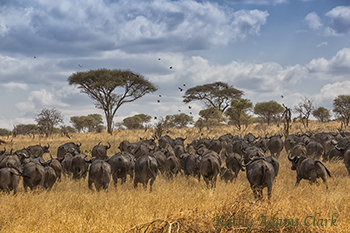
Cape Buffalo, Tanzania, processed with Nik Color Efex Detail Extractor to bring out the clouds
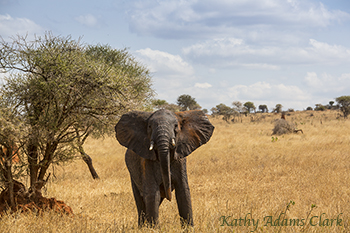
African elephant, Tanzania, processed with Adobe Camera Raw.
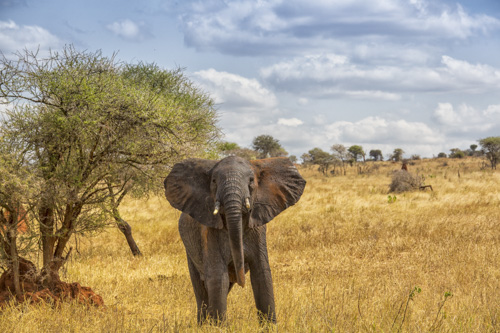
African elephant, Tanzania, processed with Nik Color Efex Detail Extractor to bring out the clouds
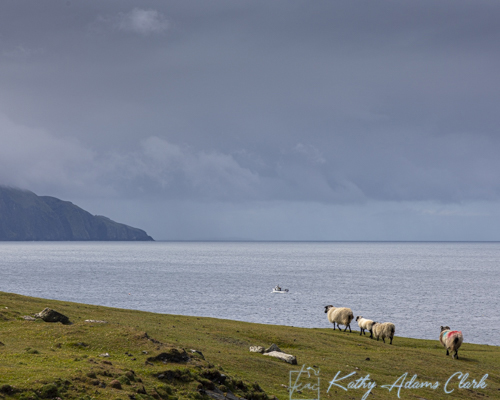
Achill Island, Ireland, processed with Nik Color Efex Detail Extractor to bring out the clouds
Achill Island, Ireland, processed with Adobe Camera Raw.
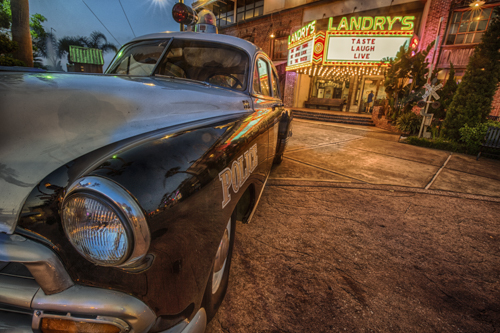
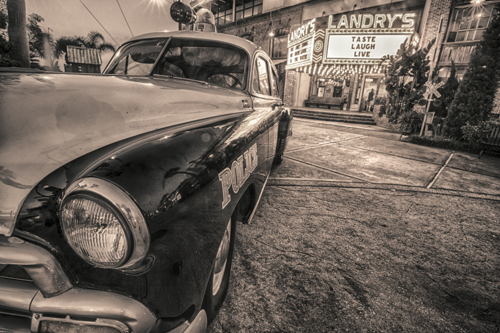
1952 Chevy at Kemah Boardwalk processed with Nik HDR Efex
1952 Chevy at Kemah Boardwalk processed with Nik Silver Efex
Yes, I use presets to enhance my creativity. I use presets sometimes to show me the potential of an image. Presets can support our creative vision as well as ruin it.
Below are some images that I processed with presets — and was thankful for the power of presets.
Great companies like Luminar and Nik make presets. Photographers should learn where, when, and how to use use them.
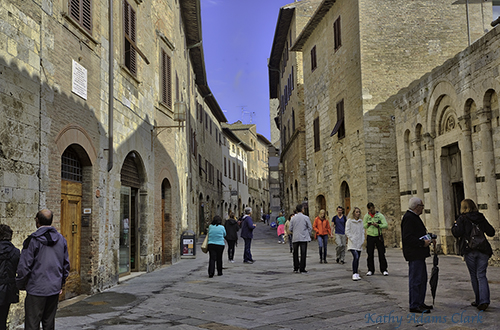
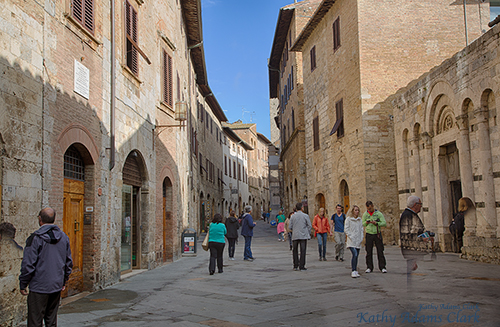
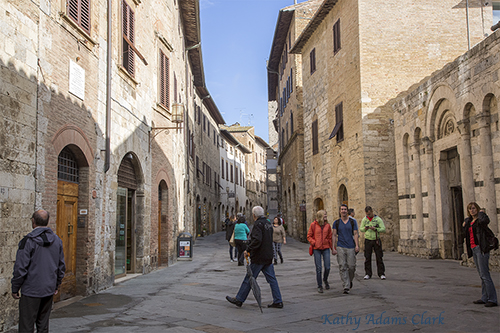
Some say that HDR, or high-dynamic range, is a great way to remove tourists from our photos taken in busy vacation locations. Well, maybe sometimes.
First some explanations. HDR is high-dynamic range photography. Our eye sees 22-stops of light but the camera can capture about 5-stops. HDR images allow us to photograph details in the shadows while still maintaining details in the highlights.
To create a HDR photo, we take 2 or more photos from the same location and vary the exposure. The examples below have been created from seven photos. The exposures range from balanced light meter to -3-stops all the way to +3-stops.
HDR software has an option to deghost or remove people. Deghosting removes people from the final photo if those people didn’t appear in the same spot in all the photos. There’s usually a scale so we can vary the intensity of deghosting. I’ve set the deghosting to maximum on each image.
You see that people are still in my photo of the busy street in San Gimignano, Italy. The only person who stood still through all seven photos was the man in the gray windbreaker on the left. Everyone else moved. The lady in the orange coat walked straight at the camera through all seven photos. The man with the umbrella walked across the scene from right to left.
In conclusion, the crowded street is still crowded with people. The different software, though, handled processing in a variety of ways.
This is an HDR image created with Macphun’s Aurora HDR software.
This is an HDR image created from the same files but processed with Nik’s HDR Efex software. Notice that there’s a half person on the left and two half people on the right. We call these “ghosts.” All of the HDR software offer a deghosting option.
Same files processed in Photoshop’s Adobe Camera Raw HDR feature. Notice there is no ghosting. The man with the umbrella in the center of the photo doesn’t appear in that location in any of the other examples.
Here are the seven photos used to build these HDR photos.