October 2022 gave us the annual grande-sized upgrade to our Adobe products. When I logged on to my Adobe Cloud and clicked the Update tab on the left, I saw that my Photoshop, Adobe Camera Raw, Bridge, and Lightroom all had updates.
The annual updates are historically big. Adobe sends the little stuff throughout the year and then WHAM! we get hit with the big stuff in October.
Warning! Update when you have time to review the changes. I wouldn’t suggest you push the Update tab when you have a big photo deadline looming. Things you use everyday might get moved, renamed, or combined. Yet, we also get some great new tools.
Here are the big things I really like in the 2022 Update
Bridge has a Workflow tab at the top. You can save workflows that you do on a regular basis. For example, your camera club wants monthly submissions at a specific ppi and size on the longest side of the photo. You can now do that workflow once and save it as a preset. Learn how to build a workflow by clicking the Learn More tab at the bottom of the Workflow screen. Or click this Workflow Builder tutorial from Adobe.
Bridge users who’ve attended my classes might notice that Bridge looks a bit different the first time you open it. Don’t freak out! Click the “Workspace 1” tab at the top. That’s the workspace I helped you build and it’s still there.
Adobe Camera Raw has changes too! Double-click a RAW file in Bridge and Adobe Camera Raw opens automatically. (Readers learned how to do this in my classes and via my YouTube videos.)
Lightroom’s Develop Module and Adobe Camera Raw do the same things so I’ll introduce all the new features together.
Masking has combined the old adjustment brush, radial filter, and graduated filter.

The tools behind this tab are HUGE! You can now click Select Subject and the software creates a mask around the subject. It does a pretty good job, too. Hover your cursor over the subject and you’ll see sliders on the right. Now you can process just for the subject.
Click Select Sky and the sky is selected. Hover your cursor over the sky and sliders appear. Now you can process just the sky.
Play around and you’ll see that you can enlarge, shrink, or fine-tune the mask.
Luminance Range allows you to only select a luminance range. Color Range allows you to select just certain colors. Then you can adjust that color only. Anyone for a bit more yellow in autumn leaves? A bit more turquoise in a cormorant’s eye?
Want to only adjust the shadows to change their tone? Here’s your way to do it.
Lightroom Users! This is a game changer for you. You now have layers.
Layers Resisters! This is a way for you to start using layers without having to really know all the technicals of Photoshop layers.
Adobe offers a great tutorial when you click on the Masking icon the first time. Read the instructions — they are super simple — and learn how to use this great new too.
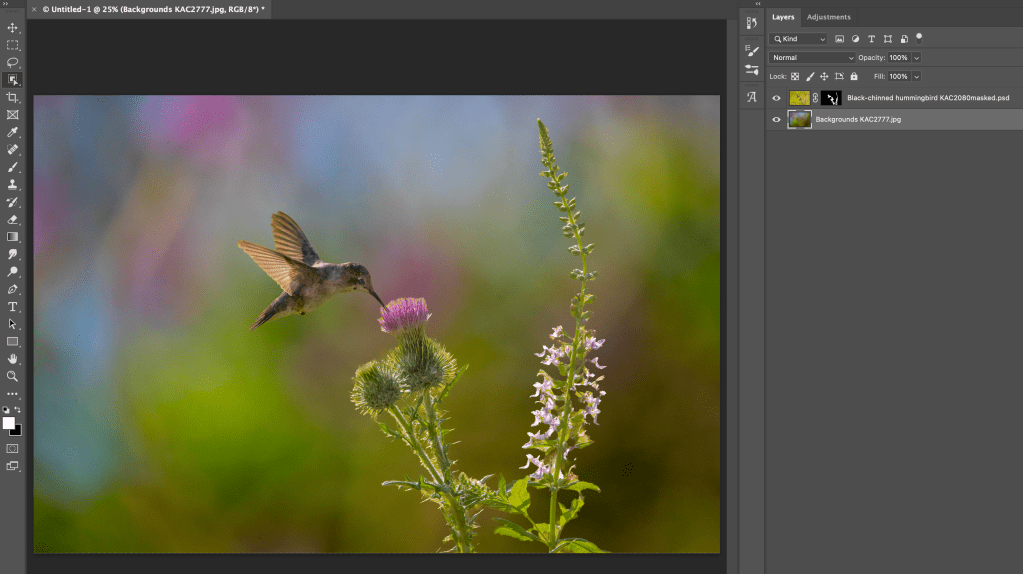
Photoshop has some great new tools, too.

The toolbar now has Object Selection Tool. Click the icon and then watch the little circular arrows at the top. When the arrows stop turning, you know the software has selected an object. Nudge the software along if nothing happens by clicking on one of the subjects in the photo.
Once an object is selected, click the Adjustments palette on the right. Choose one type of Adjustment and a layer mask appears. (If you don’t see either of these, click Windows and be sure Layer is checked.) Those of you who know layers will find yourself right at home at this stage.
Another new thing is called Harmonization. Sometimes when we work with different photos in layers, we get colors that don’t really go together. This is especially true when we’re working with Textures.
Harmonization to the Rescue!
Click Filters>Neural Filters>Harmonization. A new pop-out panel will appear. (Click the download button to download the filter the first time.)
Wait, wait, wait!!! The process bar at the bottom of the photo shows you the software is working.

Once Harmonization is finished working, you can use the sliders to fine tune the color harmony. Click OK and a new layer is created in your layer stack. Now you can go in the layer masks, use black or white brushes, and clean-up the image.
Landscape Mixer is another interesting Neural Filter. Open a landscape photo in Photoshop. Click Filter>Neural Filters>Landscape Mixer. The Landscape Mixer shows up. (Click the Download button to get the filter the first time.)
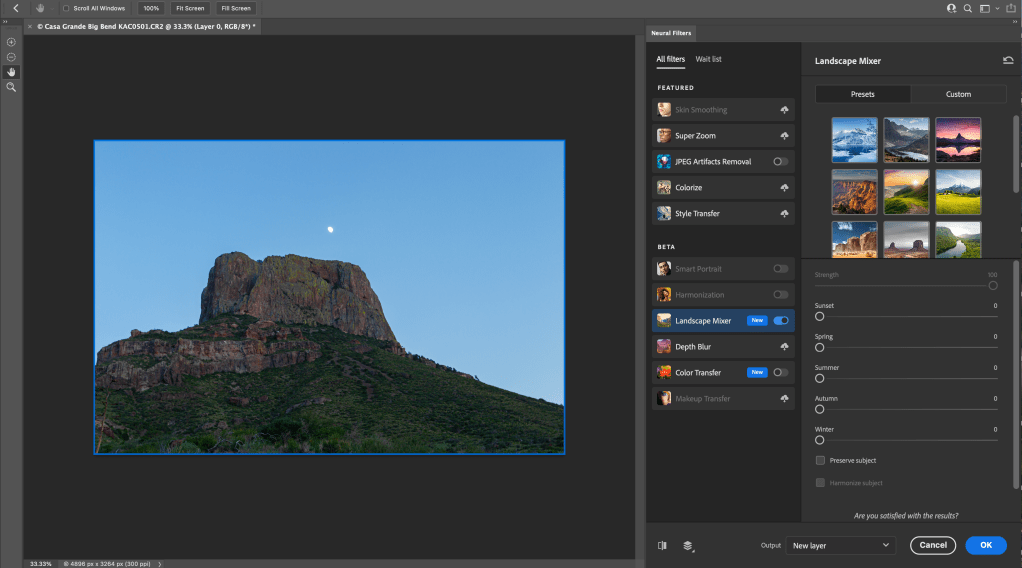
Notice you have sliders for Sunset, Spring, Summer, Autumn and Winter. I’ll move the Winter slider almost all the way to the right. Wait, wait, wait and watch the blue bar move slowly along its path.

The end product is Casa Grande in Big Bend National Park in the snow at twilight! The trees are green but that’s a minor problem. Notice that there are other option to choose from. I’ve given an extreme example but I can see how this tool might be useful to some photographers.
I hope you’ve enjoyed this brief overview. Adobe has given us some nice new tools. The tutorials provided by Adobe are simple and easy to understand. Update your software when you have some time to play. We’ve got a lot of new toys tools.
Comments? Did I miss any new features that you like? Post below.
