I took your Mastering the Manual class in June, and you mentioned that you would be open to making lens suggestions via email. I’ve been researching, and I’m still at a loss. I would appreciate any suggestions you have.
I’m a complete beginner (the manual mode class was terrific!).
I have a Canon R-10 with two lenses: 18-45mm (standard kit lens) and 55-210mm f5-7.1
Two primary areas where I’d like to use my Canon (rather than my iPhone camera).
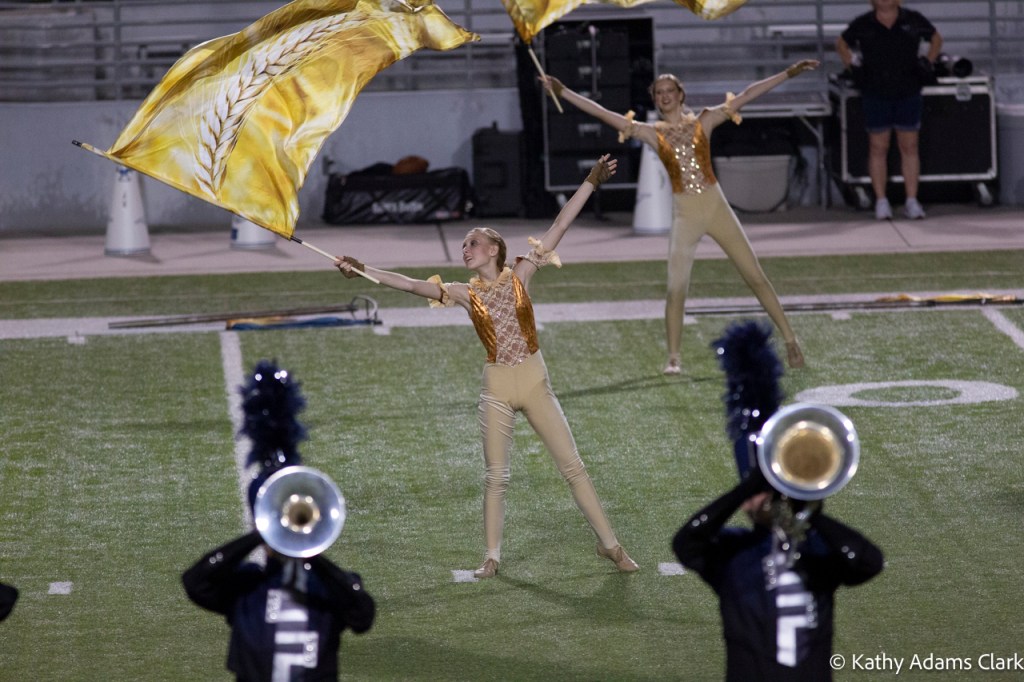
– High School Marching Band – shooting often in evenings or in gymnasiums/stadiums in low light, quick movement. I’d love to focus on the kids (with bleachers and backgrounds blurred out) and catch movement of the Band and Guard. I’m also doing a lot of candids (up-close of kids’ faces) in the stands for social media content.
– Work – I work for a nonprofit in communications. We just use our iPhones for most things, but I’d love to start adding better photos with my camera. A lot of group shots of people (mostly indoors, occasional outdoors). We also do a couple of big events in the evening indoors with low light.
Other band photographers are telling me I need the Canon RF 70-200mm f2.8. I’m seeing a range of pricing from $2800 to $4,000 for that kind of lens. At my level of photography and my camera, I’m not ready to make that kind of financial investment.
I know from the manual mode class I need a lens with a larger f-stop. Any f2.8 lens that are more reasonably priced that would work for a beginner in the two scenarios above? Ideally, I’d like to spend less than $1,500.
I appreciate any guidance. I’m not sure I’m ready for the Lens class you teach at Precision, but if it’s offered in the future, I hope to register. — Erica
My Answer: Let’s get real on your lens choice.
Canon is putting out a series of moderately priced lenses for the R10 and R7 cameras.
The RF100-400mm f/5.6-8 IS is only $700. That would be great for your band photos.
The RF 24-105mm f4-7.1 is reasonable, too. Only $429.
These two lenses would put you in great standing with your camera. I’ve used both. They are not your top of the line Canon lenses but they are VERY good.
Photographed with an fstop of 5.6
Your R10 has nice high ISO so you don’t need the 2.8 lenses. Those were needed when we didn’t have exceptional high ISO or software to process high ISO.
The reality, too, is you’re never going to blur the background from the bleachers. You need to be down on the field to do that. You can blur the background, though, for your candids of the students in the bleachers during the game. Either lens will do a great job.
In all the photos below, I used a fstop of 5.6.
f5.6 indoors with auto ISOf5.6 from the stands in the stadium with f5.6From the stands at f5.6 and auto ISO
If I have it on autofocus and it looks clear in the view but comes out completely blurry, is that the autofocus not working, or is it just me? I have a Canon Rebel T1i.
Alysia
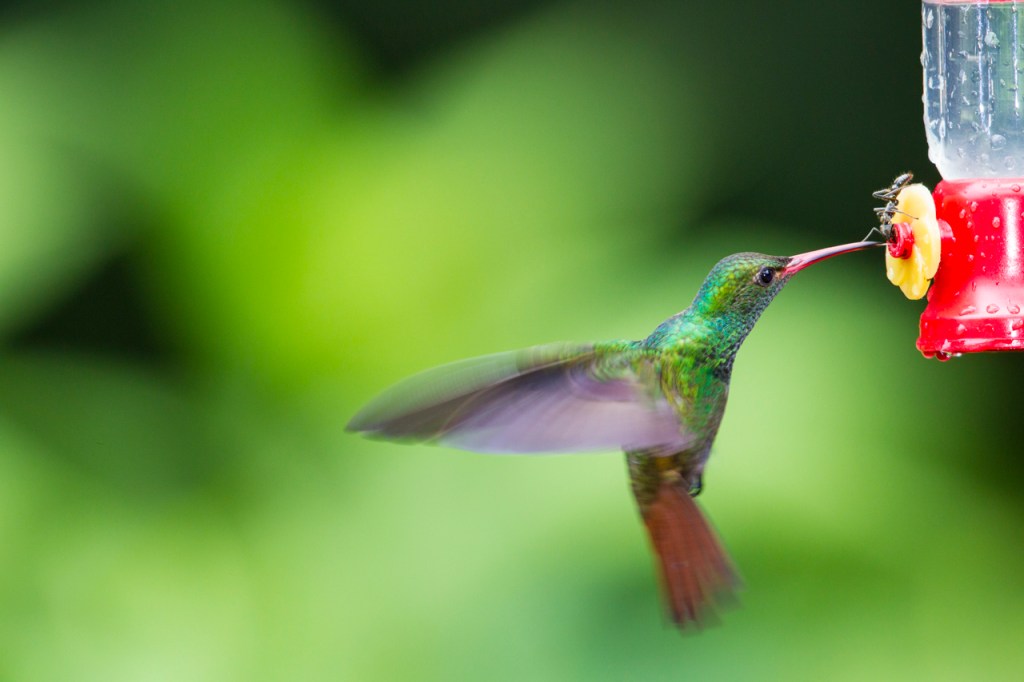
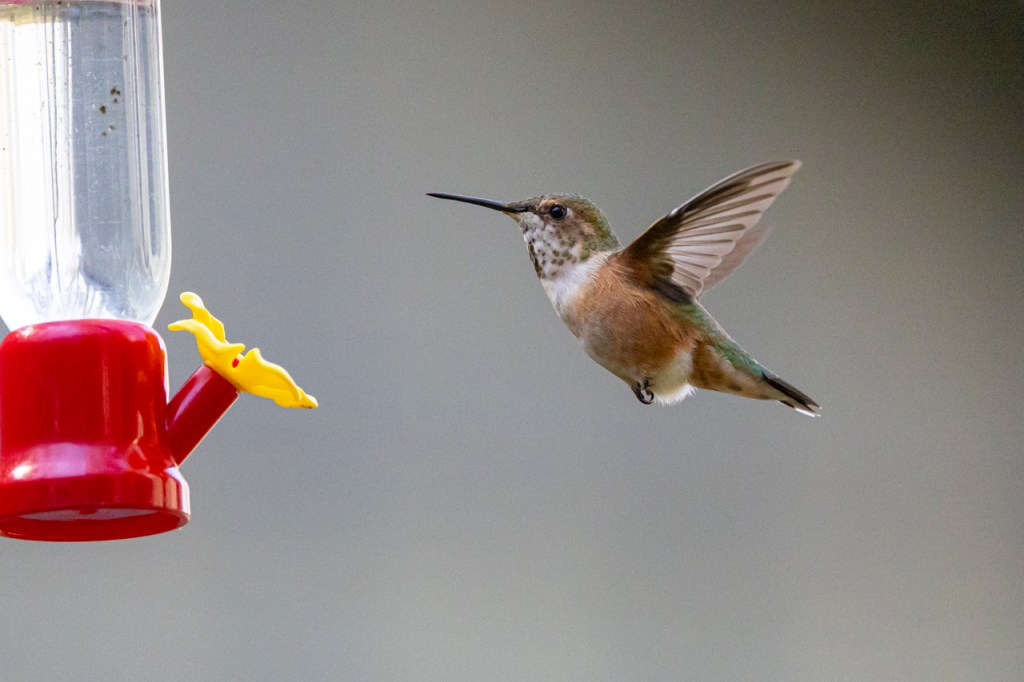
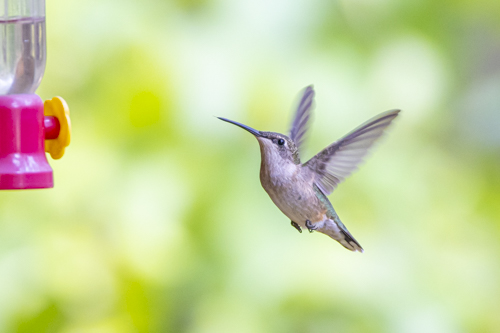
The rufous-tailed hummingbird is in focus but the wings and tail are blurred. The camera was set to 1/300th of a second shutter speed. Focus confirmation on the head. Wings and tail are blurred because the shutter speed was not fast enough.
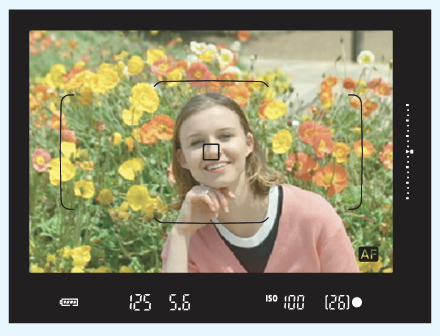
My Answer: Good question. When you look through the viewfinder and focus – there’s a green dot in the lower right or left of the viewfinder. That green dot flickers if you’re on AF-C and it’s solid if you’re on AF-S. That’s the focus confirmation. Your camera is focusing on something.
BUT, if the shutter speed is too slow then you won’t stop the action. Shutter speed too slow and the subject will be blurry.
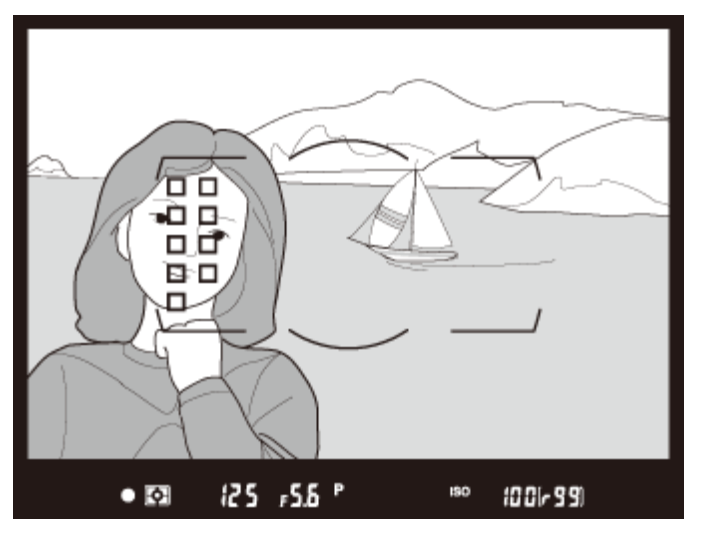
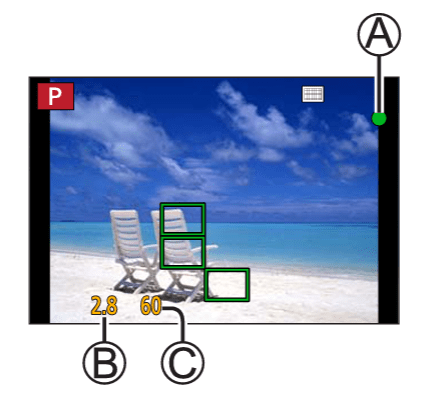
Here are some screen grabs from various camera manuals to illustrate:
Nikon D850 — dot on leftLumix FZ80 — dot at topCanon 7D Mark II — dot on rightCanon Rebel T1i — dot on the right
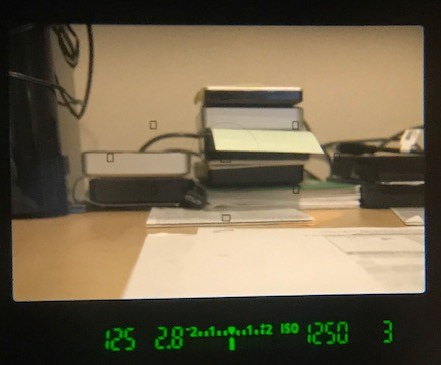
Reminder that shutter speed stops action. The shutter speed (that’s the 125 above) needs to be fast enough to freeze the action.
Shutter speeds to keep in mind when shooting:
1/8th of a second blurs water (that’s 8 in the view finder) if camera is on a tripd
1/15th of a second is needed if camera’s on a tripod but the subject is gently moving
1/60th of a second is needed for living subjects standing still
1/250th of a second is needed to stop fast walking or slow running
1/500th of a second is needed to stop running
1/4000th of a second is needed to stop a duck in flight
Continuing my test of the Canon R3, I turned to small birds in flight. There are two rufous hummingbirds in my yard so I figured they would be a good test.
FYI — below is an analysis of 516 pictures taken over 4-minutes with the camera on electronic shutter. The hummingbird left and I had more than enough photos to analyze.
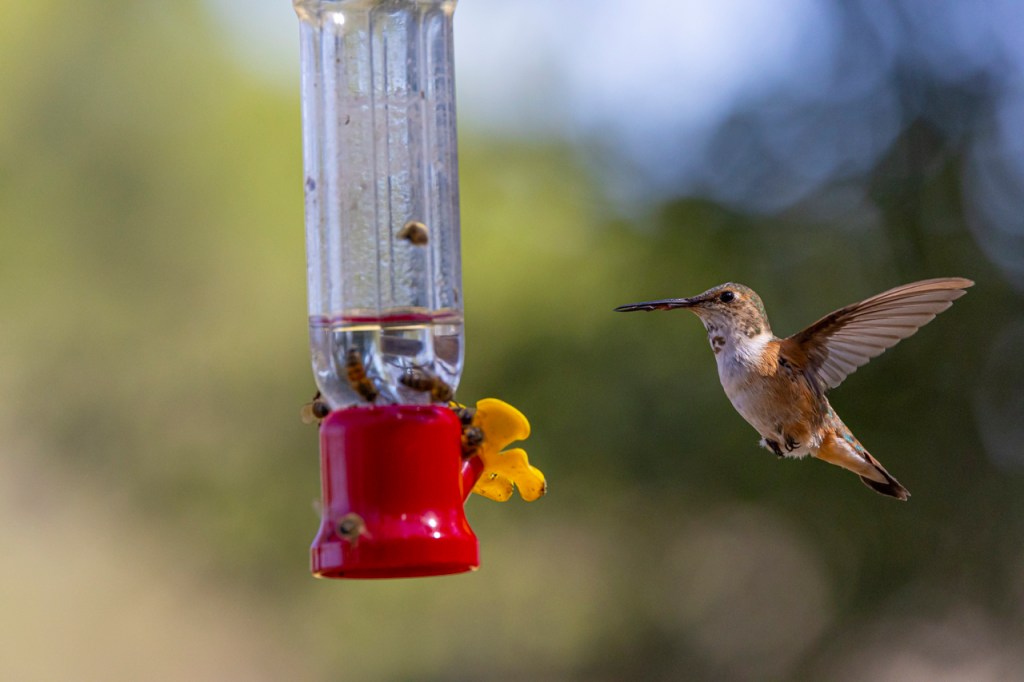
There were bees around the feeder. In only one instance did the auto focus leave the bird and hook on to a bee.
The Whole Area Auto Focus left the hummer and locked on the feeder for five frames out of the 516.
Analysis of minute one: I captured 129 images during the first minute of shooting using the electronic shutter. Two or three images were out of focus when the hummer buzzed backwards but the rest were in tight focus. 1/3200th shutter speed with auto ISO. ISO was usually in the 5000 range.
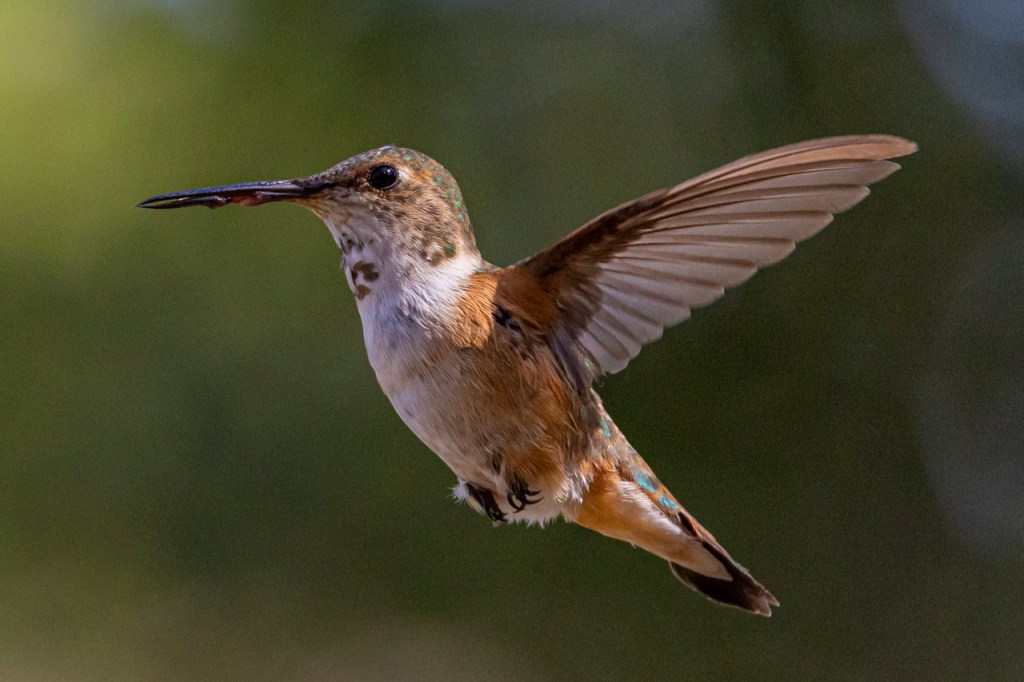
Rufous hummingbird photographed with the Canon R3, Auto ISO, 1/3200th shutter, and whole area auto focus.Image above cropped to 100%
Analysis of minute two: I captured 141 images with the electronic shutter. Shutter speed is 1/6400th with auto ISO in the 8000 range.
The autofocus lost the hummer for four frames as the bird hovered. Then the auto focus reaquired the hummer and locked on. The hummer was in motion as it flew in and out to feed at the feeder.
The hummer took a drink of sugar water from the feeder and then hovered to swallow for 21 frames. There’s tight focus on 16 of the hovering frames. The camera got a bit confused as it changed focus to the feeder and then back to the hummer.
In this instance, the R3 lost focus on the hummer when the bird was mostly obscured by the feeder. Focus locked back on the bird when the hummer moved more of its body toward the camera.
During this same minute, the hummer drank from the feeder again and the R3 never lost focus on the bird. There are 16 frames where the hummer is behind the feeder and the R3 is locked on the hummer. The hummer hovers for 11 frames with no loss of focus.
A GIF of some of the 141 images mentioned above.
Three to four frames per wing flap, if you’re curious.
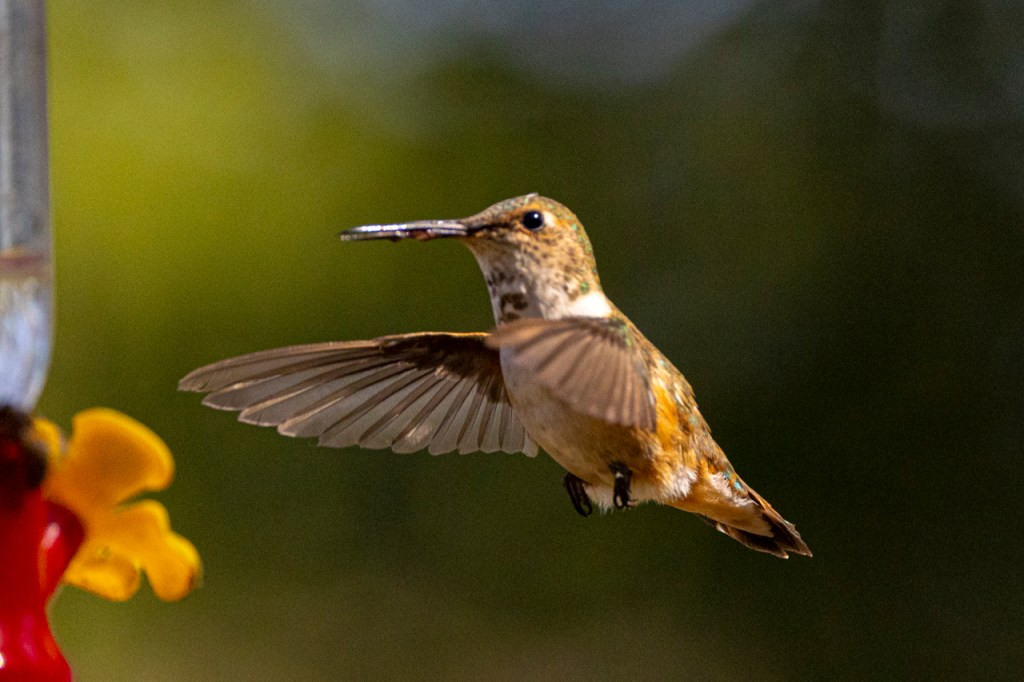
An example where the Canon R3 auto focus attached to the wing and not the body of the hummingbird.
When birds are in flight, my Canon R5 and R6 would auto focus on bird-wing-bird-wing-bird-wing. I didn’t see the R3 get distracted by the wing more than once or twice in 141 frames.
What Happened During Minutes Three and Four? More of the same. Sharp, tight focus on a hummingbird in flight. I am so impressed with the auto focus on the Canon R3.
Rufous hummingbird photographed with the Canon R3, 1/6400th shutter, ISO 8000, Canon 100-500mm RF lens. The second Rufous Hummingbird in my yard during this test. Photographed at 1/3200th shutter and ISO 25,600. Almost full frame. Slight crop to balance the frame.
Questions or comment? Please feel free to post below. Thanks for reading.
Someone recently asked me to test the Canon R3 in low light. Little did I know I’d find myself in overcast, dreary, drizzly, windy, and cold conditions all weekend. What a test!
All of the following photos were taken with the Canon R3 in Case 2 Auto Focus, High-Speed burst, and Whole Area Auto Focus. The camera is still set-up as it came out of the box otherwise.
Camera Settings: Shutter Priority, 1/6400th second, ISO Auto, f10, over-exposed by +1 because it was so overcast. (The exposure compensation was based on a test shot using the histogram and the exposure simulation in the viewfinder.)
All photos have been processed in Adobe Camera Raw. Settings: Texture +20, Vibrance +20, Saturation +20, Shadows +35-40, Noise Reduction 16. No other hocus-pocus or magic.
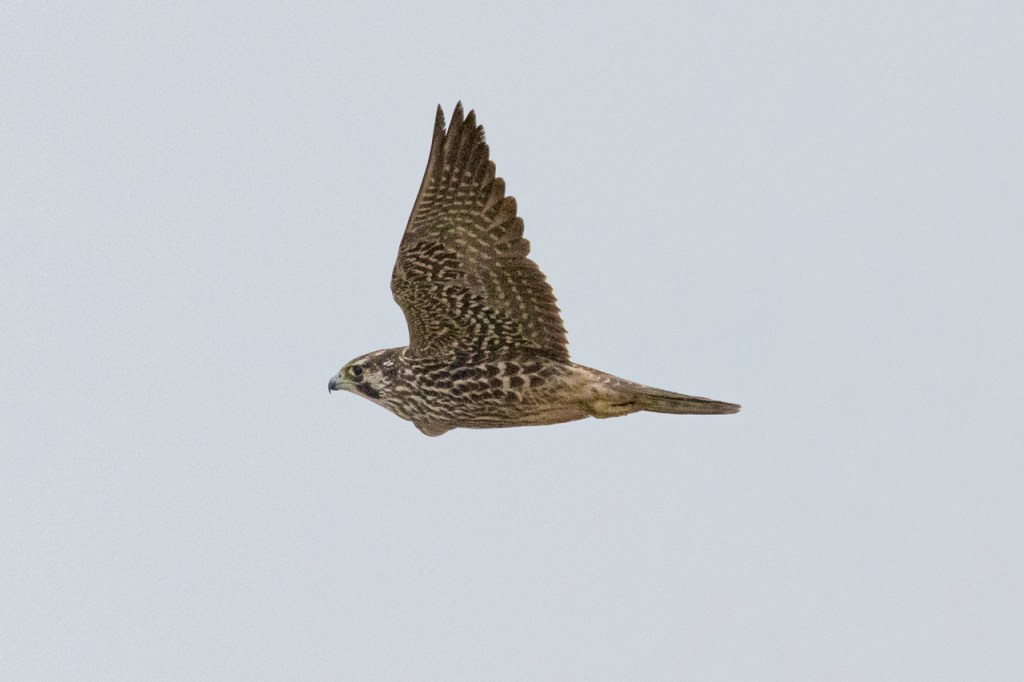
Merlin in Flight From a Boat
This is a screen capture of 18 frames I got of a merlin flying across the bow of a boat. The boat is in motion, I’m moving, and the merlin is flying, of course.First image in the series at 100% crop. Process details above.16th image in the series. at 100% crop
Notice that the R3 acquired focus on the merlin in flight and then held the focus until the bird was out of my sight. That’s exactly what I expect of a camera at this level. No hesitating and no delay.
All of the above are are ISO 16,000 with Adobe Camera Raw’s Noise Reduction at 16.
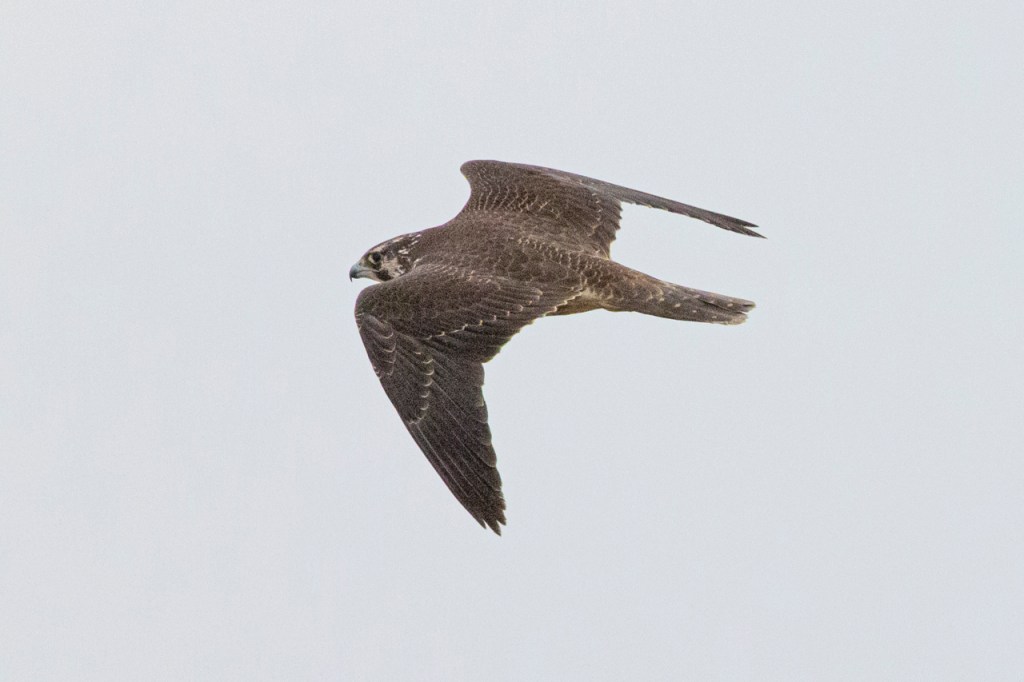
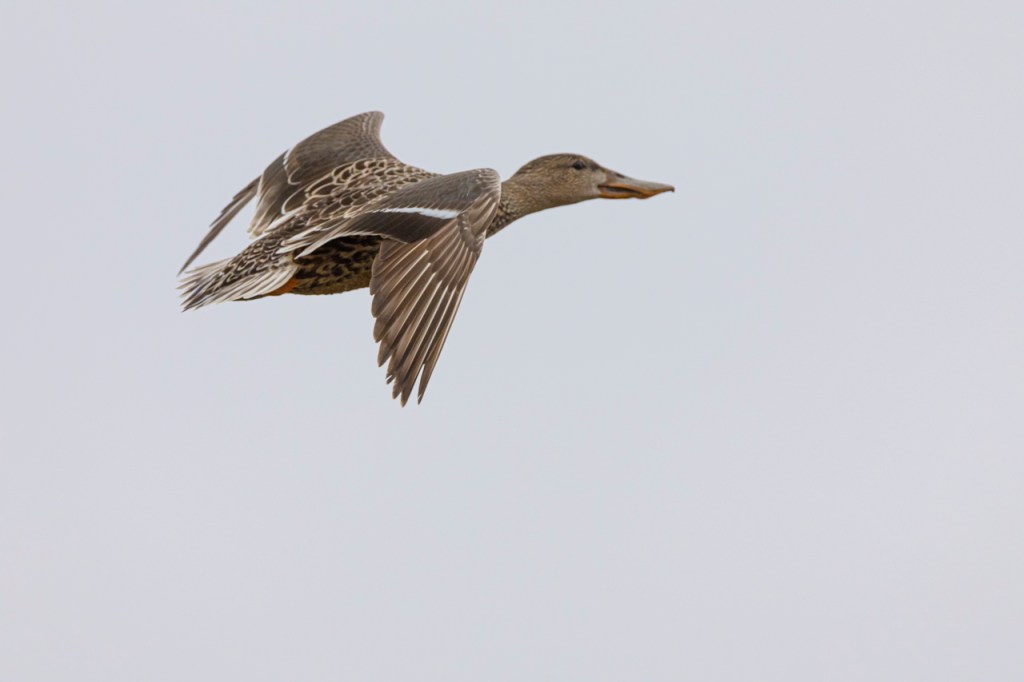
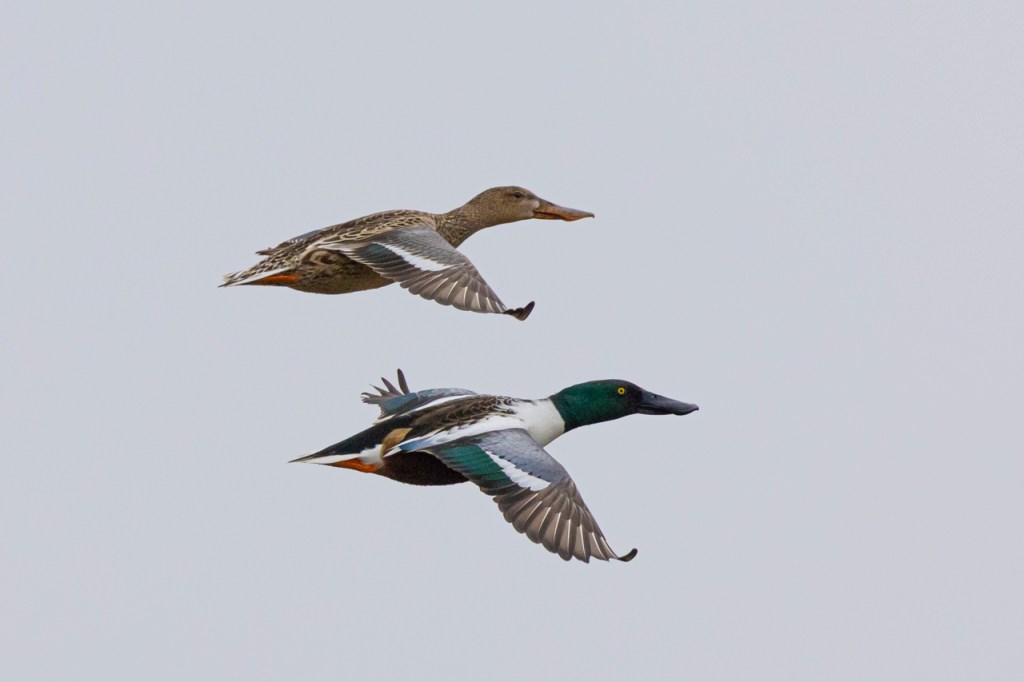
Northern Shoveler’s in Flight
Back on land but in the same weather conditions. Cold, overcast, drizzly, and windy. I wasn’t dressed for the weather so only stayed at this location for 10 minutes. Ducks were taking flight in front of me and flying to the right. I took 219 photos in that 10 minutes. Same settings and processing as above.
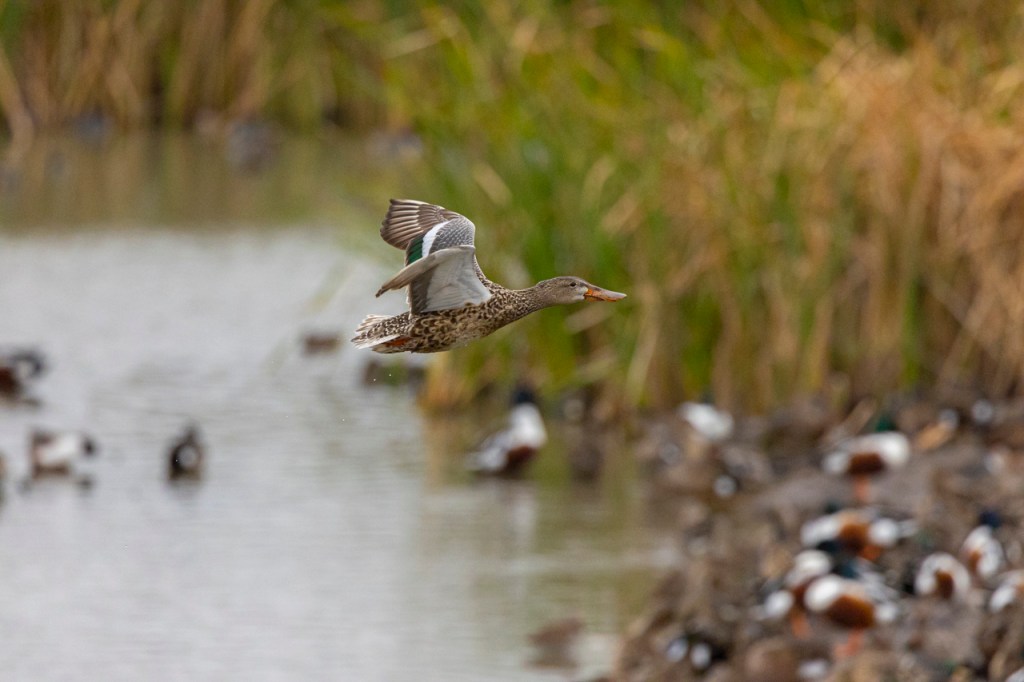
Screen capture of some of the images that follow unprocessed.Me getting started.Testing the camera.Realizing the R3 was going to perform!Northern shoveler female in flightImage cropped 100%
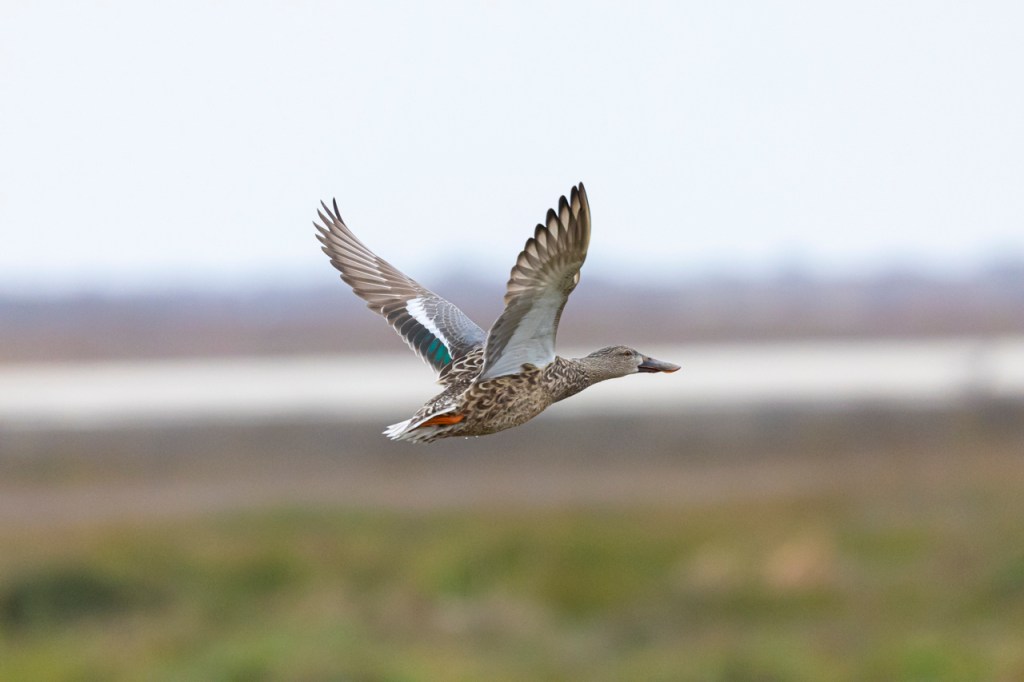
I realized at this point that the Canon R3 was going to acquire focus and not let go even on these flying ducks. For the next 10-minutes, I photographed any duck that flew by. Reminder that I am pivoting to the right on each duck that flies by.
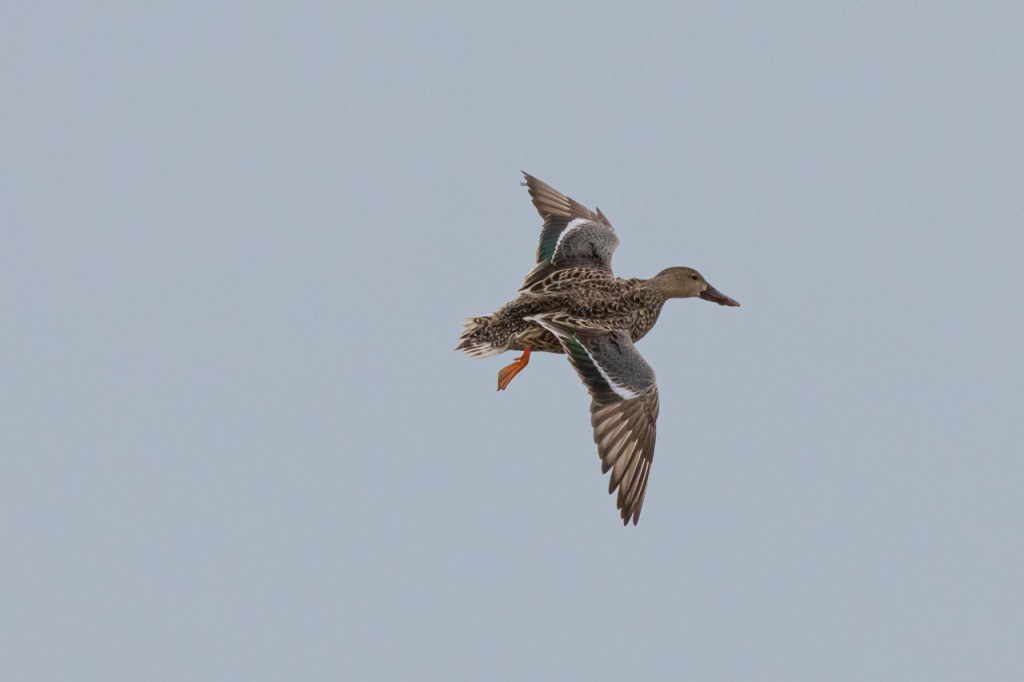
R3 auto focus is acquiring focus on every frame.Image cropped 100%
ISO 8000 on this series. I captured 22 frames of this female as she flew by.
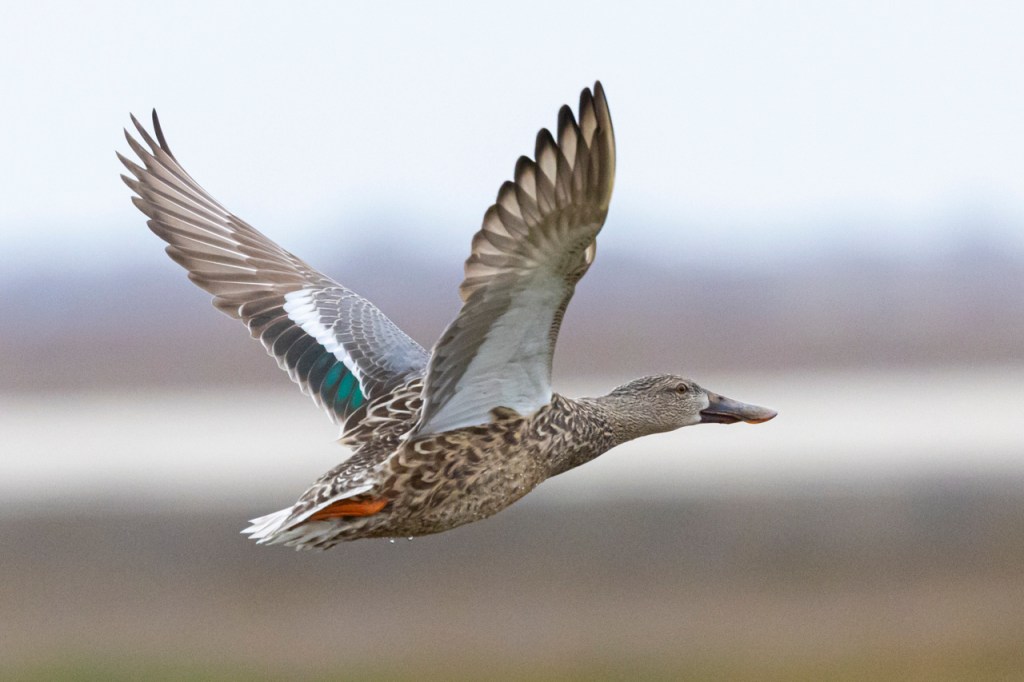
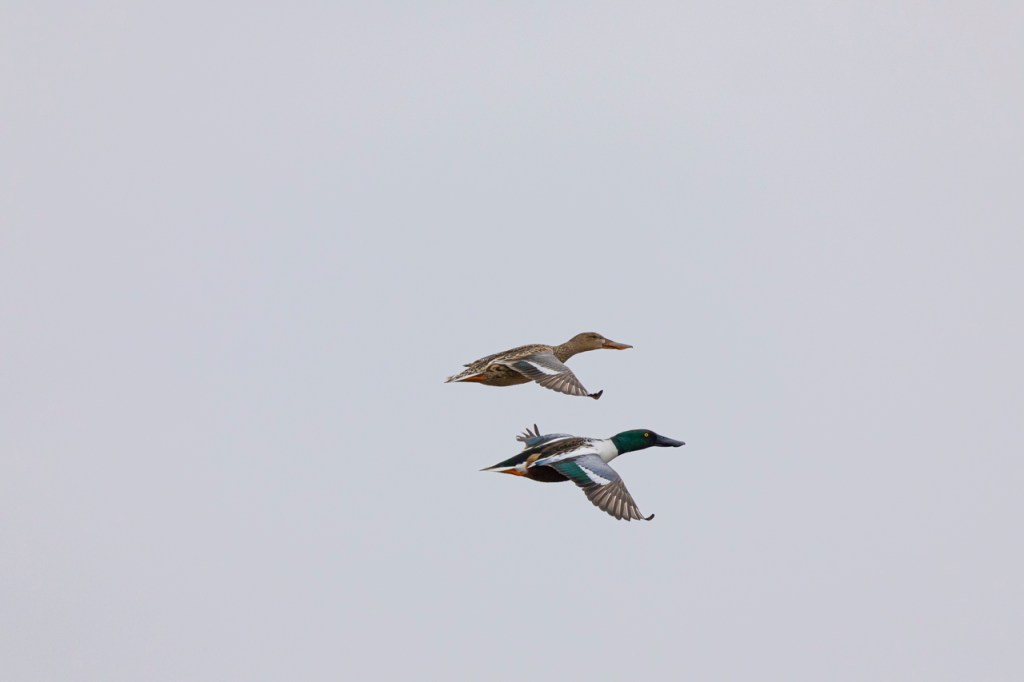
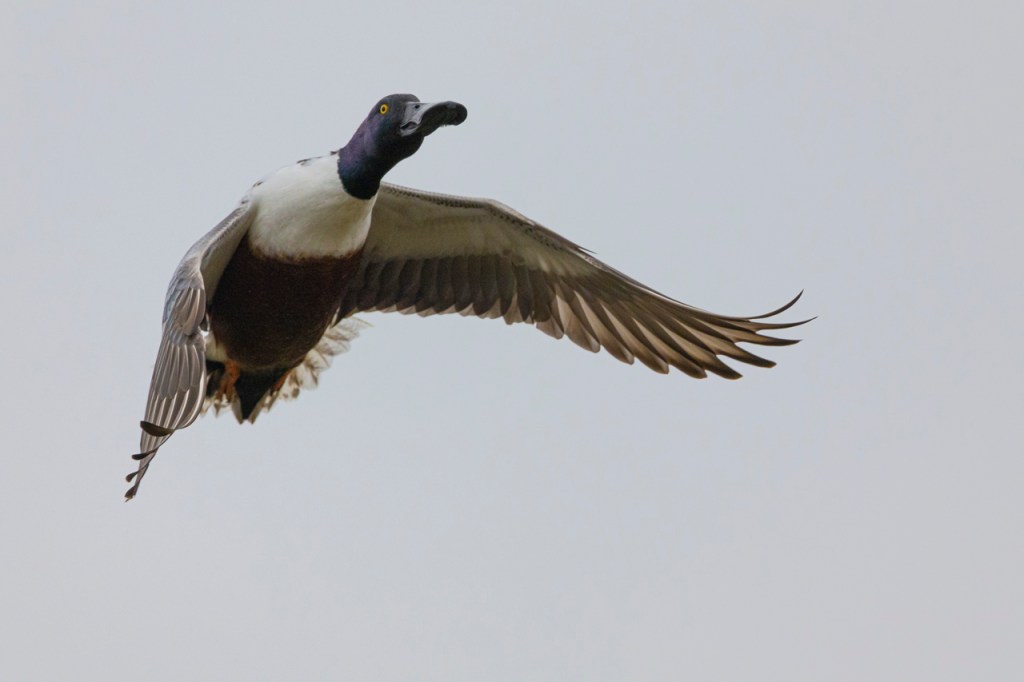
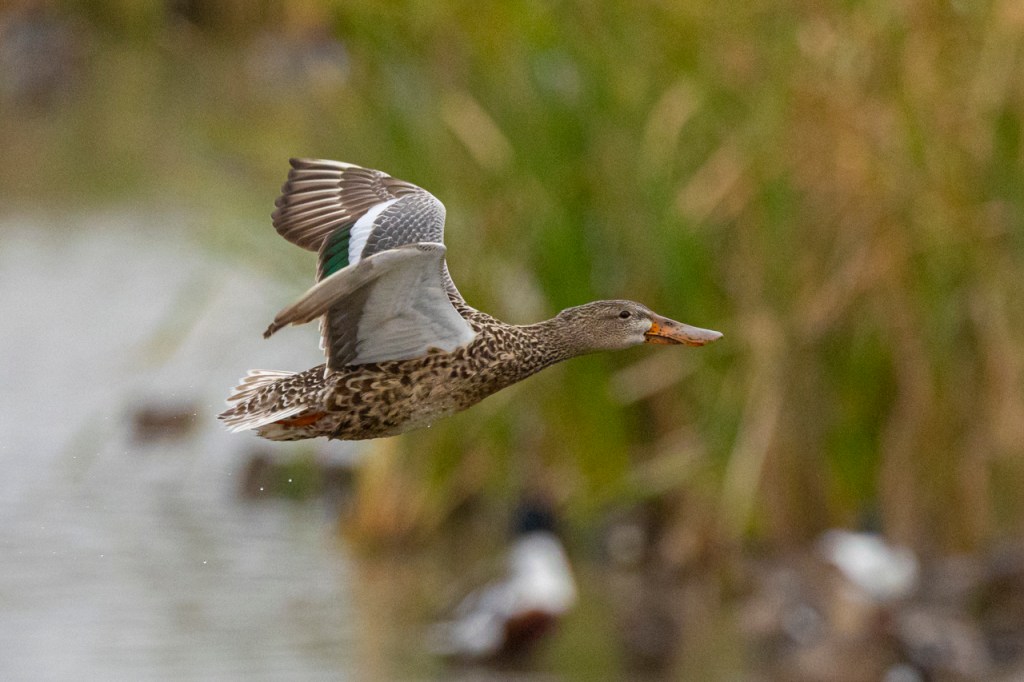
ISO 5000 on this male and female pairImage cropped 100%Female northern shoveler in flight. ISO 4000 and cropped to 100%Northern shoveler coming right at me. The Canon R3 with the 100-500mm RF lens acquired focus.Not a great photo but you can see the lamellae, or thin combed edge along the edge of the beak. Pretty amazing detail for a duck in flight at ISO 5000. Northern shoveler male in flight with ISO 5000.Above is a tricky situation for some cameras. Single bird flying in front of a busy background. Another camera might focus on the background since the large zone auto focus is set. The Canon R3 found the northern shoveler. The image above enlarged to 100%.
I am totally impressed with the auto focus on the Canon R3. The camera never lost focus on a flying bird. I shot for a total of three hours on this day and never was I disappointed in the performance of the Canon R3.
For users of the Canon EOS 1-D x — The R3 is equal to and better. Canon has given us an amazing camera.
Questions or comments? What me to test something else on the R3? Post below.
I finally got a chance to sit on the beach and play with the Canon R5’s autofocus. At heart, I’m a bird photographer. How would this new camera function on fast moving birds? My DSLR is a Canon 1Dx. I hoped the new mirrorless had autofocus equal to or better than that camera.
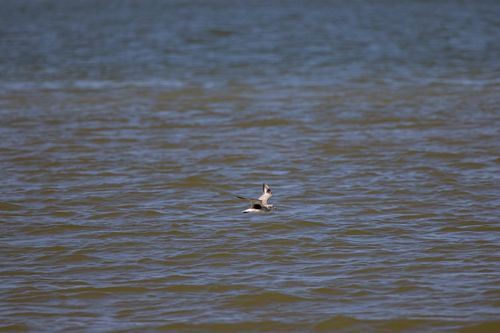
I saw this small whitish bird flying over the water so I simply aimed and shot. To my eye, the bird was too far away to identify. I’m just shooting.
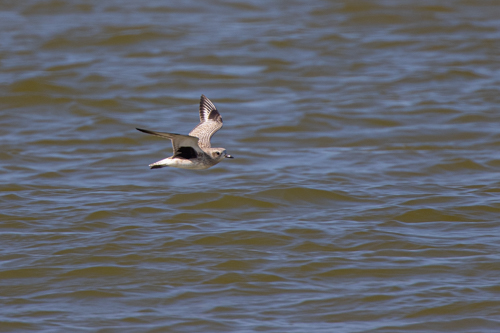
The bird is a Black-bellied plover when I enlarged the photo to 100%
This is the black-bellied plover when I enlarge the photo to 200%. Simple “grab shot” but the Canon R5’s autofocus found the small bird and locked-on it.
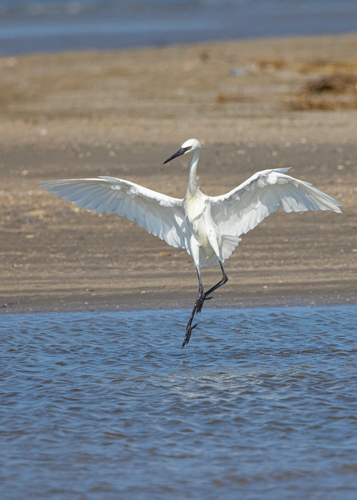
White phase Reddish egret “dancing” as it fishes for food. The autofocus is set for “animal eye” so it stays on the eye of the bird. My job is to keep the camera on the bird.
Another shot from the series of the reddish egret fishing. The autofocus is set to stay on the eye of the bird. ISO 3200, 1/8000 shutter speed, f/10, spot meter, 100-500mm lens, 1.4x extender.
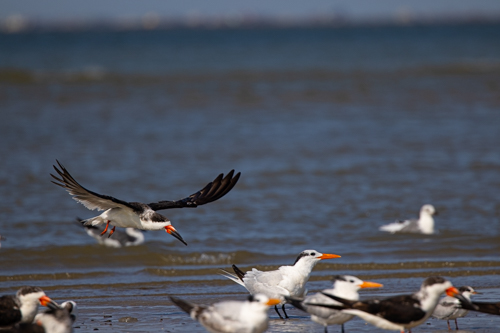
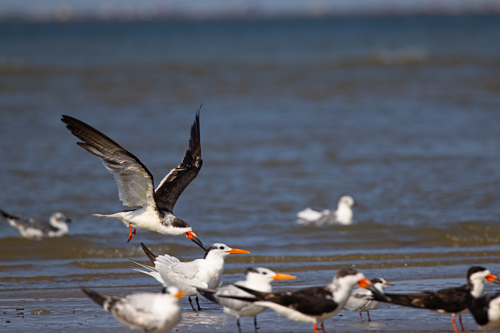
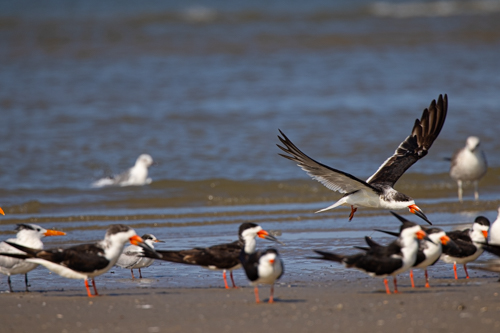
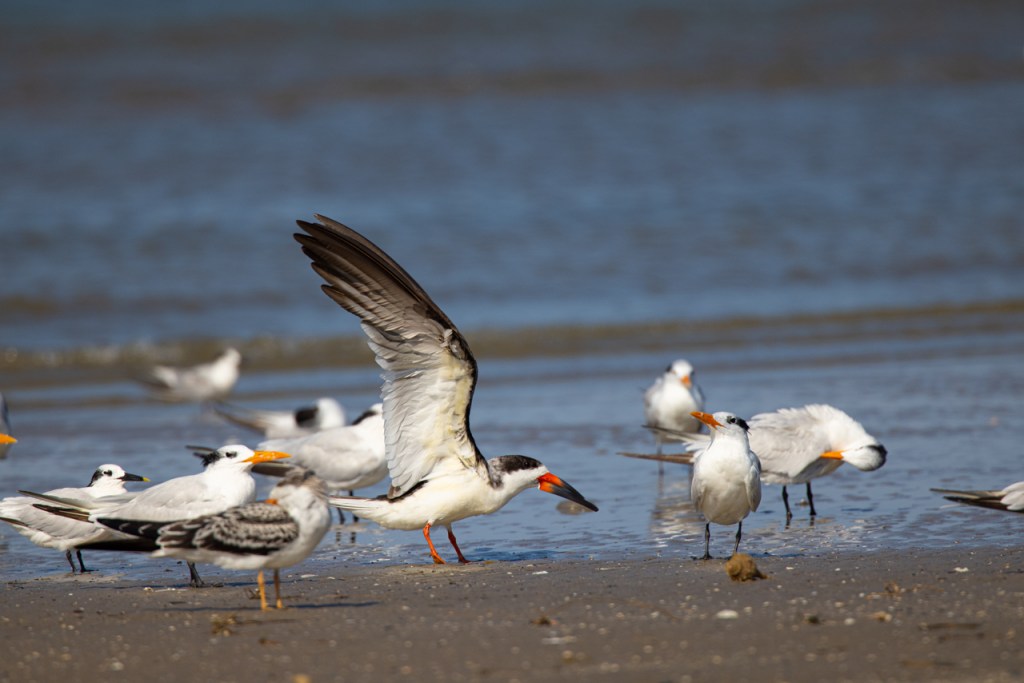
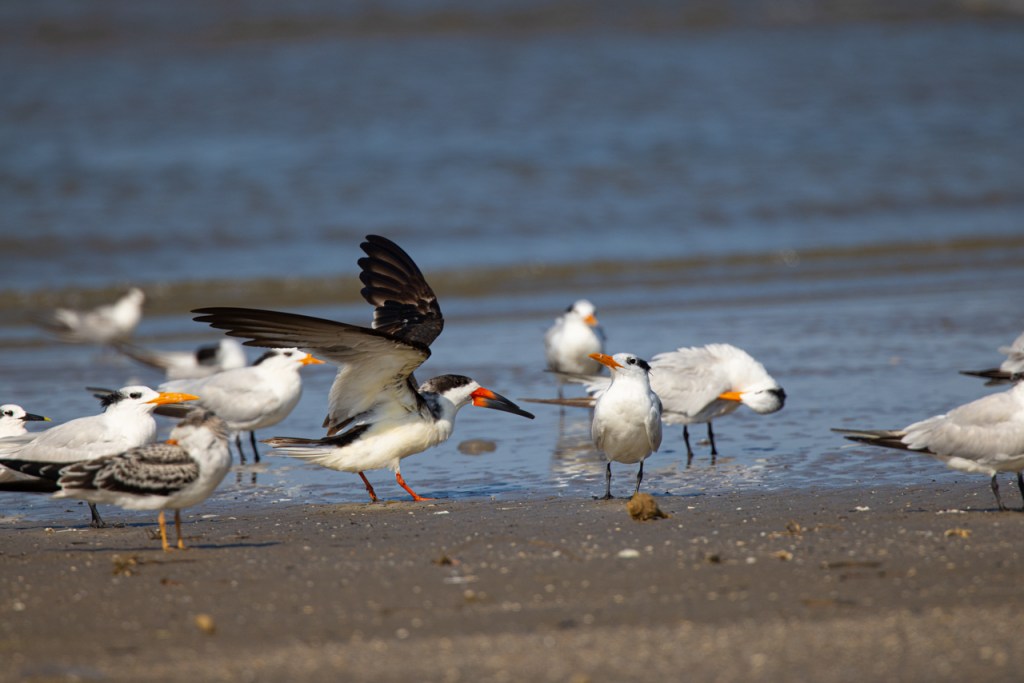
Can the autofocus on the Canon R5 separate one bird flying from a flock of birds? I took 14 frames of this black skimmer flying into a group of birds roosting on the beach. Below you can see the first seven frames plus bloopers.
Shot #1 — Black skimmer approaching a flock of roosting birds on East Beach in Galveston, Texas.
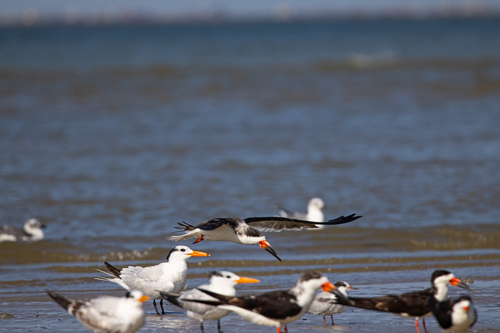
Shot #2 — Black skimmer approaching a flock of roosting birds on East Beach in Galveston, Texas.
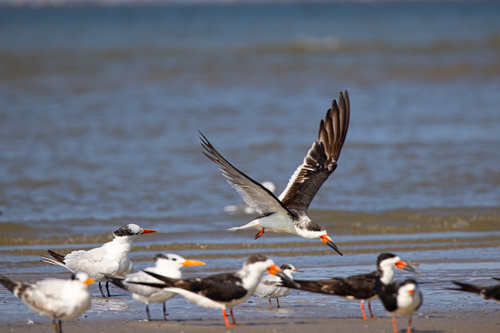
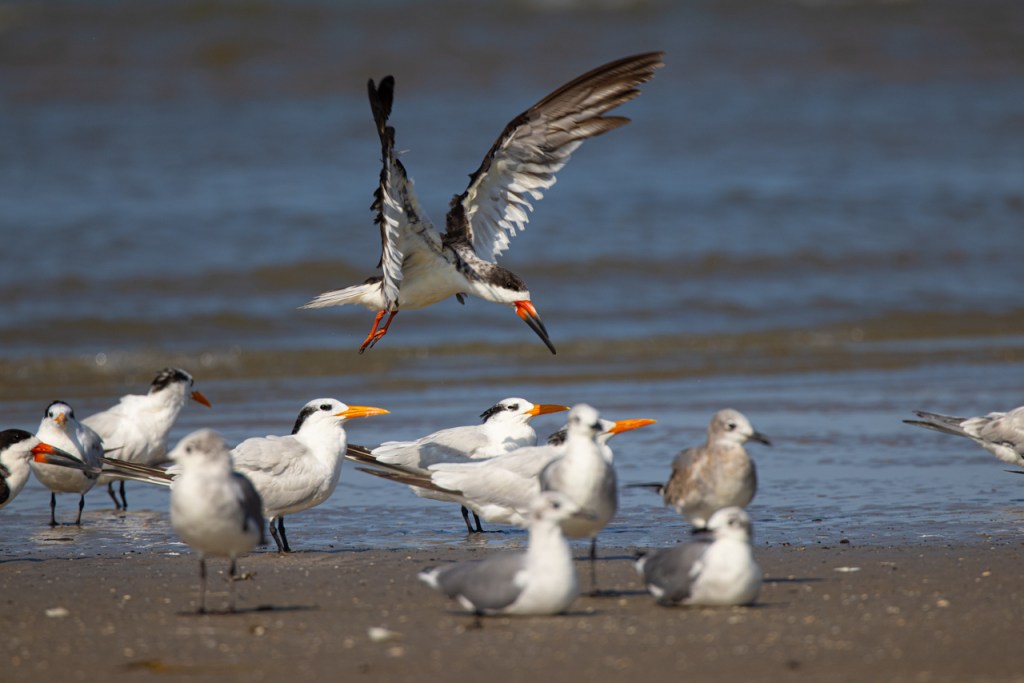
Shot #3 — Black skimmer crosses in front of the royal tern. Danger!
Shot #4 — Autofocus shifts away from the black skimmer to the royal tern.
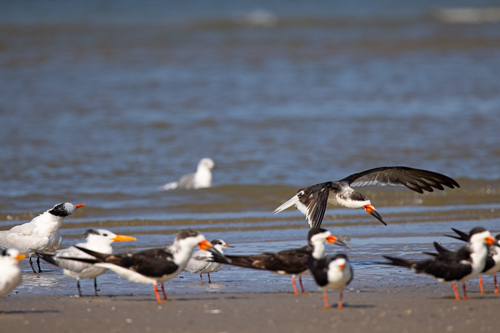
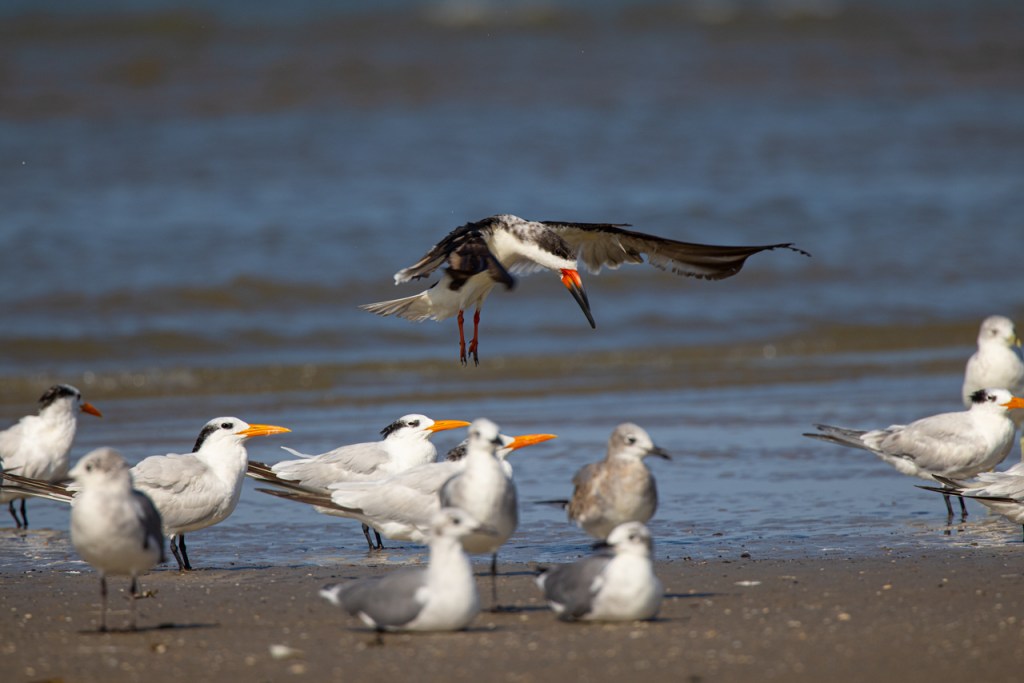
Shot #5 — Autofocus shifts back to the black skimmer as I keep the camera on the bird I want to photograph.
Shot #6 — Black skimmer is slightly out of focus as the R5’s autofocus tries to lock-on the subject. I’ve made this harder for the camera by not keeping the subject in the center of the frame.
Shot #7 — Autofocus back on the black skimmer but photographer not doing her job.
The R5 fires 14 frames a second so the above is only 1/2-second of shooting. What happens next?
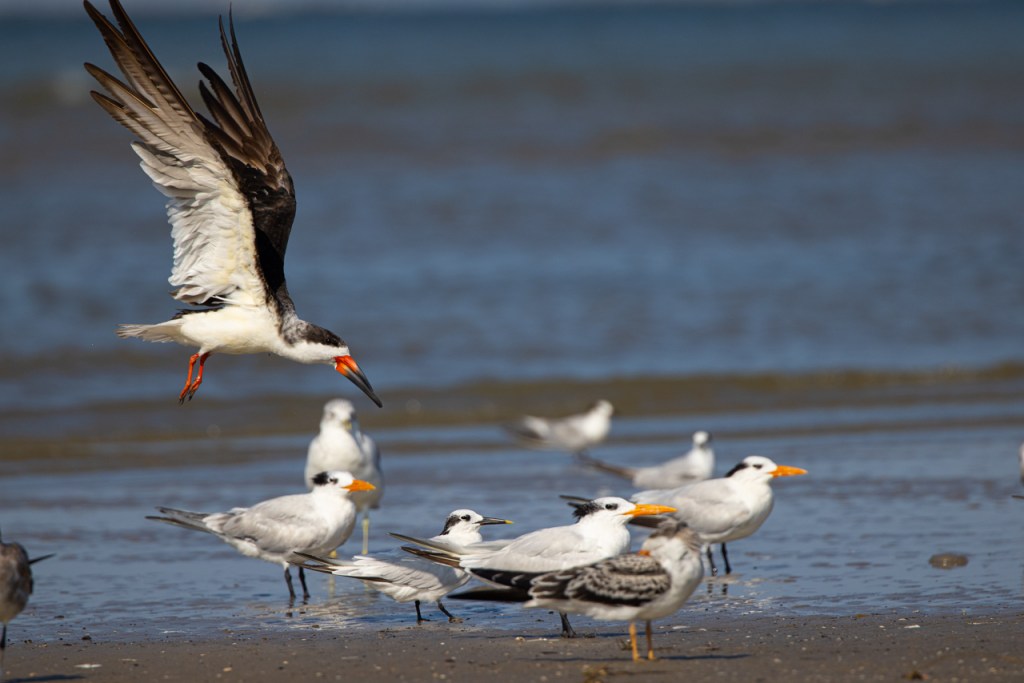
Shot #1 but really #8 in the series — I get the camera back on the black skimmer. The R5’s autofocus shifts away from the royal tern roosting on the ground and back to the flying skimmer.
Shot #2 — R5s autofocus is back on the skimmer now that I have my act together.
Shot #3 — Black skimmer is in focus and I’m doing my job.
Shot #4 — I get ahead of the bird but the R5 is still in focus because I have the wide focus area set.
Shot #5 — Black skimmer lands and the autofocus is still right on the target.
Shot #6 — Black skimmer wraps-up the approach and bird is still in focus.
Settings on the above: Aperture Priority, ISO 640, Shutter speed 2000, f/10, spot meter, Servo, Large Zone AF Horizontal, AF-2, 100-500mm lens at 500mm with 1.4x teleconverter.
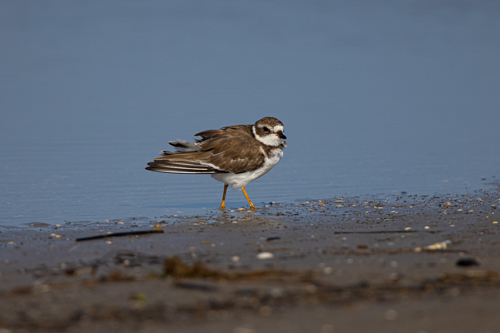
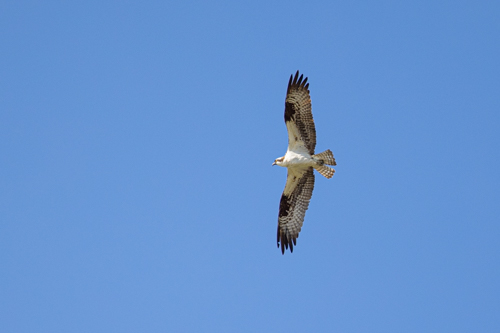
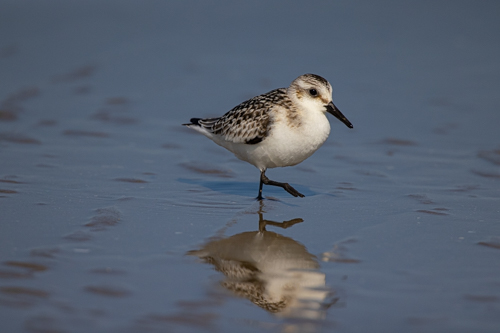
On small birds like this semipalmated plover, the R5’s autofocus was spot on.Flying osprey and the R5’s autofocus was right on target.Quick and tiny sanderling was no match for the Canon R5’s autofocus. Got the shot!
Conclusion — the Canon R5’s autofocus system is equal to – if not better – than the Canon D1x’s system.
What’s been your experience with the R5? I’d love to hear your thoughts.
I headed out with the Canon R5 in hand attached to the new 100-500mm lens and 1.4x extender. This would be my first time to try action photography with the R5 and first outing for the 100-500mm.
Ruby-throated hummingbird; photographed with the Canon R5 and 100-500mm lens
I decided to work with hummingbirds. These little gems are a challenge for any action photographer. Right now, we’re in the middle of hummingbird migration on the Upper Texas Coast so I knew there would be plenty of subject.
Kleb Woods Nature Park in Tomball, Texas, has 15+ hummingbird feeders this time of year and usually attracts lots of hummers. I wasn’t disappointed. From 12:30 to 2:30 pm on a warm Saturday afternoon I shot 1326 photos. After basic editing in Adobe, I had 494 keepers. I was super happy with 110 of my photos. Not bad for two hours of work.
Overall, I was very pleased with the R5 and 100-500mm lens.
In one feeding series, I shot 49 images as a ruby-throated hummingbird flew in and out to the feeder. The ruby-throat flew in, took a drink from the feeder, hovered, took another drink, hovered, took a drink, hovered , drank, hovered, drank, hovered, drank. Six sips of nectar with hovering in-between. I kept 39 photos out of that session. 39 out of 49, or 80%, is not a bad success rate with hummingbirds.
In another series, I took 90 photos as a hummer visited the feeder. That group had 23 shots that were worth keeping because they were sharp and in focus. That 25.5% or a quarter keepers.
Within about an hour, I figured out settings with the new camera and got into the groove of photographing hummingbirds in flight. I’ve photographed hummingbirds like this hundreds of times, but this was the first time I let the camera take the lead.
I set the R5’s auto-focus and then I let it do the work.
I found the greatest success with (1) Servo, (2) Subject to Detect: Animals, (3) Servo AF 2, (4) Large Zone Horizontal AF. Yes, this last one is a big change for me. (I’ve always been a single-point autofocus person.)
An hour into the shoot, I fired off 22 shots of a male ruby-throated hummingbird during one feeding session. That series lasted less than a minute and I threw away two. Keeper ratio 22 out of 24.
An auto-focus system should be able to do a pretty good job when there are only two objects in a frame: feeder and hummingbird. What happens when the hummingbird is at a bush with foliage in every direction?
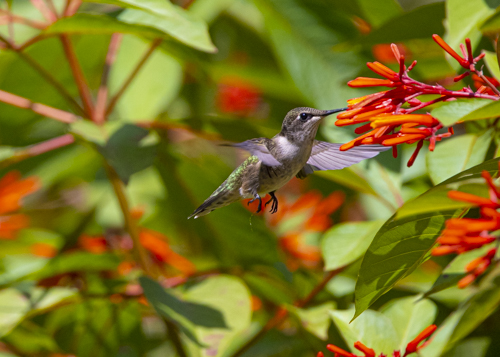
I stepped over to a hamelia bush to continue testing the Canon R5’s autofocus capabilities. When a hummingbird flew down to a flower, I took 36 shots and kept 6. That’s only 16% keepers but several of those were tossed in the trash because the bird had its back to the camera.
When a hummer came in to feed on the hamelia and there was a clean background, my keeper rate was 100%. The Canon R5 kept the bird in focus the entire time it visited the flower — and I kept the camera on the bird.
What happened when there were several items in the frame?
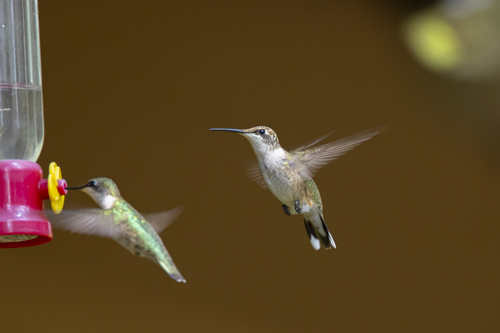
In one series of photos, I had a feeder with three hummers hovering around the feeder. The Canon R5 kept focus on the hummer in the center of the frame. It’s autofocus system didn’t get distracted by the hummer on the right edge of the frame or the one on the left.
Through the viewfinder of the R5, we see tiny blue dots flashing on the subject to let us know that the camera’s found the subject and is in focus. These dots are similar to the red dots we see on the Canon 5D Mark IV or the D1X. Nice confirmations to let us know the camera is doing its job.
Wayne sent me an email asking if his next card should be a SD or a CF. Good question!
Here’s my reply:
I visited the Sandisk site to see what they are currently offering.
–CF Cards by Sandisk: 256 GB with 160 MB/s. 128 GB with 120 MB/s
–SD cards by Sandisk: 256 GB with 150 MB/s. 128 GB with 300 MB/s (That’s fast!!)
— CFast 2.0 by Sandisk: 512 BG with 450 MB/s (Wow doggie!!)
Background Information — In the beginning of the digital photography age we had Compact Flash cards, Standard Definition cards, and some other cards that have fallen by the wayside.
Compact Flash cards, or CF cards, were for the big, new digital cameras, like the 10D and D100 made by Canon and Nikon. Standard Definition cards, or SD cards, were for the tiny point-and-shoot cameras. Tiny cameras needed tiny cards.
Then camera like the Canon Rebel came out with SD slots. Eventually, the larger digital SLR cameras came out with SD slot and a CF slot. The Canon 6D is a larger digital SLR and it only takes the smaller SD cards.
What we have today is a choice. SD cards are just as fast as CF cards. Then CFast 2.0 are on the market with reasonable prices.
Canon wrote on their site that they are not abandoning the CF cards because so many pros use them. Good to know.
How fast of a card do you need? Do the math. Photo size x burst rate is the basic formula. 24MB raw file x 7 frames per second = 168 MB per second. That’s your starting point.
Ask also “how often do you hold the button down for 7 fps?” If the answer is often, then get a fast card. If the answer is never, then speed is not an issue when buying cards.
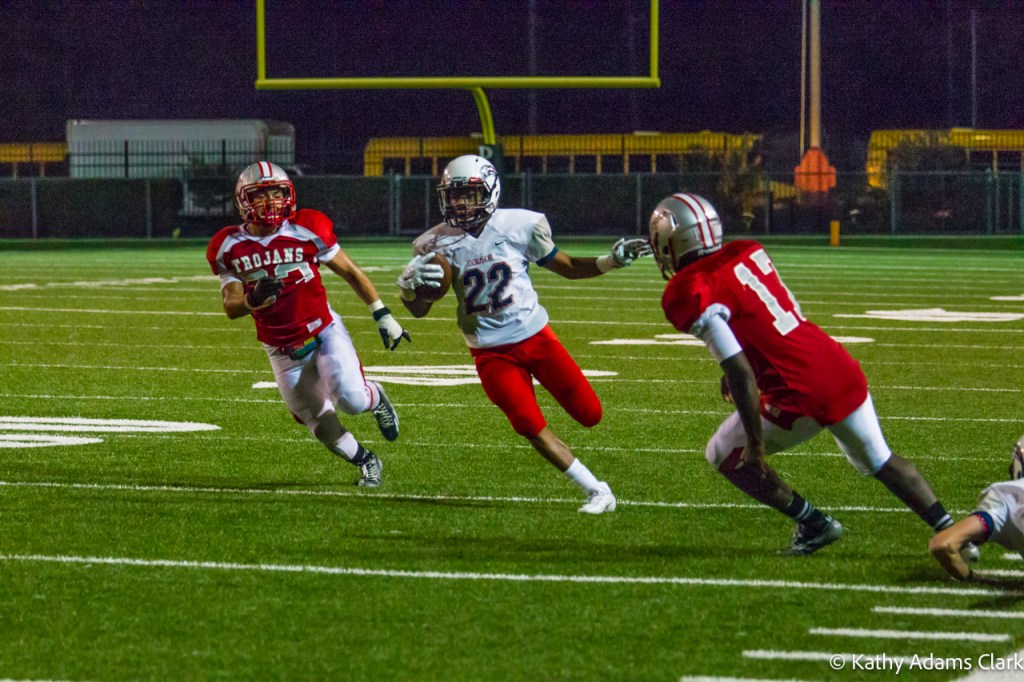
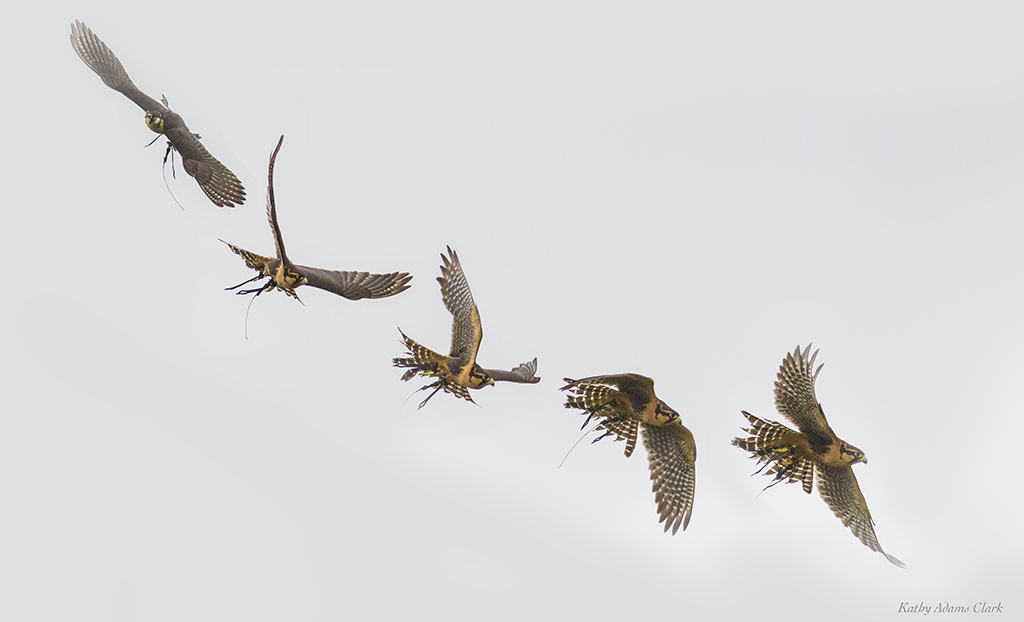
Sequence of an aplomado falcon in flight. We need fast card and fast “frames per second” to capture the action.
One last thing if you’re still with me. Buffer is also an issue. Look through your viewfinder on your camera. Push the shutter button half-way down. Look at the number is the bottom right corner or along the right side. The number might be 3 or 6 or 19 or 56. That number is how many photos the camera’s buffer (internal memory) can hold before the dreaded BUSY signal pops up and the camera stops firing. The buffer is based on the size of the photos you’re taking such as RAW or fine JPG. Bigger the photos the less photos that will fit in the buffer.
My photo group was on the Serengeti in Tanzania during the last two weeks in May 2018.
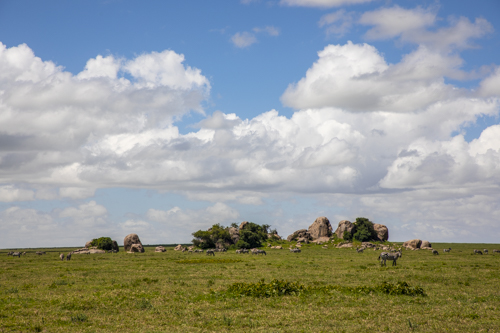
Kopje, or rocky outcrop, on the Serengeti in Tanzania.
One morning while out on a game drive, we got a call over the radio that a baby leopard was in danger on a nearby kopje. My driver, Tompson, picked up speed and told me what to expect. Along the way, I translated all the terms and relayed the situation to the people in my Land Cruiser.
Here’s the situation we were racing toward. A mother leopard left her young baby unattended on a kopje. A kopje is a pile of rocks on the Serengeti plain. The kopje has crevices between all the rocks. Sometimes trees and bushes grow on top of the kopje or around the base of the kopje.
This is traditionally a great place to raise cubs and stash them while out hunting or sleeping. The babies are usually pretty safe with nooks and crannies to sleep, sun, and play.
In this case, though, a group of olive baboons had gathered on the top of the kopje. Baboons hate leopards. That means the baboons will kill the baby leopard if they find it. With no mother leopard on site, the baby leopard was in real danger.
We arrived at the kopje in a few minutes and found a group of twenty baboons on one side of the kopje. After driving around the kopje, we found the baby leopard on the other side. The baby was very young and agitated. It paced, sat down, paced, and then sat again. The baby seemed to know things weren’t right.
We photographed the baby leopard and keep watching for the baboons. There was a good distance between the two so it seemed that the baby leopard was safe.
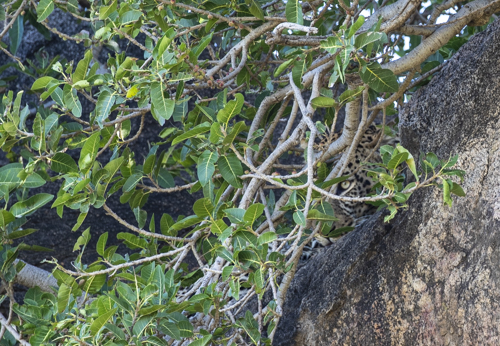
Then the baby leopard got nervous. It started climbing across the rocks of the kopje and maneuvered under bushes. It came into view then disappeared out of view. But the baboons must have smelled the baby or seen movement. Four large males started slowly moving across the top of the kopje toward the baby leopard.
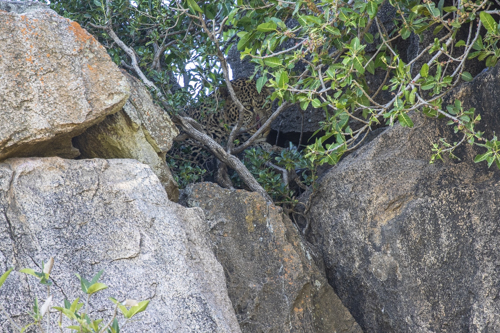
Baby leopard moves to crevice
Baby leopard hides
The baby moved down the rocks and found a crevice. Maybe it was the crevice where it was born or a roosting place with its mother. The baby walked into the crevice, came back out, looked around, and then went back in the crevice. We all encouraged the baby to get deep into the crevice but, of course, our words meant nothing to the young leopard.
The four male baboons started perching on the rocks outside and above the crevice. The baby moved deeper in the crevice to escape the baboons. The baboons peered into the crevice. They moved closer to the crevice. The baby leopard was surrounded. If the baboons headed into the crevice, the baby was cornered.
Someone in the Land Cruiser next to me said “I don’t want to hear what comes next.” Someone else said, “I don’t want to see what’s coming.” My driver told me the baby was a goner and that there was no way the baby could fight off the baboons.
My driver suggested we pull the Land Cruiser back just in case the mother leopard was trying to get back from her hunt. I asked everyone in the three vehicles if they wanted to stay and watch the kill or move back and let nature happen.
Everyone agreed that the attack was going to be horrible. We had out photos of the baby leopard and everyone wanted to remember him as a cute, little kitten.
All three of our Land Cruisers pulled away from the kopje and we turned our backs on nature. During lunch we talked but the baby leopard and everyone wondered what happened. Our thoughts were really with the little guy.
When we left camp later in the day, my driver Tompson asked if I’d like to take the group back to the kopje to see what happened. Tompson assured me the baby was dead but I decided we needed to go back.
A half-hour later we were nearing the kopje. I started scanning the rocks for anything that looked like a leopard. There were no baboons in sight. Not one.
I stood up on my seat with my body out of the top of the Land Cruiser and started scanning the rocks. High up on one of the rocks I spotted the profile of a feline. “There she is,” I yelled. Tompson spotted the mother leopard immediately and drove the Land Cruiser in photography distance. The other two Land Cruisers in our group fell into position next to us.
Mother leopard with a fresh gash in her nose.
Mother leopard was laid out on the top of the kopje all pretty and content. She had a fresh, deep gash from her nostril straight up her nose. She’d been in a fight and she was the winner.
Tompson popped up on his seat and poked out of the top of the Land Cruiser. He raised his arms high in the sky and yelled “You are a good mother leopard!!” The mother leopard beat off the baboons and she took a beating while doing it. Yet, was the baby alive?
My vehicle drove slowly to the other side of the kopje. There was the baby leopard! It was out in the open and resting on a nice warm rock. Baby was safe and Tompson gave the mother another “Your a good mother leopard!!” salute.
Mother leopard’s eye is on the right behind the bush.
Mother leopard bedding down behind a bush on the kopje.
Mother leopard didn’t take to our noisy group of photographers. We were a good distance from her but were pretty excited that mother and baby were safe. I suspect we were a bit noisy.
The female moved deep into a crevice protected by a small bush. She bathed her injured nose one more time and then fell asleep. (People in my group would have given her all the Neosporin in their packs if she would have allowed us near her.) .
Baby leopard gave us a few more stunning photos and then fell asleep. It lived for another day in the Serengeti.
Question from a reader: I was taking photos yesterday of my daughter at a gymnastics event. A red light in the bottom right corner on my Canon Rebel kept flashing. Once I saw the word “BUSY” in the viewfinder. What was I doing wrong?
The red flashing light on your camera shows that the camera is accessing the memory card.
It’s normal to see a red light when the camera takes a photo. (Nikon users see a green light.) The light should quickly go on-and-off if all is well.
During a rapid burst of photos, the red light will flash as long as the camera is moving the photos to the memory card. The camera has a memory buffer of 6-9 photos. It’s holding those in memory and waiting to move them photos to the card.
If you take 10 photos in a row, the camera moves some to the card and then some to the buffer. Those in the buffer wait in line until it’s time for them to move to the card.
You’ll see BUSY in the viewfinder if you take too many photos and the buffer fills. The camera won’t take any more photos until the buffer clears out and has room to store another photo.
You’re likely to see the flashing red light and BUSY in the viewfinder if you held the shutter button down and took a lot of photos. Those photos need to process out of the buffer and through to the card.
Solution — get a memory card that records faster. How fast? That depends on the camera. A 20MB camera that takes 7 fps (frames per second) is going to record 140MB worth of photos per second. A card that records 64MB per second can record roughly three frames a second. The other four frames are going to sit in memory. That means you have three frames recording to the card while four photos are waiting in buffer. That’s usually okay since the buffer will clear in a second or two.
This card records 150MB/s. That’s seven photos per second using a 20MB camera.
This card records 45MB/s. That’s two photos per second using a 20MB camera.
The card on the left records 150MB/s. That’s seven photos per second using a camera with a 20MB file. This is almost more card than the Rebel needs. Someone who shoots sport or action regularly might need this, though.
The card on the right records 45MB/s. That’s two photos per second using the same camera. Too slow for someone photographing sports or action.
The card you need depends on what you photograph and what camera you use. I get my cards from Hunt’s Photo and Video. Ask for Alan Samiljan (781) 462-2383 or email him at asamiljan@huntsphoto.com His hours are Monday, Tuesday, Thursday & Friday, 8:30-5:00pm eastern


 d and keep watching for the baboons. There was a good distance between the two so it seemed that the baby leopard was safe.