For those of you still using or new to the Canon R5, my friend Richard Day has amazing luck photographing birds with this camera. He’s using the same menu settings I’ve used but finds the following settings helpful.
Richard uses the back button when he wants to switch to Eye Detection AFUsed when you need to nudge the focus a bit on the lens. Very useful!Allows the camera to keep focusing. Per the owner’s manual, “You can manually adjust the focus after the AF operation if you keep holding down the shutter button halfway.” Good option. I agree. What color do you want “peaking” when you’re in MF? I have mine set to red. Anything surrounded by red is in focus.Turn this feature to Disable so your nose doesn’t select the focus point.This AF method can also be changed with the AF Point Selection button on the back of the camera.
I’ve moved on to a Canon R6 Mark II and a Canon R3 camera. I hope these settings help for those using the R5.
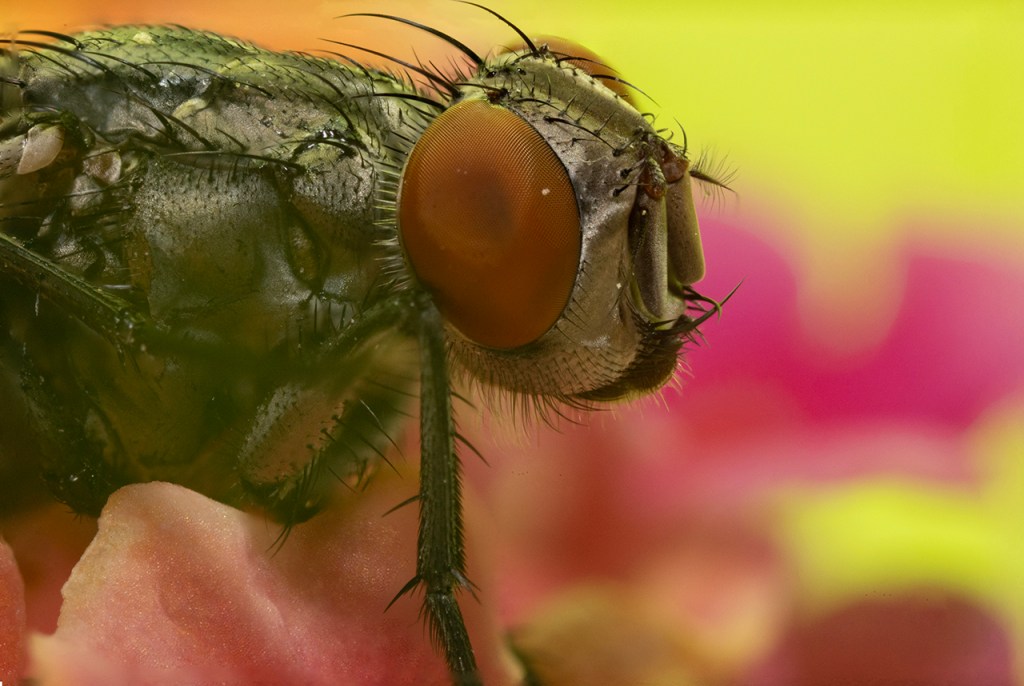
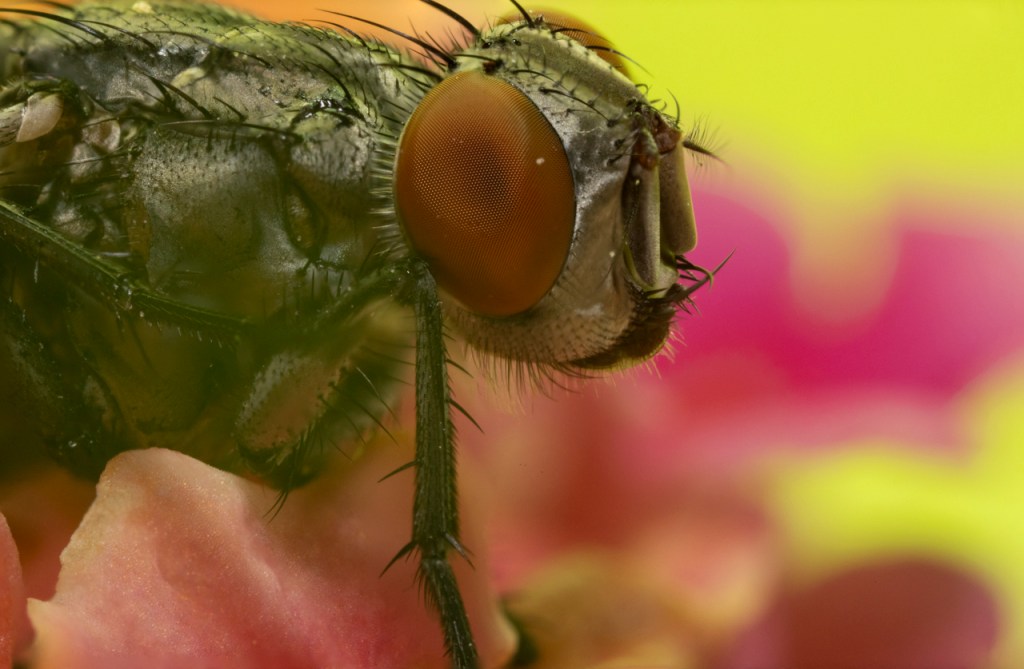
House Fly photographed at 5 times life size with the Lawoa 2.5-5x macro lens.
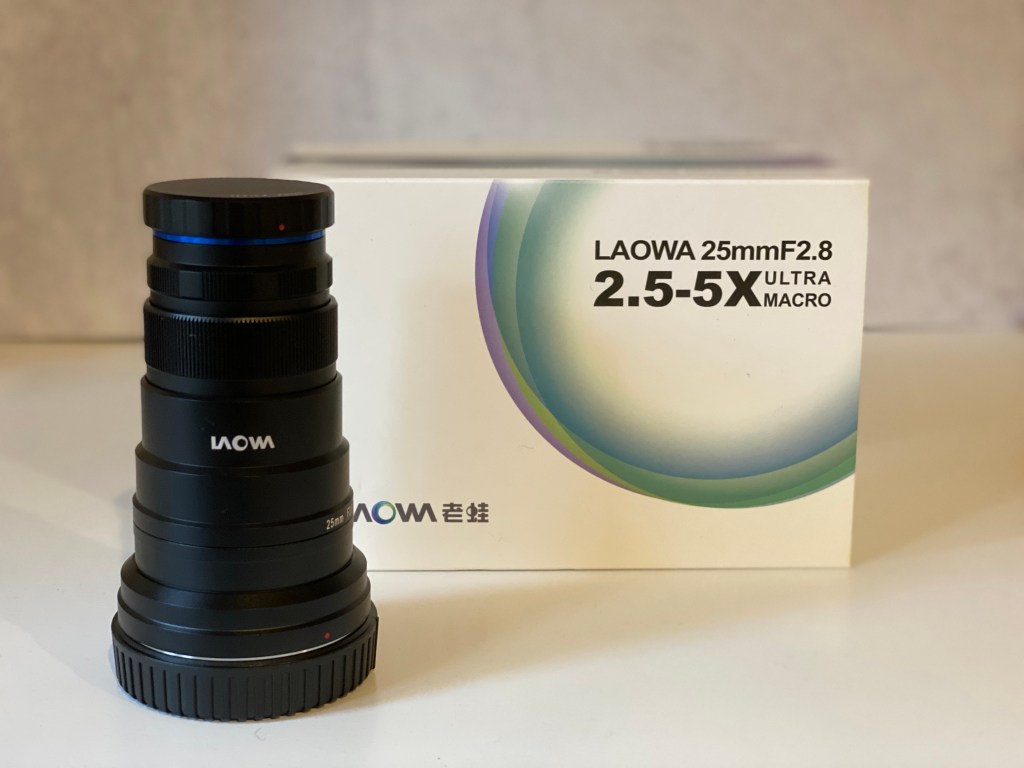
I saw an ad for the Lawoa macro lens that could photograph things up to 5 times life size. The price was only $399 and it came with a mount for my Canon R5 mirrorless camera. In a moment of weakness, I clicked the button and ordered the lens.
I’ve always loved high magnification macro photography but it was expensive. Canon has the MP-E 65mm that photographs 5 times life size but it’s well over $1,000 and I’d need an adapter for my mirrorless.
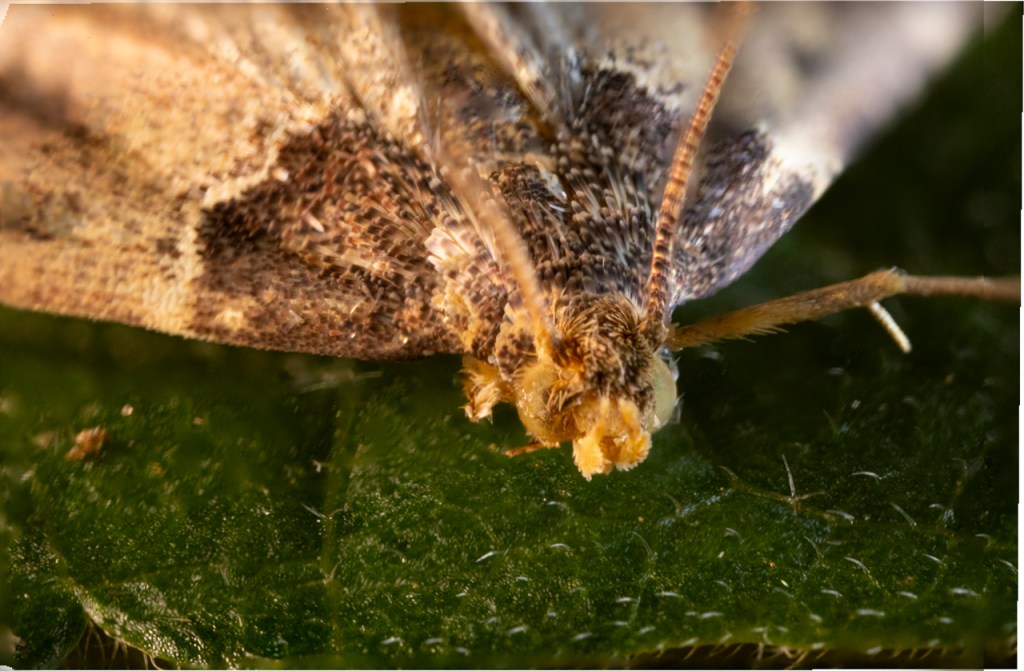
Once the Lawoa lens arrived, I needed to find a subject. I went on a search around the house and found a tiny moth about 1/3 of an inch long. Perfect subject except it didn’t want to be captured or photographed.
No, I am not going to kill a moth so I can photograph it. Nope! That’s not how I live my life.
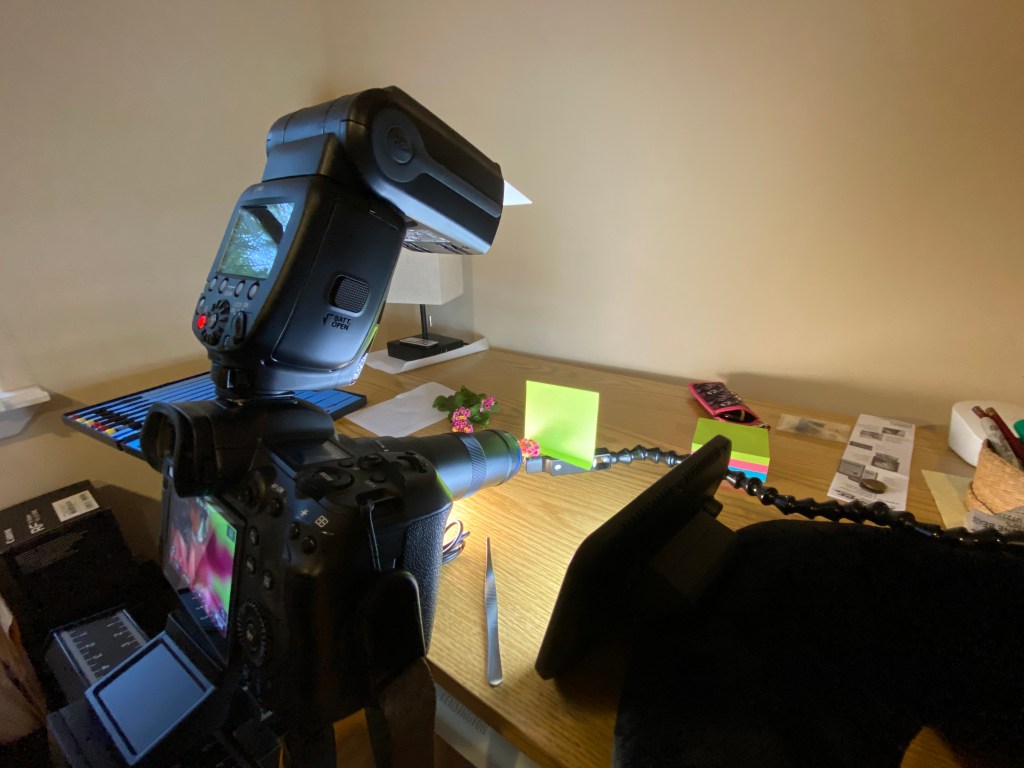
So an hour later, the moth was resting on a leaf under a glass jar in my office. Equipment was assembled for the photo session: Tripod, Neewer Pro 4 Way Focusing Rail Slider, camera, Laowa lens attached, flash, Savage LED light on the right, and Lume Cube LED light on the left. (Scroll down to see a photo of the set-up.)
Moth photographed at 5x life size. Actually 1/3 of an inch long.
My time with the moth was highly frustrating — for it and me. The moth wanted to wander off the leaf. When it settled I would move the leaf and get it back in the frame and focused. This is not easy when the subject is magnified 5 times.
The moth twitched its antenna often. This messed up any hopes of focus stacking.
Eventually, the moth was set free. I left the equipment in place until I found a new subject.
The next day a fly got in the house and needed to be swatted. Turns out the little fellow wasn’t totally dead so I had a moving subject once again. Back to putting my subject on a leaf and waiting for it to calm down.
Lesson learned on the moth was that focus stacking would be necessary to get the photos I wanted. I settled in to take 5 to 10 photos for each focus stack.
The Laowa is a manual focus lens so there’s no in-camera focus stacking or focus bracketing as Canon calls it. I needed to move the knob on the focus rail to create each set of focus staked images. (Practice this skill ahead of time.)
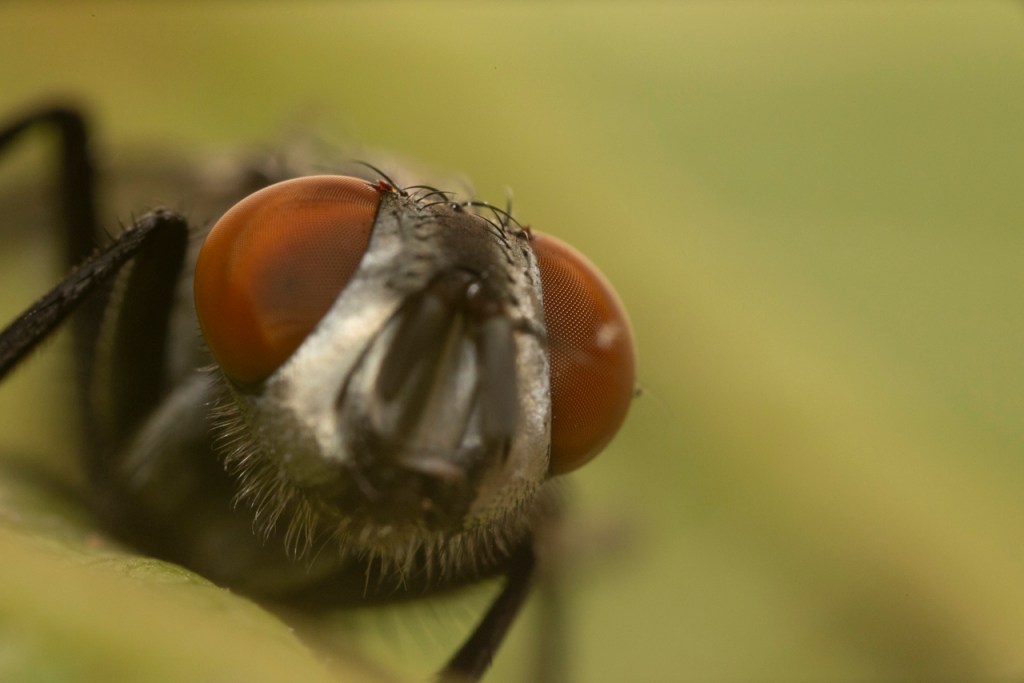
House fly, magnified 5x life size, and focus stackedHouse fly, magnified 5x life size, single image.A focus stacked image on the left versus a single image on the right.
The fly was still alive so the number of images I could get depended on its movements. Sometimes it sat still and other times it wiggled or twitched.
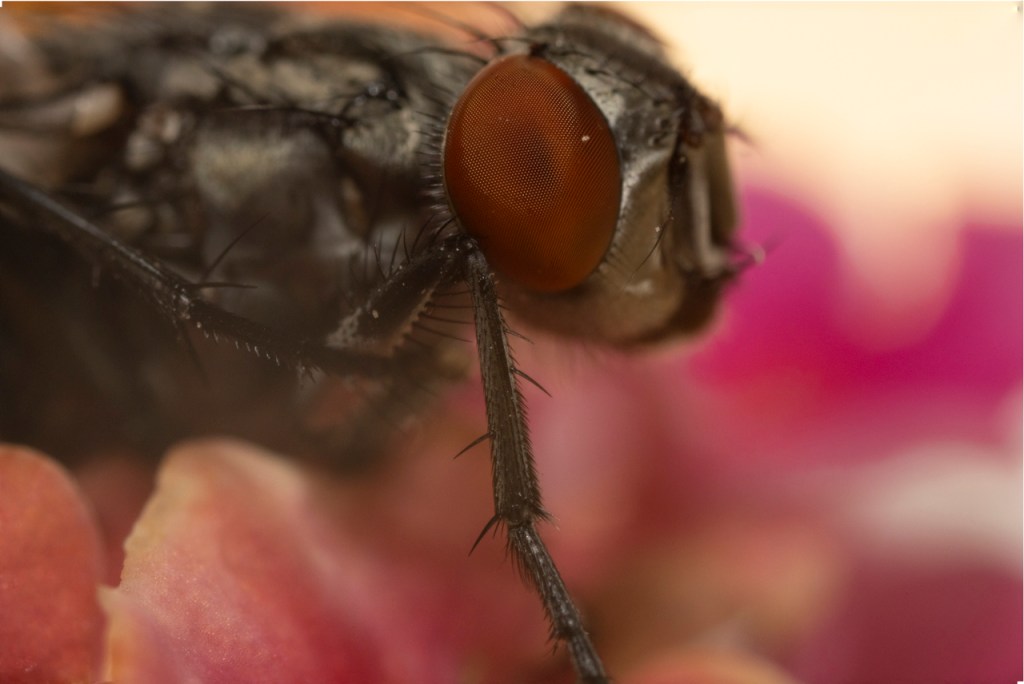
House fly with three photos in the focus stack.
In a series of images, maybe only two or three would work. Below is an example of only two photos.
House fly, using only two photos in the focus stack. Notice that the eye is in focus but the rest of the head is out of focus. House fly, focus stack using 10 images. House fly, again, but using only 5 images in this session.House fly using six photo in this session. The fly was moving so I had to wait for it to be still.
Focus Stacking in Photoshop
My software of choice is Photoshop for focus stacking. Open all the photos into a Layer stack. In Bridge, that’s (1) highlight the photos, (2) click on Tools>Photoshop>Load into Photoshop layers. In Lightroom, (1) select the images, (2) click Photo>Edit in>Open as Layers in Photoshop.
In Photoshop, highlight all the photos in the Layers palette. Edit>Auto Align Layers and wait. Then Edit>Auto Blend Layers and choose Stack from the options. Then wait again for Photoshop to do its work.
Moth photographed at 5x life size. This is a blend of six images. Notice the problems in the upper left corner.Same photo after working with Layers to correct issues in focus stacking.
Most of the time, Photoshop does a pretty good job. A bit more work might be needed to fix tiny details.
Equipment needed for high magnification photograph: tripod, shutter release, focusing rail, flash, continuous LED light(s), camera and lens. The fly is in the center of the flower.
Thanks for reading. Let me know below if you have any questions.
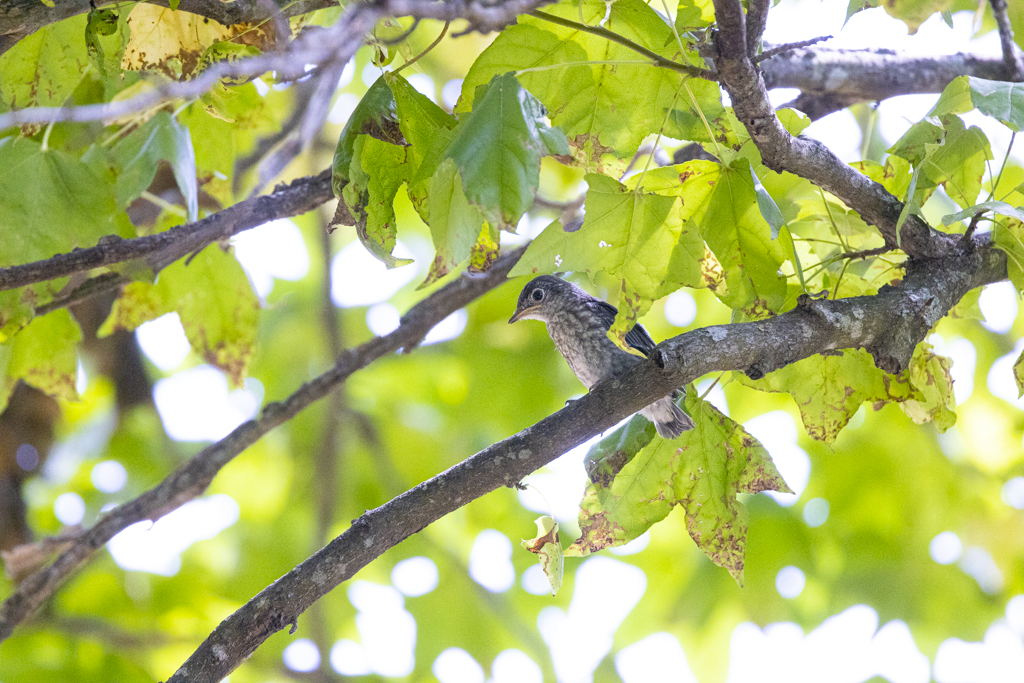
I had a chance this morning to test the Canon EOS R7 against the R5 and R3. All cameras were set to roughly the same menu settings. Each was used in shutter priority (TV), shutter 1250, ISO Auto, and F/11. Each had the same 100-500mm RF lens with a 1.4x converter.
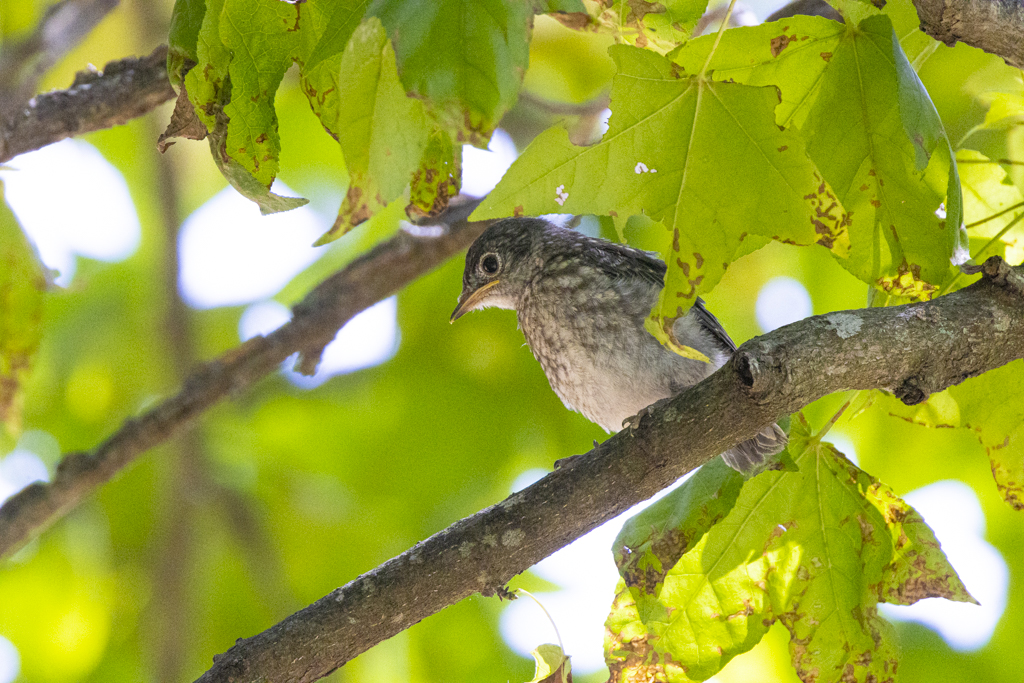
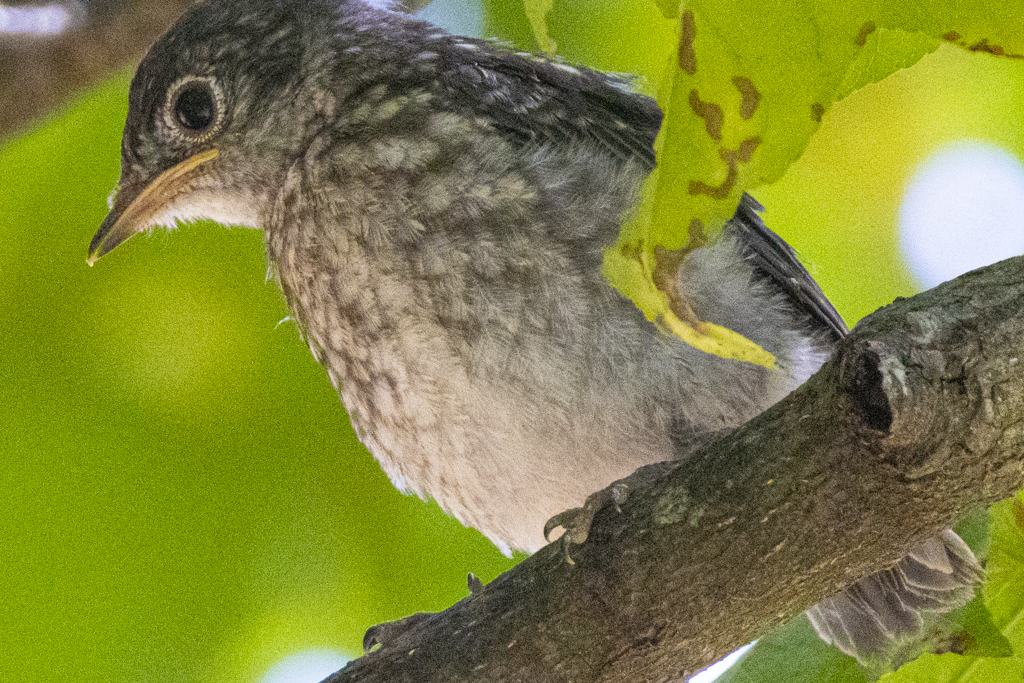
My subject stayed the same as well. Lucky for me, a fledgling eastern bluebird stayed on the same branch during my test.
All images were taken while I was seated in the same chair at the same angle. The sky was partly cloudy with lighting remaining generally the same during the test.
R7R5R3
Notice that the bird photographed with the R7 is larger in the frame. The Canon EOS R7 has a cropped sensor so the subject will appear bigger with a telephoto lens. Hence, the reason a lot of bird photographers like photographing with a crop sensor camera.
Here’s the images larger:
Eastern bluebird fledgling with the Canon R7. The bird is larger in the frame due to the cropped sensor.Eastern bluebird photographed with the Canon R5. Same bird from same vantage-point but notice that I zoomed back a tiny bit by mistake.Eastern bluebird photographed with the Canon R3.
I was impressed with the auto focus on the Canon R7. The camera was set to Flexible Zone 1, Subject, and Eye Detect. The Canon R7 never failed to acquire focus on the small bird. (Watch for my post on camera set-up.)
I’ll compare ISO in a future post but here’s a look at the Canon R7 image enlarged to 100%.
The same photo from above enlarged to 100% photographed using ISO 6400.
Posts coming up will show my set-up for the R7, file size, ISO, and night photography. Stay tuned!
First impression with the Canon R7 shows that this is going to be a great camera for bird photography.
After a long wait I finally got my Canon R3. I’ve used the Canon R5 and R6 for the past two years. Use the “search” feature here to read my reviews of those cameras.
The Canon R3 was advertised as a mirrorless equivalent to the Canon D1X. The D1 line and particularly the D1X have been my preferred camera for over 15 years.
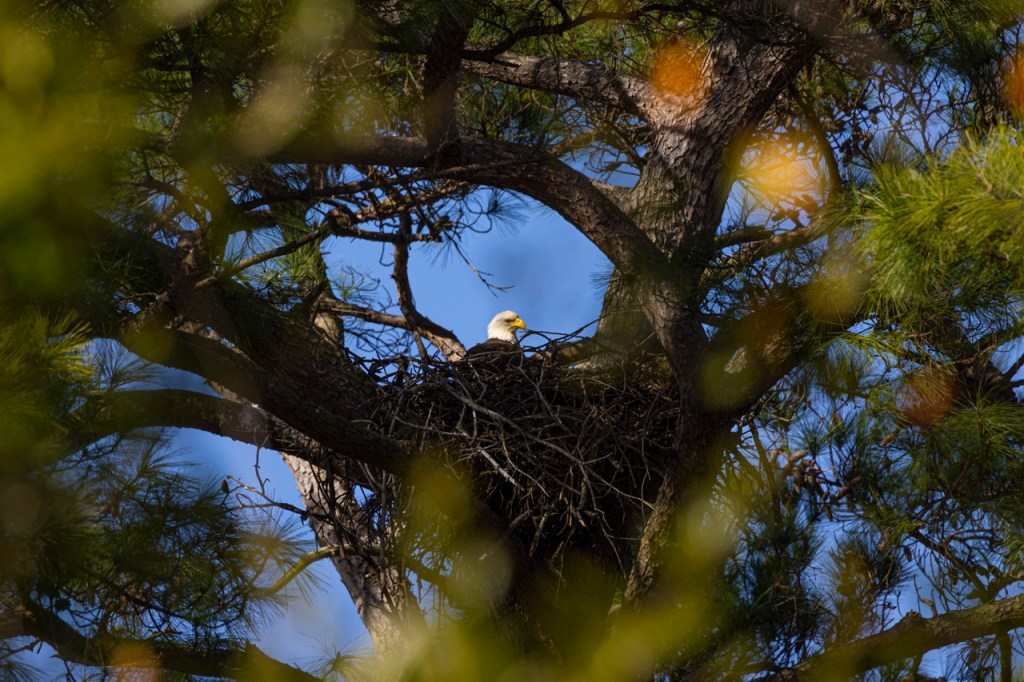
This first review of the Canon R3 is with minimal set-up. I took the camera out of the box and set the following menu items: (1) date and time, (2) copyright, (3) Raw, (4) animal eye focus, (5) AF Servo AF Case 2, and (5) High speed release. That’s it! The bare minimum for this first test run.
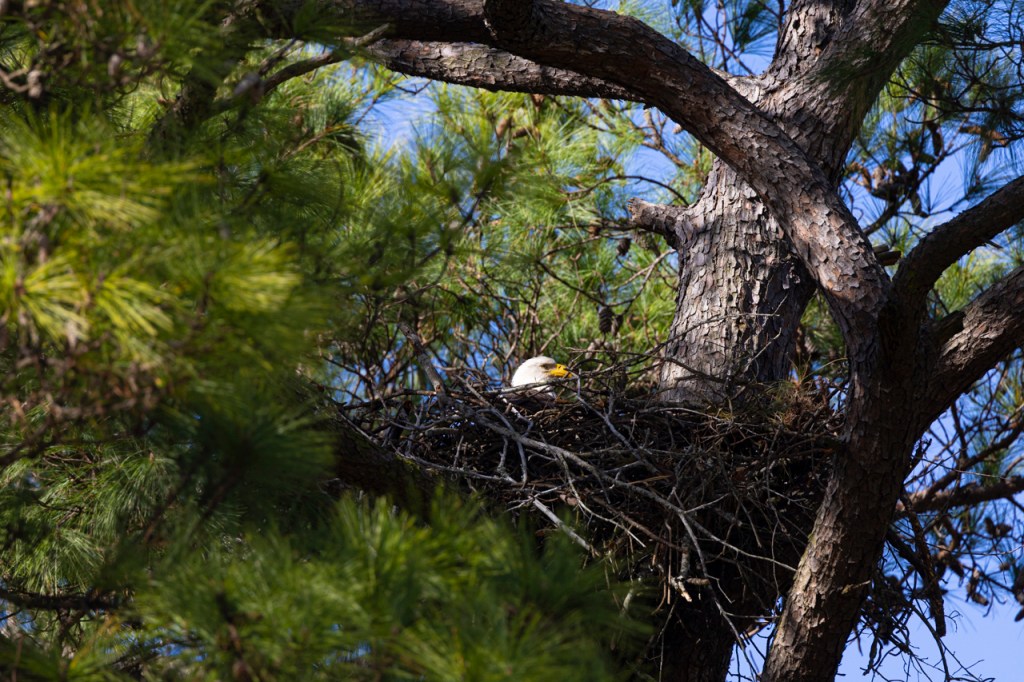
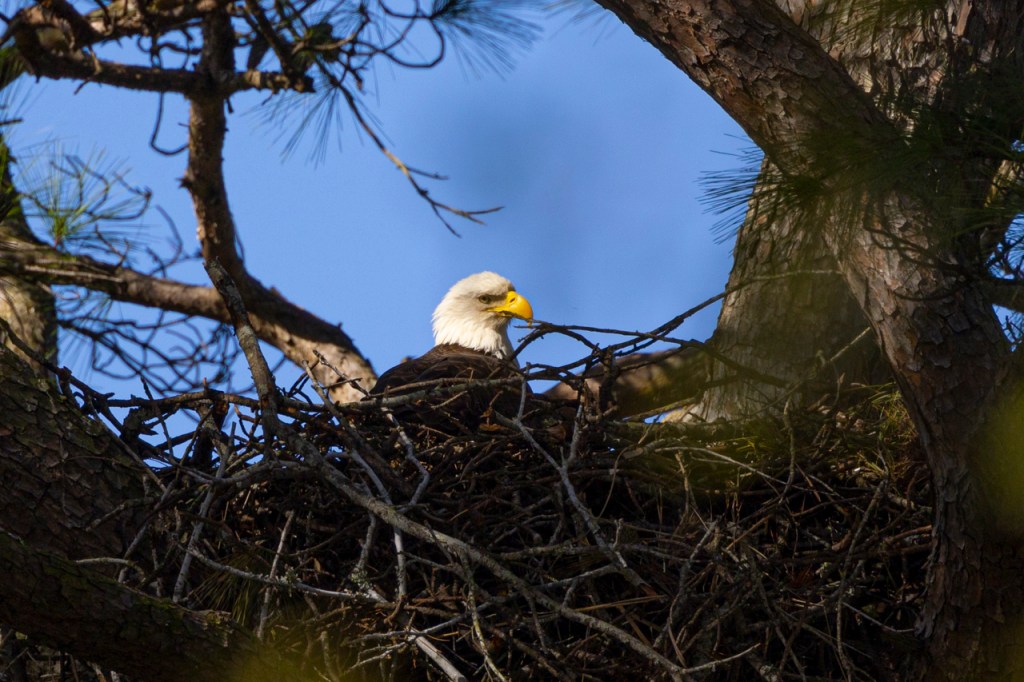
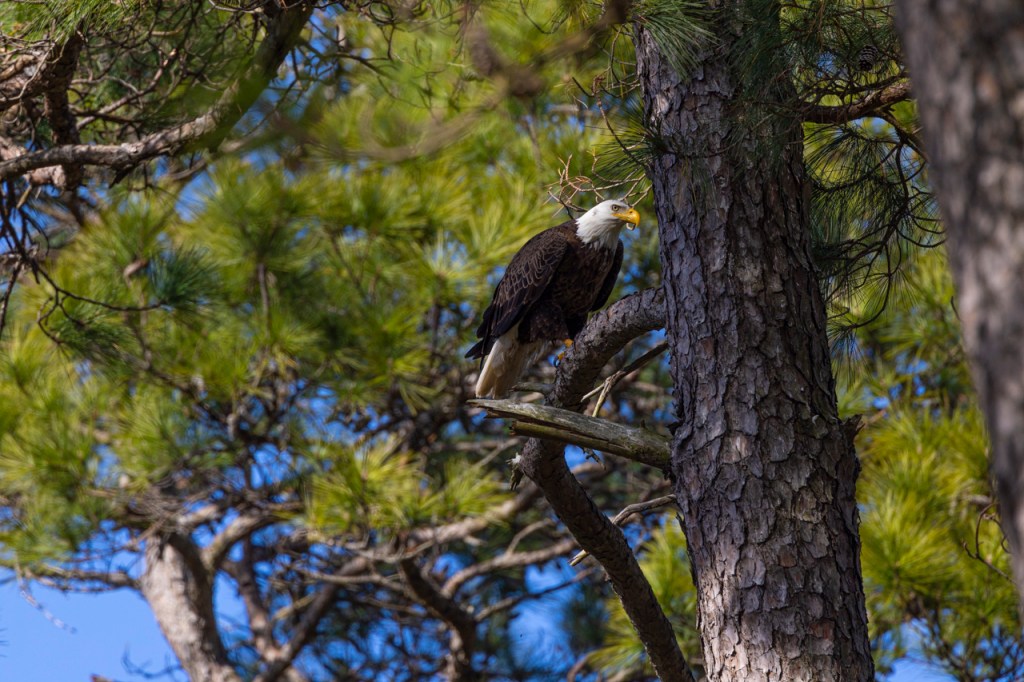
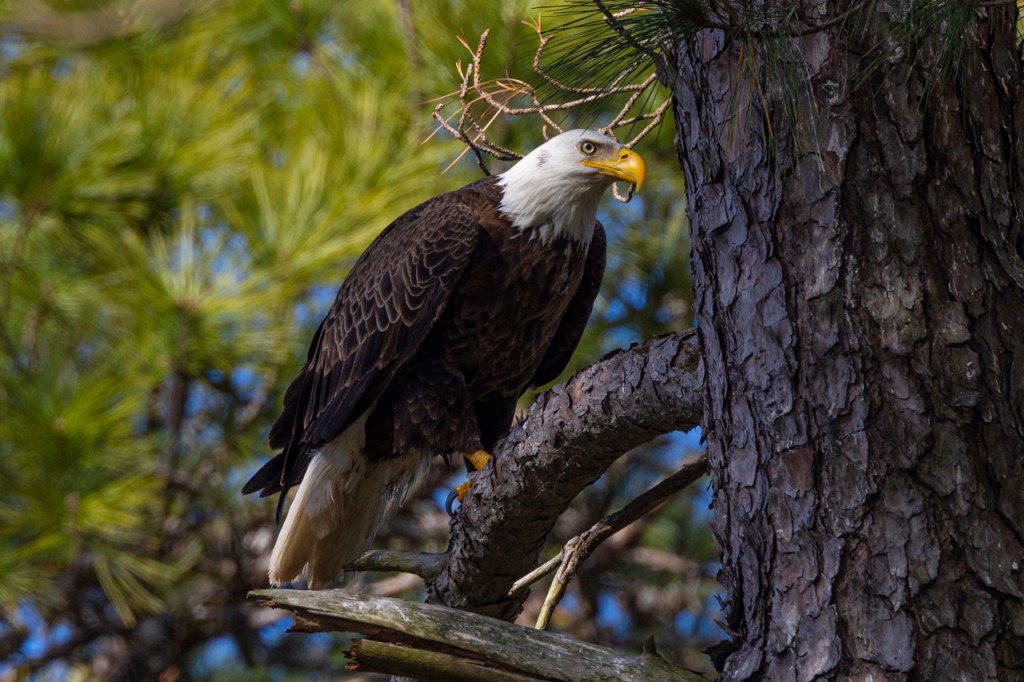
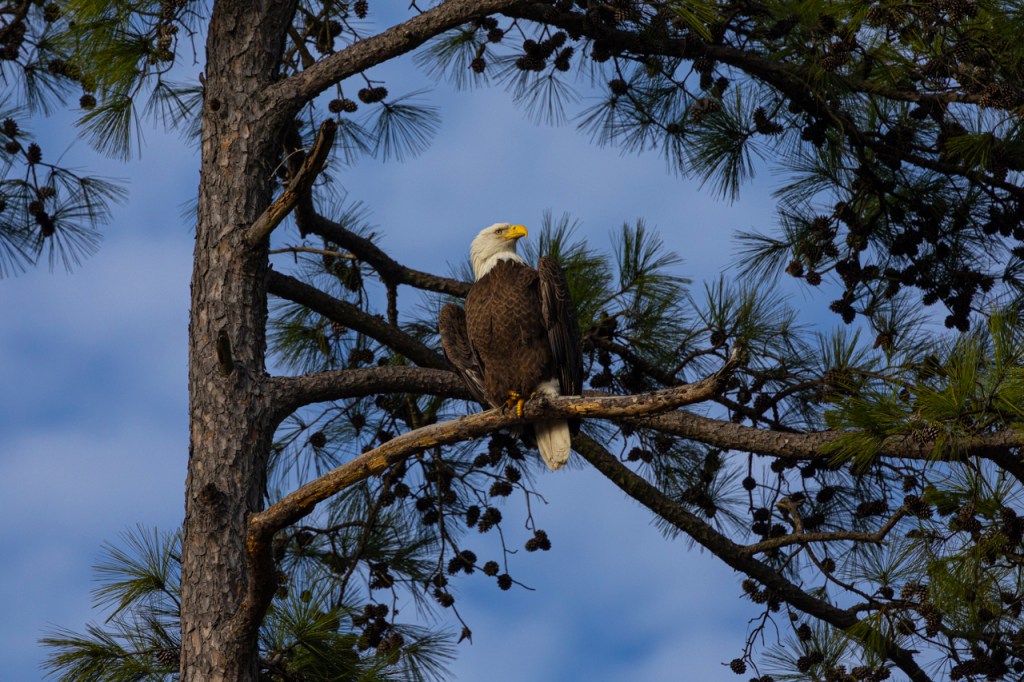
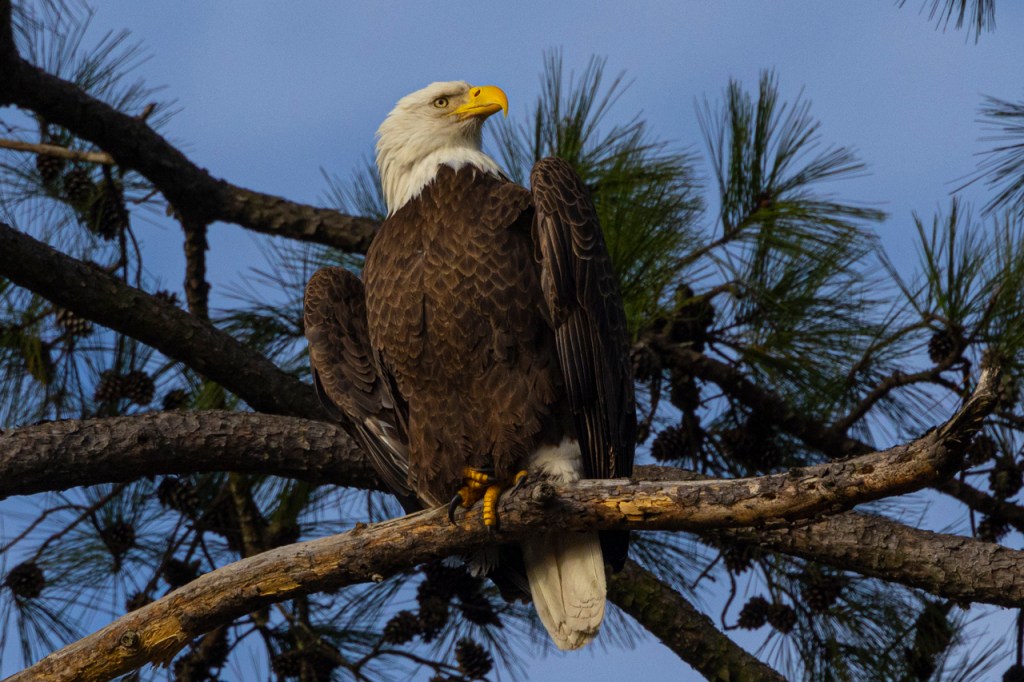
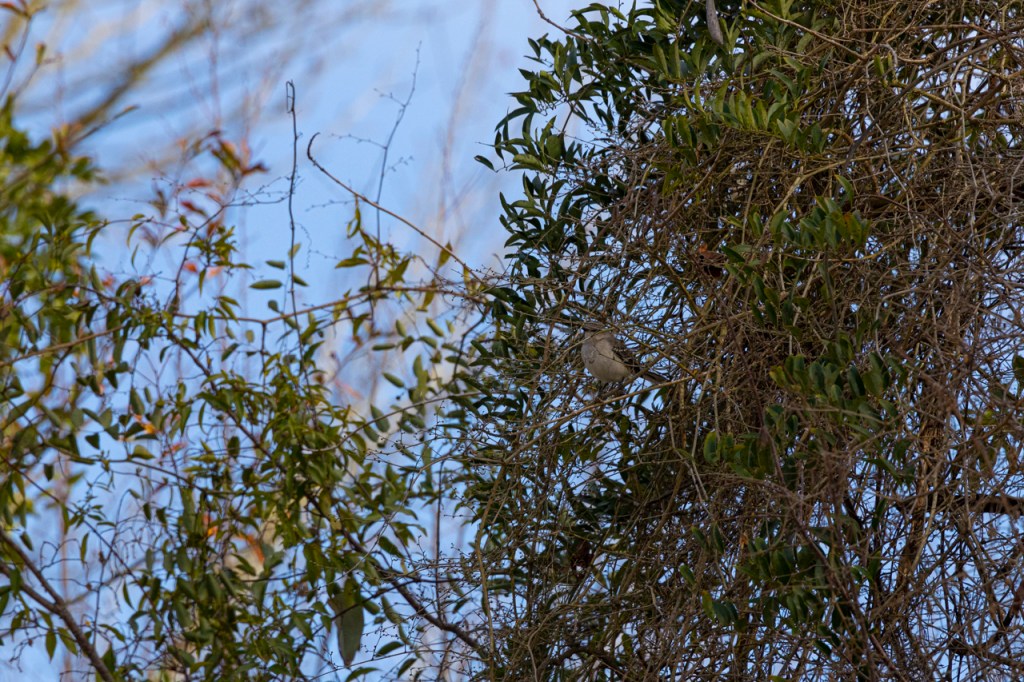
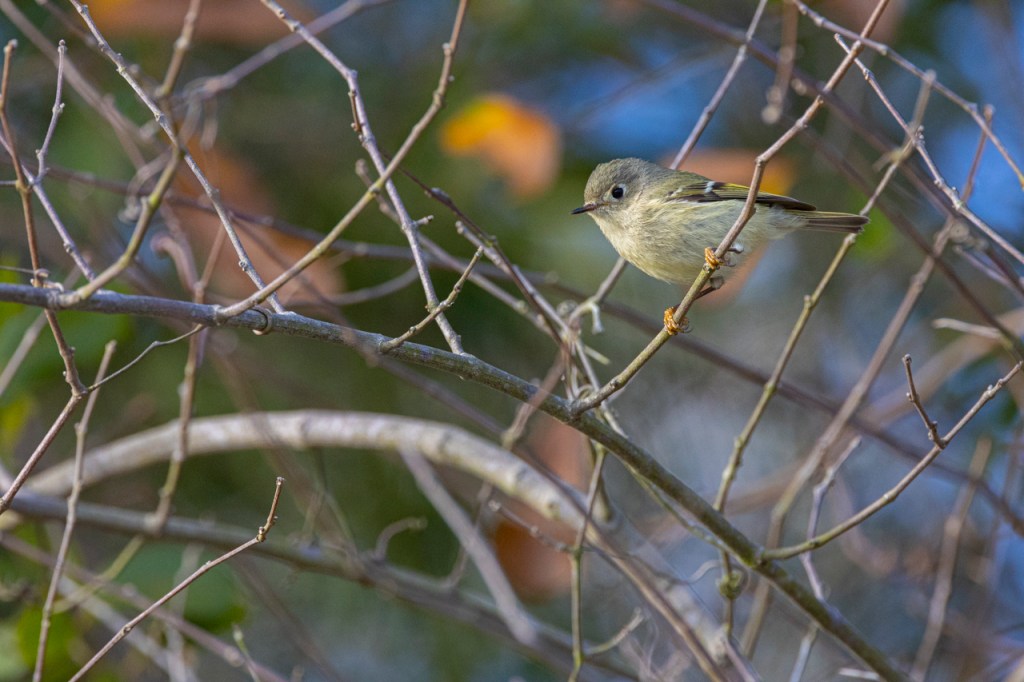
Bald eagle is a nest shooting through trees in the foreground. Handheld Canon 100-500mm lens with a 1.4x extender. One point focusing on the eagle.100% enlargement showing the Canon R3 focused through all the mess on the eagle’s head and produced a sharp photos.I walked closer to the eagle’s nest. R3 focus does not get distracted by the brush.100% crop.Animal eye focus continues to stay with the eagle as it moves around the tree.100% of that image.Viewfinder Simulation allows me to under exposure to maintain the white feathers.100% enlargementThere’s a northern mockingbird in this bush. The Canon R3 locked onto the eye and held focus despite all the tangle of brush in front of the bird. No coaxing on my part. The camera did all the work.Ruby-crowned kinglet is a hyper-active little bird that never sits still. The Canon R3 found the eye and stayed with the bird as long as I could keep the bird in the frame.Uncropped image of a white-throated sparrow in the brush. The Canon R3 found the eye and stayed with the bird. This is an easy one because the sparrow wasn’t very active. The Canon R3 didn’t get distracted by any of the round leaves nearby as we’ve seen with the R5 or R6.There weren’t a lot of flying birds during my test run. The wind was blowing hard and erratic. A few black vultures flew across, though. I raised the Canon R3 and the camera immediately found the bird. No hunting or hesitation. The Canon R3 stayed with the bird as long as I could keep it in the frame.
The Canon R3 works like the Canon D1X! I feel that I finally have a D1X back in my hands but with all the bells-and-whistles of a mirrorless camera.
The Canon R3 is a big camera so it has a different feel in the hand. I’ll write about that in an upcoming post. Stay tuned.
I’ve been asked to compare noise between the R5 and R3. I’ll do that comparison in another post. Keep watch for that one.
The Canon R3 has Eye Control. This is a new feature where the camera uses my eye to determine where to focus in the frame. Can’t wait to explore that feature!
INITIAL IMPRESSION:
The Canon R3 looks and feels like a D1X
Minimal set-up is needed to get this camera up and running. Yea!!
Precise auto focus that allows us to photograph birds deep in the brush with Animal Eye activated.
Birds in flight are tracked on par with the D1X.
Exposure Simulation allows us to over or under exposure to get the picture right in the camera. This is expected in today’s mirrorless cameras.
Stay tuned as I work with the Canon R3.
Ask questions below or suggest items that you’d like to see tested. Thanks for reading!
Years ago I remember my friend Nolan Braud telling me that updating the camera’s firmware was not as easy as it seemed. Nolan wrote instructions and it still wasn’t easy.
Today I updated my firmware and remembered Nolan’s words. Yep! It’s still not easy. Here are some instructions that might help.
Go to your camera’s website and navigate to the firmware page. Canon lists firmware on the page for each piece of equipment. Click “download” when you find the firmware. Then open your computer’s download site and double-click on the firmware package to open it.
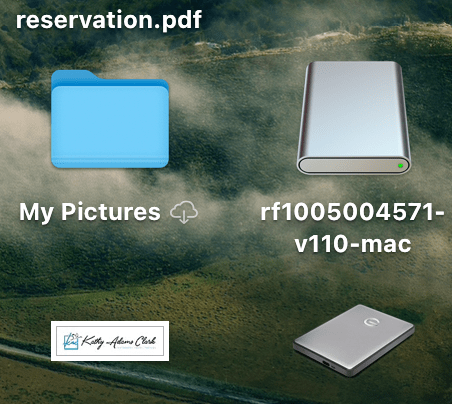
On our computer, double-click on the firmware download and you get two files like you see above. The RF029110.afu is the firmware update for my lens. The “update-procedure-pdf” folder contains instructions in various languages.
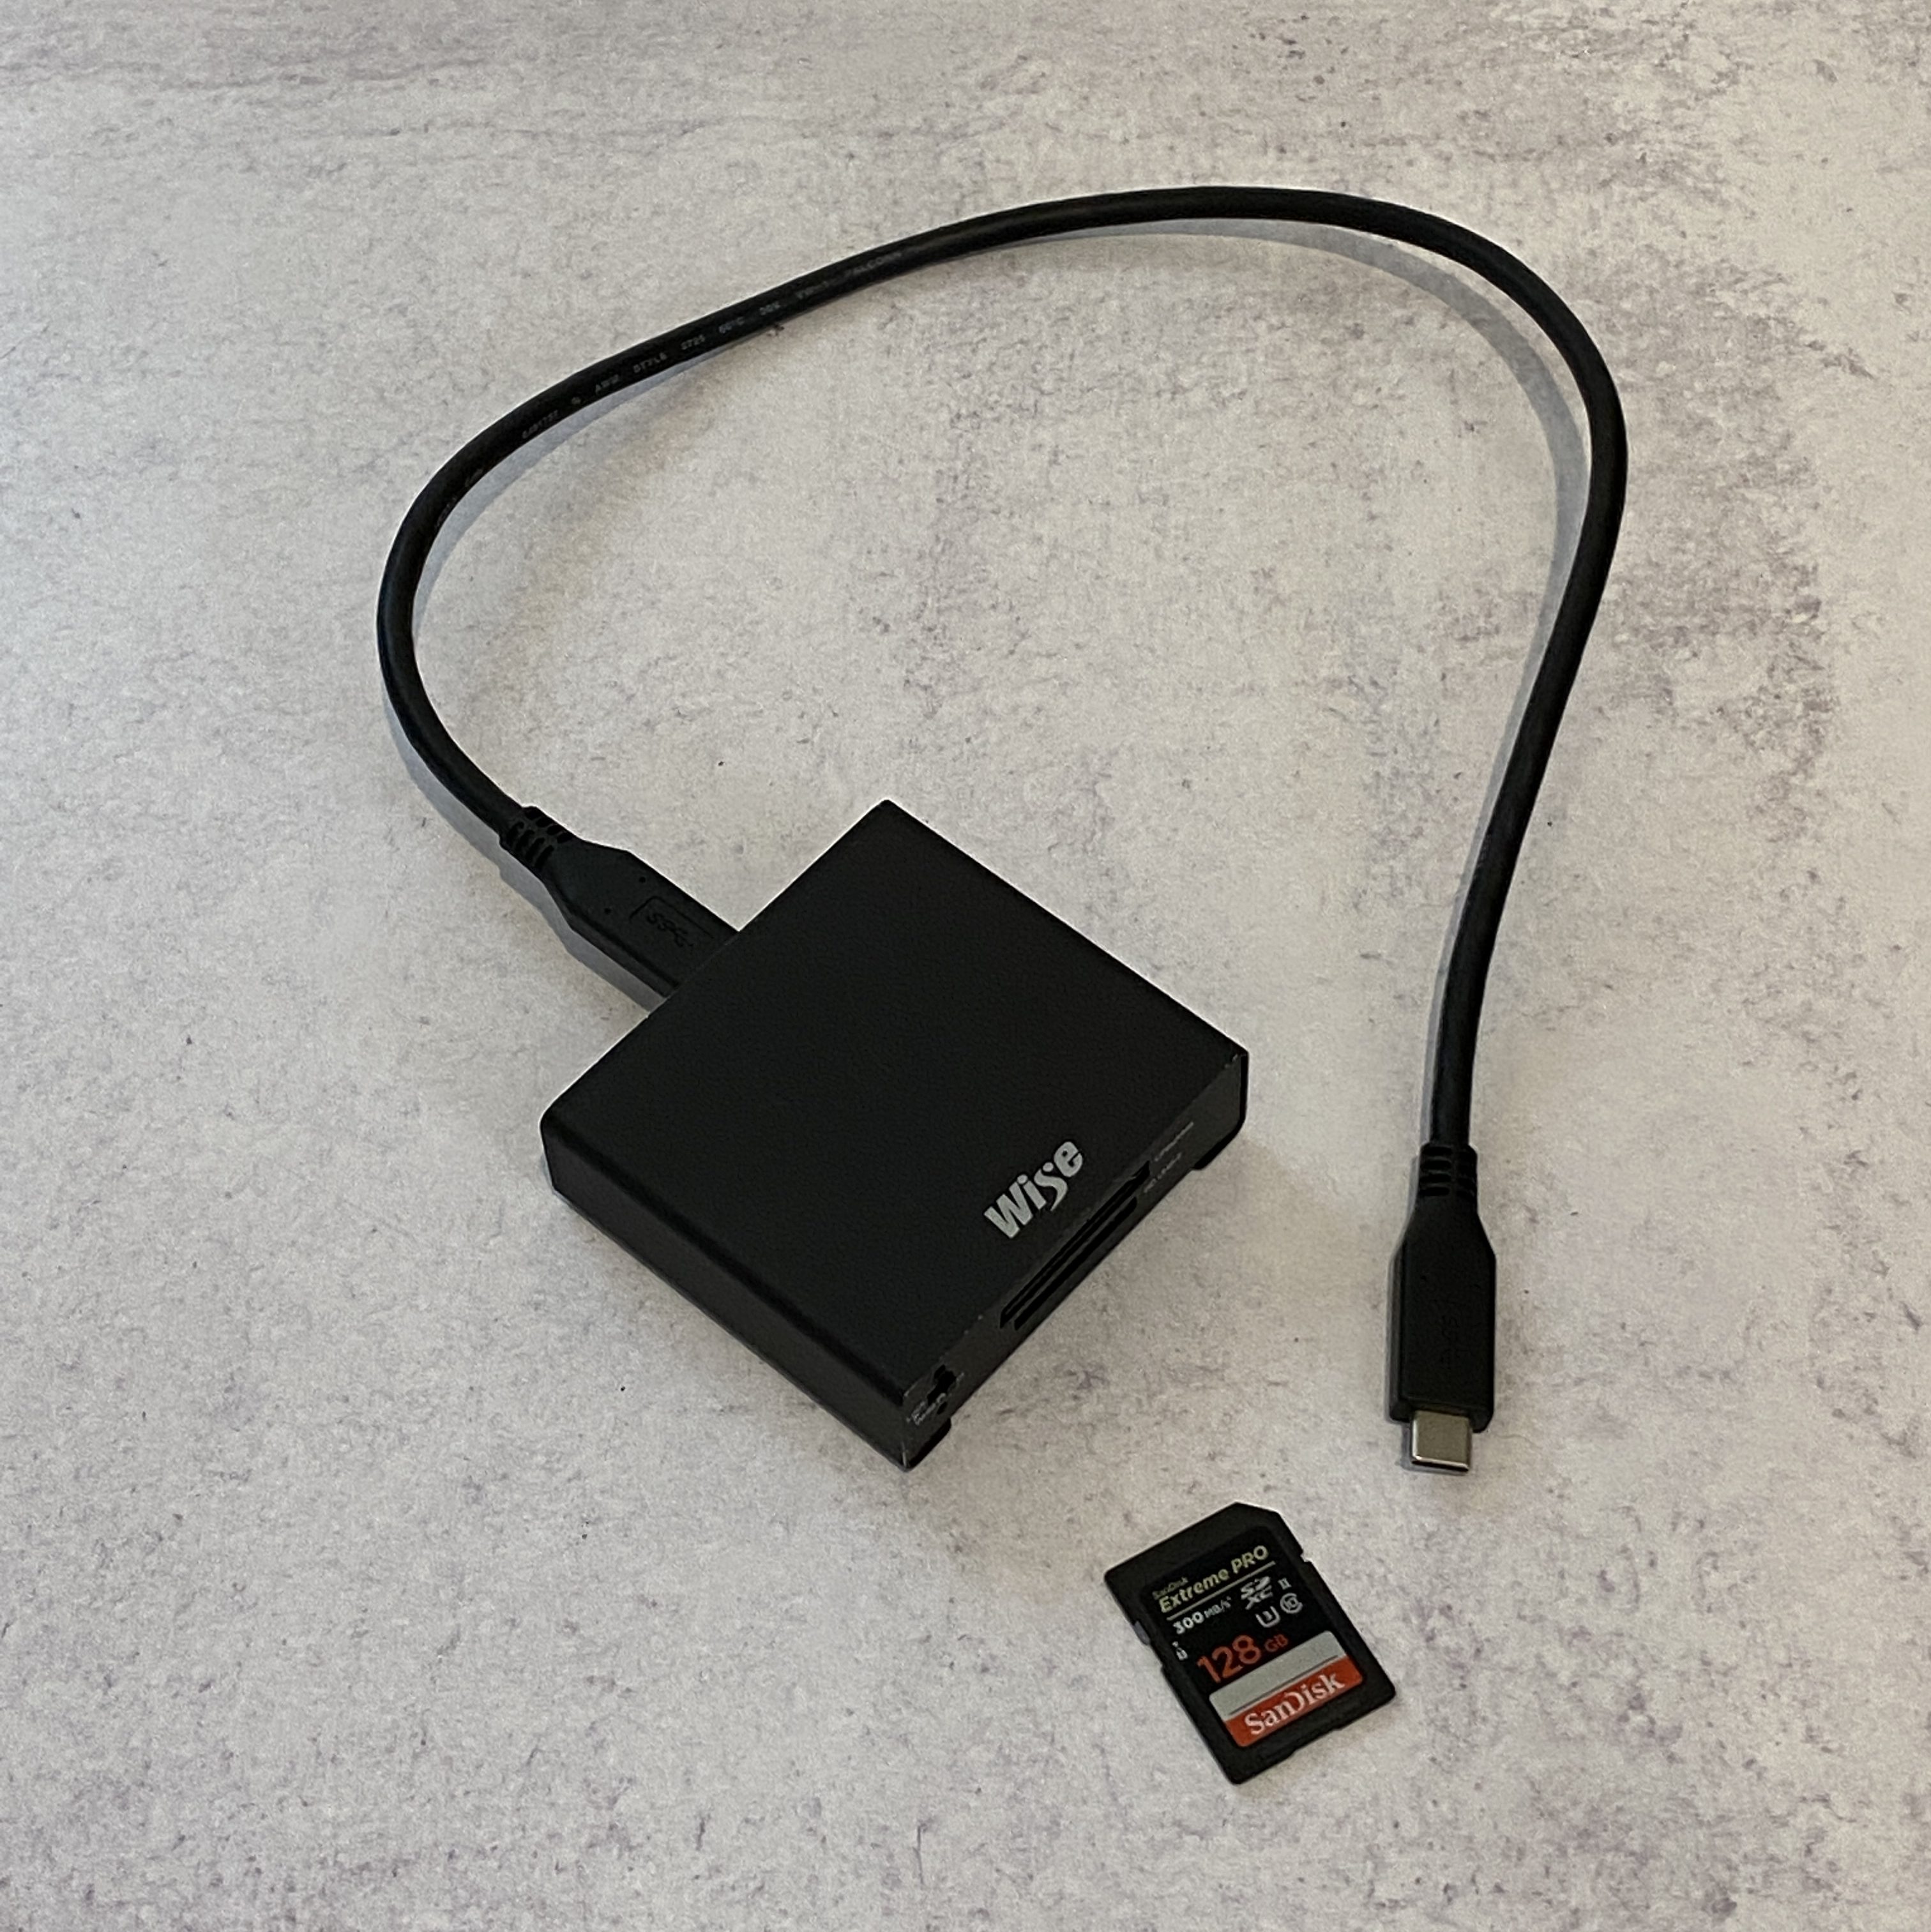
Plug a card reader into your computer. Put a SD card into the card reader. Copy that .afu file to the SD card. Eject the card reader and put the card in your camera.
Glitch #1 — I found the .afu file would not copy to a CFExpress card. The .afu file copies without any problem to a SD card.
Glitch #2 — the card needs to be formatted for your camera. It doesn’t matter if there are pictures on the card. The card doesn’t need to be empty.
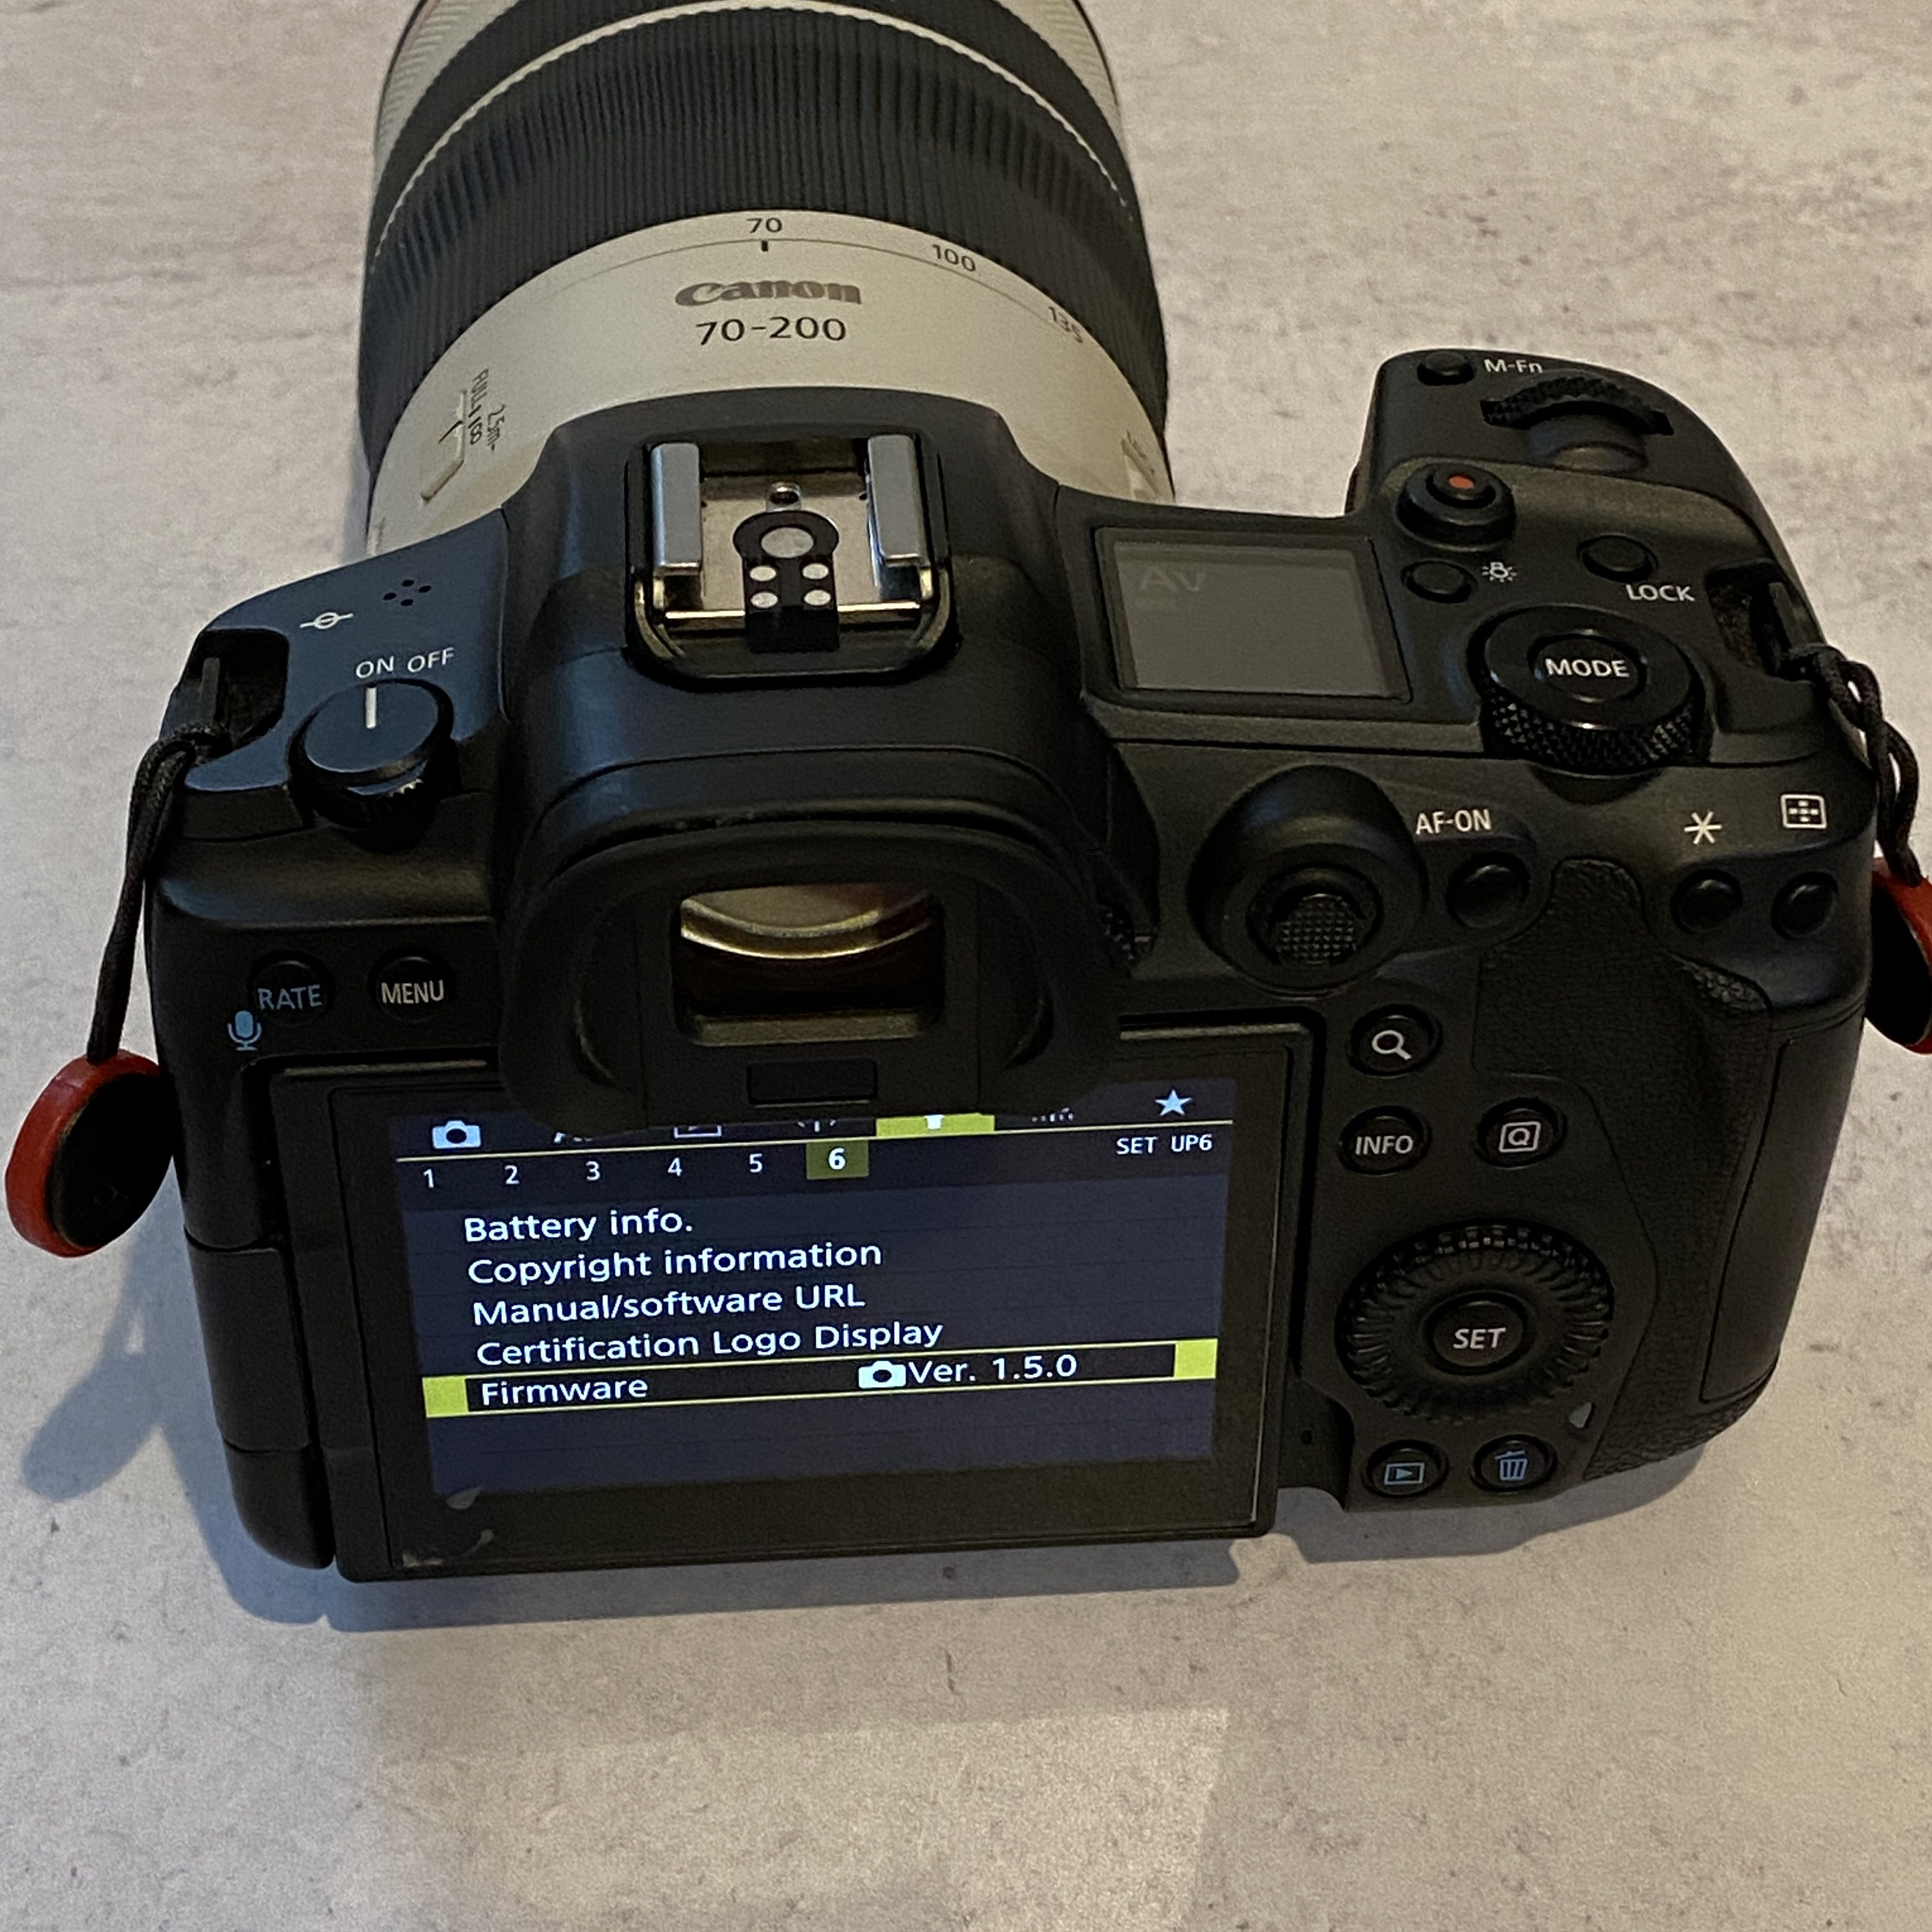
Put the card containing the firmware into your camera. Navigate to the Firmware screen. Click OK or Set or tap to open that menu item.
If all is going well, you’ll see the firmware files on the card. Select the one you want to use.
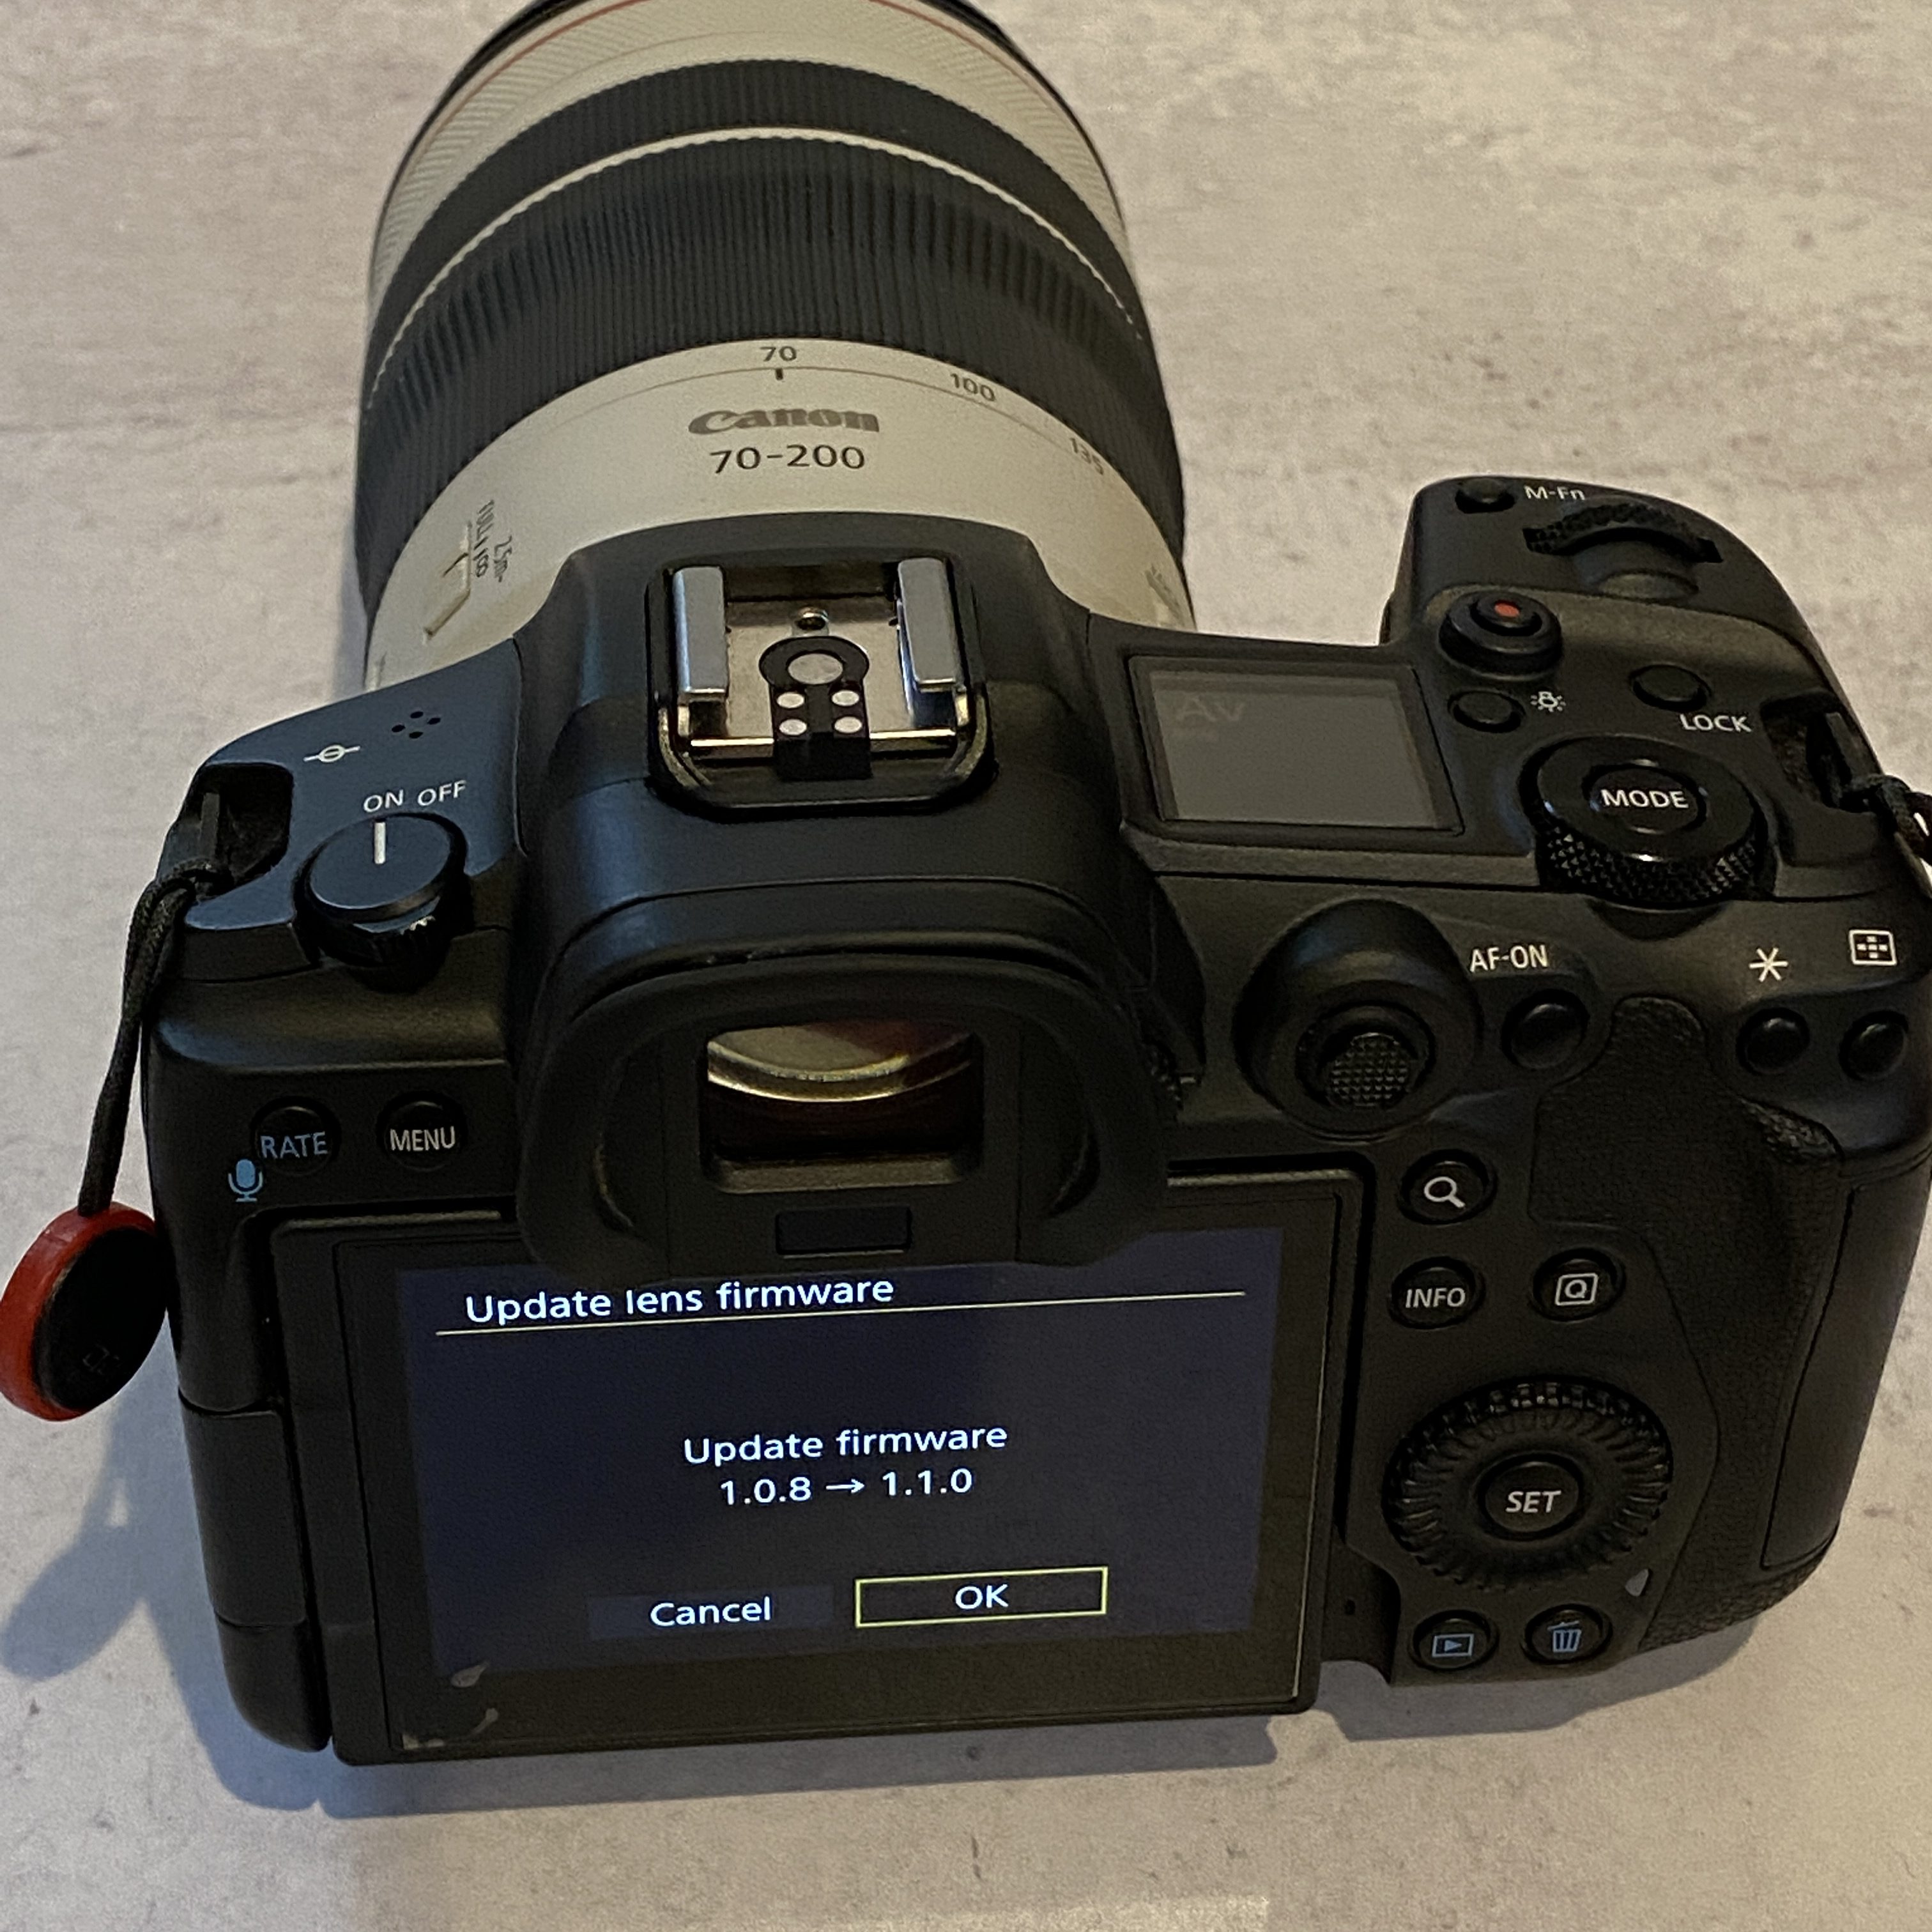
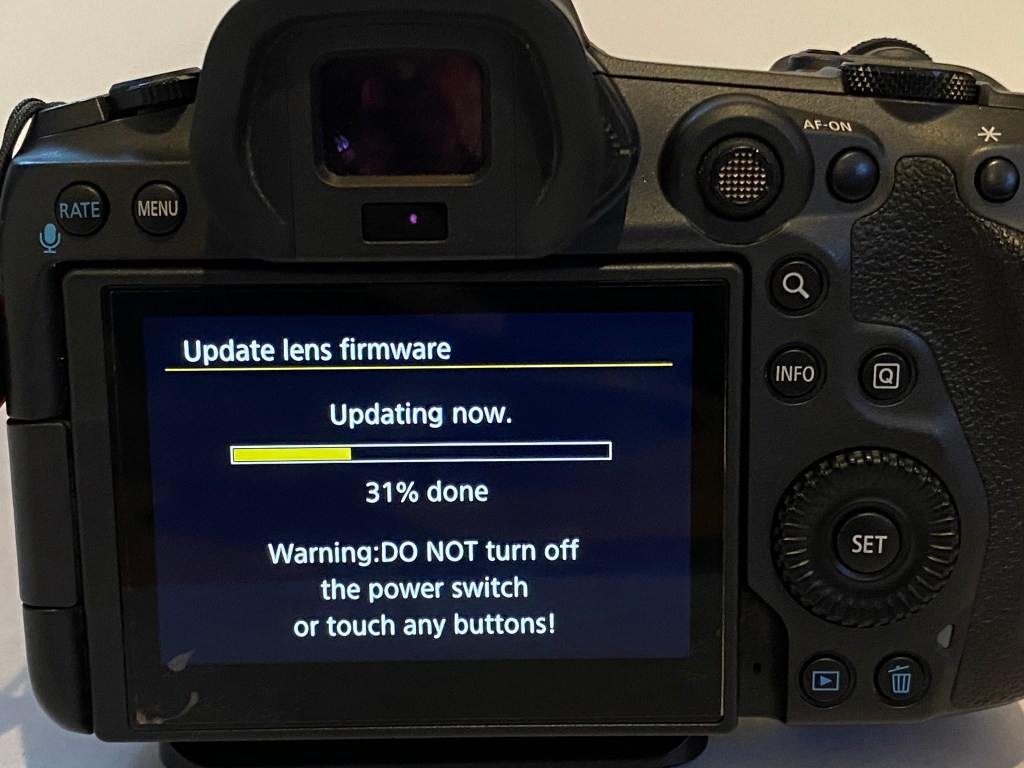
The camera shows that 1.0.8 is currently in use and we’re moving to 1.1.0. Click OK. (FYI, I’m updating the lens firmware in the photo above.)
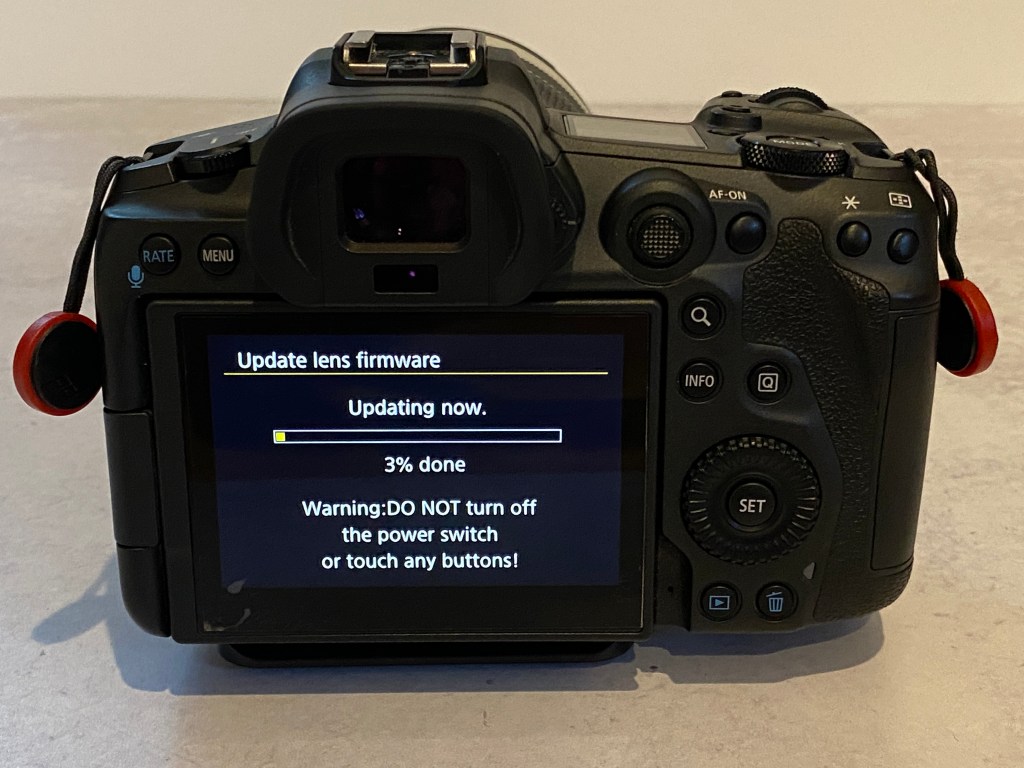
Then you get a screen showing that the firmware is updating. Don’t push any buttons at this point. Let the camera do its work.
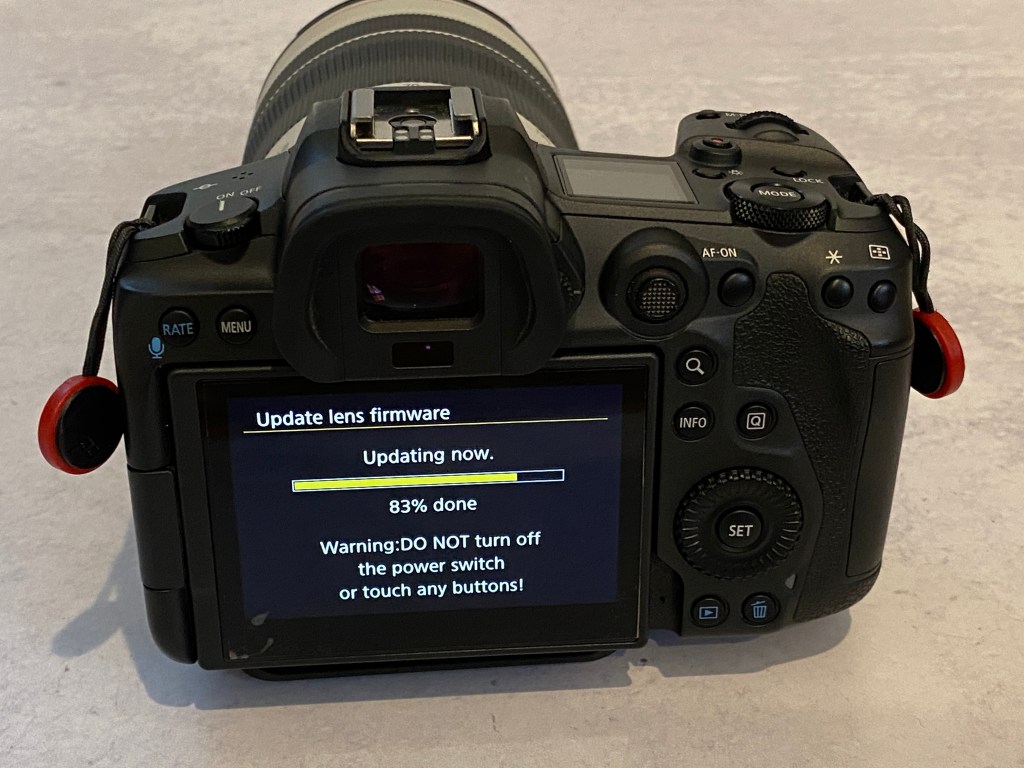
Be patient. Let the camera work.
Be patient. The process takes four or five minutes at max.
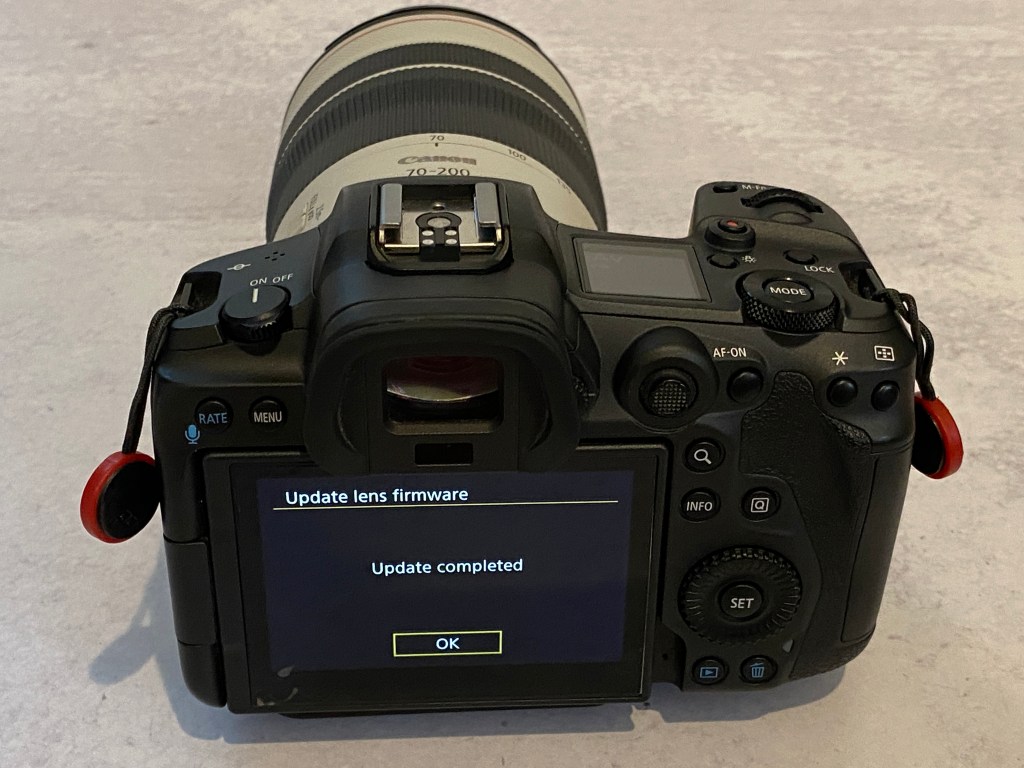
You see this screen when the process is finished.
Instructions from Canon say to update firmware for the camera with no lens on the camera body. I put a body cap on the camera body during this process.
Instructions from Canon say to update the firmware for the LENS with the lens attached. That’s what’s showing in the illustrations for this post.
Was it easy to update your firmware? Problems or tricky situations with other camera brands? Post below. I’d love to hear from you.
This is a screen capture to illustrate Mark’s comment below. Mark wrote that the download file “mounted like a drive” when double-clicked. You’ll see in the photo (above) that the file does look like a mounted hard drive. Slightly different icon on my Mac but similar to the G external drive below in the photo.
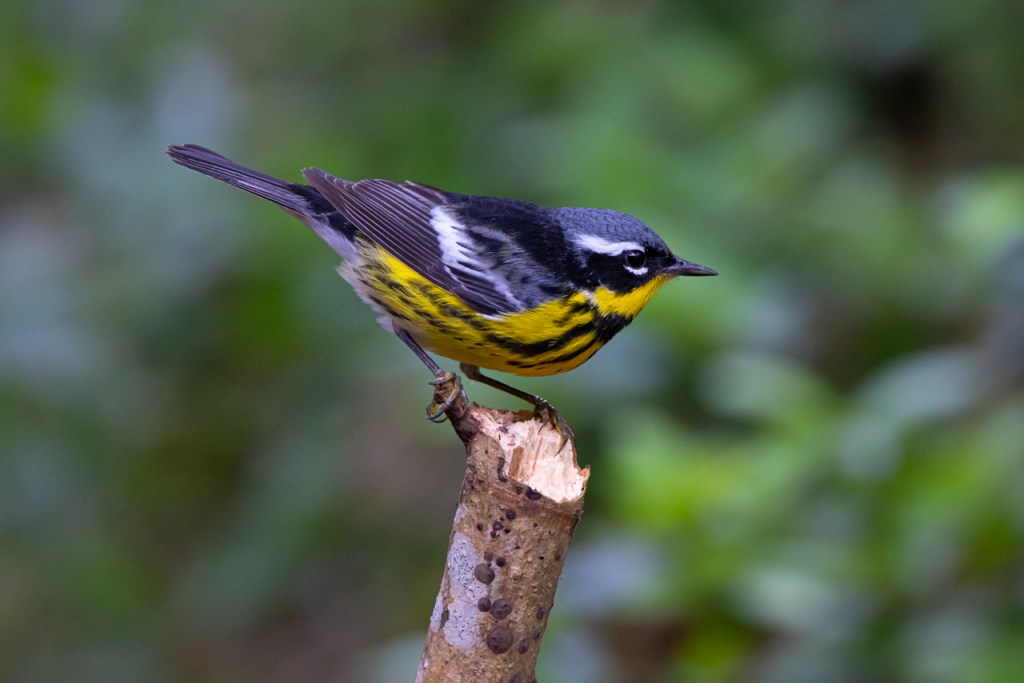
I started pushing the AF: Eye Detection (Animal Eye Focus) feature on the Canon R5 and R6 cameras this spring. Warblers are fast moving little birds who love to feed in dense foliage. Could the Animal Eye Focus stay with a hyperactive warbler?
Magnolia warbler photographed with Canon R5 set to AF: Eye Detection
Flip through the back of my screen with me. This is a video showing each image I took and where the Canon R5 focused. Watch the red squares to see where the camera focused.
Notice in the above video that the camera focused on the bird most of the time. Things were great once it narrowed down to the eye.
Here’s another series of images. Remember, you’re looking at the back of my camera as I scroll through the images.
The Canon R5 focuses on the bird pretty well. It does very well when the bird turns its face to the camera. Notice that the camera did get confused by the foliage for an instant. Yet, it kept focus when the warbler went behind the leaves.
In this instance of the hooded warbler perched on a branch the Animal Eye Focus did a great job.
I’ve been impressed with the AF: Eye Detection on the Canon R5 and R6. The photographer has to keep the camera on the bird. That’s a skill that has to be developed. The camera does its job and we get the reward of outstanding images.
AF Screen 1
Select AF Method to Face Tracking
Select AF: Eye detection — Animal
On the back of the camera while shooting
Select AF: Eye detection
Prothonotary warbler you saw on the back of my camera in the video above.
I finally got a chance to create a star trail with my Canon R5. The star trails — and night photography in general — I’ve done with mirrorless cameras in the past have been disappointing. Not so with the Canon R5 and R6. The results are just as good as anything I created with my Canon 5D Mark IV.
Star trail, or the light left behind as the Earth rotates, Texas Hill Country on a winter night.
Star trails, like the image above, are fairly easy to do. You’ll need some equipment to capture the images and Photoshop to blend the images. You’ll also need a dark sky with an unobstructed view. The view above is pointing directly north at Polaris.
Equipment: Camera with a bulb setting, sturdy tripod, programmable shutter release like the Vello Shutterboss II, fully charged battery, storage card. The photo above is made up of 20 photos. More time, more photos, better spiral.
Set the programmable shutter release to take 99 or 399 photos at a 4 minute exposure with a 1 second interval. Attach the programmable shutter release to the camera. (Suggestion: Do this inside in the light because it’s darn hard to read the instruction book in the dark when you’re trying to shoot.)
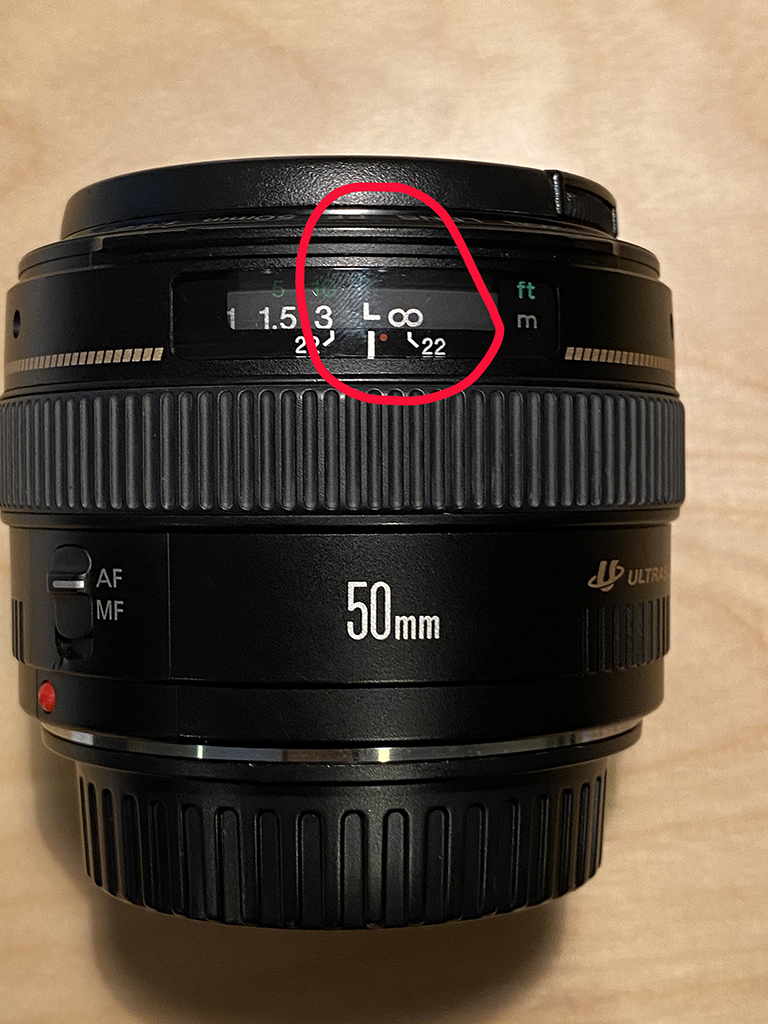
Before walking outside, set your camera’s focus to infinity. This varies by lens manufacturer so here are some tips.
Canon traditional lens with focus set to infinity by aligning the white lines. (Nikon and other lenses align the line with the infinity symbol.)
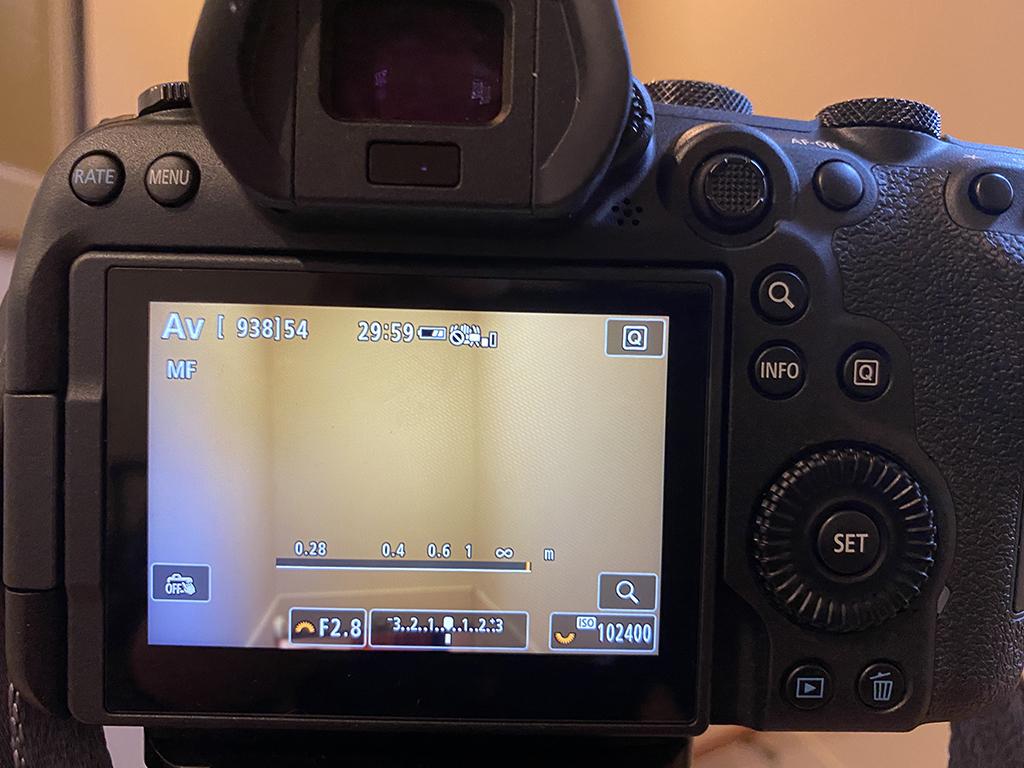
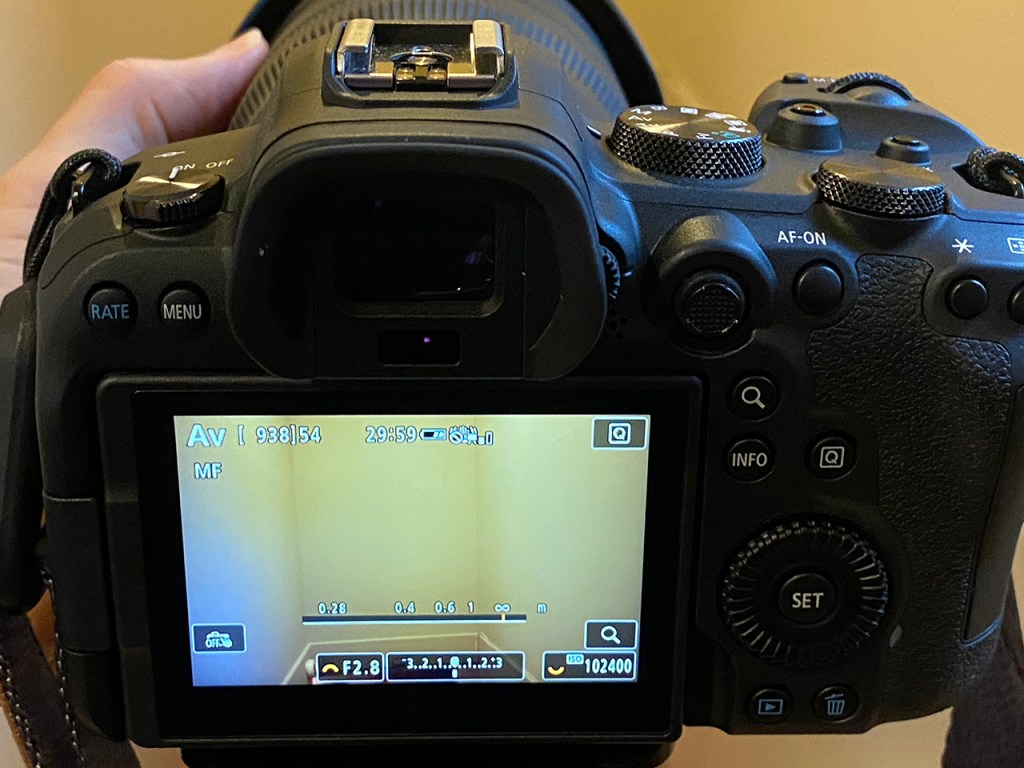
To set the focus to infinity on a R5 or R6 mirrorless camera, go to live view. Flip the switch on the lens to MF. Turn the focus ring to align the focus with the infinity symbol. NOTE: Sony mirrorless users rotate the focusing ring until the infinity symbol appears. Stop when the symbol appears! You’ll go out of focus if you continue to rotate the focus ring.
Outside under a dark sky, put the camera on the tripod and point it at the North Star for a star spiral. Compose the photo to include some foreground or an interesting subject in the foreground.
Check your focus to make sure the lens is set to infinity. Take a couple of test shots make sure the stars are in focus. (Suggestion: take these images at a really high ISO so the exposure is quicker. Enlarge these photos on the LCD panel to check focus. Delete them when ready to start shooting.)
Set the camera to Bulb, f/3.5 or f/4.0, ISO 800, IS or VR off, MF. If your lens has 2.8 then ISO 400 might be okay. A lens with 3.5 as the lowest f/stop might mean you’ll need to use ISO 800. Take some test shots to determine what works for your camera.
Make sure the camera is locked down on the tripod. Press the “Start” button on the Vello Shutterboss II. Monitor the first couple of shots to make sure the shutter stays open for 4 minutes, closes, and then reopens. Let the camera keep shooting for at least 30 minutes but hours are better.
To process the images, follow these instructions precisely to create a layer blend in Photoshop. (1) Download the images into Photoshop Bridge or Lightroom. (2) Highlight all the images.(3) Click Tools>Photoshop>Load Files into Photoshop Layers. Photoshop should open with the images in a layer palette. Lightroom users click Photo>Edit>Edit in Photoshop Layers (4) All the photos will open into a layer palette in Photoshop. (5) Highlight all of the photos in the stack and change the blend mode to Lighten. (6) Viola!! (7) Flatten the image and save.
Make any necessary exposure, contrast or other corrections in Adobe Camera Raw or Lightroom.
I ordered my Canon R5 when it was announced in February 2020. The camera finally arrived in July 2020 and I was totally excited about the new experience of using this much anticipated camera.
Life was good — but the camera wouldn’t focus. The R5 was amazing 95% of the time. Yet, 5% of the time it just wouldn’t focus. It failed to acquire focus.
I shot some video footage so I could share my experience with others. I played with settings. I figured out workarounds. But, by November 2020 I felt like I was beating my head against the wall. Why wouldn’t this camera acquire focus.
Then, my R6 arrived. The R6 never refused to focus. It might hesitate here and there like the Canon 7D or Canon Rebel but it never refused to focus.
That’s when I realized something was wrong with my Canon R5. I contacted Canon Professional Services. They offered some suggestions to my settings — but nothing I hadn’t already tried.
Finally it was time to send the R5 to the shop. I shared my videos with Canon and talked with the technicians.
Here are changes to my settings recommended by Canon Professional Services:
AF Menu –Tab 4 – Lens electronic MF ; this is currently set to OFF. If you set it to One-Shot-Enabled the lens will manual focus by the focus ring if shutter is half depressed. This will make it behave like a long telephoto on a EOS 1D-X body
AF Menu- Tab 5 – Initial Servo AF Point for Tracking; Suggest second selection Tracking will start with the selected AF point
AF Menu – Tab 3 – Case 3 or 4 might work better for birds in flight or moving objects than Case 1
AF Menu – Tab 4 – Switching tracked subjects – might want to try “Initial Priority”
So far, so good! I’ve used the R5 for a week and it’s worked as expected. I’ll keep you posted.