For those of you still using or new to the Canon R5, my friend Richard Day has amazing luck photographing birds with this camera. He’s using the same menu settings I’ve used but finds the following settings helpful.
Richard uses the back button when he wants to switch to Eye Detection AFUsed when you need to nudge the focus a bit on the lens. Very useful!Allows the camera to keep focusing. Per the owner’s manual, “You can manually adjust the focus after the AF operation if you keep holding down the shutter button halfway.” Good option. I agree. What color do you want “peaking” when you’re in MF? I have mine set to red. Anything surrounded by red is in focus.Turn this feature to Disable so your nose doesn’t select the focus point.This AF method can also be changed with the AF Point Selection button on the back of the camera.
I’ve moved on to a Canon R6 Mark II and a Canon R3 camera. I hope these settings help for those using the R5.
The Canon EOS-D1X was my workhorse camera for years. It focused fast, held focus, and never hesitated. That what I hoped from the new Canon R3.
So far, my hopes are reality.
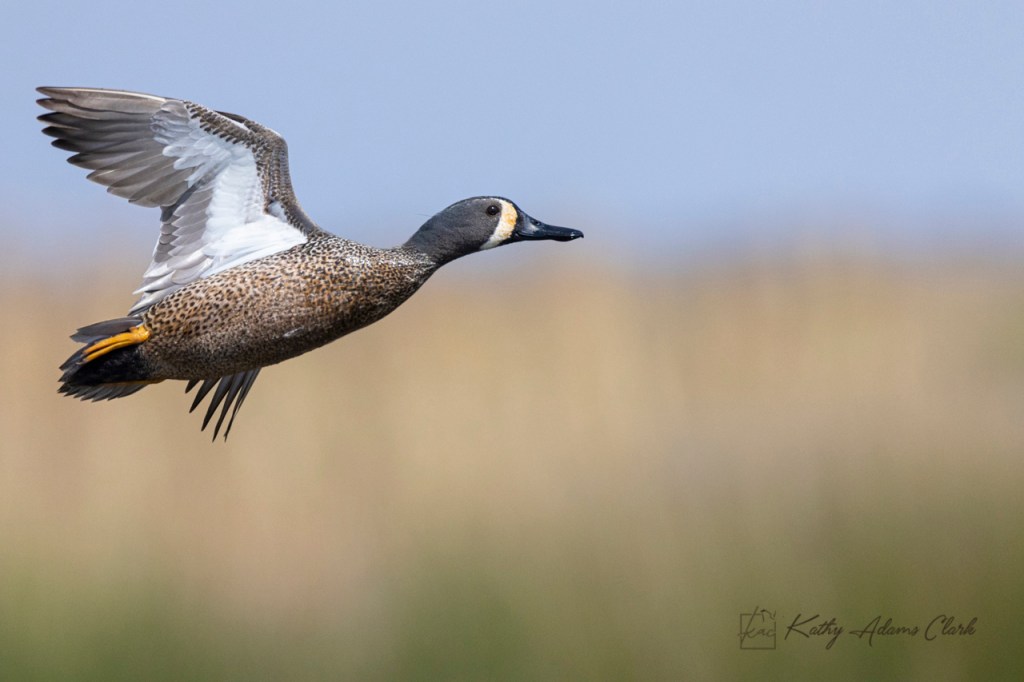
I grabbed a couple of hours during sunny weather this weekend to photograph at the Anahuac National Wildlife Refuge. My goal was to photograph ducks and raptors in flight at high shutter speeds.
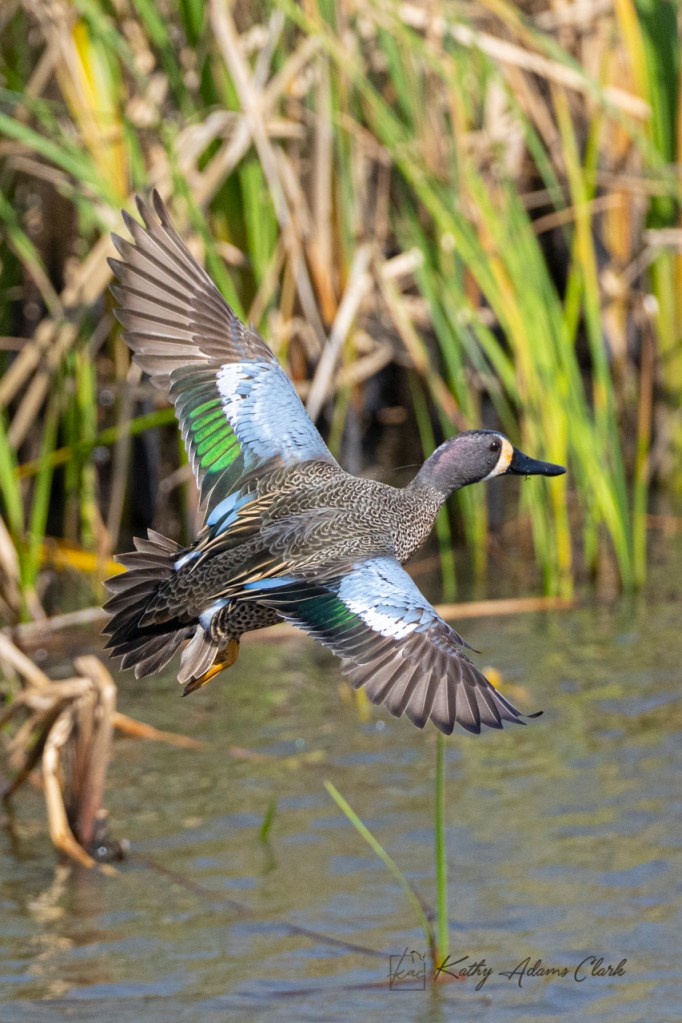
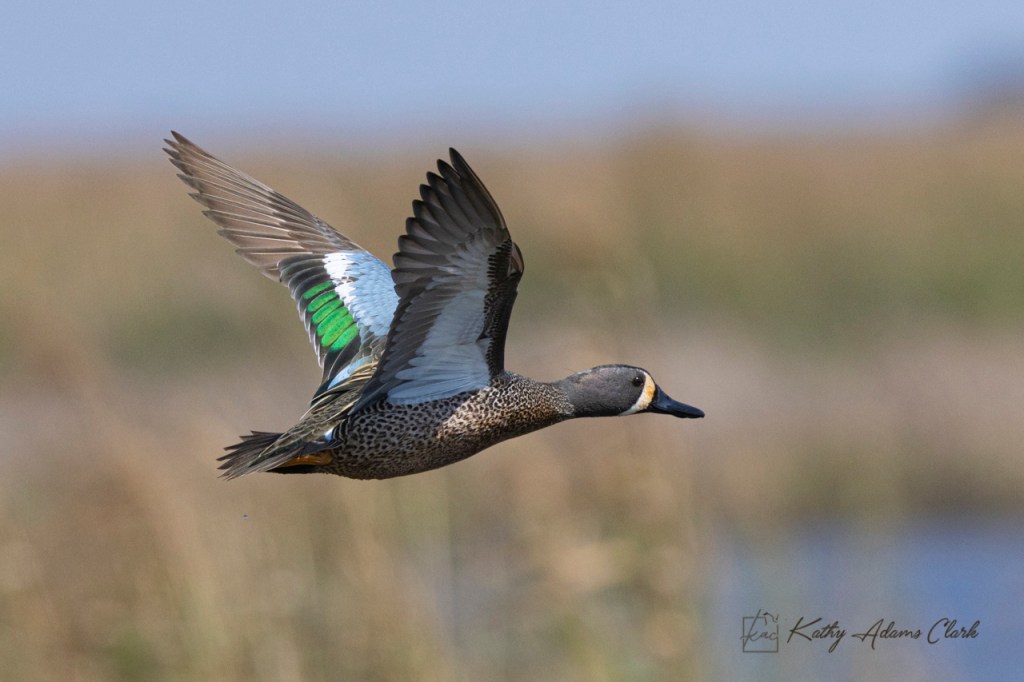
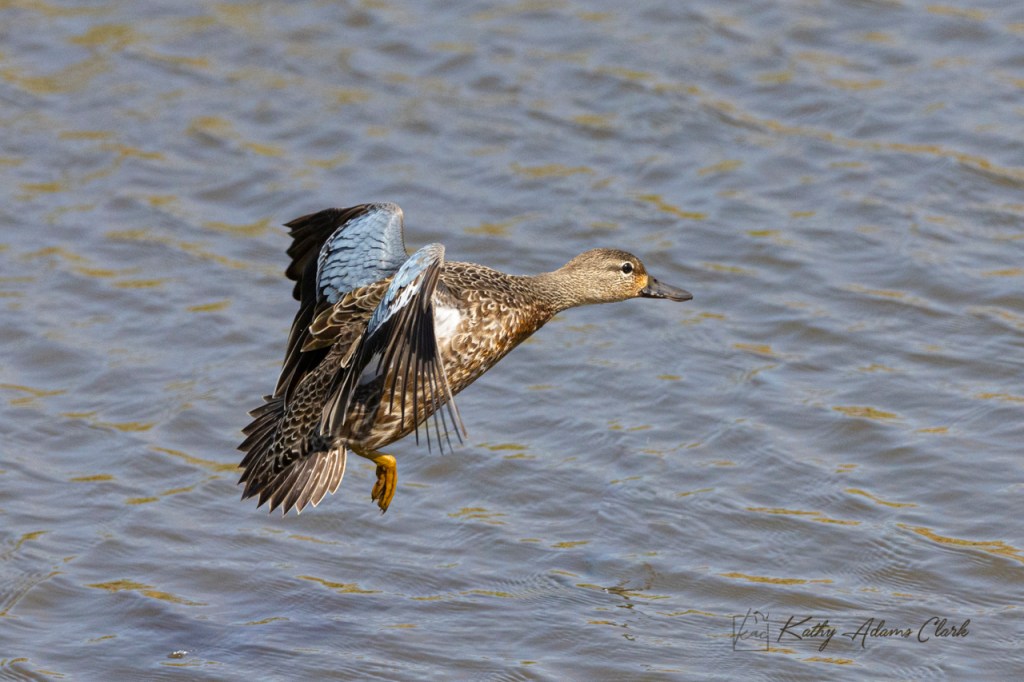
Blue-winged teal in flight. Canon R3, 100-500mm RF lens, 1.4x extender, shutter speed 1/8000thBlue-winged teal flying low along the cattails. The Canon R3 kept focus on the bird and didn’t get distracted by the cattails. (100-500mm RF lens, 1.4x extender, 1/8000th shutter)Blue-winged teal in flight. Same equipment and settings as above.
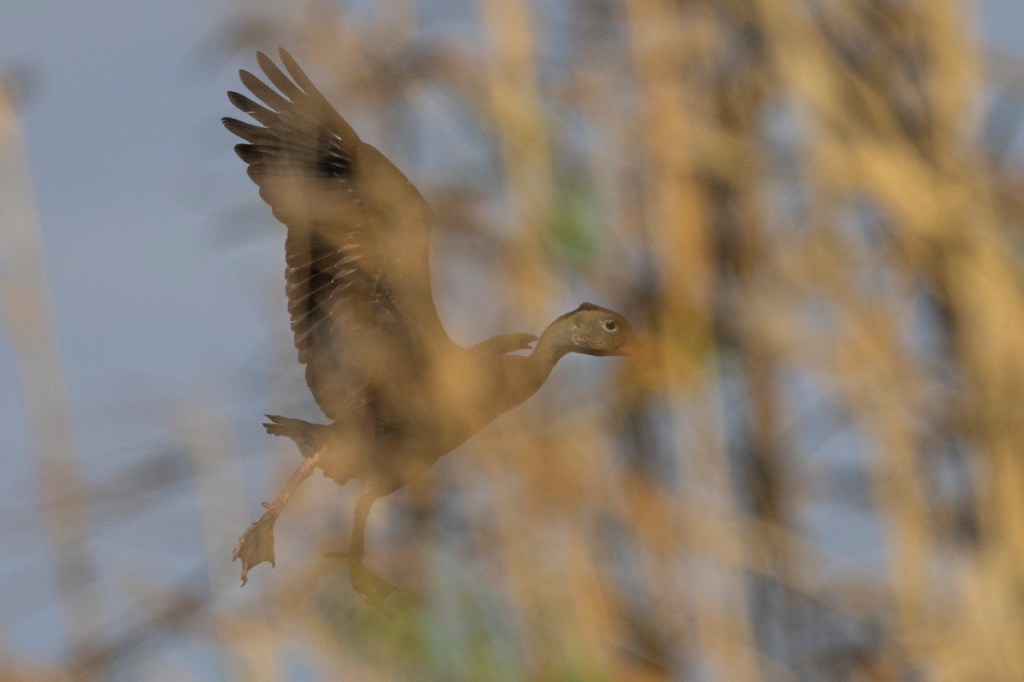
Below is a series of a black-bellied whistling-duck that I tracked across the marsh. The camera is set on large zone autofocus versus a small cluster of focus points.
When the bird flew behind the reeds, the Canon R3 didn’t lose focus. The camera stayed locked on the bird and didn’t get distracted by the brush.
Red-tailed hawk under similar circumstances. Tree limbs come between the bird and me. The Canon R3 doesn’t get distracted by the limbs. It stays focused on the bird.
During my time in the field, I aimed the camera at any bird that flew nearby. I aimed the camera at hawks and vultures in the distance. Not once did it fail to acquire focus on the bird.
One or two times the camera lost focus during a burst but it reaquired focus by the next click of the shutter. I used to see this same thing with the EOS-D1x.
I missed a couple of birds but those were “operator error” versus the Canon R3. The R3 is living up to the hype and I’m a happy photographer!
Female blue-winged teal comes in for a landing.
Please feel free to post questions below. Would you like me to test something during my next outing with the Canon R3?
The new mirrorless cameras give us so many options. I’m using the Canon R5 but the following will apply to Nikon, Sony, Olympus, and Fuji. The key is to experiment and learn from your mistakes and triumphs.
I used 1-point AF on my DSLR cameras most of the time. I’d move that one point around the screen with lightening speed — a skill I developed over many years of practice.
1-point AF has its place in our photography toolkit.
After working with the R5 for four months, I’ve found that the 1-point AF has its place.
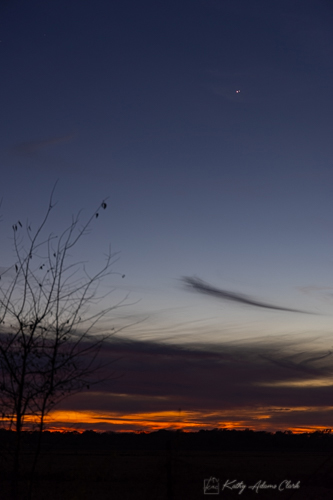
Use 1-point AF when there’s one specific point of focus. Conjunction of Saturn and Jupiter.
1-point AF is great when you want to focus on the body of the skipper versus the wings.
1-point AF is perfect for selecting the focus point for artistic reasons.
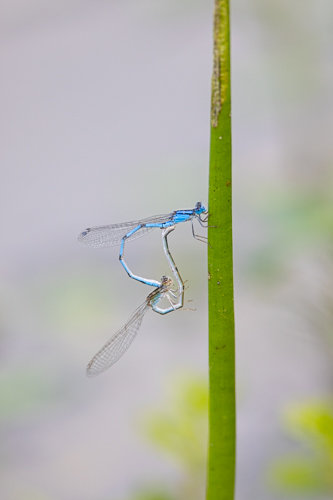
1-AF Point helped the camera focus on these tiny familiar bluets.
Eye tracking is amazing. We’ve had this technology on cheap point-and-shoot cameras for years and even on cellphone cameras. The engineers at Canon have really hit a homerun with Animal Eye tracking. I hear Olympus has done well in this arena, too.
Use your Menu setting to tell the camera to look for human eyes or animals eyes, by the way. Canon puts this in the pink menus.
Animal Eye AF worked well on this small Savannah sparrow
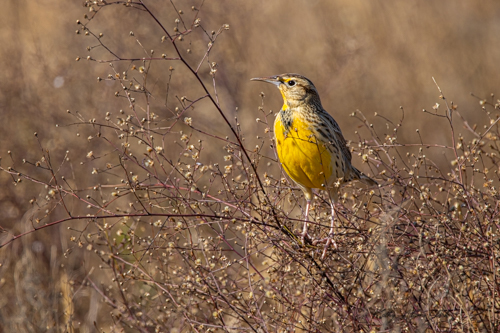
Animal Eye AF helped me keep the face of the eastern meadowlark in focus no matter which way it turned.
Animal Eye AF kept the peregrine falcon in focus.
Animal Eye AF found the turkey in the grass and kept the focus point on the turkey.
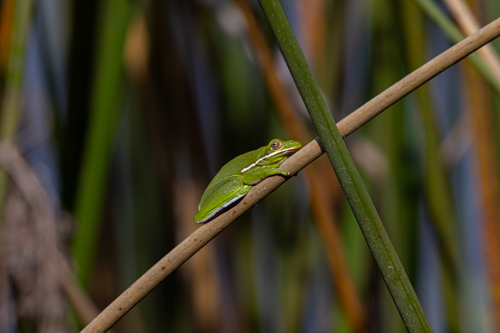
I was amazed that the Animal Eye AF found the tiny eye of the green treefrog.
A clear and defined eye helps Animal Eye AF do its job.
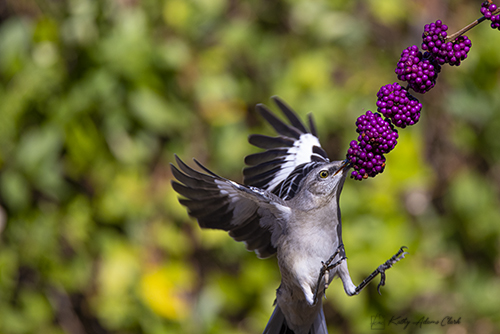
The Animal Eye AF will get confused, though. The camera kept trying to focus on the berries versus the bird.
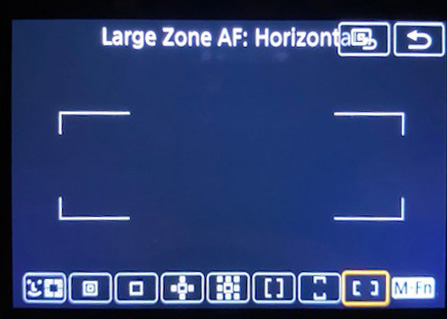
Large Zone AF: Horizontal has been great for flying birds.
The Large Zone AF focused well on this bald eagle overhead.
This lesser black-backed gull was out in the marsh stretching. The Large Zone AF stayed with it as it preened and moved.
Cattle egret feeding on a mouse. Large Zone AF stayed with the aciton.
I switched to Large Zone AF: Horizontal for this flying northern shoveler.
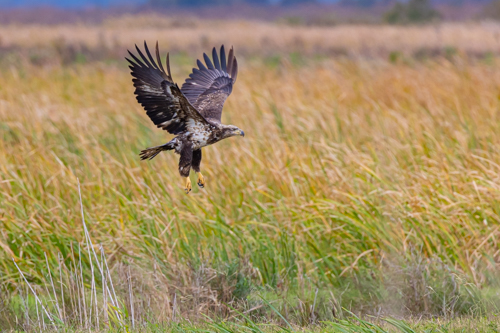
Large Zone AF helped me stay with this immature bald eagle as it lifted off out of the marsh.
I’ve worked with Canon R5 for several months under a variety of different situations. I’m changing Focus Methods now depending on the circumstances. My old skill at moving one focus point around on my DSLR has now morphed into changing my Focus Method.
Approaching a bird with a defined eye in clutter — switch to Animal Eye AF
Approaching a duck that’s about to take off — switch to Large Zone AF
Trying to photograph a small bird in the brush — switch to 1-point AF
Flying hawk overhead — switch to a small cluster
These focus options give us lots more tools in the toolbox. Take some time to practice and develop your skills.
Questions? Feel free to post below. Thanks for reading.
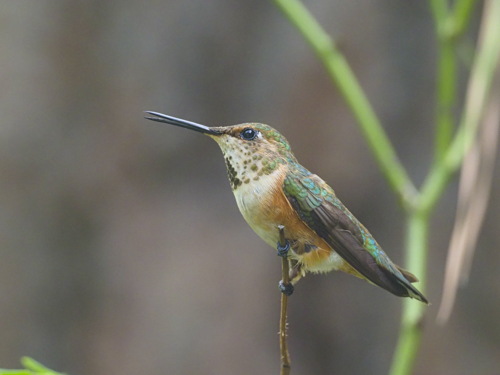
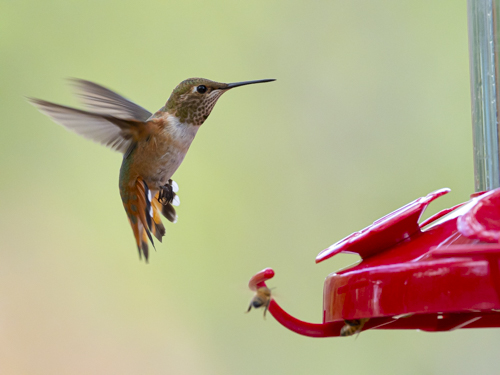
Rufous hummingbird photographed with Olympus EM1 Mark ii with a four-thirds sensor.
A full-frame sensor camera has a sensor that is 35mm on the longest side. A cropped sensor camera (APS-C) has a sensor that is smaller. A four-thirds sensor is even smaller at 17.5mm on the longest side.
Those smaller sensors give us what is called a crop factor. An image on a full-frame camera looks the same as if the image was taken with a film camera. Take the same photo with a APS-C camera and the image would appear to be cropped. Take the same photos with a four-thirds sensor and the image would appear more cropped.
That cropping is 1.5x on a Nikon and 1.6x on a Canon camera. The cropping is 2x on an Olympus or other four-thirds sensor camera.
Using that 2x magnification, a 300mm lens is now a 600mm lens. Add a teleconverter on that 300mm lens and you have a 420mm lens. Put that lens on a four-thirds camera and it is now equal to 840mm on a full-frame sensor camera.
Below are three different cameras all with a 300mm lens with 1.4x extender for 420mm from the same location.
full frame sensor camera
1.6 cropped sensor camera
four-thirds sensor camera
The full frame is photographed with 420mm. The cropped is photographed with the same lens but because the sensor is smaller the lens is equal to a 672mm lens. The four-thirds sensor is magnified even more for a lens equal to an 840mm lens. (As was pointed out in an earlier post, all the camera set-ups weigh roughly 4.9 pounds but the view with the four-thirds is equal to a much heavier camera with lens.)
So the advantage of a four-thirds sensor camera is our subject appears bigger when using a telephoto lens with a lighter camera.
I was curious if the quality would be acceptable since the sensor was smaller.
Above is a photo of a female rufous hummingbird perched outside my kitchen window. This was photographed under horrible conditions. I’m shooting through a dirty window. I’m hand-holding the camera at ISO4000 and the image was shot in jpg versus raw. (I was cooking dinner at the time so give me a break.)
Same image as above and cropped to 100%. Notice the fine details in the feathers. No smooth, blotchy colors but actual fine details.
“Expert” opinion has been that the smaller the sensor the worse the quality. I think the fine engineering put into APS-C cameras like the Canon 7D Mark II and Nikon 500 really put an end to that thinking. My brief tests with the Olympus OM-D EM1 Mark ii shows this four-thirds sensor can stand up with the best.
As usual, give me your thoughts. It’s always fun to read your experiences. Thanks again to Hunt’s Photo and Video and the folks at Olympus for making this test possible.
It’s a great time to be a photographer! Nikon, Canon, Pentax, Olympus, Fuji, and Sony are pushing the engineering envelope. Each company gives us something new to keep ahead of their competition. We benefit, as photographers, with great new gadgets and features.
Problem is, though, there is no camera with every amazing feature. We have to settle on the features that are important to our shooting. My important features are not going to be the same as your important features. We each have to find the machine that works for us.
I’m testing the Olympus OM-D E-M1 ii and OM-D M1X for a month.
Each of these camera bodies has interesting features that I might use in regular shooting.
Here’s my opinion and some test results:
Focus stacking – This is nice! I’ve done focus stacking with software and love the results. Focus stacking in the camera, though, is something I’ve wanted to try for a long time.
Both the OM-D E-M1 ii and OM-D M1X gave amazing results.
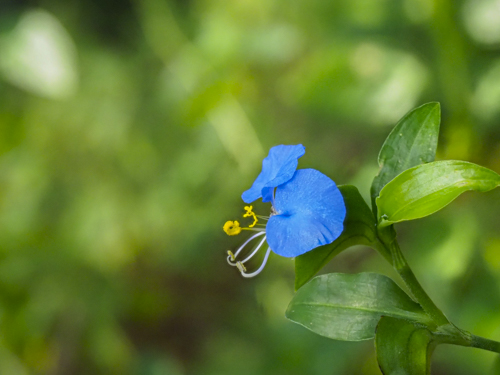
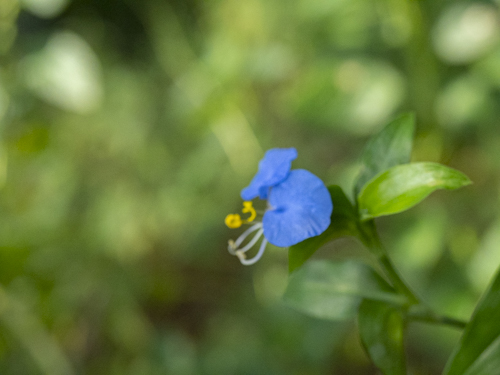
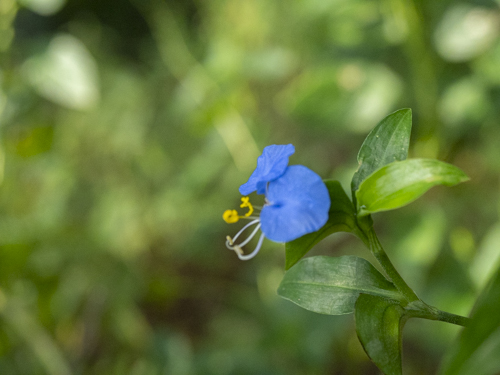
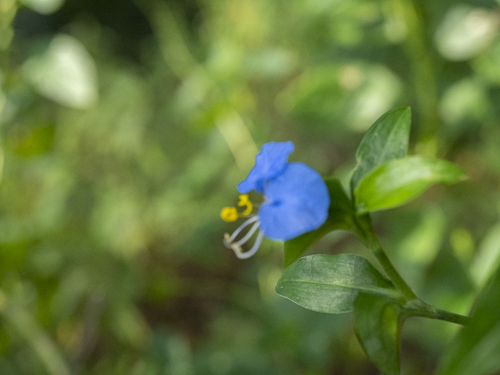
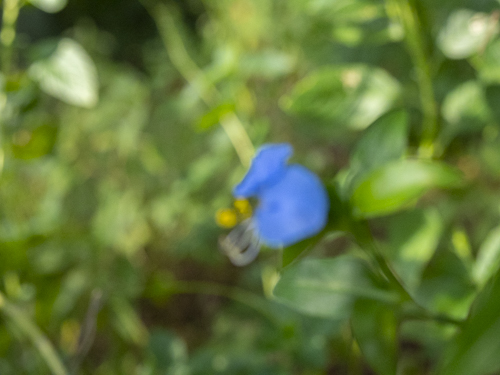
Dayflower focus stacked at f/5
Dayflower not stacked at f/5
Dayflower focus stacked at f/5
Dayflower not stacked at f/5
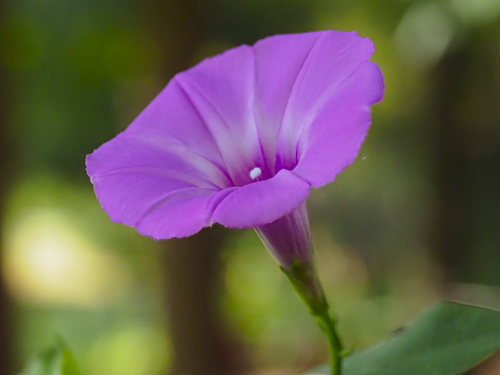
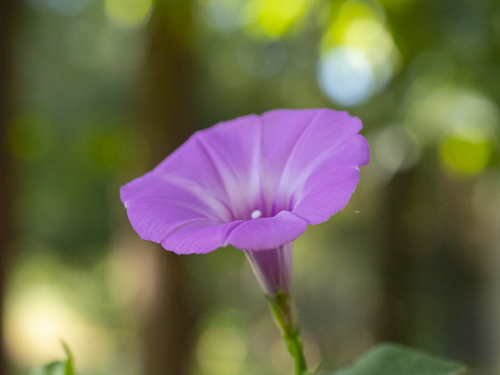
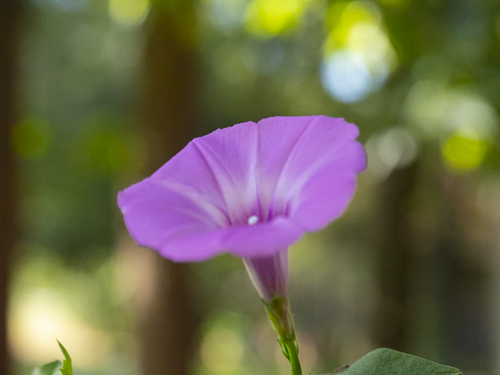
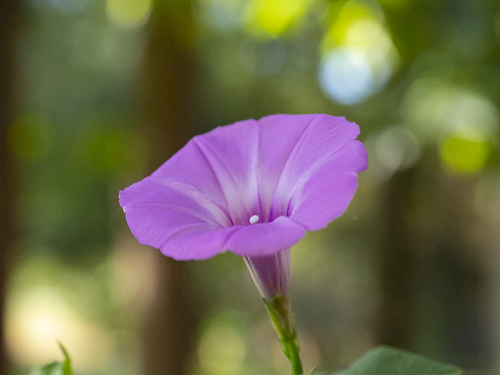
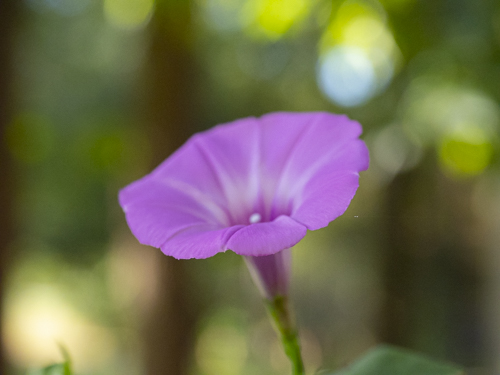
morning glory focus stacked at f/5. Notice the camera has cropped.
morning glory not focus stacked at f/5
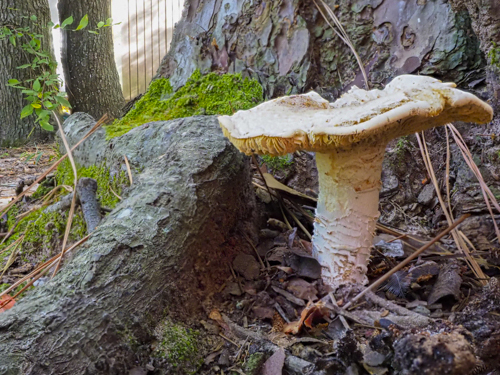
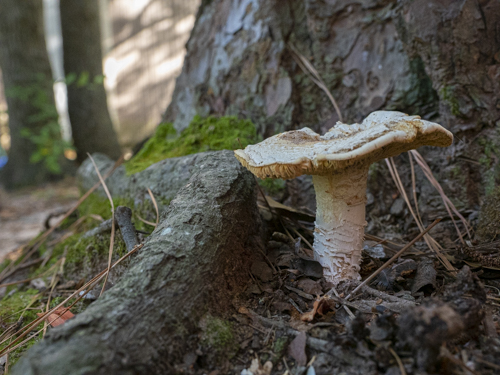
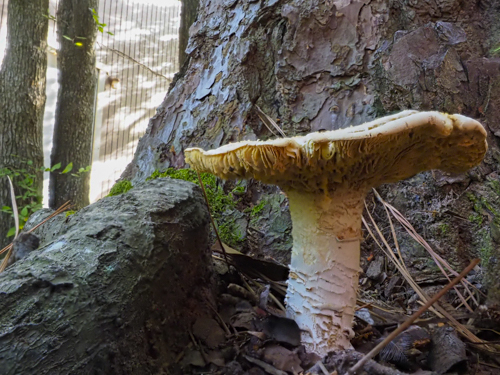
Mushroom focus stacked at f/5. Notice the cropping and detail on the back wall.
Mushroom not stacked at f/5
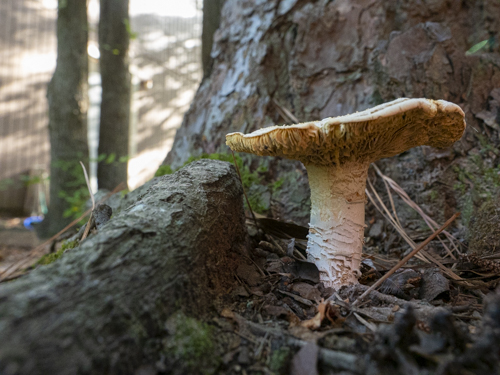
Mushroom focus stacked at f/5. In camera cropping.
Mushroom not stacked at f/5
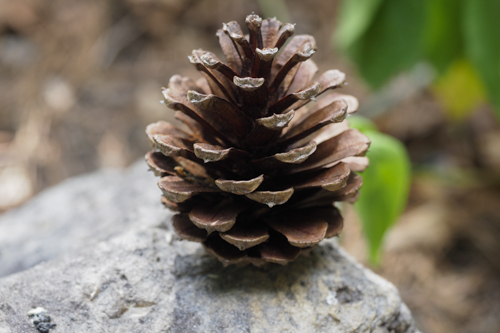
Loblolly pine cone focus stacked at f/4. In camera cropping cut off the top.
Loblolly pine cone not stacked at f/4
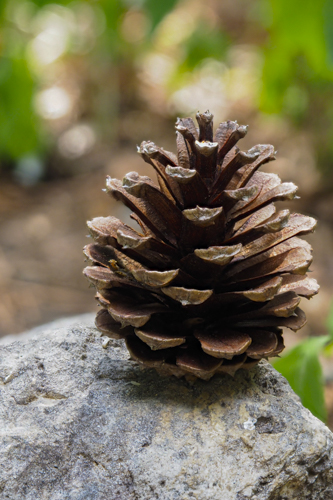
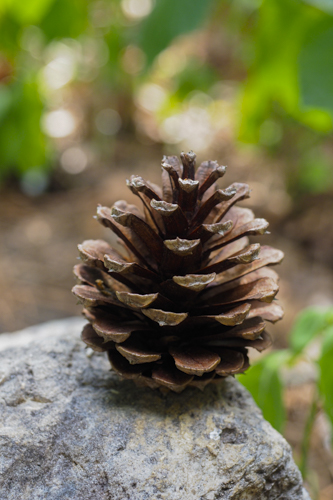
Loblolly pine cone focus stacked at f/4. Cropped in camera.
Loblolly pine cone no stacked at f/4
Below are the individual pieces of the stacked morning glory.
Below are the individual pieces of the stacked dayflower shown above.
Lessons learned when working with both cameras. (1) Be sure to click OK to each option in the set-up process. There are several steps. (2) Confirm you’re in Focus Stacking by looking for the BRKT icon at the top of the view finder. (3) Turn off RAW/Jpg since this causes the camera to work extra and takes longer to process the finished picture. (4) The finished picture is a large Jpg. (5) In-camera focus stacking is lens dependent. Doesn’t work with every lens.
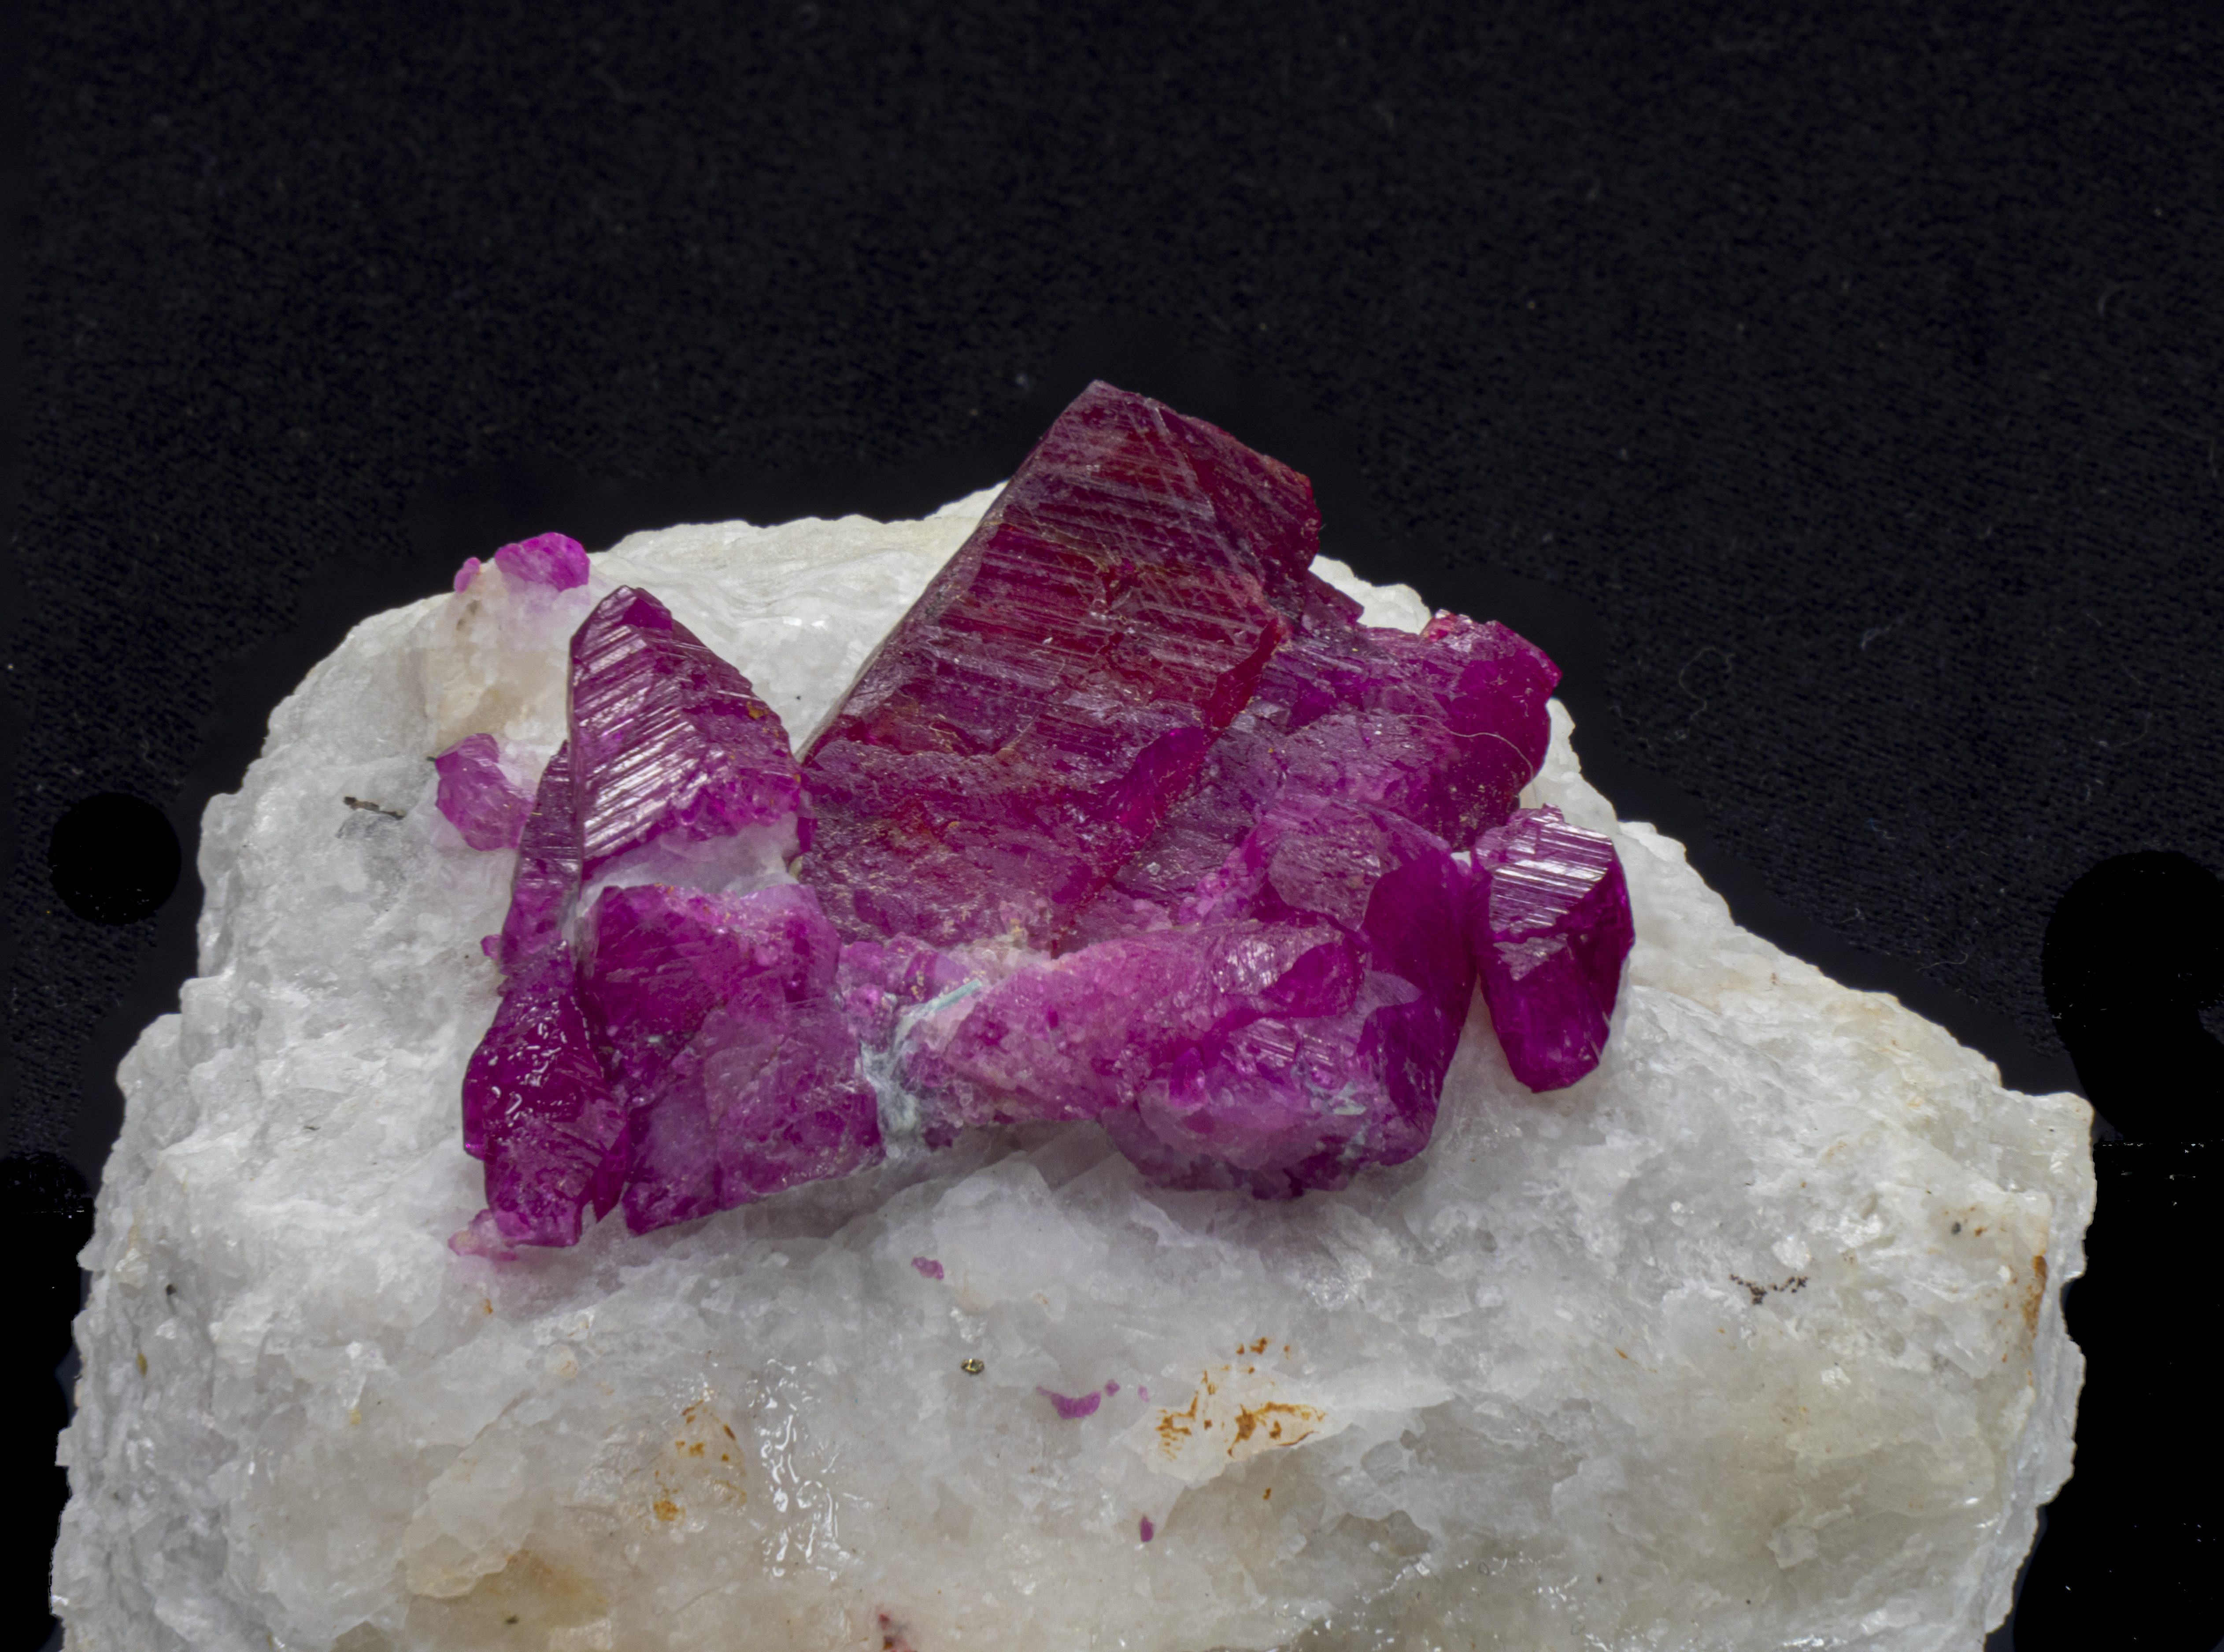
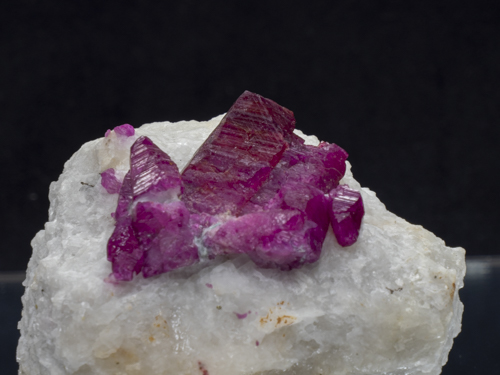
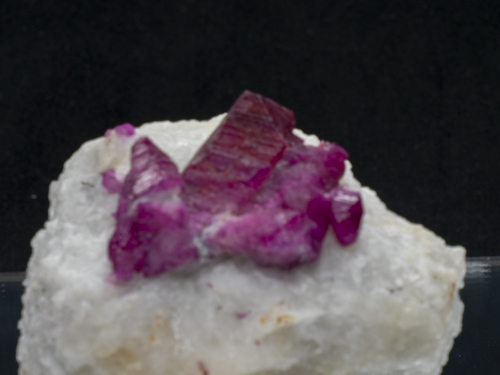
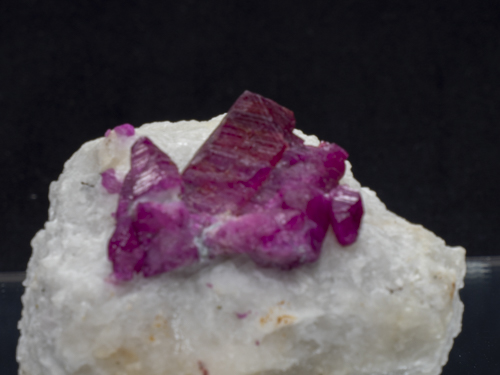
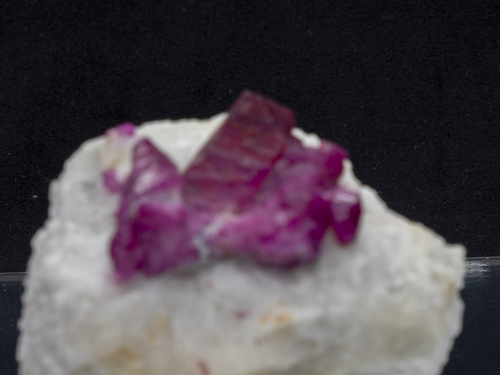
Below is a photo of a gemstone loaned to me by a friend.
This image had to be stacked in Photoshop because I used a lens that was not compatible with in-camera lens stacking.
The individual photos that made up the above image are show below.
There’s a bit to learn with Olympus focus stacking but it’s pretty easy. The camera settings include how many photos to take and focus differential. A large subject like the ruby needs a wider differential.
Silent shooting – This is a nice feature and on the Olympus it’s really silent. I’ve used this at two weddings during the vow exchange. There’s no sound from the camera. Beware though — This is a great way to fire off 50 shots without knowing it. Heck of a time deleting those buggers.
HDR – The cameras do this. In-camera HDR has become standard these days.
Handheld High Res – use f/2.8 to f/8 and fire off 16 shots. Gives tons of DOF. I tried in the office and worked well. I’ll post more results once I get out in a grand landscape. Stay tuned!
Keystone Composition – like using a tilt-shift lens. Adjust the foreground or background to move forward or backward. Straighten the sides from left to right. Worked well in the office but I need to test on a grand landscape. Watch this space.
Thank for reading and subscribe so you’ll see my next post. Feel free to ask questions or make comments below.
A lady in class mentioned that she was taking eight camera batteries on her next vacation. Eight batteries! That’s unheard of. I own two batteries for my Canon 5D Mark IV and one for my Canon 1DX. Why would this lady need eight for one camera?!
I’ve been testing the Olympus OM-D E-Mii and the OM-D E-M1X. Thanks to my testing I understood her statement wasn’t so crazy.
The battery life on these cameras is not great. A battery gets 2-3 hours of life. That’s turning the camera off and on, looking at photos on the back, taking a group of photos, putting the camera down, picking it back up, taking some more photos, setting it down, turning it off, turning it on, taking some photos, reviewing photos, etc. Two or three hours of this type of activity and the battery warning light is flashing.
For comparison, I can use a Canon 5D Mark IV battery all day without worrying. The Canon 1DX battery will last three or four days even with heavy shooting.
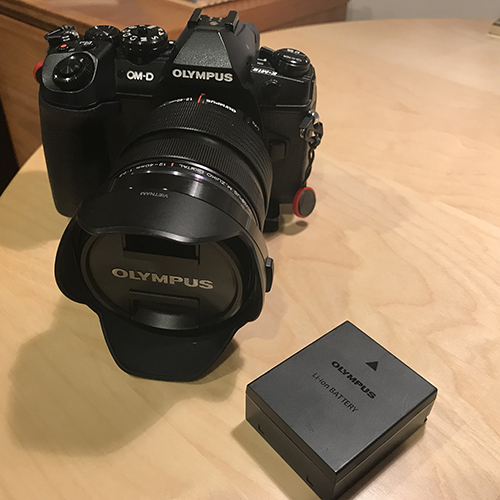
The E-Mii uses one battery. The more powerful E-M1X has a battery holder that uses two batteries. Luckily, both cameras use the same battery. That’s a great move, Olympus!
Each battery charges in a little over an hour. That’s not unusual for a camera battery. I charged three Olympus batteries in an evening with no problem but I was watching the charger and switching the batteries.
In real life, though, I’m dragging in at 10:00pm after a hard day of shooting and everything needs to be charged and ready to go by 5:00am. I’d find it hard to charge three batteries while sleeping.
Luckily, the batteries for these cameras are reasonably priced. A battery is $54 so it’s possible to buy some extras. The battery recharger is $59 so a photographer could have one or two more. There’s an after-market charger that claims to charge two batteries at a time. (I’ll let someone else test that item.)
Yes, there is a power grip for the OM-D E-Mii. That add weight and bulk — a reason many are using for switching to mirrorless.
Thanks to the folks at Olympus, I get to test the Olympus OM-D E-M1 Mark II and OM-D E-M1X.
Both are called “micro four-third” sensor cameras. That means the sensor is 17.4 mm on the long side by 13.0 mm on the short side. Contrast this with a “full sensor camera” that has a sensor that is 35mm on the long side by 24mm on the short side. (Notice the sensor is the same size as a 35mm piece of film.)
The advantage of a “micro four-thirds” sensor is things appear closer.
The Canon Rebel T6i has a “cropped” sensor, or 22.3 mm by 14.9 mm, so the same object appears farther away.
The Canon 5D Mark IV is a “full frame” camera with a sensor 35mm x 24mm. Objects appear much farther away.
I took each photo above from the same place. Each camera had a 300mm lens with a 1.4x tele-extender. That means I was using a 420mm lens for each photo but the subject was more or less magnified based on the sensor size.
The Olympus “four-thirds” sensor would mean a bird would be larger in my photo. The “four-thirds” sensor would mean I might not have to crop as much since the subject would already be bigger in the photo.
Rufous hummingbird with 300mm lens & 1.4x extender
100% magnification of Rufous hummingbird with 300mm lens & 1.4x extender
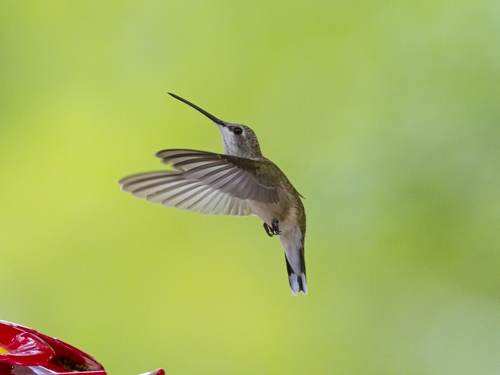
Black-chinned hummingbird with 300mm lens & 1.4x extender.
Once again, thanks to Gary Farber at Hunt’s Photo & Video for making this test possible.
Stay tuned for tomorrow’s post as I continue to explore these cameras.
It’s inevitable that a mirrorless camera is in my future. I shot with Nikon film cameras for 15 years. Then I moved to Canon for digital SLRs and have been happy for 16 years. Will I make a brand shift when I go to mirrorless?
The nice folks at Olympus were kind enough to send me an OM-D E-M1 Mark II to test. (Thanks to Gary Farber at Hunt’s Camera & Video for your help!) This camera retails at $1,699 with a 20.4 megapixel sensor and 15 frames per second shooting. Check, check, and check on price, file size, and shooting speed.
There were some other features that were intriguing. The camera can shoot 60 frames per second is silent mode which would be amazing for birds. It has in-camera focus stacking and in-camera time lapse. Both of these are important to me.
I’ve used the Olympus OM-D E-M1 Mark II for a week and here are my initial impressions. (Check back tomorrow for more.)
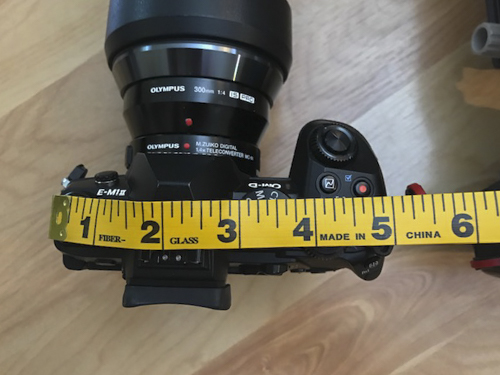
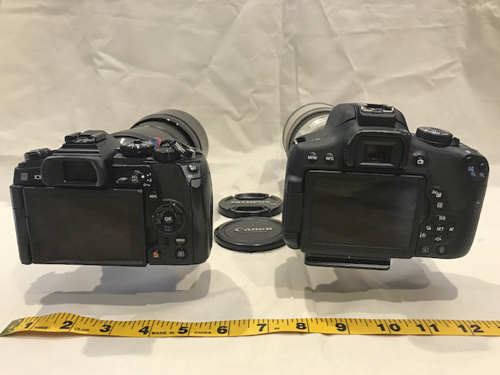
Weight — Let’s get that out of the way first. I thought there would be more difference.
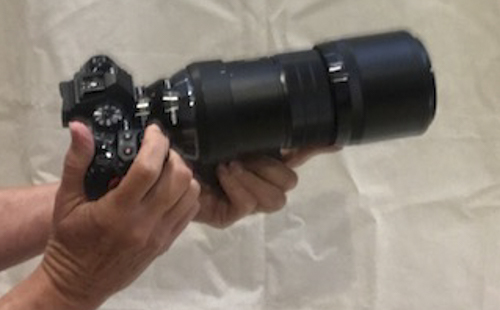
4.9 lbs OM-D E-M1 Mark II with 300mm lens & 1.4x teleconverter
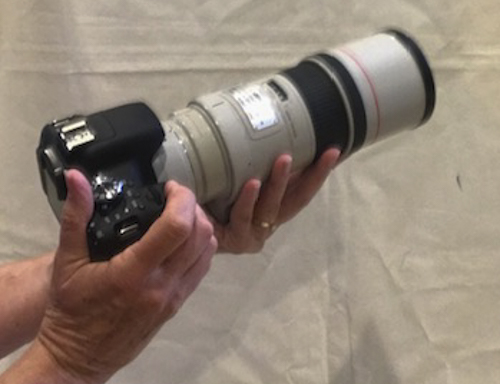
4.9 lbs Canon 5D Mark IV with 300mm lens & 1.4x teleconverter
6-inches wide by 3-inches deep on the Canon 5D Mark IV
5-inches wide by 3.25-inches deep on the Canon Rebel T6i
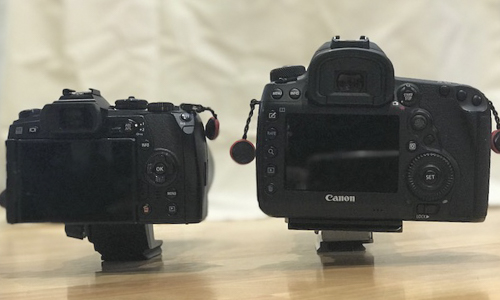
OM-D E-M1
Canon 5D Mark IV
OM-D E-M1 on left and Canon 5D Mark IV on right
OM-D E-M1 on left and Canon Rebel T6i on right
Set-up — I wasn’t looking forward to this step. I’ve taught photography for 25-years and know Canon and Nikon cameras well. The Canon R was intuitive right out of the box. Sony, Olympus, and Fuji tend to put things in different places and call them by different names.
The OM-D E-M1 forced me to go to the user’s manual. I was able to get the camera set to my liking with the help of the manual. Dials and Fn buttons have to do double duty since the camera body is smaller.
Once I got the camera set-up to my liking, the features I needed were easy to reach and adjust. ISO, exposure adjustment, focus points were at my finger tips and I could shoot.
OM-D E-M1 Mark II w/ 300mm lens
Canon 5D Mark IV w/ 300mm lens
Canon Rebel T6i w/300mm lens
But — What about the picture quality? So far, I’m impressed.
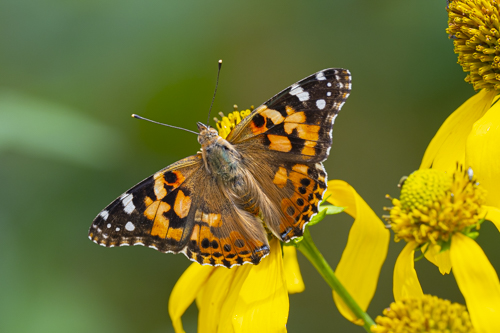
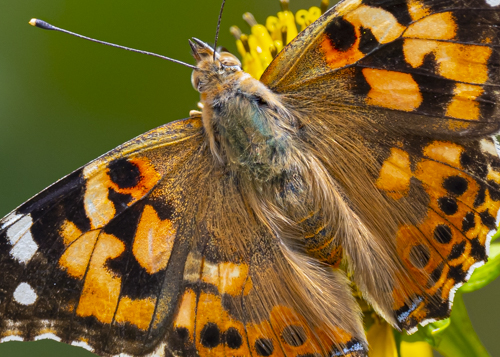
Painted lady with 300mm lens plus 1.4x extender ISO 400
Painted lady blown up to 100%. Notice the body hairs
Rufous hummingbird in flight with 300mm lens plus 1.4x extender ISO 2000
Julia & Eric’s wedding with camera on silent mode 12-200mm lens at ISO 2000
Check back tomorrow for more about this camera and the OM-D M1X. Once again, thanks to Gary Farber at Hunt’s Photo & Video for your help with this loaner.