Extreme Macro Photography

House Fly photographed at 5 times life size with the Lawoa 2.5-5x macro lens.

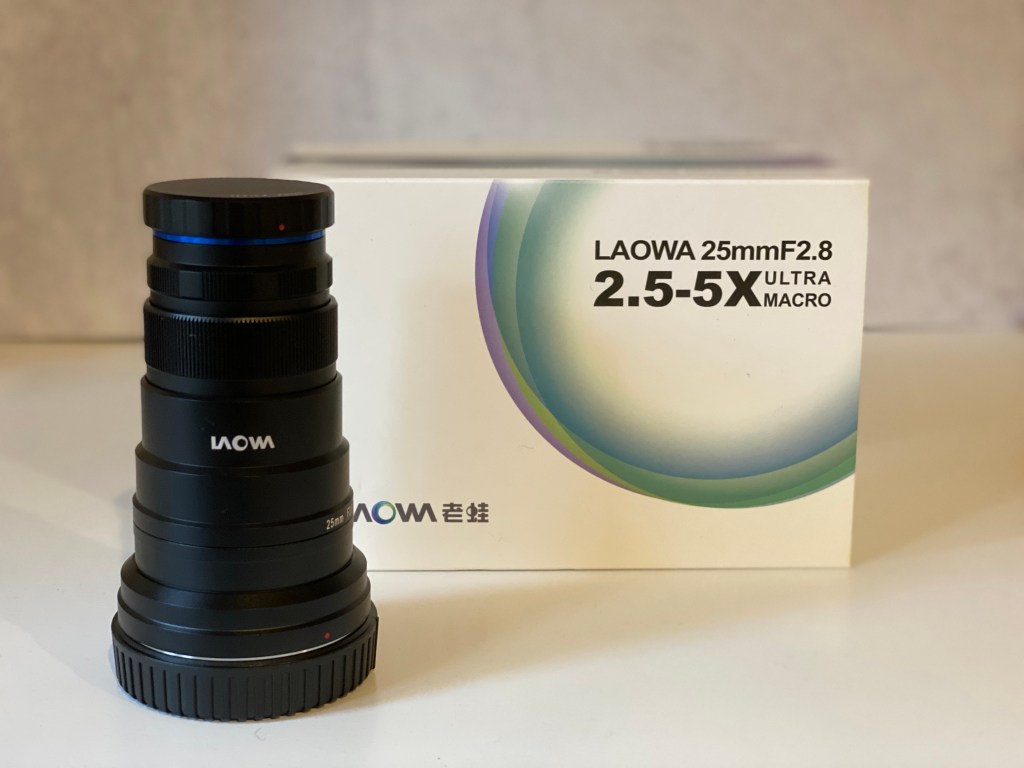
I saw an ad for the Lawoa macro lens that could photograph things up to 5 times life size. The price was only $399 and it came with a mount for my Canon R5 mirrorless camera. In a moment of weakness, I clicked the button and ordered the lens.

I’ve always loved high magnification macro photography but it was expensive. Canon has the MP-E 65mm that photographs 5 times life size but it’s well over $1,000 and I’d need an adapter for my mirrorless.

Here’s a link to my blog article from 2020 about using the Canon MP-E to photograph monarch butterfly eggs.

Laowa 2.5-5x Ultra Macro lens

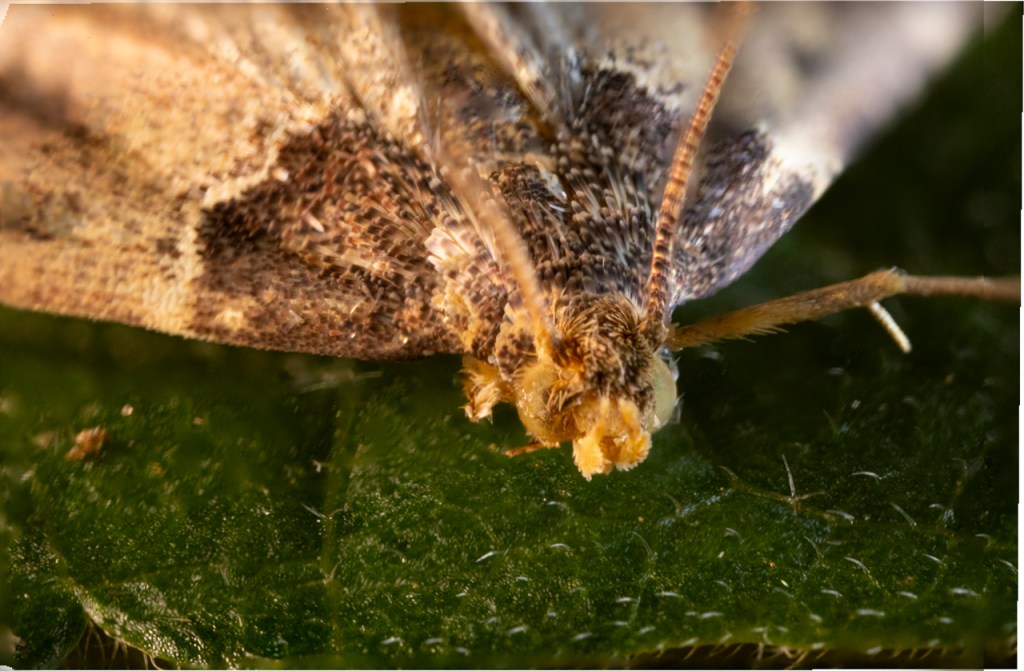
Once the Lawoa lens arrived, I needed to find a subject. I went on a search around the house and found a tiny moth about 1/3 of an inch long. Perfect subject except it didn’t want to be captured or photographed.

No, I am not going to kill a moth so I can photograph it. Nope! That’s not how I live my life.

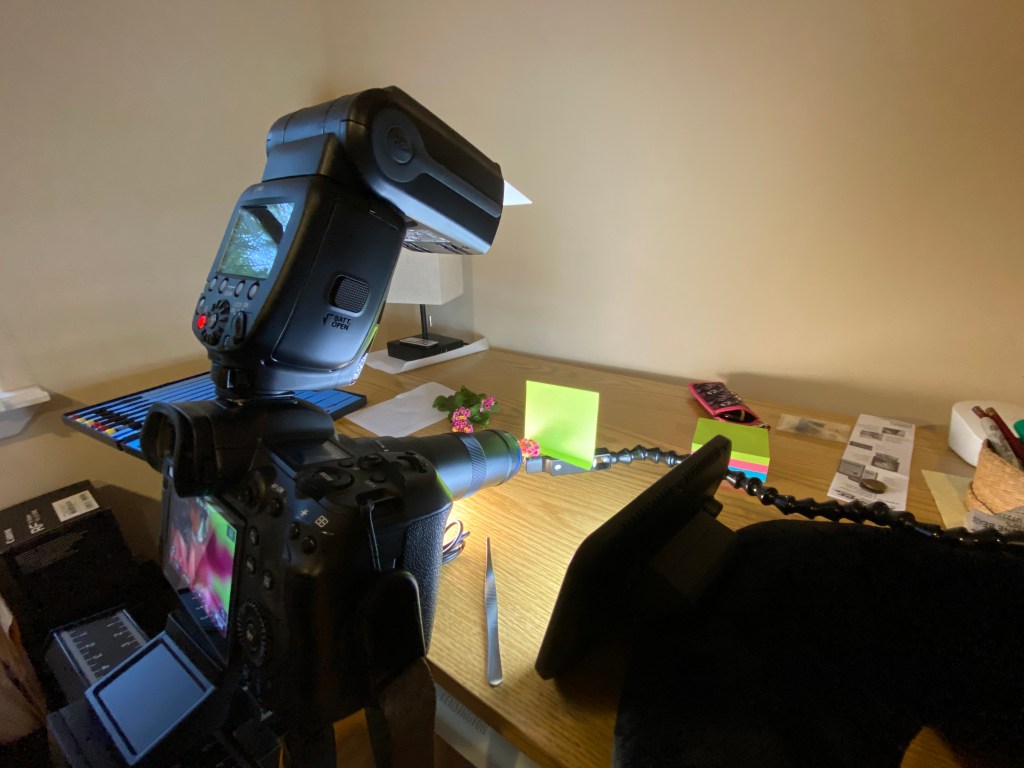
So an hour later, the moth was resting on a leaf under a glass jar in my office. Equipment was assembled for the photo session: Tripod, Neewer Pro 4 Way Focusing Rail Slider, camera, Laowa lens attached, flash, Savage LED light on the right, and Lume Cube LED light on the left. (Scroll down to see a photo of the set-up.)

Moth photographed at 5x life size. Actually 1/3 of an inch long.

My time with the moth was highly frustrating — for it and me. The moth wanted to wander off the leaf. When it settled I would move the leaf and get it back in the frame and focused. This is not easy when the subject is magnified 5 times.

The moth twitched its antenna often. This messed up any hopes of focus stacking.

Eventually, the moth was set free. I left the equipment in place until I found a new subject.

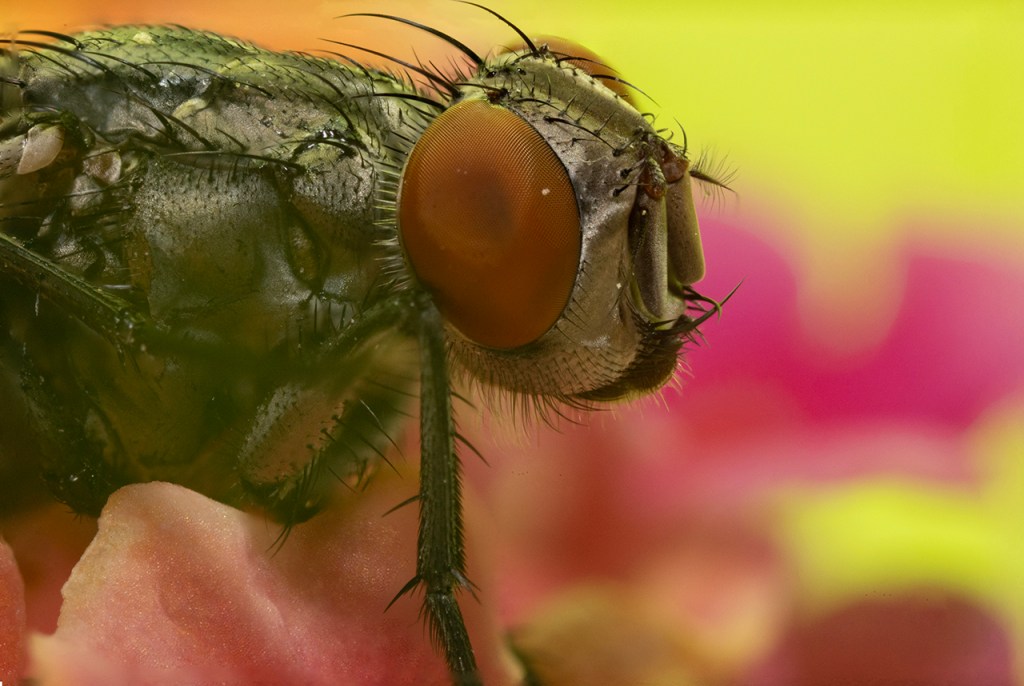
The next day a fly got in the house and needed to be swatted. Turns out the little fellow wasn’t totally dead so I had a moving subject once again. Back to putting my subject on a leaf and waiting for it to calm down.

Lesson learned on the moth was that focus stacking would be necessary to get the photos I wanted. I settled in to take 5 to 10 photos for each focus stack.

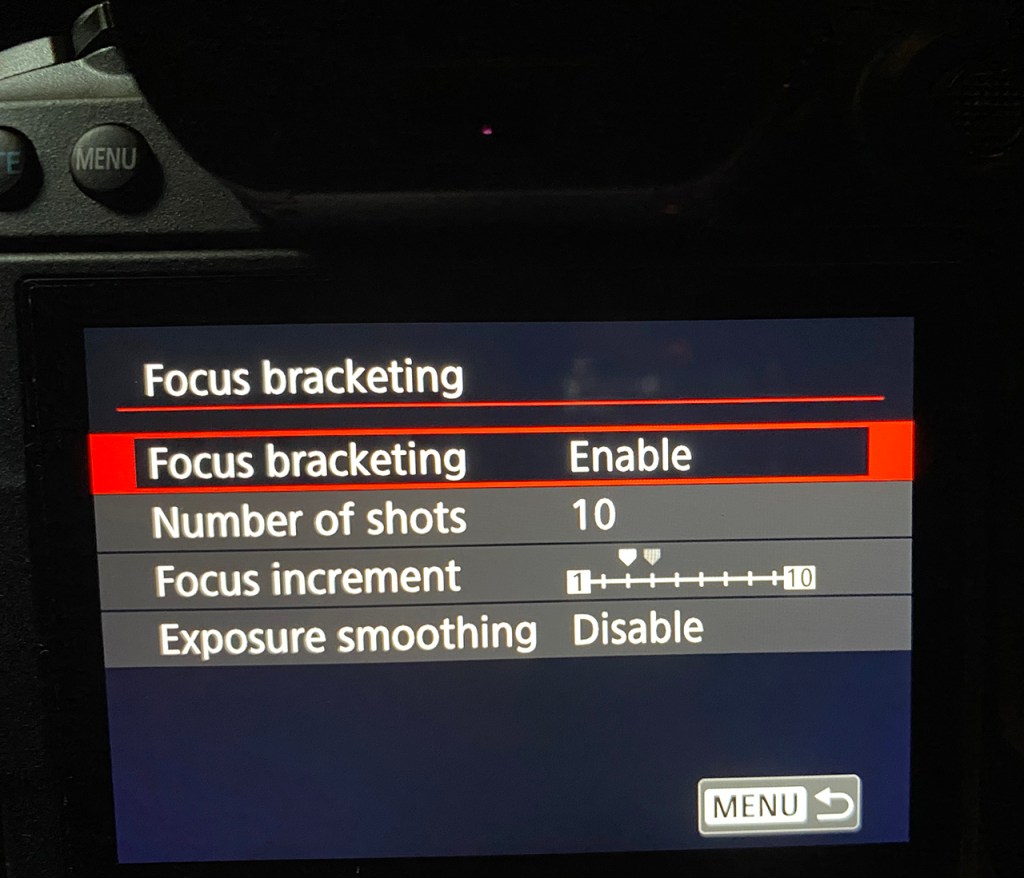
The Laowa is a manual focus lens so there’s no in-camera focus stacking or focus bracketing as Canon calls it. I needed to move the knob on the focus rail to create each set of focus staked images. (Practice this skill ahead of time.)

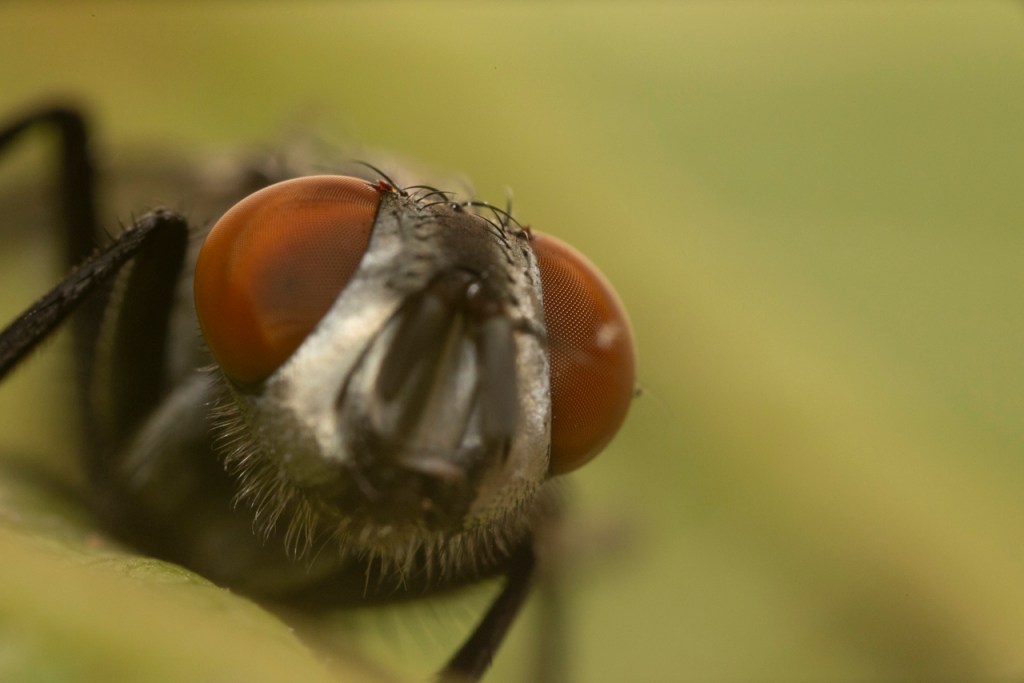
The fly was still alive so the number of images I could get depended on its movements. Sometimes it sat still and other times it wiggled or twitched.

House fly with three photos in the focus stack.

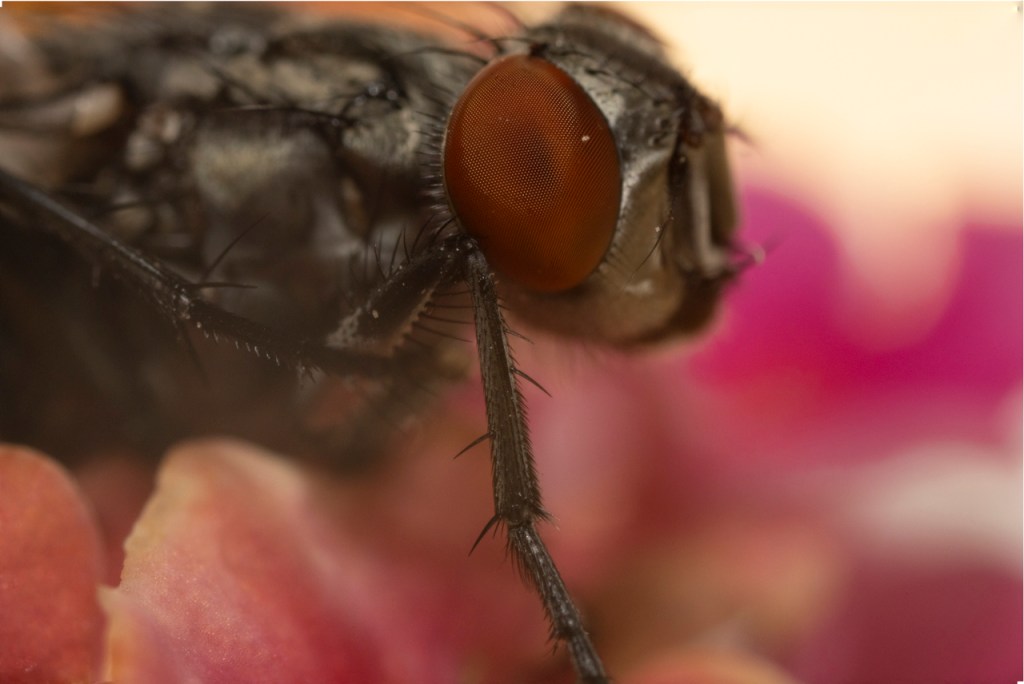
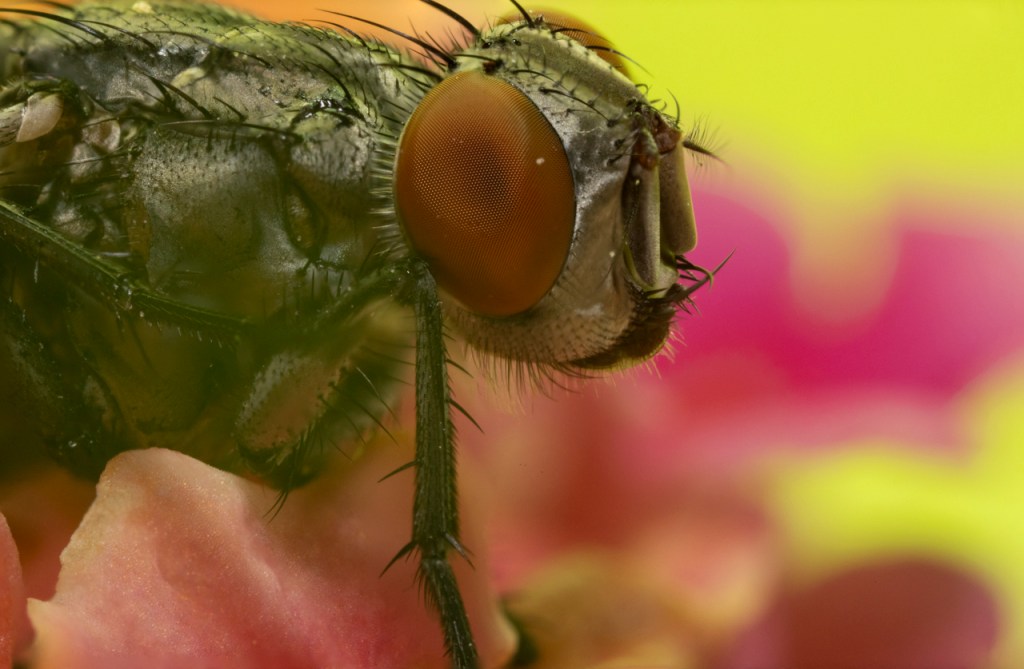
In a series of images, maybe only two or three would work. Below is an example of only two photos.

House fly, using only two photos in the focus stack. Notice that the eye is in focus but the rest of the head is out of focus.
House fly, focus stack using 10 images.
House fly, again, but using only 5 images in this session.
House fly using six photo in this session. The fly was moving so I had to wait for it to be still.

Focus Stacking in Photoshop

My software of choice is Photoshop for focus stacking. Open all the photos into a Layer stack. In Bridge, that’s (1) highlight the photos, (2) click on Tools>Photoshop>Load into Photoshop layers. In Lightroom, (1) select the images, (2) click Photo>Edit in>Open as Layers in Photoshop.

In Photoshop, highlight all the photos in the Layers palette. Edit>Auto Align Layers and wait. Then Edit>Auto Blend Layers and choose Stack from the options. Then wait again for Photoshop to do its work.

Most of the time, Photoshop does a pretty good job. A bit more work might be needed to fix tiny details.

Equipment needed for high magnification photograph: tripod, shutter release, focusing rail, flash, continuous LED light(s), camera and lens. The fly is in the center of the flower.

Thanks for reading. Let me know below if you have any questions.

Canon R5 Mirrorless — Focus Stacking

Here’s another test of the Canon R5’s focus stacking. My more detailed post on Focus Stacking for Focus Bracketing can be found here.

Blend of 10 images merged together in Photoshop to get the entire set of blooms in focus.

Here’s a view of my menu setting for this series of photos.

Canon, Olympus, and other mirrorless systems have focus stacking. Here’s my review of focus stacking using Olympus.

So far, the Canon R5 has impressed me with its focus bracketing. I can’t wait to get out and work with it on different subjects.

Have you worked with Focus Stacking or Focus Bracketing on your camera? Results? I’d love to hear from you.

Canon R5 Mirrorless — Focus Stacking or Bracketing

Photographers have fought against depth-of-field since the beginning. To get more depth of field, we have to use a smaller aperture and that means a slower shutter speed. It’s just the way photography works.

For years, we’ve been able to take photos of a subject, focus in different places, and then blend those photos later to increase our depth-of-field. Then about 10 years ago camera manufacturers started putting focus stacking in the camera. Today, Canon calls it focus bracketing in the Canon R5.

To activate focus bracketing on the R5, go to Shooting Menu 5. The menu then offers options such as how many photos to take and how far to focus into the scene.

A little icon shows on the shooting screen while Focus Bracketing is active. Push the shutter button and the camera rapidly fires a series of photos. It doesn’t blend the photos in camera but provides the RAW files for blending later. I use Photoshop to do my blending. (Instructions are below.)

Notice the tiny imperfections in the photo on the left. Look closely at the tails. See the little blue highlights? That’s where the birds moved their tails. Focus bracketing doesn’t work well on moving subjects.

My instructions for blending a focus bracket (1) Open all the photos in Photoshop in a Layer. In Bridge, highlight the photos then select Tools>Photoshop>Load Files into Photoshop Layers. In Lightroom, highlight the photos then select Photo>Edit In>Open in Layers in Photoshop; (2) Select all the photos once they are in the Layers Pallette; (3) Select Edit>Auto Align; (4) Select Edit>Auto Blend, (5) Select Layer>Flatten.

I suggest you focus a bit closer than needed for your first photo of the series. That way you get some foreground in focus.

Have you tried focus stacking or focus bracketing? Success?

Moving Toward Mirrorless — Camera Features

It’s a great time to be a photographer! Nikon, Canon, Pentax, Olympus, Fuji, and Sony are pushing the engineering envelope. Each company gives us something new to keep ahead of their competition. We benefit, as photographers, with great new gadgets and features.

Problem is, though, there is no camera with every amazing feature. We have to settle on the features that are important to our shooting. My important features are not going to be the same as your important features. We each have to find the machine that works for us.

I’m testing the Olympus OM-D E-M1 ii and OM-D M1X for a month.

Each of these camera bodies has interesting features that I might use in regular shooting.

Here’s my opinion and some test results:

Focus stacking – This is nice! I’ve done focus stacking with software and love the results. Focus stacking in the camera, though, is something I’ve wanted to try for a long time.

Both the OM-D E-M1 ii and OM-D M1X gave amazing results.

Below are the individual pieces of the stacked morning glory.

Below are the individual pieces of the stacked dayflower shown above.

Lessons learned when working with both cameras. (1) Be sure to click OK to each option in the set-up process. There are several steps. (2) Confirm you’re in Focus Stacking by looking for the BRKT icon at the top of the view finder. (3) Turn off RAW/Jpg since this causes the camera to work extra and takes longer to process the finished picture. (4) The finished picture is a large Jpg. (5) In-camera focus stacking is lens dependent. Doesn’t work with every lens.

Below is a photo of a gemstone loaned to me by a friend.

This image had to be stacked in Photoshop because I used a lens that was not compatible with in-camera lens stacking.

The individual photos that made up the above image are show below.

There’s a bit to learn with Olympus focus stacking but it’s pretty easy. The camera settings include how many photos to take and focus differential. A large subject like the ruby needs a wider differential.

Silent shooting – This is a nice feature and on the Olympus it’s really silent.  I’ve used this at two weddings during the vow exchange. There’s no sound from the camera. Beware though — This is a great way to fire off 50 shots without knowing it.  Heck of a time deleting those buggers.

HDR – The cameras do this. In-camera HDR has become standard these days.

Handheld High Res – use f/2.8 to f/8 and fire off 16 shots.  Gives tons of DOF.  I tried in the office and worked well.  I’ll post more results once I get out in a grand landscape. Stay tuned!

Keystone Composition – like using a tilt-shift lens.  Adjust the foreground or background to move forward or backward.  Straighten the sides from left to right.  Worked well in the office but I need to test on a grand landscape. Watch this space.

Thank for reading and subscribe so you’ll see my next post. Feel free to ask questions or make comments below.

My thanks once again to the folks at Olympus and Hunt’s Photo & Video for letting me borrow this equipment.

%d bloggers like this: