Solar Eclipse — Time to Get Ready

We get two opportunities soon to photograph a solar eclipse in the US. October 14, 2023 we have an annular eclipse and April 8, 2024 we have a total eclipse of the sun.

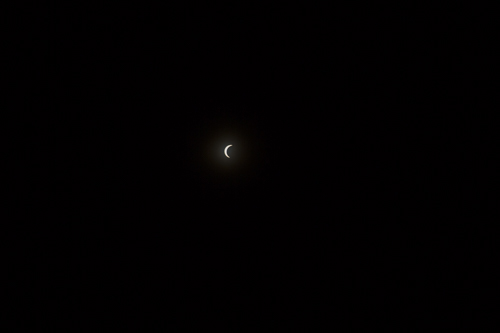
In the October 14th annular eclipse, the moon will partially block the sun. There will be an orange ring around the sun.

In the April 8th total eclipse, the moon will completely block the sun. The sun will go dark and then we get a tiny flare of light (Baily’s beads) as the moon moves to reveal the sun again.

You’ll need a couple of things to photography both events.

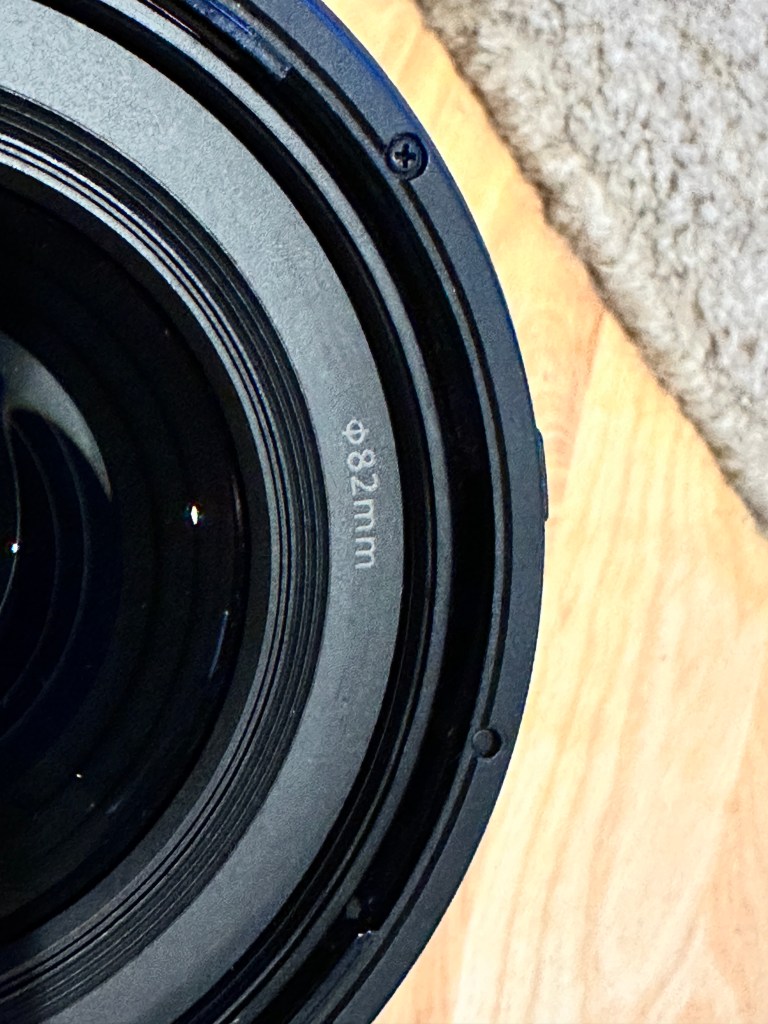
Now is the time to order your 16-stop solar filter! Don’t wait until the day before. Here’s a link to the filters offered by B&H Photo.

Solar eclipse without a 16-stop solar filter. Just doesn’t work!

Be sure to order the filter that fits the front of your lens.

This lens takes a 82mm filter

You’ll also need a sturdy tripod. Order that today, too, if you need it.

You’ll need a shutter release. My favorite is the Vello RC-C2II ShutterBoss II. Buy the one for your camera. Buy the one with the cord and not the cordless.

Magnification — Here’s a blog post I wrote regarding lens choice. There’s a place for your telephoto zoom and a place for your wide angle lens.

Planning — Here’s a blog post I wrote about planning a couple of years ago.

I’ve photographed three eclipses and here’s what I’ve learned along the way.

Planning

  • Planning is essential.  Have all the equipment assembled and ready to go an hour before the eclipse begins.
  • Focus on infinity and turn off auto focus.
  • Turn off image stabilization.
  • Manual exposure at f/4.5 during totality works well.  When the sun is brighter f/16 for f/22 helps to cut some the light.
  • Spot meter with a focus point on the sun to get an accurate reading. Mirrorless camera users have the advantage of seeing the exact exposure so use that to your advantage.
  • Exposure compensation was needed when the sun was big.
  • Shutter speed easily stays between 1/5000 and 1/8000 for most of the eclipse.
  • A sturdy tripod is a must. Don’t kick it.
  • A programmable shutter release like the Vello Shutterboss II is perfect.
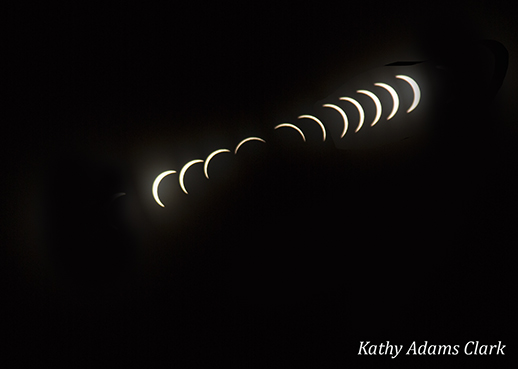
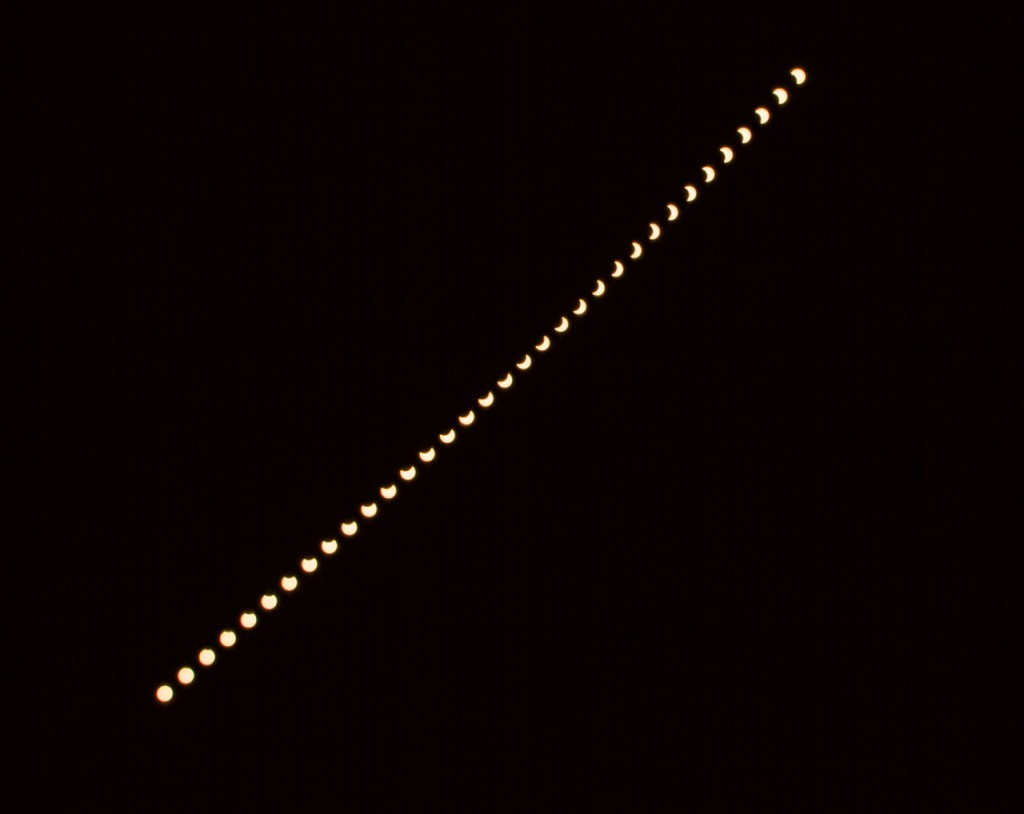
  • For a time lapse, set the Vello Shutterboss to take photos at precise intervals. A time lapse is best with a wide angle lens. That means a second camera, second solar filter, second tripod, and second Vello Shutterboss.

Prepare for Controtions

My first eclipse started early in the morning and it was in a northern latitude. The sun rose above the horizon and was still low when the eclipse ended.

My last eclipse ended after 1:00pm so the sun was high in the sky.

At my location on October 14th, annularity begins at 11:51 when the sun is 46.1 degrees above the horizon. When annularity ends at 11:54, the sun will be 46.5 degrees in the sky.

Camera aiming nearly directly overhead during solar eclipse

So what that means is my camera/lens combination has to be able to angle up at 46 degrees while it’s on the tripod. During a previous eclipse, the ball head got in the way, the camera body was hitting the ball head, etc. Make sure things work for your location.

Maybe a Gimbal head would work better than a ball head? Test your set-up ahead of time.

Details from NASA

Here’s a website from NASA that might help you prepare.

The sun is going to move in the frame a lot. The earth is rotating so the sun will move out of the frame. Be prepared to reposition the camera when needed.
Plan ahead if you want to stack image later.

Enjoy!! Prepare ahead of time and don’t get stressed.

Post any questions below. I’ll gladly help.

Photographing the Eclipse: How Much Magnification?

How much magnification do you need to photograph the solar eclipse on August 21, 2017?

Sun KAC6341
This is the sun photographed at 10:21 in the morning, Canon 100-400mm lens with a 1.4x extender.  10-stop ND filter.  4000 shutter speed, f/4, ISO 100.

It’s going to take some magnification to photograph a big sun.

Solar eclipse, March 20, 2015, over Iceland.
This is the solar eclipse photographed in Iceland in 2015.  The lens is a 16-35mm on a full-frame camera.  I used the same 10-stop ND filter as above.  Notice how small the sun is in this frame.  (BTW, this is the same as using a 10-22mm lens on a cropped-sensor camera.)

Solar eclipse, March 20, 2015, over Iceland.
Solar eclipse in Iceland 2015 photographed with a 24-105mm lens on a full-frame camera.  I used the same 10-stop ND filter as above.  (This would be the same as using a 15-85mm lens on a cropped sensor camera.)

Solar Eclipse Sequence KAC1blog
This is a stack of images shot during the Iceland 2015 eclipse with the 24-105mm lens.  Then the entire image was cropped.  I used the 24-105mm because I wanted to build this stack later on in Photoshop.

Think about what lens you are going to use to photograph the solar eclipse on August 21, 2017.  The event will happen fast so the time to get prepared is now.

Photographing the Solar Eclipse

Solar Eclipse Sequence KAC1blog
Total eclipse of the sun photographed in Iceland in 2015.  This sequence was photographed with a 300mm lens fitted with a 10-stop ND filter to block the light to the sun.

August 21, 2017 there will be a total eclipse of the sun.  Most people in the United States will be able to see this event.  Several million lucky people will be right under the eclipse as it moves diagonally across the US from Oregon to Georgia.

Photographing the eclipse is going to be a challenge.  I photographed the total eclipse of the sun that passed over Iceland in March 2015.  Now is a good chance to share my experience from that event.

Repost from March 2015:

A few years ago I read a news report about a total eclipse of the sun on March 20, 2015.  I’ve never had the opportunity to photograph solar eclipse.  Why not build a photo tour around the eclipse?

Strabo Photo Tour Collection has coordinated my photo tours for years so I contacted the owner, Jacque Steedle, with the idea.  The eclipse would go pretty close to Iceland, one of Strabo’s premiere destinations.  We both liked the idea and thought it would be fun to also offer opportunities to photograph the northern lights as well as landscapes of Iceland in the winter.

Our group arrived in Iceland on March 13th and the weather leading up to March 20th was been horrible.  Our flight to Iceland was cancelled due to high winds.  Then we had rain, sleet, snow, and more high winds.  Clouds covered the skies most of the time.

On the evening of March 19th we had clear skies for a bit.  We briefly saw the aurora borealis but then the clouds moved back in.  The weather forecast for the morning looked good as we headed off to bed.

March 20th dawned clear, crisp, and cold.  There was not a cloud in the sky when I opened the curtains in my hotel room.  The wind was still.  Could the photo gods really have given us such a treasure?

The group ate breakfast and then we grouped together to review all our camera settings.  Einar Matthiasson, our guide in Iceland, agreed with me that we stay on the hotel grounds and shoot from the small hill in a hay field.  That hill gave us a view of Hekla, one of the most famous volcanoes in Iceland.

Einar had researched the angle of the eclipse and placed two large sticks on the ground in front of our group.  Those of us shooting time lapse with wide-angle lenses used the sticks to make sure we had the entire arch of the sun in our frames.

At around 8:30 a.m. it was time to get into position.  We put our eclipse glasses and started photographing.

Details and Equipment:

  • Planning is essential.  We had all the equipment assembled and ready to go an hour before the eclipse began.
  • Focus on infinity and turn off auto focus.
  • Turn off image stabilization.
  • Manual exposure at f/4.5 during totality worked well.  When the sun was brighter f/16 helped cut some the light.
  • Spot meter with a focus point on the sun gave an accurate reading most of the time.
  • Shutter speed stayed between 1/5000 and 1/8000 for most of the eclipse.
  • Exposure compensation was needed when the sun was big.
  • A sturdy tripod is a must.
  • A programmable shutter release like the Vello Shutterboss II or the Canon TC80N3 was perfect for the time lapse.

Lessons Learning the Hard Way:

  • Buy a 10-stop ND filter for all the cameras.  I didn’t have one for my small camera shooting the time lapse or for my telephoto lens.  (Stupid me!!)   I had to hold the 10-stop ND in front of my telephoto lens for most of the shoot.
  • Don’t kick the tripod if you’re planning to layer a sequence of images.
  • Use a programmable shutter release to get a precise sequence of images.  Shooting here and there is okay but the precision of a regular interval is better.
  • The sun is big in the frame if you use a telephoto lens.  The sun is small in the frame if you use a wide-angle lens.
  • Two heads are better than one.  Have a buddy who knows what they are doing.  Work as a team.  Temporary moments of insanity are possible during the eclipse.

Solar Eclipse Sequence KAC2blog
Total eclipse of the sun photographed in Iceland in 2015.  This sequence was photographed with a 300mm lens and 10-stop ND filter to block the light to the sun.


Here’s a time lapse of the eclipse.  I did not use a 10-stop ND filter on this camera so the sun is not totally in darkness.  This is a good example of what you will see with your “eclipse” glasses on.

Totality, by the way, is when the airplane circles the sun.  Yes, an airplane full of people circled around the sun at totality so they were in all our photos.