My photography students and photo friends frequently ask me how to resize a photograph. It’s super easy in Lightroom or Adobe Camera Raw.
Why would you need to resize a photograph?
- A teacher like me asks that you submit homework at a particular size and ppi. (PPI is pixels per inch).
- A photo contest needs the images to be a particular size.
- Your camera clubs asks that photo be submitted a certain size.
- You want to email a photo to someone but the photo out of the camera is too big.
- You’re building a Powerpoint or Keynote program and a lot of images to be resized so they project well.
- Photos on your website need to be a particular size.
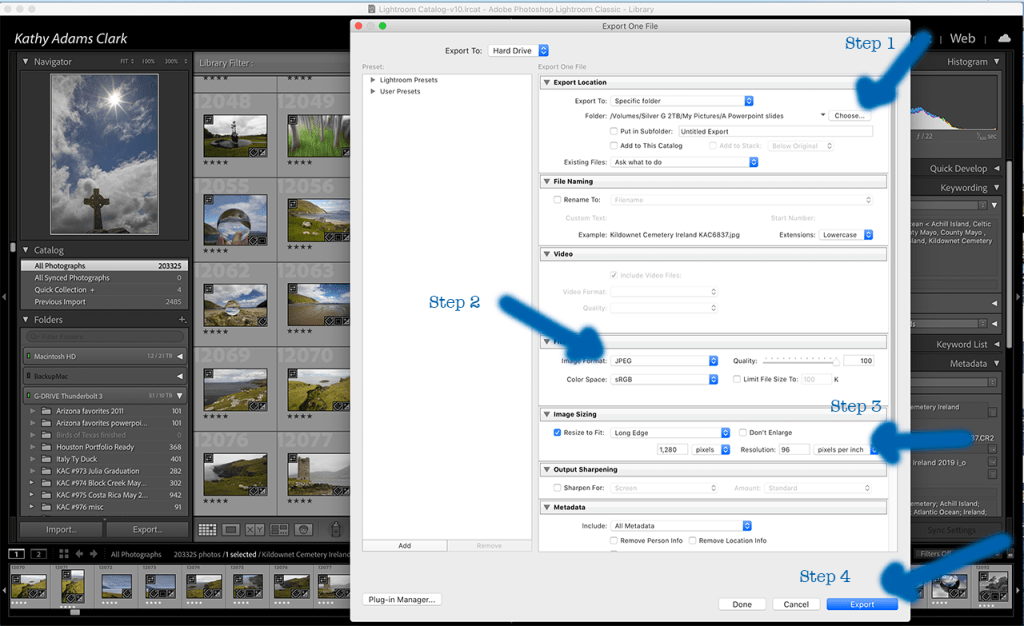
From Lightroom Library, right click on the image or images, and select Export.
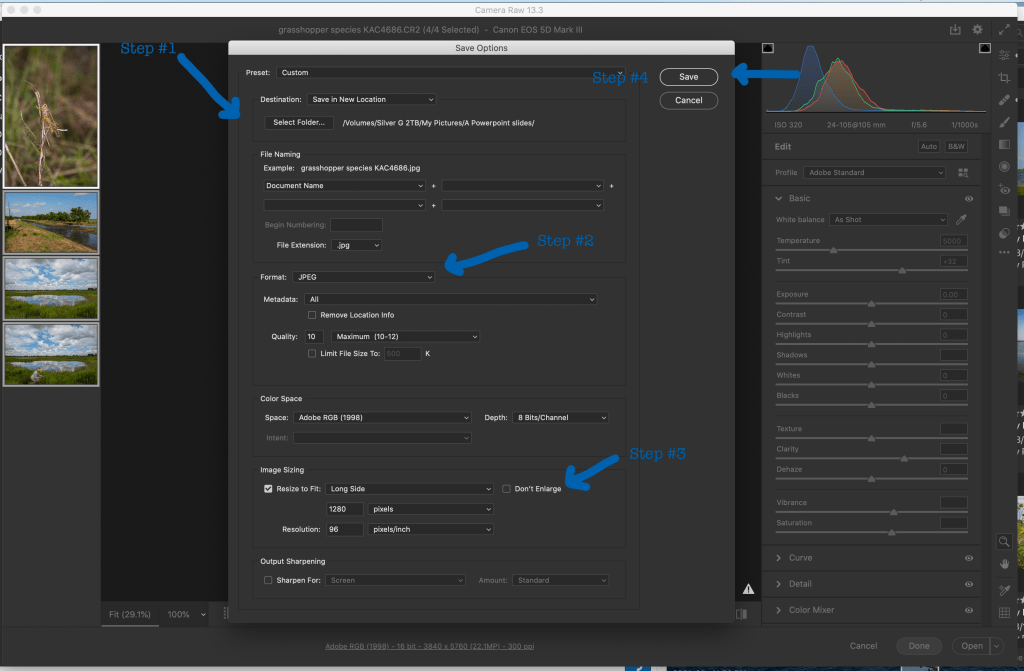
In Bridge, select the photo or photos to export (or save), right-click to open in Adobe Camera Raw. Once in Adobe Camera Raw, select the image(s) and select the tiny “save” icon. You’ll see that when you hover your mouse over one photo.
What size photo do you need?
- Powerpoint or Keynote images look best when resized to 1280 pixels on the longest side at 96 pixels/inch resolution in jpg
- Facebook same
- Email same
- Instagram likes 500 pixels square at 96 pixels/inch in jpg
- Printing? Use the sizes recommended by your printer or printing company. You might need a tiff so do some research.
- Webpage photos vary but jpgs at 800 pixels on the longest side at 96 pixels/inch show well and don’t take too long to load
Short lesson that I hope answers some of your questions. Comments welcome below.
