I’m having fun exploring Macphun’s Intensify. This is a plug-in that works with Photoshop or Lightroom
Watch what happens to this image that I took in Venice two years ago.
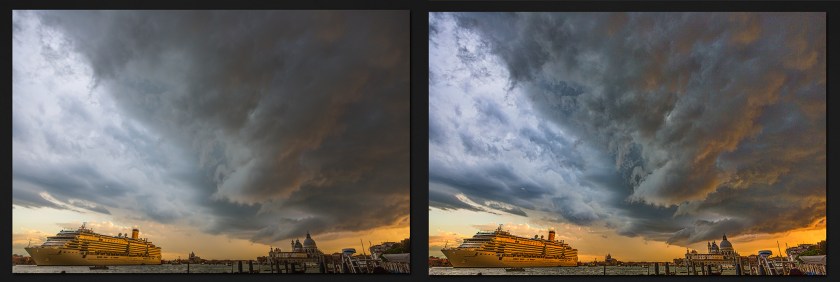
This is my photo of a magnificent storm over Venice. I’ve processed the image in Adobe Camera Raw and then opened it into Photoshop.
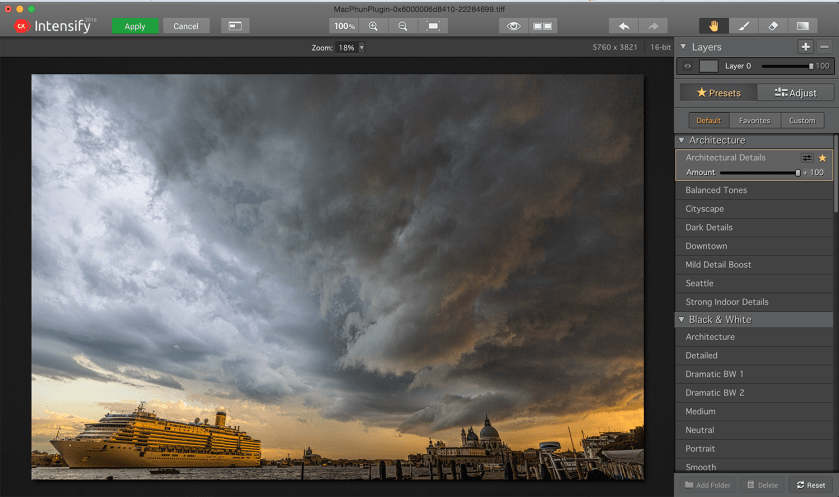
With the image open in Photoshop, I click Filters and open Macphun Intensify. A screen capture is above.
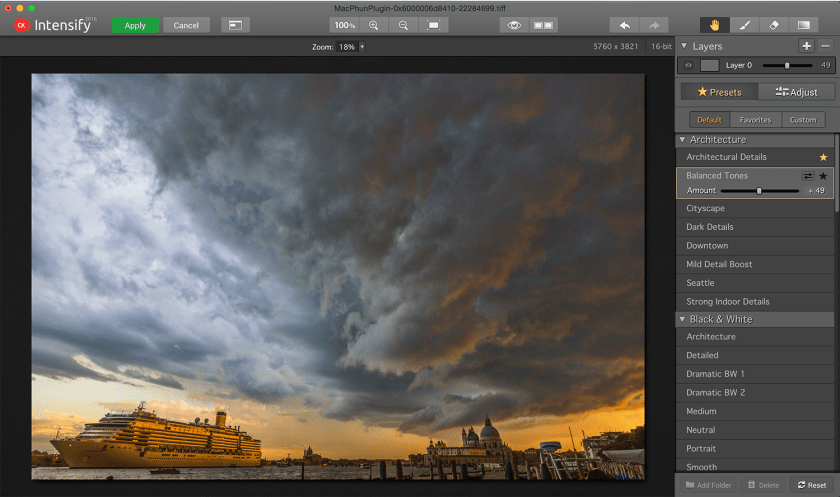
The first slider I selected was Architectural Details. Notice the details in the clouds. The second slider that I used was the Balanced Tool slider. Notice how this slider brings out the gold on the edge of the clouds on the right side. It was too much at 100% so I moved the slider to 49%.Then I selected the Strong Indoor Details slider. The change is pretty subtle but there’s a bit more detail in the buildings.Here’s the before and after. Macphun Intensify is pretty amazing.
Professional photographer leading workshops and tours. I use Canon cameras but I'm familiar with all the other brands. Love photography birds and nature. Love talking about photography and gear.
View all posts by kathyadamsclark
2 thoughts on “Macphun Intensify”
Amazing! Thanks for sharing! Is this an expensive plug-in? Or maybe free?


Amazing! Thanks for sharing! Is this an expensive plug-in? Or maybe free?
LikeLike