A friend emailed: Hi Kathy. I have a question and I can’t find an answer on the Internet. I am looking at a lens with a fixed aperture of f4. What I’m wondering is how do you get more depth of field with a fixed aperture? People are singing praise for this lens and report it is on their camera all the time. But I’m wondering how it would do for landscape where you would want everything in focus. Or if you were focusing on a closer object and had mountains in the background. Any thoughts? Thanks
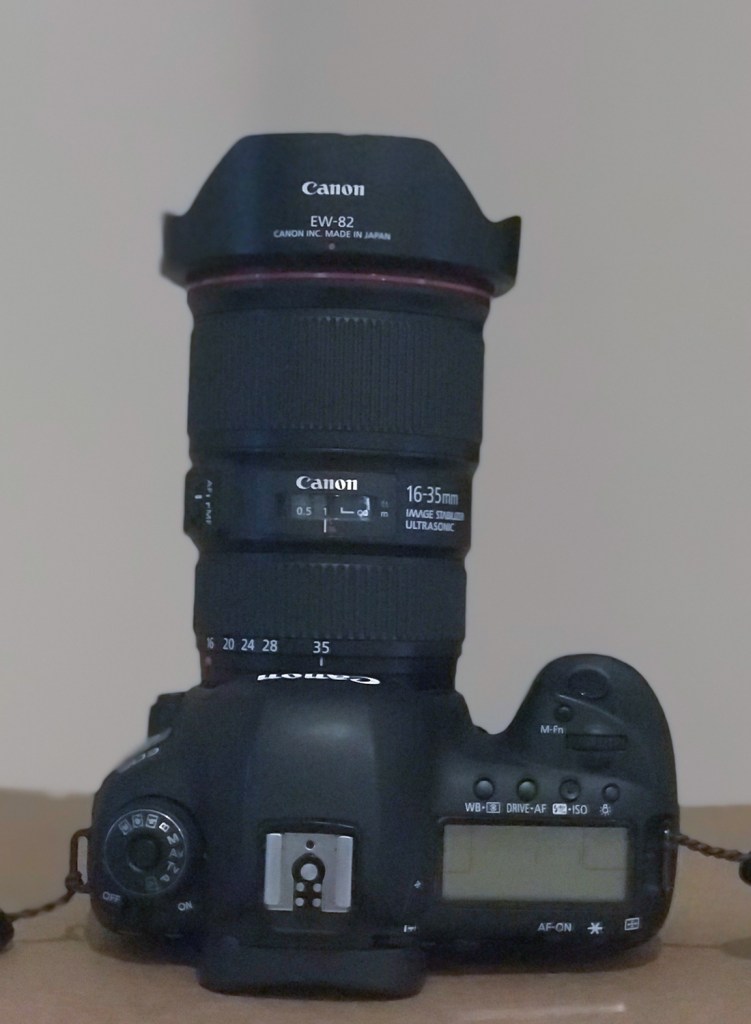
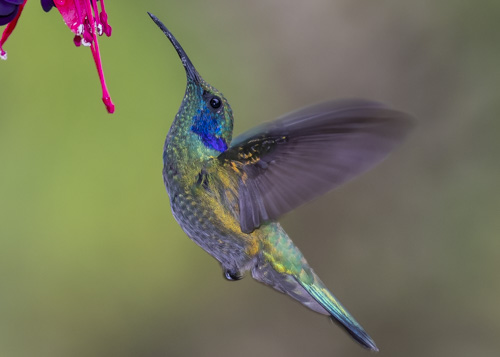
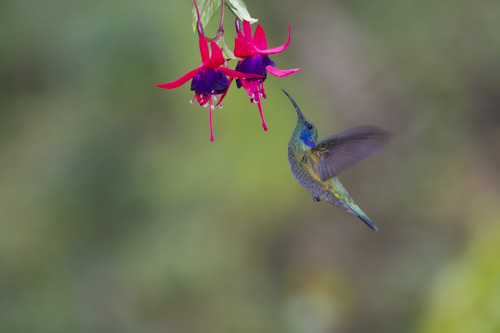
The Canon 16-35mm f/4 lens has f/stops from f/4 to f/22
My Answer: A fixed f/4 lens might have an aperture range from f/4 to f/22. You’d use the f/4 to blur backgrounds and the f/22 for landscapes. The lens has lots of f/stops and not just one.
A “fixed” lens doesn’t change the f/stop as you zoom the lens. In the Canon 16-35mm lens, zoom back to 16mm and you can use f/4. Zoom out to 35mm and you can still use f/4.
A “variable f/stop lens” would change the f/stop as you
zoom. In the Canon 18-55mm lens, zoom
back to 18mm and you can use f/3.5. Zoom
out to 55mm and you can only go to f/5.6.
The f/3.5 is no longer available.
Traditionally, “fixed” f/stop lenses give crisper and
clearer photos. Fixed f/stop lenses are
usually more expensive and better made.
I think that’s the reason they give a better photo.
The photography world is awash with presets. Companies like Luminar and Nik offer great presets. I’m a big fan and use presets from both companies.
Yet, I think photographers need to learn how to use presets.
Just because you can use a preset, doesn’t mean you should use a preset. We used to say the same about the saturation slider, by the way. Just because the slider goes all the way to the right, doesn’t mean you should move it all the way to the right.
What’s a preset? Presets are “pre-made” formulas for processing an image. The various sliders in a software are “pre-set” to give a specific look. Presets are a bit like using the Auto mode on your camera. Auto mode is okay but it’s better when you really learn how to use the camera.
I’ve used presets for years to process HDR image. It was simple to scroll through the presets in Photomatix back in the old days to get the HDR look I wanted. Critics were screaming “HDR looks so fake!” because photographers were overdoing the presets in Photomatix.
HDR looked great, though, if the processing was in moderation. A photo editor once asked me to send “more of those dreamy-looking photos” for a project. Those “dreamy photos” were HDR images with moderate processing.
Today we have presets from big companies, small companies, and individuals. A photographer recently told me that he only uses Pentax presets because that’s how Pentax files are designed to be processed. Turns out someone has made presets and is marketing them to Pentax users.
I recently watched a photographer accept gushing praise for an image that I know was processed with a preset. The processing wasn’t that great. To the uneducated eye, though, the photographer appeared to be on location at the exact right magical moment when the light was perfect. Nope! The magic came from a preset.
Photos entered in a recent contest were passed over by the judges because the presets were so exaggerated. These were possible winning images but the processing was too much. The photographer needs to learn where, when, and how to use presets.
I’m not suggesting that presets go away. I’m suggesting photographers learn how to process. We should understand what’s going on with the software and use it when and where it’s needed. Exaggerate all you want but tone it down when it’s appropriate.
Below I’ll show you my photos that are reasonably processed and then exaggerated with presets.
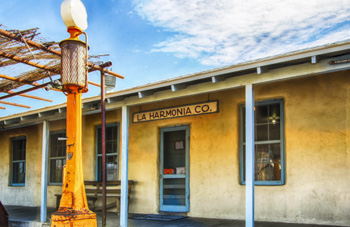
La Harmonia Store, Big Bend National Park, processed with presets in Nik HDR Efex
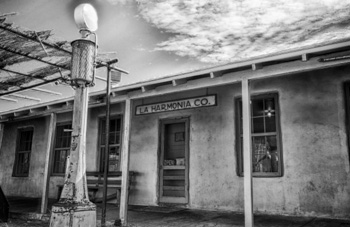
La Harmonia Store, Big Bend National Park, processed with another preset in Nik HDR Efex
La Harmonia Store, Big Bend National Park, processed with a different preset in Nik HDR Efex
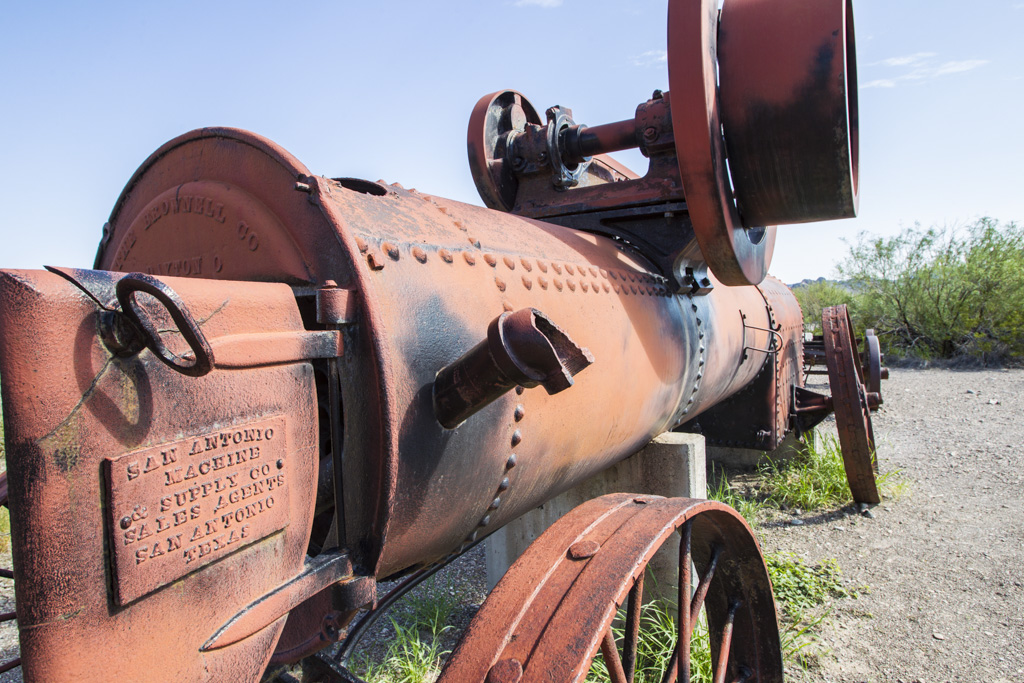
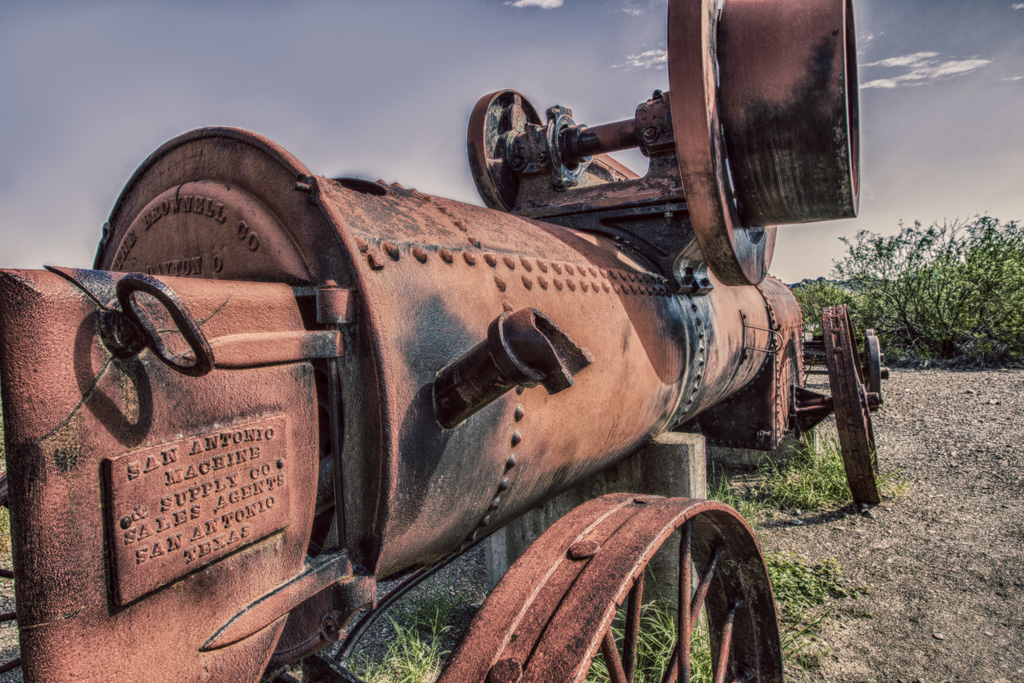
Old equipment in Big Bend National Park simply processed in Adobe Camera Raw
Old equipment in Big Bend National Park processed in Nik HDR Efex
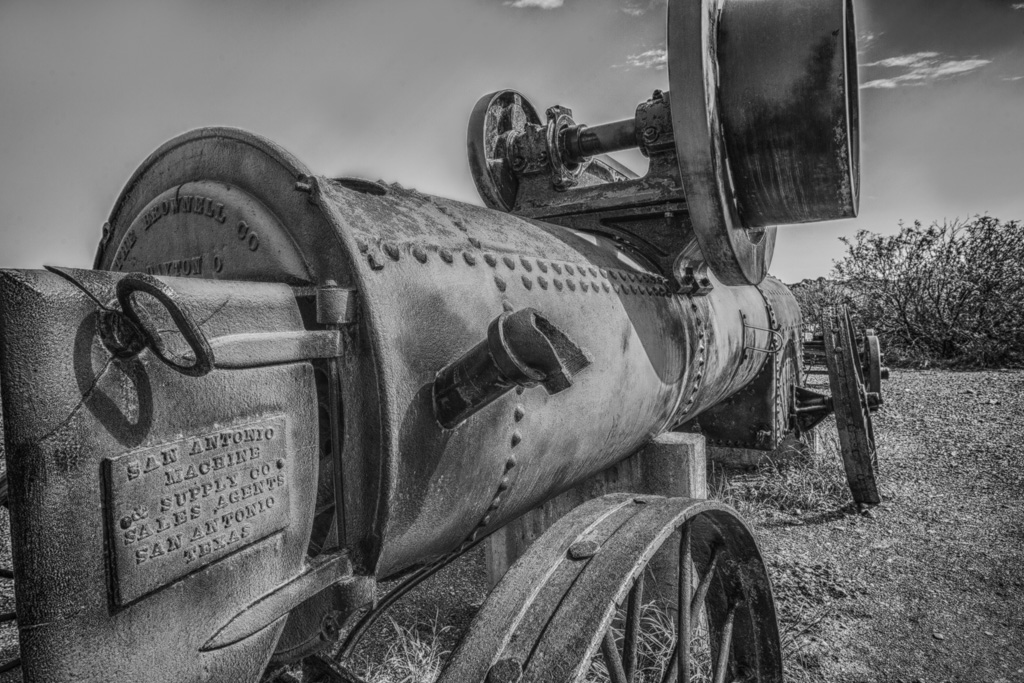
Old equipment in Big Bend National Park processed in Nik Silver Efex
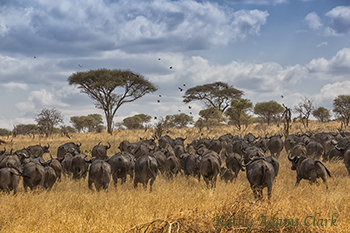
Cape Buffalo, Tanzania, processed with Nik Color Efex Detail Extractor to bring out the clouds
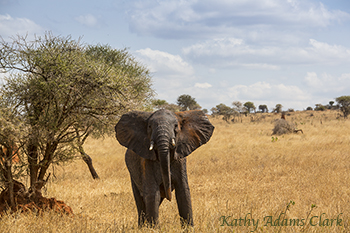
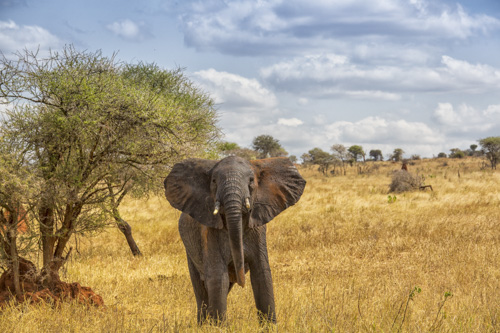
African elephant, Tanzania, processed with Adobe Camera Raw.
African elephant, Tanzania, processed with Nik Color Efex Detail Extractor to bring out the clouds
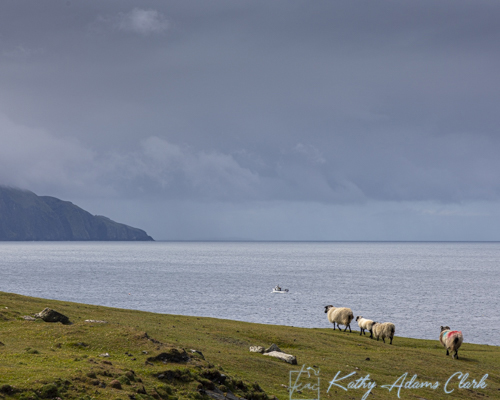
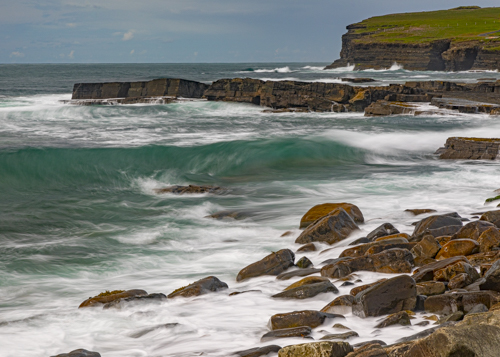
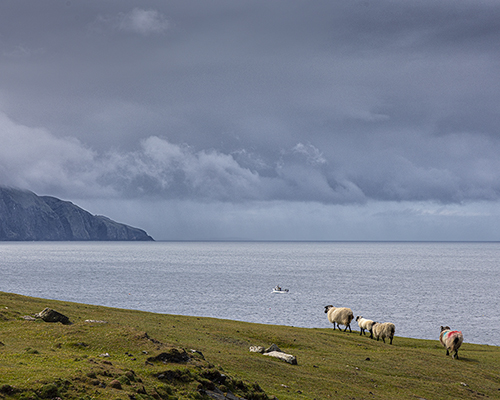
Achill Island, Ireland, processed with Nik Color Efex Detail Extractor to bring out the clouds
Achill Island, Ireland, processed with Adobe Camera Raw.
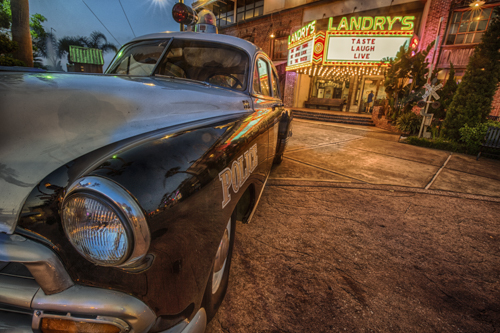
1952 Chevy at Kemah Boardwalk processed with Nik HDR Efex
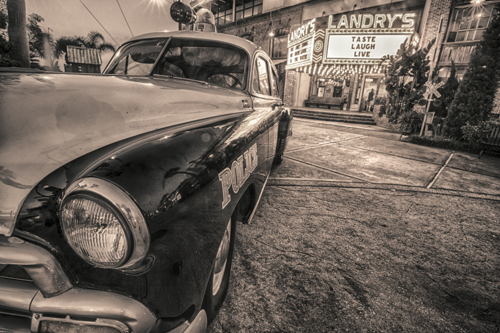
1952 Chevy at Kemah Boardwalk processed with Nik Silver Efex
Yes, I use presets to enhance my creativity. I use presets sometimes to show me the potential of an image. Presets can support our creative vision as well as ruin it.
Below are some images that I processed with presets — and was thankful for the power of presets.
Great companies like Luminar and Nik make presets. Photographers should learn where, when, and how to use use them.
In May of this year, Adobe gave us the Texture slider. You can find this in Adobe’s Lightroom Classic or Adobe Camera Raw.
The Texture slider enhances or reduces texture in a photo. Texture would be bird feathers, animal fur, tree bark, alligator skin, stucco, etc. The Texture slider does not enhance details in our nice blurry backgrounds. The Texture slider is a game changer on certain photos.
I’ve been a real champion of the Clarity slider since that tool was introduced by Adobe. Almost all my processing began with Clarity slider to 20, Vibrance to 20, and Saturation to 20. “Go to CVS first” was the line we used in class.
The Clarity slider, though, worked on details and textures throughout the image. Minor details in the blurry background were often enhanced.
Texture slider only works on textures. It’s a pretty smart tool that can really bring out key details in our photos.
The Texture slider is also available under the Adjustment Brush tool. This allows us to enhance or reduce the texture in one area of a photo.
Pretty neat tool. Give it a try. I’m sure you will like it and find many uses for the Texture slider.
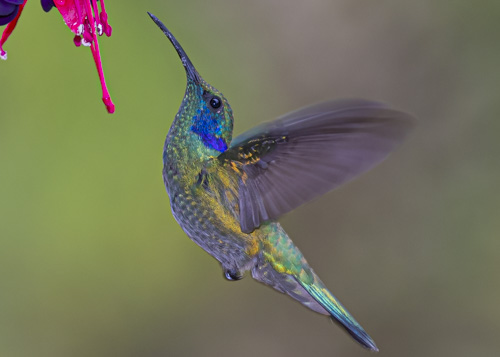
Green violetear or Lesser violetear with the Texture slider blown up to 100%Same photo as above with the Clarity slider blown up to 100%. Notice how the background at top right has more detail. Not as soft as the image processed with the Texture slider. Same as above with no Clarify or Texture slider. Nice soft background thanks to a shallow f/stop. We don’t want to mess with that background during processing.
Texture on the left image. Clarity on the right image.
My friends at Hunt’s Photo & Video are offering these equipment specials:
Dear Photo Friends, Ah, Spring is in the air. Time to get out and start shooting! Following are our specials for April 2019:
We received a limited quantity of Nikon Refurbished bodies and lenses. They carry a 90 Day Nikon Warranty, but I have longer warranties and Damage Protection available. Call me now at 781-462-2383: D7500 Body $799.99D850 Body $2,599AF-S 24-70mm f/2.8E ED VR $1,899 D750 Body $1,149 AF-S 24-70mm f/2.8G ED $1,399AF-S 200-500mm f/5.6E ED VR $1,149Coolpix P900 $499.99Coolpix P1000 $849.99AF-S 85mm f/1.4G $1,449.99AF-S 24-120mm f/4 ED VR $599.99
If you’ve thought about getting into mirrorless here’s a great opportunity:Olympus E-M1 II with 12-40mm f/2 PRO lens $1,998.98 (reg. $2,699.98) Lens Specials. Call me for pricing, 781-462-2383:Olympus 7-14mm f/2.8 PRO (MFT) Olympus 40-150mm f/2.8 PRO (MFT)Panasonic Leica 100-400mm f/4-6.3 (MFT)Sigma Contemporary 150-600mm f/5-6.3 (Canon or Nikon) Sigma Contemporary 100-400mm f/5-6.3 (Canon or Nikon) $669 with FREE UV filter Preorder now, due in April:Nikon Z 14-30mm f/4 S $1,299.95Nikon Z 24-70mm f/2.8 S $2,299.96 (about 1/3 lighter then current DSLR model!) The following are rumors, not official announcements. Send me your phone number if you want to be notified if and when any are announced:Olympus 150-400mm f/4.5Canon RF 15-35mm f/2.8L ISCanon RF 70-200mm f/2.8L ISNikon Z 50mm f/1.2 SNikon Z 14-24mm f/2.8 SNikon Z 70-200mm f/2.8 S
Used Lenses (subject to prior sale)Nikon 200-400mm f/4 VR II $3,299Nikon 80-400mm f/4.5-5.6G ED $1,499Nikon 300mm f/4D $749Sigma 50mm f/1.4 Art (for Nikon) $669Canon 500mm f/4L IS $3,399Canon 70-200mm f/2.8L (non IS) $849Canon 70-200mm f/4L (non IS) $499Canon 90mm f/2.8 TS-E $779Canon 45mm f/2.8 TS-E $999Zeiss Milvus 85mm f/1.4 (for Canon) $1,299Sigma 20mm f/1.4 Art (for Canon) $649
...and something else you may want to know about: Canon has continued their printer rebate program. Now through April 30, 2019 or until supplies run out, we are offering the Canon Pixma PRO 10 printer at $379.99 before rebate (Canon sells it on their website for $699.99). If you purchase the printer plus a package of 13x19x50 sheets of Canon Semi-Gloss or Luster paper, $50, Canon will send you a $250 mail in rebate! This is a pigment based printer and is always reviewed very well. Your final cost is $129.99 plus the $50 paper package after mail in rebate! And don’t forget to ask me about special pricing on Monitor Calibration from Data Color and Xrite, a crucial part of the printing process! Hunt’s is also offering an incredible special on the Canon Image PROGRAF Pro-1000 17″ Printer. Purchase the printer for $1,299.99, and receive an assortment worth $499.96 of 17×22″ and 13×19″ Canon paper! You then mail in for your $300 rebate. Your final cost is $999.99 for the printer with $499.96 worth of FREE paper. Supplies definitely limited on this one. Call me now to reserve yours. Rebate runs through April 30, 2019!
In order to take advantage of these specials please call, Alan Samiljan, at 781-462-2383 to place your order and reference this email. As always, UPS Ground shipping is FREE in the Lower 48. My regular hours are 8:30-5:00pm eastern, Monday, Tuesday, Thursday & Friday.
A friend wrote: My “new” 1 Tb laptop I bought for doing PS Raw is almost out of memory. I realize the new full crop files are much larger than the crop frame 70D images but I think the real problem is redundant storage of images. Windows 10 automatically dumps them into their “My Pictures” & I’ve been saving the jpg’s in another pictures file. Should I buy a storage so I can free up some memory by moving my PS Raw &/or jpg files out of the C drive on my laptop?
My Answer: I’m only using an external hard drive for my photos and processing. I have a Western Digital My Passport with 2 or 3TB of storage. I put all my photos on that drive. That way the computer never sees them and puts them somewhere.
I have another external hard drive that I use for back-ups when in the field. That gets a back-up and then might go in my suitcase versus my computer bag on the way home.
(When I bought my latest Mac, the sales person asked me what I was going to use it for. I said photos but I was going to only put them on the external hard drive. He said that was the way most people were moving.)
That external hard drive can then be plugged into my big computer at home for more processing.
When I’m totally finished processing a trip, I copy all those files (RAW, jpg, and xmp) to the Drobo on my desk that I can grab in the event of a hurricane. All photos are stored in the cloud via Backblaze.
That means I have the photos on the hard drive while I’m processing. There’s a temporary backup on another hard drive but it’s just a temp backup. Once I’m finished with the processing, the files get moved to the Drobo for permanent storage and then the cloud. Just in case, I also copy them to another external hard drive that is a duplicate copy of the files on the Drobo.
Once the photos on the working hard drive have been copied, then I delete them. I also delete them from the temporary backup. I always do this with the help of another person to cross-check and verify that the photos are really copied to both the Drobo and the copy hard drives.
That’s four hard drives:
Hard Drive #1: For working on photos in the field on my laptop. Pictures are in folders labeled “Ireland 2018 day 1”, “Ireland 2018 day 2”, etc.
Hard Drive #2: A back-up of the above. Folders called the same as above.
Hard Drive #3: Working files and photos on my big desktop in the office.
Master storage of all processed and finished photos in individual folders on the Drobo. Folders have the same names as above.
Drobo is copied to external hard drives (#4) as master storage that can be stored off-site. Folders exactly the same as on the Drobo.
I would recommend you copy all your photos to a working hard drive. That would be #1. Copy them again to #2 hard drive. Then create a Master Storage unit with lots of space for #3. That’s duplicated on #4.
Redundant files?!?!?!?! Welcome to the world of photography. This is an ongoing issue. Concentrate on getting it clean as you can. Then get the back-ups. Then try to stay on top of it. I swear these files multiply at night.
I’m putting all photos on external hard drives now. Photos are so big that they take up a lot of space. I am not putting photos on my laptop’s hard drive or my desktop’s hard drive. All photos are on external hard drive.
I’ve gone pretty extreme. My iMac is my main desktop computer. It has a 4TB hard drive attached that has photos, documents, etc. All documents were moved off the iMac’s hard drive to the external hard drive.
My Macbook Pro has a 4TB hard drive that has the same. I work on photos in the field and at home on the laptop. No documents or photos are on the computer’s internal hard drive.
Once I am finished processing a folder of photos or all the photos from a trip, those photos get copied to a Drobo 15TB storage unit in a folder. Those folders are numbered and named. The folder might be “#1057 Costa Rica 2018 A_C”.
The photos are then imported to my database (or Lightroom) for the catalogue. This means that the only photos on the big 15TB storage device are finished photos. The photos on my laptop or desktop hard drives are unfinished.
I try to get photos off the desktop and laptop hard
drives as soon as I can. Doesn’t always
work because some trips/outings take longer to process than others. I try though.
I’m now using BackBlaze to put my photos in the cloud. My MacBook Pro wants to put everything in the cloud so some photos are in iCloud.
Applications like Photoshop, Bridge, Adobe Camera Raw, Lightroom, Word, Excel, etc are on each computer’s hard drive. It’s faster to use software that resides on my computer. I also have the software where I can use it if we have a power failure, hurricane, or disruption to the internet like in Africa or Peru.
So – in a nutshell – each computer has an external hard drive. Photos are processed and then moved to the Drobo 15TB storage unit. Those photos are the master catalogue.
I’ve created Favorite folders that reside on the external hard drive. These are a nice way to get photos quickly to attach to an email or upload to social media.
Thanks to the folks at Hunt’s Photo & Video I got to test drive the new Canon EOS R. This is Canon’s first entry into the full-frame mirrorless camera market. I am highly impressed.
The camera has a great feel in the hand. There’s plenty of room for your hand and right thumb giving a more robust feel than the Canon M-series cameras.
Canon EOS R, Huntsville State Park, Huntsville, Texas, Autumn
Canon EOS R, Huntsville State Park, Huntsville, Texas, Autumn
The swivel screen on the back of the camera is great for ground-level macro photos.
Canon EOS R, Huntsville State Park, Huntsville, Texas, Autumn
Canon EOS R, Huntsville State Park, Huntsville, Texas, Autumn
Hand-feel and ergonomics — give the camera an A+. The electronic viewfinder is the brightest I’ve seen. The touch screen on the back is quick and responsive.
Yet, how about the photos. Last year, I pushed the Canon M-series camera pretty hard when I gave it a test drive so I thought I’d do the same with the EOS R.
Black walnut leaves taken with a Canon EOS R
Same photo enlarged 200%
Black walnut leaves taken with a Canon EOS R
Same photo enlarged 200%
Notice in the photos above that there’s no fringing on the leaves when the photo is enlarged to 200%. The grain structure looks good.
Let’s try another test.
Canon EOS R, Christmas tree, lights, twilight, The Woodlands, Texas, Hughes Landing.
Canon EOS R, Christmas tree, lights, twilight, The Woodlands, Texas, Hughes Landing.
Above is a twilight photo with the Canon EOS R on a tripod. Enlarged to 200% on the right.
Christmas tree, lights, twilight, The Woodlands, Texas, Hughes Landing.
Christmas tree, lights, twilight, The Woodlands, Texas, Hughes Landing.
Same scene but photographed with a Canon 5D Mark IV.
In low light I can’t see any difference between the photos taken with the Canon EOS R and the Canon 5D Mark IV.
Canon EOS R, Canoes, Huntsville State Park, Huntsville, Texas, Autumn
Canoes, Huntsville State Park, Huntsville, Texas, Autumn
A simple comparison of photos. The photo taken with the Canon EOS R is on the left. Canon 5D Mark IV on the right. Both are enlarged to 100%. I can’t see any difference in quality.
Canon EOS R, starburst, leaves, lens test
Canon EOS R, starburst, leaves, lens test
I like starbursts in my photos. How does the EOS R’s 24-105mm lens work in the starburst category? Not bad!
Conclusions:
The Canon EOS R is a “real” camera on par with the Canon 5D Mark IV.
There does not appear to be any differences in the picture quality between the two cameras.
This is not a point-and-shoot or lower quality camera.
The Canon EOS R is going to make a lot of people rethink their mirrorless options.
First-time camera owners might skip the DSLR body in favor is this mirrorless.
I’m impressed with the Canon EOS R on static subjects. How does it handle action? Stay tuned.
Check out the great deals at Hunt’s Photo & Video on Canon EOS R and other products.