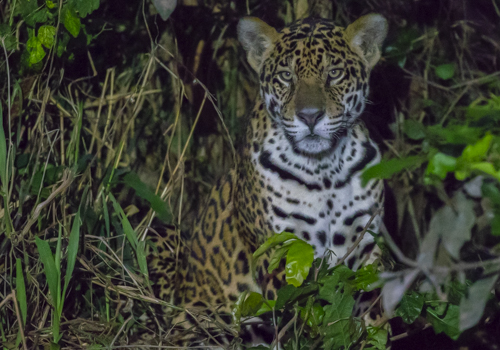
At sunset in July we were cruising down the Rio Piquiri in the Pantanal of Brazil. Junior, the boat driver, killed the motor and pointed to a pair of jaguars sitting on the riverbank.
Jaguar photographed at 51,200 ISO with the aid of a flashlight. Canon 1Dx, f/8, 1/160th shutter speed.
There were 10 people in the boat and all were squirming to get their cameras and find the jaguars. The boat was bobbing in the water. There was a lot of movement to try to photograph something after sunset.
I pushed the ISO button on my camera and rolled the dial all the way to 51,200. I could only get a 50th of a second shutter speed. No way the photos were going to work with a shutter speed like that!
Raul, our guide, had been bragging about this high-powered flashlight that he’d received as a gift from a previous guest. His little flashlight was nearly a spotlight.
“Raul, point that flashlight at the jaguars!” I yelled. It was magic! The light was enough light to give us shutter speeds in the 1/160th or 1/200th of a second range.
A modern high-power flashlight and modern cameras with high ISO gave us the ability to photograph a jaguar in the dark. I love it!
I love infrared photos but somehow I never seemed to get around to having an old camera converted to infrared. So earlier this year I got an email ad from Singh-Ray Filters advertising their infrared filter. My hand grabbed my computer mouse without my will and order the filter. Before I knew it, Singh-Ray’s IR 690 filter was heading to my doorstep.
Photo out of the camera with IR 690 filter
The filter arrived, I read some articles online, and then went out to give it a try. The photos came out RED. Yep, they were red but they were supposed to be red.
The articles I read said that the photos out of the camera would be red. I was then supposed to process with method #1, method #2, or method #3 to get an infrared image.
I tried all the methods and simply had a black-and-white image. No snowy-white grass or grass that look so great in infrared photos. I could never get anything that even remotely looked like infrared.
The above photo processed is just a black-and-white photo.
Out of frustration, I sent an email to the folks at Singh-Ray Filters. I got an immediate response and they put me in touch with one of their experts. That man and I exchanged photos and emails for the next two weeks. I shot photos with the filter, processed them per his instructions, but nothing worked. He paid for me to ship my filter to him so he could use it on his camera.
In the end, we found that my Canon 5D Mark IV and my Canon Rebel need a Singh-Ray 830 Infrared filter. The IR 690 filter only yields a black-and-white image after processing.
Mystery solved. Singh-Ray Filters immediately shipped me an 830 Infrared Filter and issued a credit for my 690 IR filter once they received it.
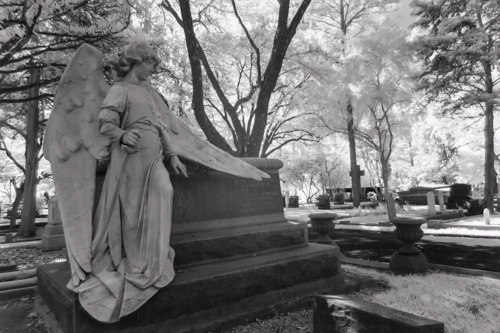
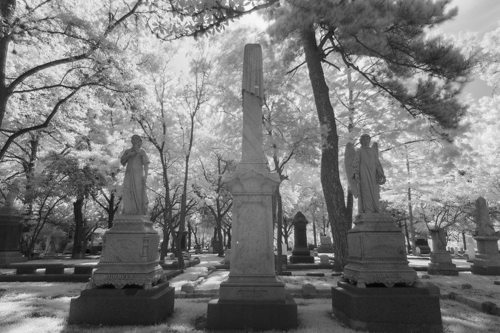
Processed images using the 830 Infrared Filter from Singh-Ray Filters. Notice the white tree leaves.Processed images using the 830 Infrared Filter from Singh-Ray Filters. Notice the white tree leaves in the center and white grass on the ground.
Thanks to the great customer service at Singh-Ray Filters I’m now shooting infrared photos and loving my 830 Infrared filter.
By the way, the IR 690 filter works fine on Nikon camera. We found this situation only applies to Canon cameras.
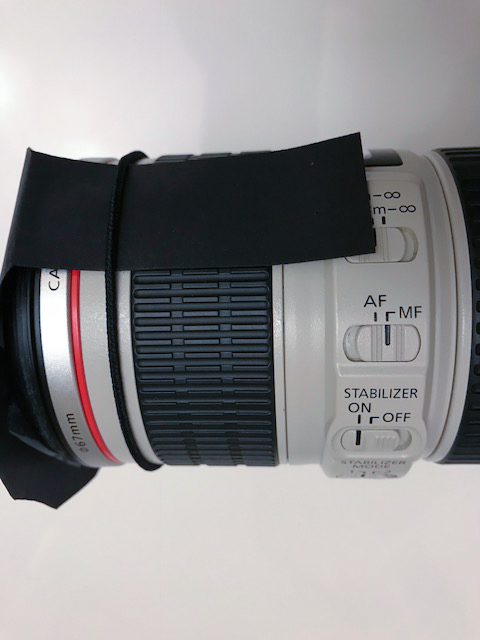
Here’s how to take a photo with the 830 Infrared Filter:
Set the camera to the Bulb exposure mode and decide which f/stop you’ll use.
Frame the shot and focus the lens.
Turn off auto-focus on the lens.
Screw the filter on the lens without moving the focus ring.
You can’t see through the IR filters.
With the camera in Bulb
Take the photo with the shutter open for about 4-minute.
Adjust based on the histogram. A bit less time if the photo is too bright or a bit more time if the photo is too dark.
Here’s my method for processing photos taken with the 830 Infrared Filter:
Open in Adobe Camera Raw or Lightroom
Open Hue Saturation Luminance
Move the red Luminance slider all the way to the right
Move the red Saturation slider all the way to the left
This gets rid of the red cast to the photo
Go back to the Basic Tab
Move the Exposure slider so the histogram hits the right corner
Move the Black slider so the histogram hits the left corner
Add some Contrast
Continue processing to taste
I’ve just begun shooting in infrared and processing those photos. Stay tuned. More discoveries in store.
My photo group was on the Serengeti in Tanzania during the last two weeks in May 2018.
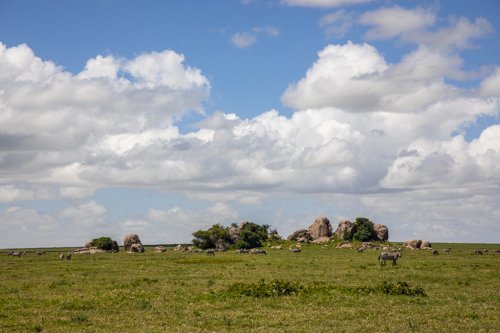
Kopje, or rocky outcrop, on the Serengeti in Tanzania.
One morning while out on a game drive, we got a call over the radio that a baby leopard was in danger on a nearby kopje. My driver, Tompson, picked up speed and told me what to expect. Along the way, I translated all the terms and relayed the situation to the people in my Land Cruiser.
Here’s the situation we were racing toward. A mother leopard left her young baby unattended on a kopje. A kopje is a pile of rocks on the Serengeti plain. The kopje has crevices between all the rocks. Sometimes trees and bushes grow on top of the kopje or around the base of the kopje.
This is traditionally a great place to raise cubs and stash them while out hunting or sleeping. The babies are usually pretty safe with nooks and crannies to sleep, sun, and play.
In this case, though, a group of olive baboons had gathered on the top of the kopje. Baboons hate leopards. That means the baboons will kill the baby leopard if they find it. With no mother leopard on site, the baby leopard was in real danger.
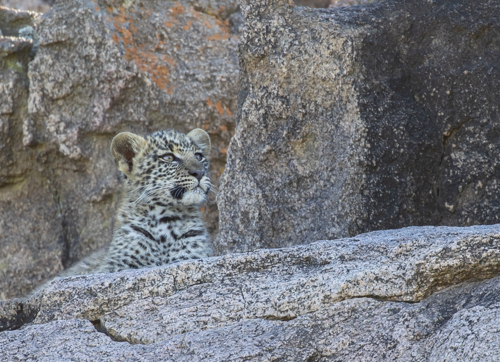
We arrived at the kopje in a few minutes and found a group of twenty baboons on one side of the kopje. After driving around the kopje, we found the baby leopard on the other side. The baby was very young and agitated. It paced, sat down, paced, and then sat again. The baby seemed to know things weren’t right.
We photographed the baby leopard and keep watching for the baboons. There was a good distance between the two so it seemed that the baby leopard was safe.
Then the baby leopard got nervous. It started climbing across the rocks of the kopje and maneuvered under bushes. It came into view then disappeared out of view. But the baboons must have smelled the baby or seen movement. Four large males started slowly moving across the top of the kopje toward the baby leopard.
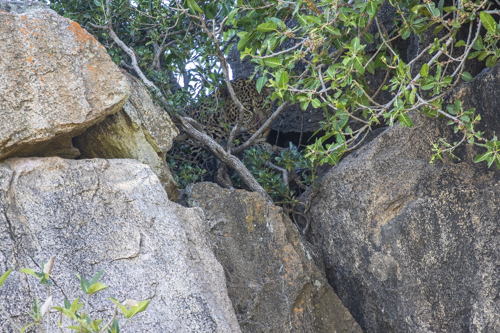
Baby leopard moves to crevice
Baby leopard hides
The baby moved down the rocks and found a crevice. Maybe it was the crevice where it was born or a roosting place with its mother. The baby walked into the crevice, came back out, looked around, and then went back in the crevice. We all encouraged the baby to get deep into the crevice but, of course, our words meant nothing to the young leopard.
The four male baboons started perching on the rocks outside and above the crevice. The baby moved deeper in the crevice to escape the baboons. The baboons peered into the crevice. They moved closer to the crevice. The baby leopard was surrounded. If the baboons headed into the crevice, the baby was cornered.
Someone in the Land Cruiser next to me said “I don’t want to hear what comes next.” Someone else said, “I don’t want to see what’s coming.” My driver told me the baby was a goner and that there was no way the baby could fight off the baboons.
My driver suggested we pull the Land Cruiser back just in case the mother leopard was trying to get back from her hunt. I asked everyone in the three vehicles if they wanted to stay and watch the kill or move back and let nature happen.
Everyone agreed that the attack was going to be horrible. We had out photos of the baby leopard and everyone wanted to remember him as a cute, little kitten.
All three of our Land Cruisers pulled away from the kopje and we turned our backs on nature. During lunch we talked but the baby leopard and everyone wondered what happened. Our thoughts were really with the little guy.
When we left camp later in the day, my driver Tompson asked if I’d like to take the group back to the kopje to see what happened. Tompson assured me the baby was dead but I decided we needed to go back.
A half-hour later we were nearing the kopje. I started scanning the rocks for anything that looked like a leopard. There were no baboons in sight. Not one.
I stood up on my seat with my body out of the top of the Land Cruiser and started scanning the rocks. High up on one of the rocks I spotted the profile of a feline. “There she is,” I yelled. Tompson spotted the mother leopard immediately and drove the Land Cruiser in photography distance. The other two Land Cruisers in our group fell into position next to us.
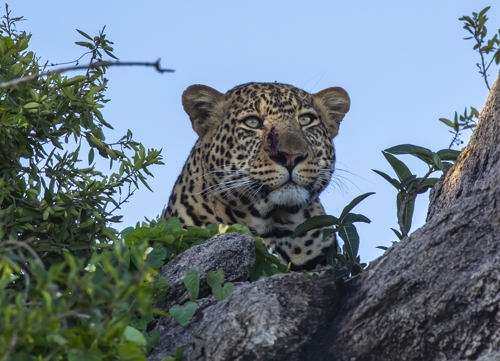
Mother leopard with a fresh gash in her nose.
Mother leopard was laid out on the top of the kopje all pretty and content. She had a fresh, deep gash from her nostril straight up her nose. She’d been in a fight and she was the winner.
Tompson popped up on his seat and poked out of the top of the Land Cruiser. He raised his arms high in the sky and yelled “You are a good mother leopard!!” The mother leopard beat off the baboons and she took a beating while doing it. Yet, was the baby alive?
My vehicle drove slowly to the other side of the kopje. There was the baby leopard! It was out in the open and resting on a nice warm rock. Baby was safe and Tompson gave the mother another “Your a good mother leopard!!” salute.
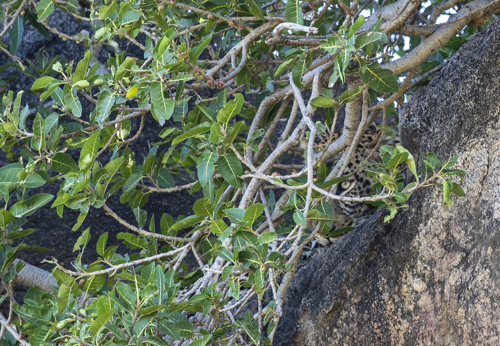
Mother leopard’s eye is on the right behind the bush.Mother leopard bedding down behind a bush on the kopje.
Mother leopard didn’t take to our noisy group of photographers. We were a good distance from her but were pretty excited that mother and baby were safe. I suspect we were a bit noisy.
The female moved deep into a crevice protected by a small bush. She bathed her injured nose one more time and then fell asleep. (People in my group would have given her all the Neosporin in their packs if she would have allowed us near her.) .
Baby leopard gave us a few more stunning photos and then fell asleep. It lived for another day in the Serengeti.
“A lot of photographers come into our gallery. They wouldn’t recognize a good photo if they took one.” This is a paraphrase of something I heard at a photography conference over the weekend.
“A good physicist recognizes a discovery when they see it and they know what to do with it.” I heard this later in the weekend on the radio. (I’ve paraphrased once again.)
Both statements got me thinking about the creative process and recognizing that creativity.
How do you know when you’ve taken a good photo? Post below please so we can all learn.
Show shutter speed of a camel caravan in Morocco. One of my personal favorites.
I am getting ready to buy some filters and had a few quick questions. On the Singh-Ray filters, I see there are warming and neutral polarizing filters. Which one do you recommend?
Should I use a polarizing filter on both the 10-22mm and 15-85mm lenses? I read something that indicated not to use it on the 10-22 mm lens.
If I can use it for both, can I buy one filter and use rings to fit the other lens?
I have been researching online which means I have seen about 100 different opinions!
Your 10-22mm has a 77mm filter size. Your 15-85mm has a 72mm filter size. The step-up ring will allow you to use the 77mm polarizer the lens with the 72mm opening.
Get the thin polarizer so the edges don’t show when using the 10-22mm lens.
Enjoy!
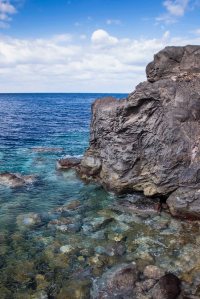
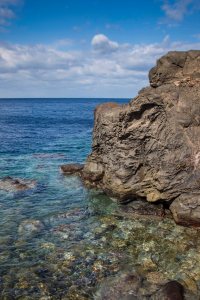
Aegean Sea with polarizer
Aegean Sea with Singh-Ray LB polarizer. Notice the intensity of the color.
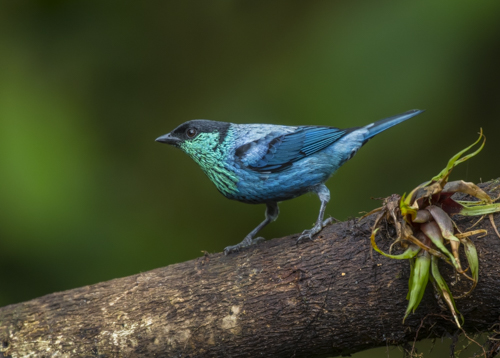
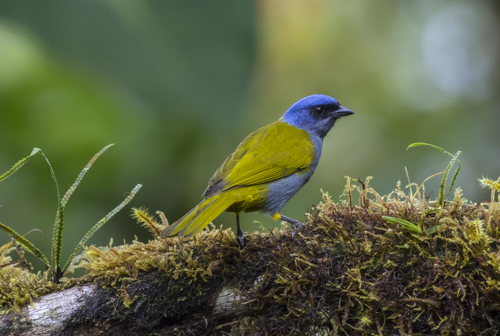
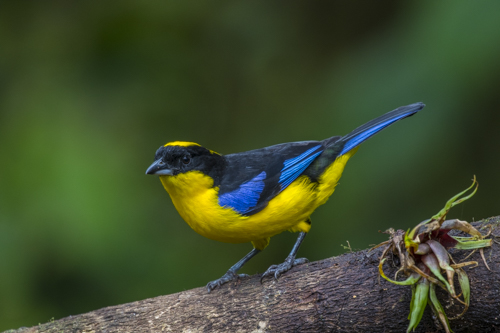
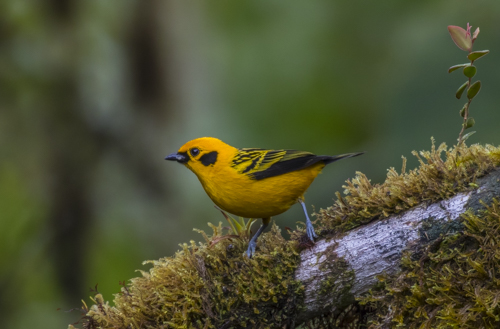
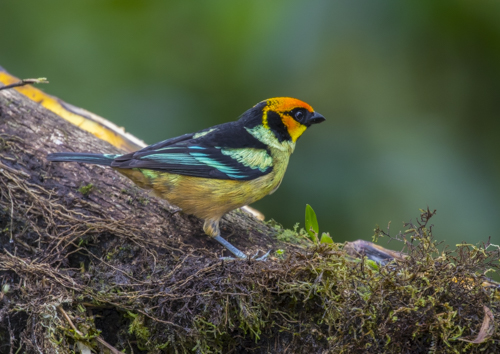
Tanagers are one of my favorite families of birds in the tropics. They are colorful, rather large, somewhat slow, and plentiful. The Ecuador birding field guide lists about 66 species with tanager in their name. We didn’t photograph that many during our Strabo Photo Tour Collections trip in March but we got a lot.
Black-capped tanager — Mindo Valley, EcuadorBlue-capped tanager in the Mindo Valley. This was a new bird for me.Blue-capped tanagerBlue-winged mountain-tanagerGolden tanager — Mindo Valley, EcuadorFlame-faced tanager — Mindo Valley. What a great name!White-lined tanager — See the white line?
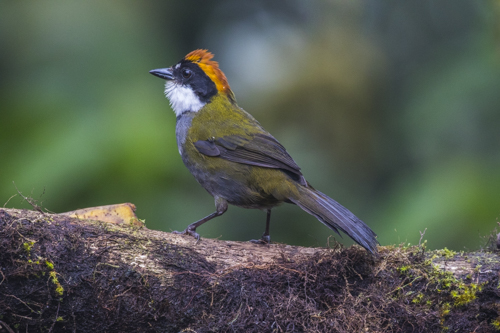
We found a nice variety of birds along the way. These are all from the Mindo Valley of Ecuador on the western slope of the Andes Mountains.
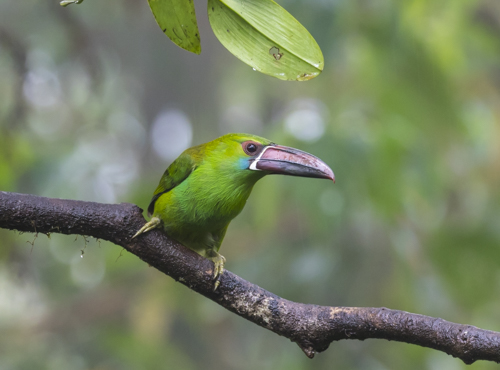
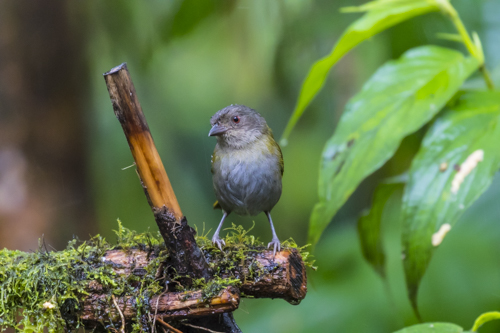
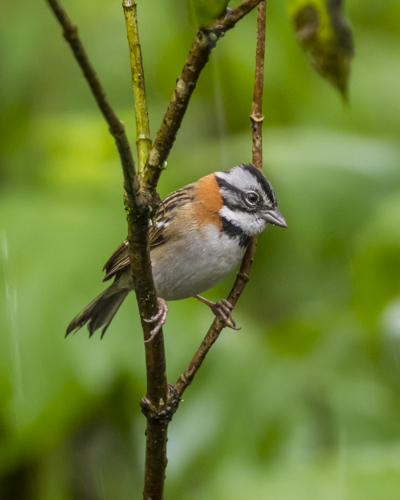
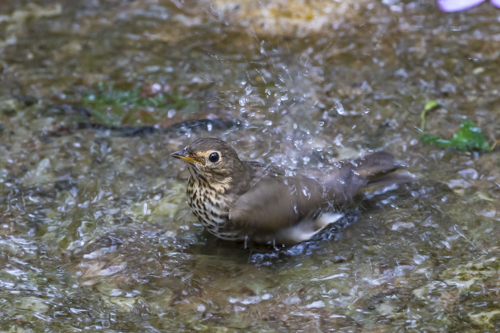
Chestnut-capped brush-finchCrimson-rumped toucanetCrimson-rumped toucanet — here you can see the rumpDusky Chlorospingus — Love that name!Rufous-collared sparrow — so common but so pretty.Swainson’s thrush on wintering grounds. It will be arriving in my area of Texas in mid-April on its way to breeding grounds in the north.
Here are a couple more hummingbirds from the last day of the trip. The birds in Ecuador are amazing.
Hummingbirds are on the agenda for anyone taking a bird photography or bird watching trip to Ecuador. Gary and I planned our photo tour in March to see as many hummingbirds as possible during our 10-day stay in the country.
Ecuador has more than 132 hummingbird species. That’s more species than any other country and 40% of all hummingbird species in the world.
Lucky for us, hummingbird feeders are a common sight around Ecuador. We chose our stops during this trip based on hummingbird feeding location so we could maximize our photo and viewing opportunities.
First stop was Guango Lodge on the eastern slope of the Andes Mountains. Guango is great for photography with a new hummingbird “Pavilion” by the bus parking area. There are natural perches by each feeder. This gave us an opportunity to photograph the hummers as they rested between visits to the feeders.
We used flashes to bring out the sparkle in the hummingbird’s feathers. Everyone used a diffuser of some sort to soften the light so the flash wasn’t so obvious. I used the Lumiquest Softbox. Someone else used the Rogue FlashBender 2. No need for a flash extender since the hummers were 6-10 feet away most of the time.
This slideshow requires JavaScript.
Our guide, Nelson Apolo Jaramillo, suggested that we leave Guango in the afternoon and visit a friend’s lodge about 45-minutes past Guango. We all agreed and drove down to Rio Quijos Eco-lodge on Hwy 45. The lower elevation gave us some new species.
This slideshow requires JavaScript.
Our hummingbird photography continued a couple of days later as we moved across Quito to the Yanacocha Reserve. The reserve headquarters has a nice café, restrooms, and trails. These are situated near a covered hummingbird photography area. Lots of natural perches around the hummingbird feeders.
This slideshow requires JavaScript.
The target species here was the sword-billed hummingbird.
Our next stop was the Mindo Valley lower down the western slope of the Andes. Our lodge in this area was Septimo Paraiso. It truly is Seventh Heaven in so many ways.
We gave everyone a full-day of photography and birding on the grounds of Septimo Paraiso. There are several hummingbird feeding stations as well as fruit feeders for perching birds.
I set-up the hummingbird flashes in the garden under a nice pavilion that was ringed in hummingbird feeders. Once I got the set-up working then we traded out every hour. Each person in the group got to use the flashes. Everyone got at least one nice photo with the multi-flash set-up.
The next two days were devoted to visiting several location in the Mindo area that featured hummingbird feeders and fruit feeders. We went to Alambi Cloud Forest Reserve, San Tadeo, and the Birdwatcher’s House.
Each stop gave us a couple more species of hummingbirds plus more opportunities to photograph familiar species.
This slideshow requires JavaScript.
Come back tomorrow for news about tanagers and other perching birds.
My husband, Gary Clark, and I got a chance to return to Ecuador earlier this month to lead a Strabo Photo Tours Collection trip. Our trip visited the eastern slope of the Andes Mountains, the western slope, Quito, and the Antisana Reserve.
Antisana is a large tract of undeveloped land surrounding the Antisana Volcano. The reserve protects Quito’s water supply and is prime habitat for the Andean Condor.
The Antisana Ecological Reserve covers 120,000 hectares or 296,000 acres. The Antisana Volcano is 5758 meters or roughly 19,000 above sea level. Most of the reserve is above the tree line and covered in low grasses called paramo. Rolling hills, cliffs, deep valleys, and even a lagoon round out the habitat.
Permits are required to enter the reserve so access is limited. This means it can sometimes feel like you have the place to yourself even on a busy Sunday afternoon
Our first stop was a coffee shop near the entrance to the Antisana Reserve. It’s called Tambo Condor. www.tambocondor.com This is a great place to stop for coffee or a snack but we were there for the hummingbirds. The feeders attracted giant hummingbird (on the right above) and shining sunbeam (on the left.) Andean condors roost on the cliffs across the valley.
On the day we visited, the skies were clear and sunny. Wind was howling, though, but we were prepared and dressed for it.
This slideshow requires JavaScript.
Gary and I got everyone out of the motor coach when we were high on the paramo for a fun time chasing and photographing carunculated caracaras and Andean lapwings. It was cold, the altitude was killing us, but it was fun.
We ate box lunches at the lagoon. It was too cold and windy to eat outside so we used the coach as a shelter. We got in and out depending on the birds outside.
Gary and our guide Nelson were great spotters. We saw Andean Condors six times during our visit. The last sighting was the best when an adult condor flew right over our heads and gave everyone a perfect opportunity for incredible photos.
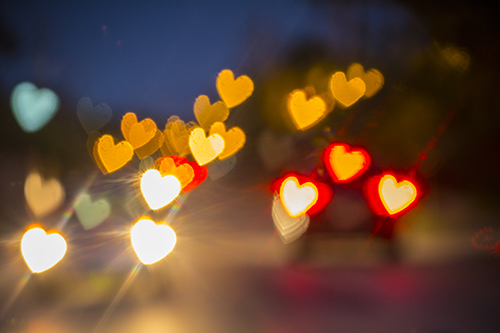
Let’s get romantic with some heart-shaped lights this Valentine’s Day
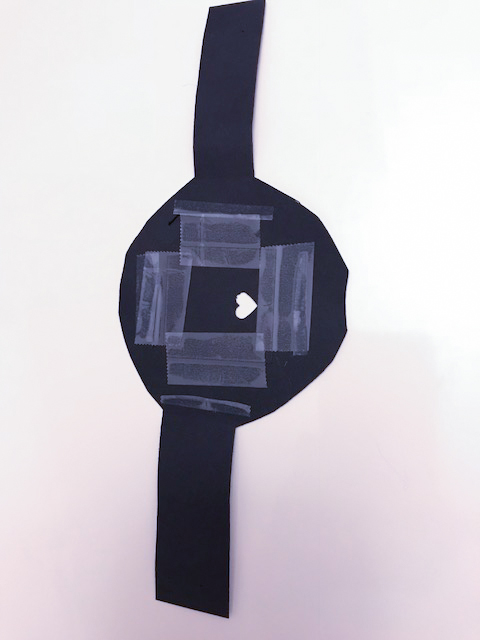
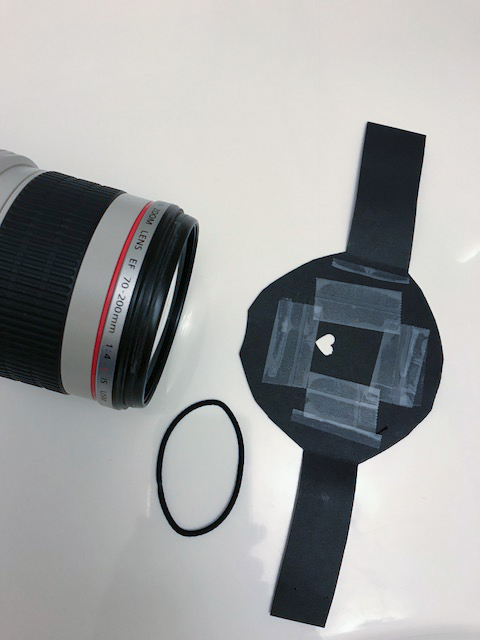
Directions are below.A heart stamp from the craft store makes a nice heart.Grab a piece of black construction paper. Cut it into this basic shape. The circular shape should cover your lens opening. Notice that the heart shape has been taped to the center. That’s because my stamp doesn’t stamp very far from the edge of the paper. I had to cut the center out of the main shape and tape a smaller piece of paper with the heart shape to the main piece. (This is good because you can remove the heart later and add shamrocks for St. Patty’s Day)
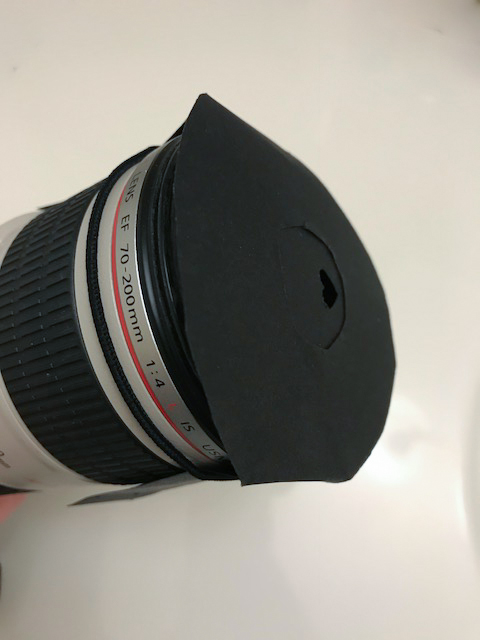
Attach the black paper object to the front of your lens. I use a hair tie. You’re almost ready to go. I’ve found that a lens in the 100mm range makes the best heart shapes.Switch to Manual focus. Blur the scene in front of you. The view through the viewfinder is dark. It might help to switch the camera to spot or partial metering.Bright lights work best. This is a photograph is a busy street.


 d and keep watching for the baboons. There was a good distance between the two so it seemed that the baby leopard was safe.


 Our next stop was the Mindo Valley lower down the western slope of the Andes. Our lodge in this area was
 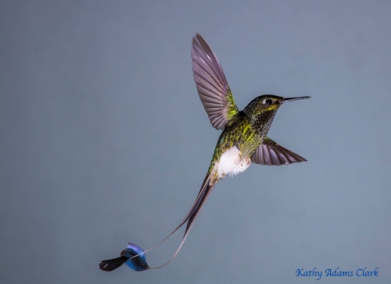 I set-up the hummingbird flashes in the garden under a nice pavilion that was ringed in hummingbird feeders. Once I got the set-up working then we traded out every hour. Each person in the group got to use the flashes. Everyone got at least one nice photo with the multi-flash set-up.


 Gary and our guide Nelson were great spotters. We saw Andean Condors six times during our visit. The last sighting was the best when an adult condor flew right over our heads and gave everyone a perfect opportunity for incredible photos.