Continuing this exploration of auto focus features in the Canon R5 and R6. Today, the difference between Face Tracking with Animal Eye selected and Large Zone Auto Focus with Animal Eye selected.
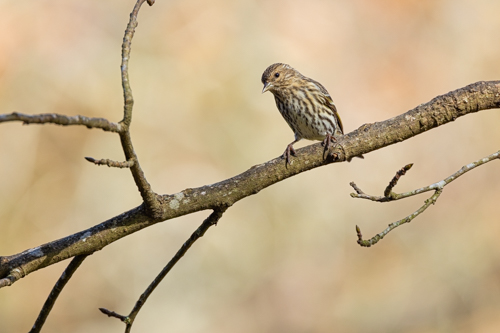
This is a video of the R5 focusing on a small pine siskin. The camera is set to Large Zone AF. The camera is also set to Servo AF Case 1 Versatile Multi Purpose (AF Menu 3) and Subject To Detect Animal (AF Menu 1). Notice that the camera focuses on any part of the bird.
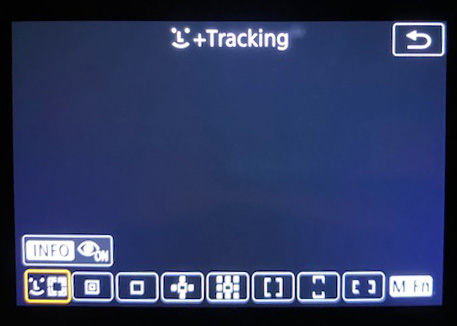
Same settings in the camera as above but the Auto Focus Method is Face Tracking. Notice how the camera narrows in on the eye of the pine siskin.
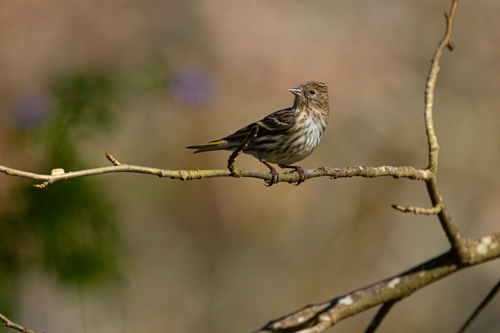
Same settings as above. Another view of how the R5’s auto focus narrows down to the eye of the bird.
The successful results are a combination of settings on the R5 or R6.
The new mirrorless cameras give us so many options. I’m using the Canon R5 but the following will apply to Nikon, Sony, Olympus, and Fuji. The key is to experiment and learn from your mistakes and triumphs.
I used 1-point AF on my DSLR cameras most of the time. I’d move that one point around the screen with lightening speed — a skill I developed over many years of practice.
1-point AF has its place in our photography toolkit.
After working with the R5 for four months, I’ve found that the 1-point AF has its place.
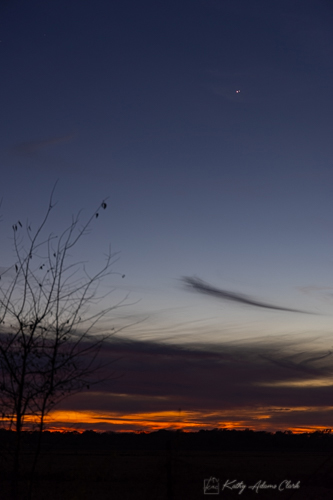
Use 1-point AF when there’s one specific point of focus. Conjunction of Saturn and Jupiter.
1-point AF is great when you want to focus on the body of the skipper versus the wings.
1-point AF is perfect for selecting the focus point for artistic reasons.
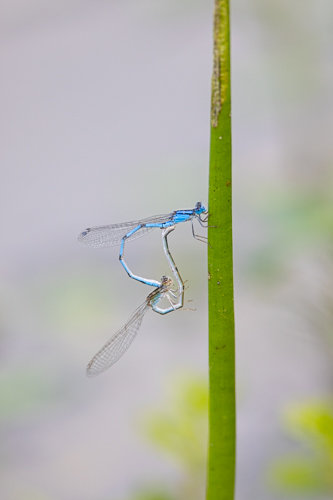
1-AF Point helped the camera focus on these tiny familiar bluets.
Eye tracking is amazing. We’ve had this technology on cheap point-and-shoot cameras for years and even on cellphone cameras. The engineers at Canon have really hit a homerun with Animal Eye tracking. I hear Olympus has done well in this arena, too.
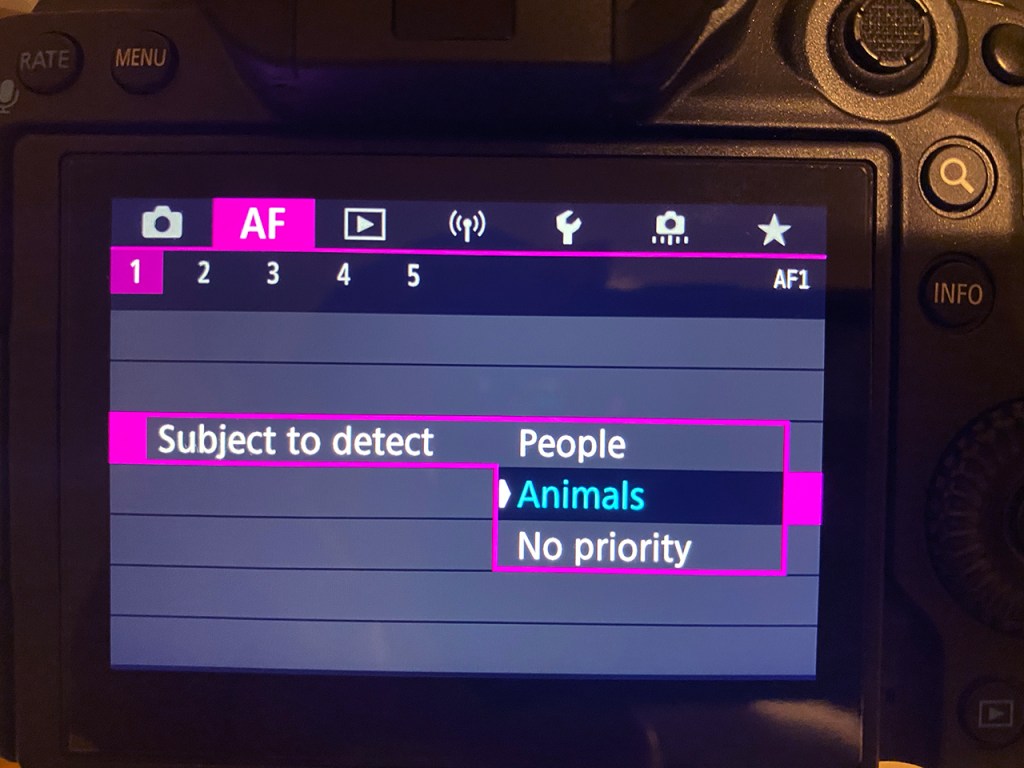
Use your Menu setting to tell the camera to look for human eyes or animals eyes, by the way. Canon puts this in the pink menus.
Animal Eye AF worked well on this small Savannah sparrow
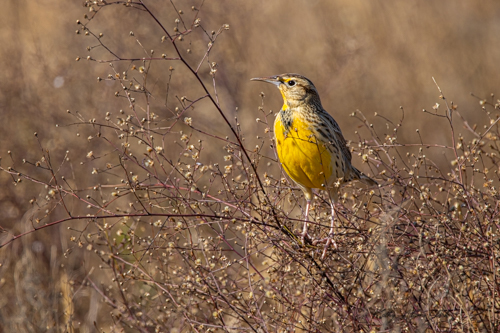
Animal Eye AF helped me keep the face of the eastern meadowlark in focus no matter which way it turned.
Animal Eye AF kept the peregrine falcon in focus.
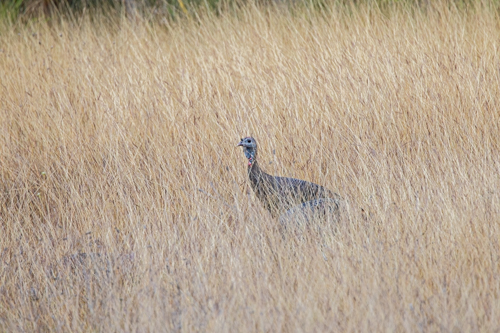
Animal Eye AF found the turkey in the grass and kept the focus point on the turkey.
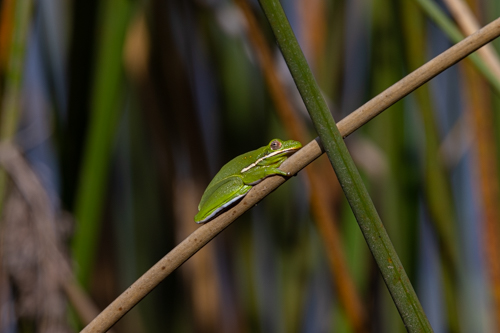
I was amazed that the Animal Eye AF found the tiny eye of the green treefrog.
A clear and defined eye helps Animal Eye AF do its job.
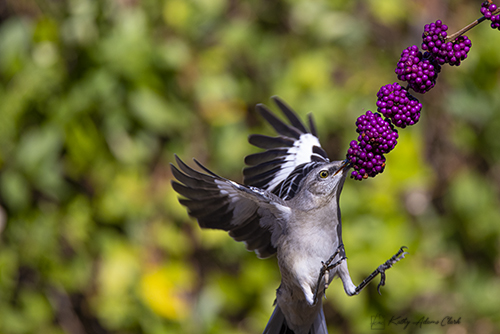
The Animal Eye AF will get confused, though. The camera kept trying to focus on the berries versus the bird.
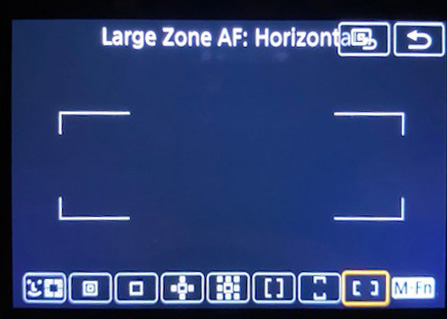
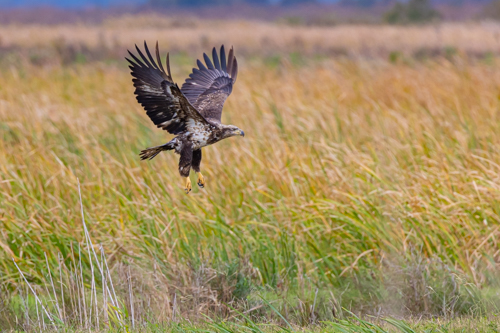
Large Zone AF: Horizontal has been great for flying birds.
The Large Zone AF focused well on this bald eagle overhead.
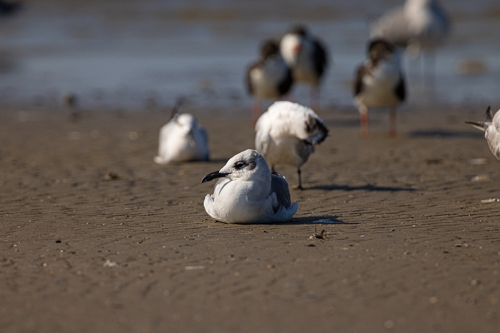
This lesser black-backed gull was out in the marsh stretching. The Large Zone AF stayed with it as it preened and moved.
Cattle egret feeding on a mouse. Large Zone AF stayed with the aciton.
I switched to Large Zone AF: Horizontal for this flying northern shoveler.
Large Zone AF helped me stay with this immature bald eagle as it lifted off out of the marsh.
I’ve worked with Canon R5 for several months under a variety of different situations. I’m changing Focus Methods now depending on the circumstances. My old skill at moving one focus point around on my DSLR has now morphed into changing my Focus Method.
Approaching a bird with a defined eye in clutter — switch to Animal Eye AF
Approaching a duck that’s about to take off — switch to Large Zone AF
Trying to photograph a small bird in the brush — switch to 1-point AF
Flying hawk overhead — switch to a small cluster
These focus options give us lots more tools in the toolbox. Take some time to practice and develop your skills.
Questions? Feel free to post below. Thanks for reading.
Photographing the December 21st “Christmas Star” or conjunction of Jupiter and Saturn is simple pinpoint star photography. Settings on your camera are the same as you’d use when photographing any pinpoint stars.
I’m planning on the 24-105mm lens at 105mm because I’d like a little foreground but enough magnification to get the . I’ll have my bigger lens just in case. That would be my 100-500mm.
I’ll use a wide open aperture of f/4 or f/2.8. At 105mm the shutter speed would be 4 seconds. At 400mm it would be a 1 second shutter speed.
Compose the scene and focus on infinity or the planets if your camera will do that. Turn off auto focus and image stabilization.
Put the camera in the manual exposure mode. Set f/stop to wide open, set shutter speed based on the formula below, and raise the ISO to balance the light meter.
The shutter speed depends on the lens you use. The formula is 500/mm of the lens. Cropped sensor is 500/(mm of lens X crop factor). Do the math but remember to do the math inside the parentheses first.
Camera has to be on a tripod, of course. A shutter release helps get a steady shot.
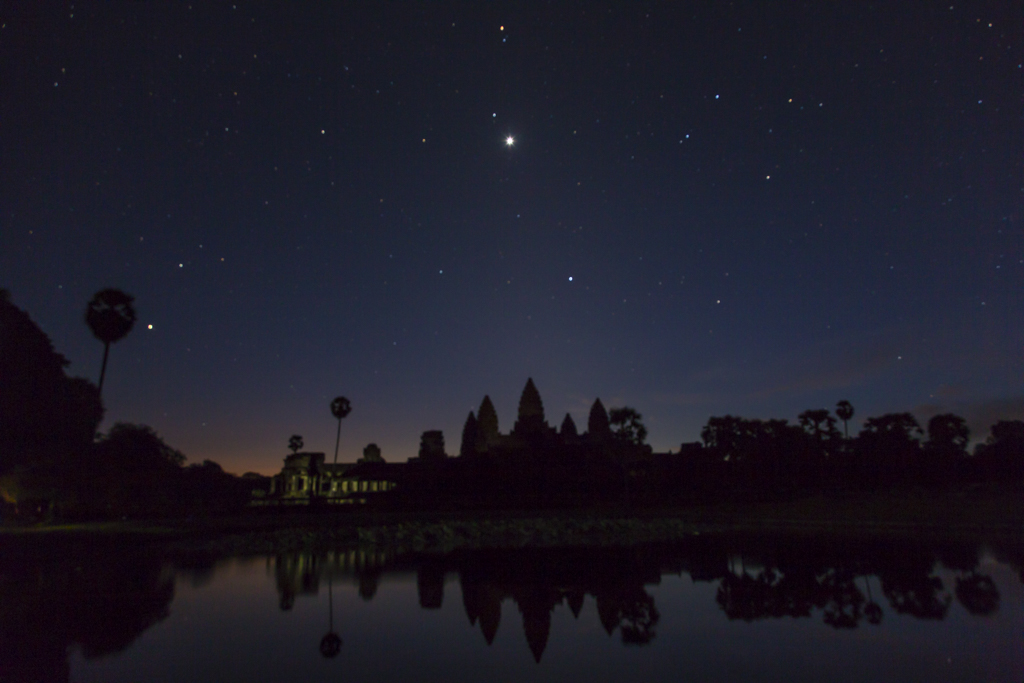
Venus, Mars, and Jupiter over Angkor Wat in Cambodia at sunrise.
The previous post ended with a question from Patti asking about noise when using high ISO and shadow recovery.
I can honestly say that the noise is not that bad.
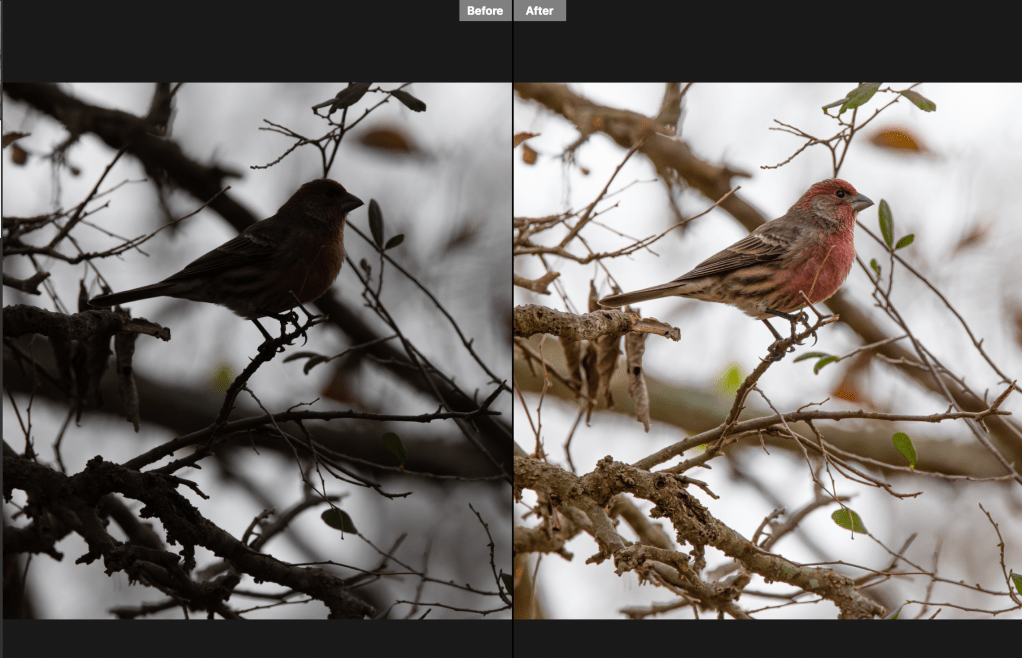
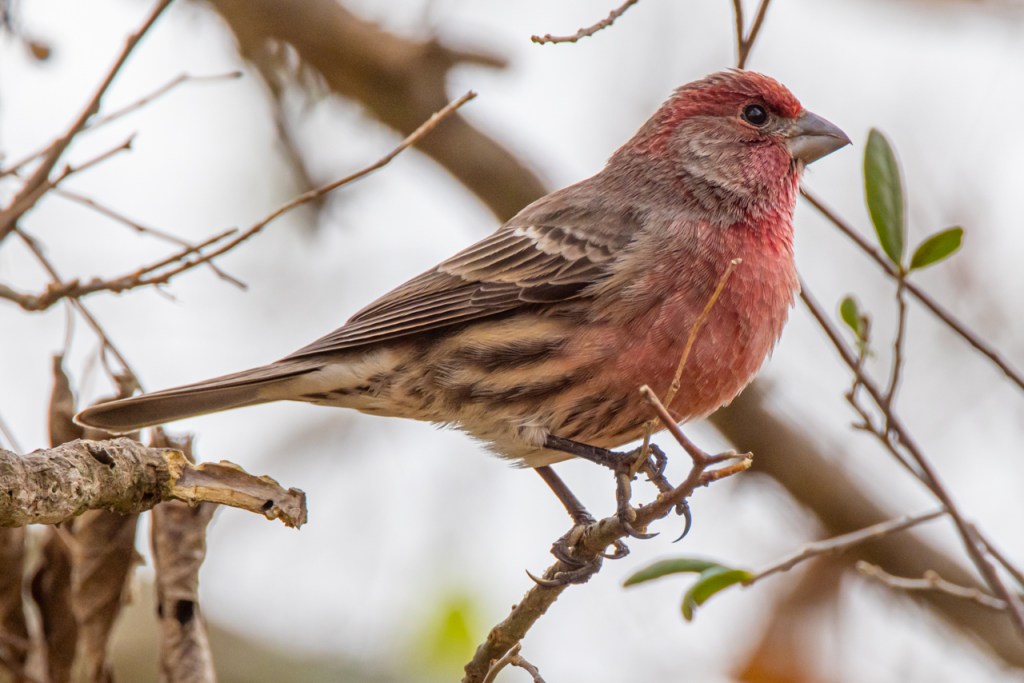
Here’s a before and after photo. (On Left) ISO 500 and very unexposed. (On Right) Basic processing with shadow slider moved to +88 and exposure slider moved to +1.25.
Below the photo is enlarged to 100% and cropped. I moved the exposure slider a bit more and then hit it with a bit of noise reduction in Adobe Camera Raw.
The noise doesn’t look too bad despite high ISO and pulling the exposure.
Someone today asked how the Canon R5 handles high ISO. I happened to shoot in the same place on different days with the Canon 1DX Mark II and the Canon R5.
Let’s see how they compare in the high ISO area.
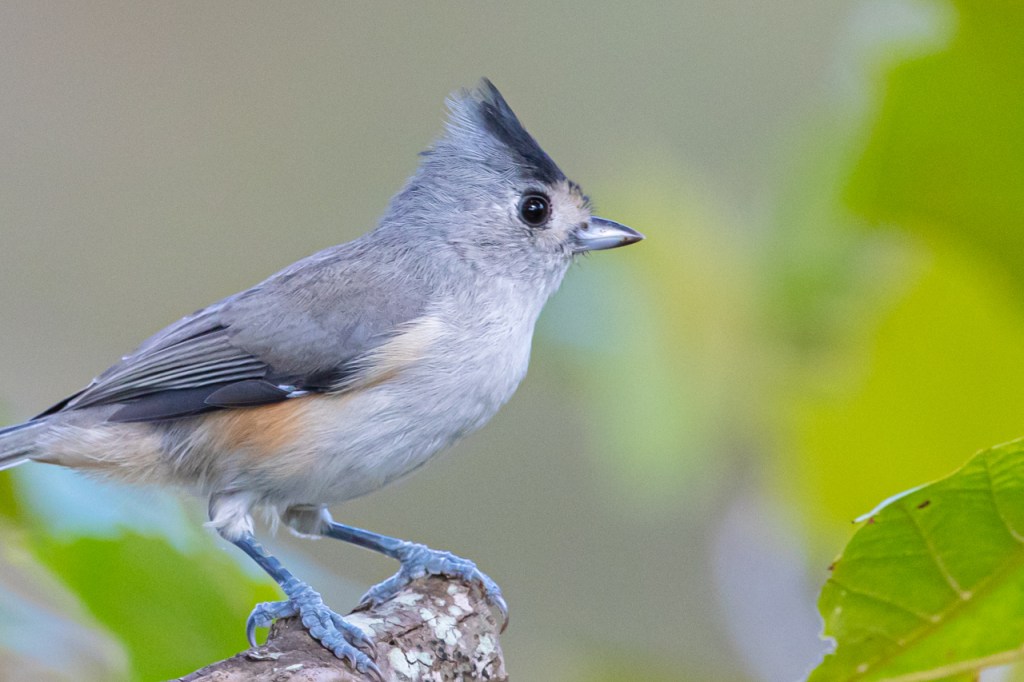
Black-crested titmouse ISO 2500 with the Canon 1DXBlack-crested titmouse ISO 2500 with the Canon 1Dx at 100%Black-crested titmouse ISO 4000 with the Canon R5Black-crested titmouse, ISO 4000 with the Canon R5 at 100%
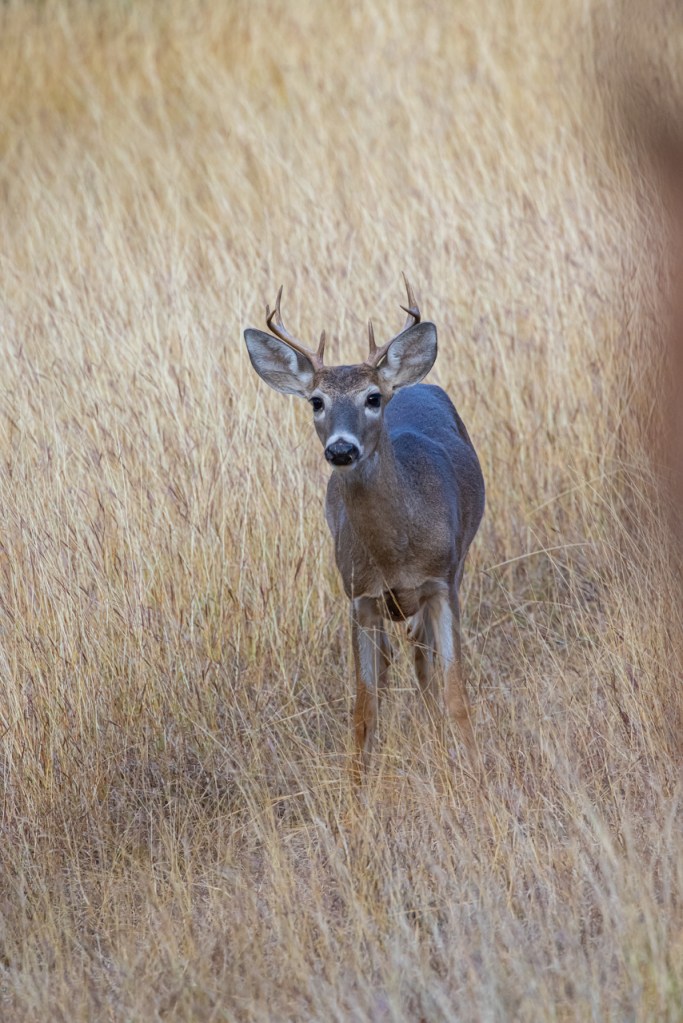
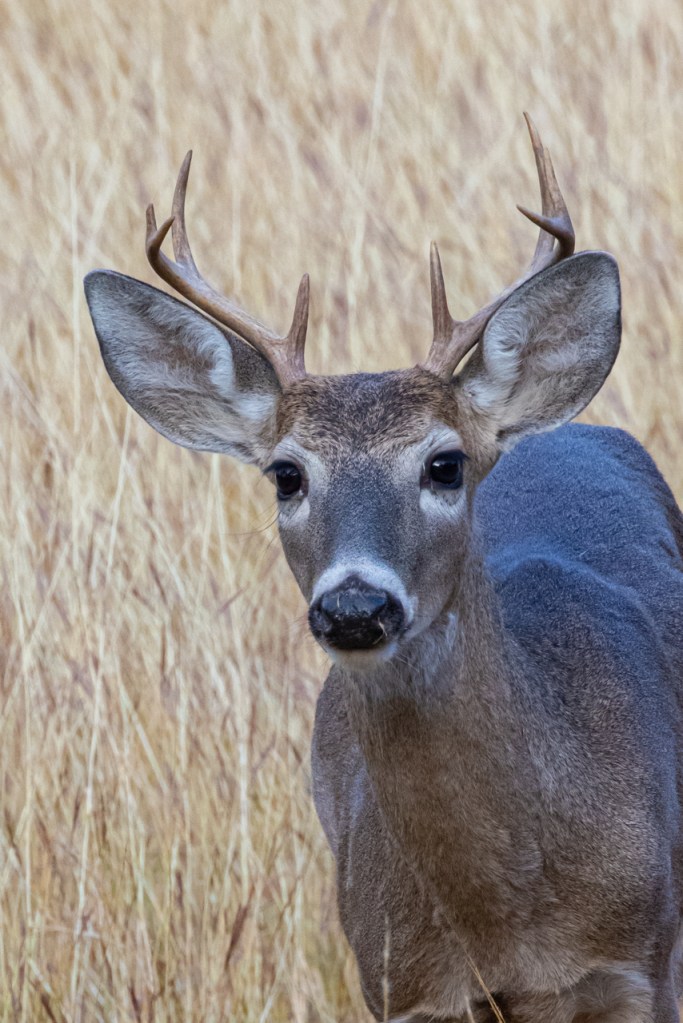
White-tailed deer, Canon 1DX Mark II, ISO 2500. Enlarged to 100% on the right.
White-tailed deer with Canon R5, ISO 3200. Enlarged to 100% on the right.
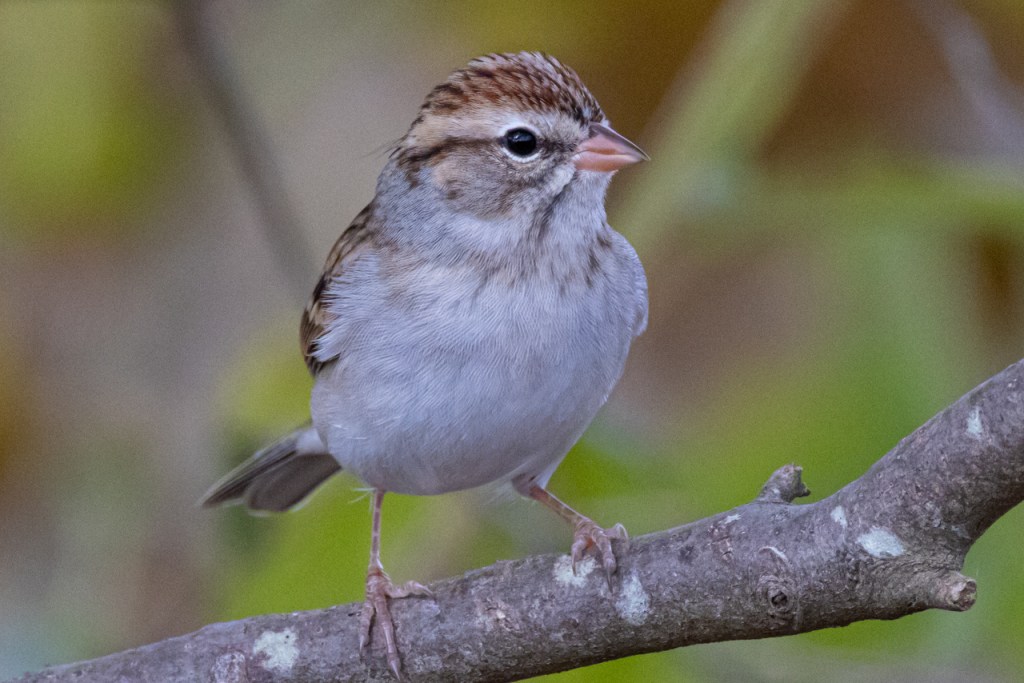
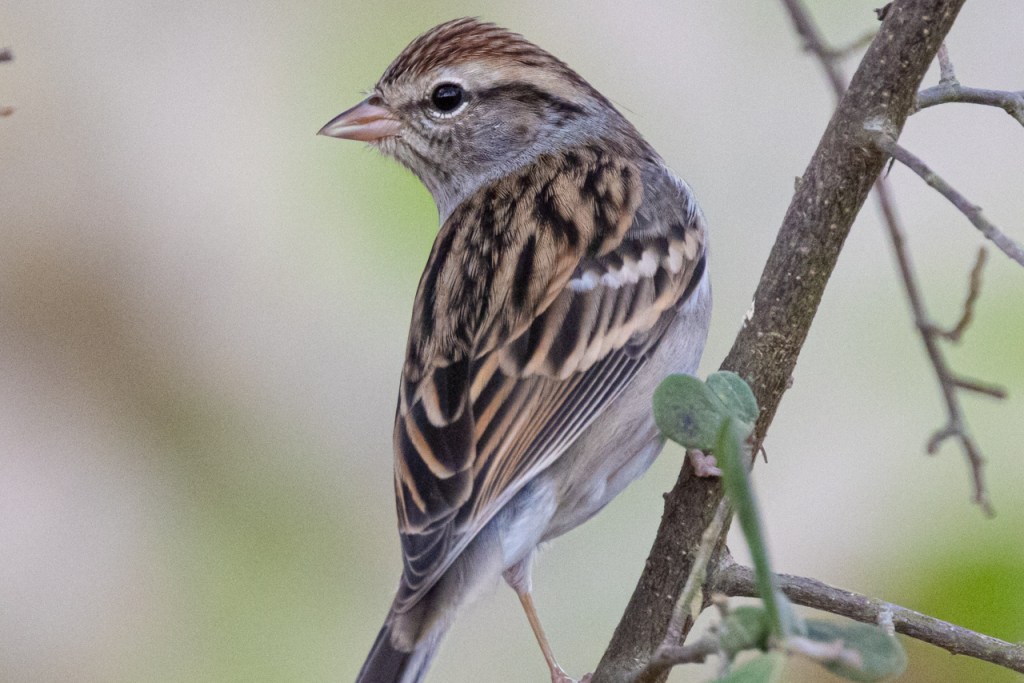
Chipping sparrow Canon R5, ISO 6400, enlarged to 100%
Chipping sparrow Canon R5, ISO 6400 with Noise Reduction, enlarged to 100%
Chipping sparrow Canon R5, ISO 5000 with Noise Reduction, enlarged to 100%
I’m not seeing much different. In my opinion, the Canon R5 handles high ISO as well as the Canon 1DX Mark II.
Canon R5 auto focus method is on face tracking and Eye Detection enabledCanon R5 auto focus method is on Face Tracking for animals.Wild turkey in a grassy field in the Texas Hill Country. With my Canon 1DX, I would have used one focus point and moved it to the turkey’s face. With the Canon R5, I simply switch to Animal Face and Eye Detection and the camera locks on to the turkey’s eye.
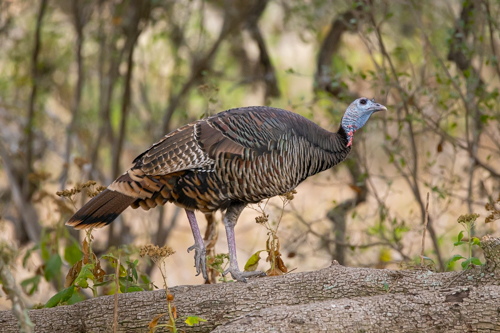
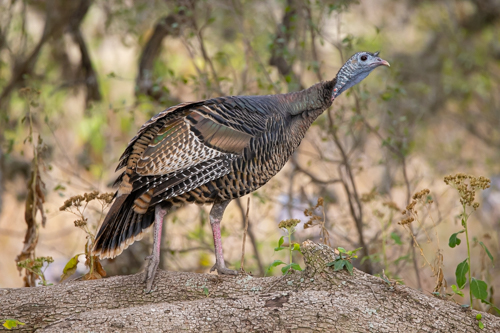
Watch how the eye of the turkey stays in focus as it moves its head.
The eye stays in focus.
The eye stays in focus.
This green tree frog was deep in the reeds. I switched to Animal Face and Eye Detect and the camera locked on immediately.
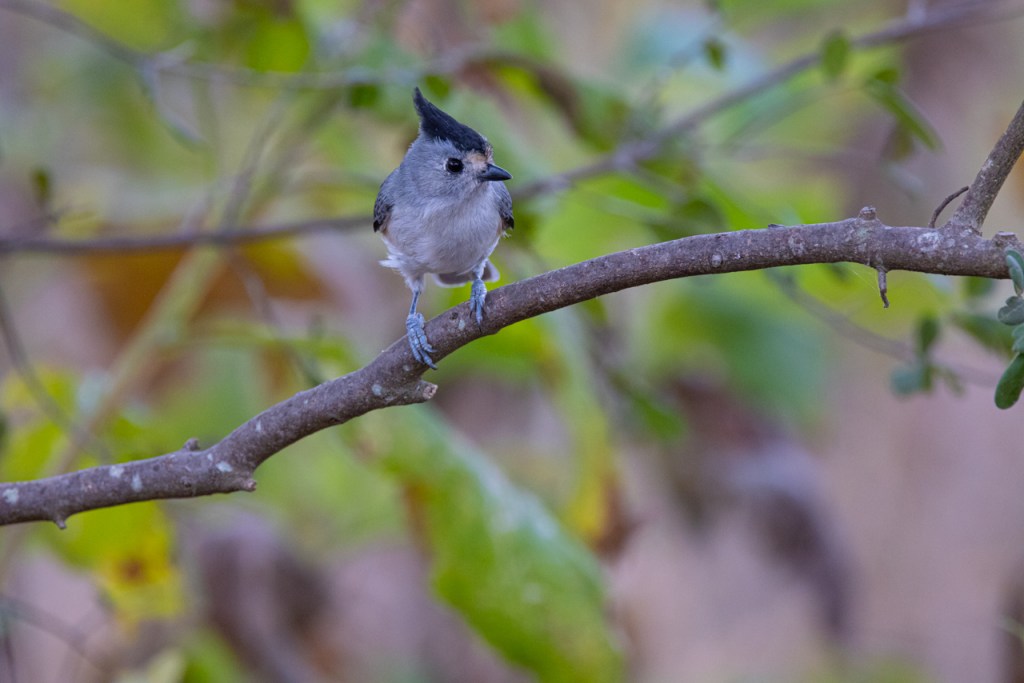
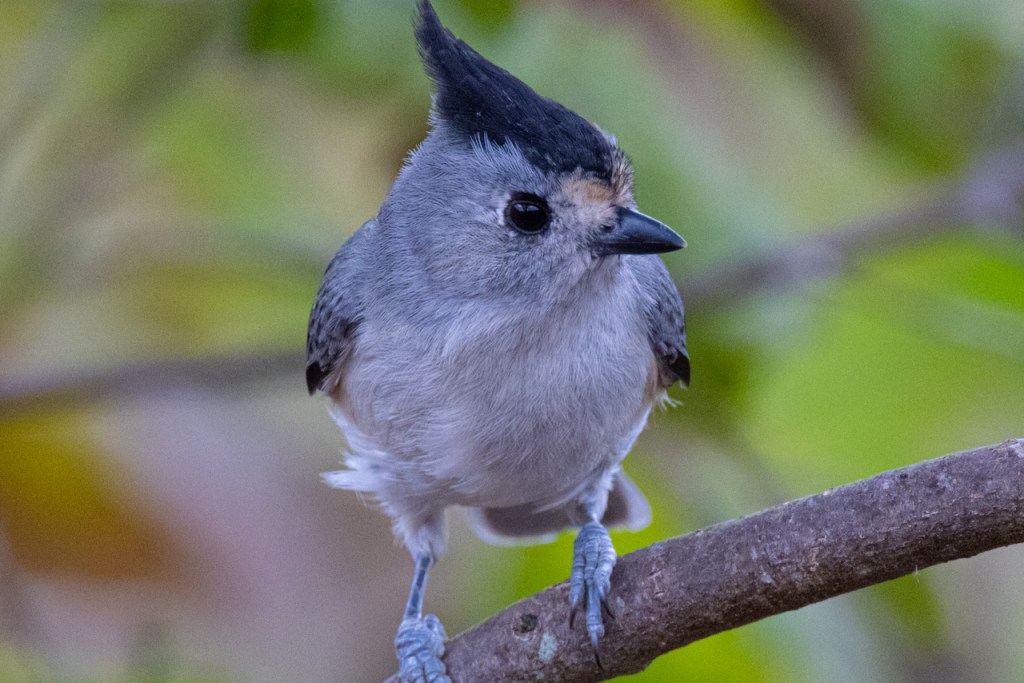
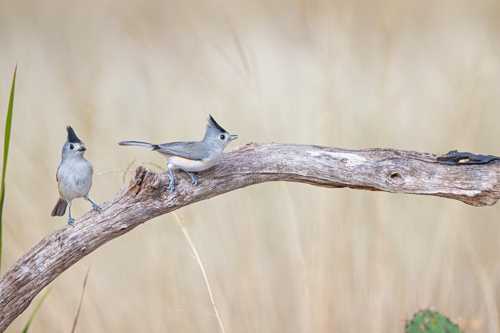
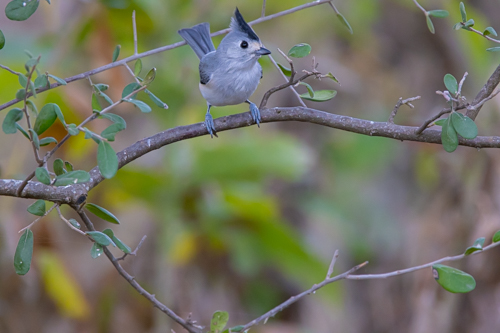
Black-crested titmouse are twitchy birds. They don’t stay still. Watch how the eye focus stays with the bird.
Eye focus moves to the top of the frame.
Eye focus stays with the bird
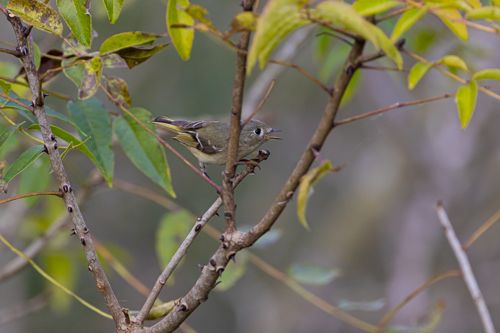
Ruby-crowned kinglet is a hyper-active little bird. It was deep in the brush, so I moved to Animal Face and Eye Detection then the Canon R5 found the bird.
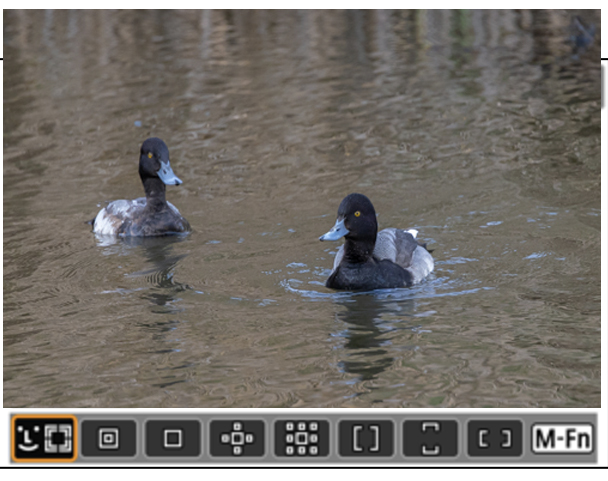
Lesser scaup with the eye detection on the male on the right.
This is what we see through the viewfinder as the focus method is changed.
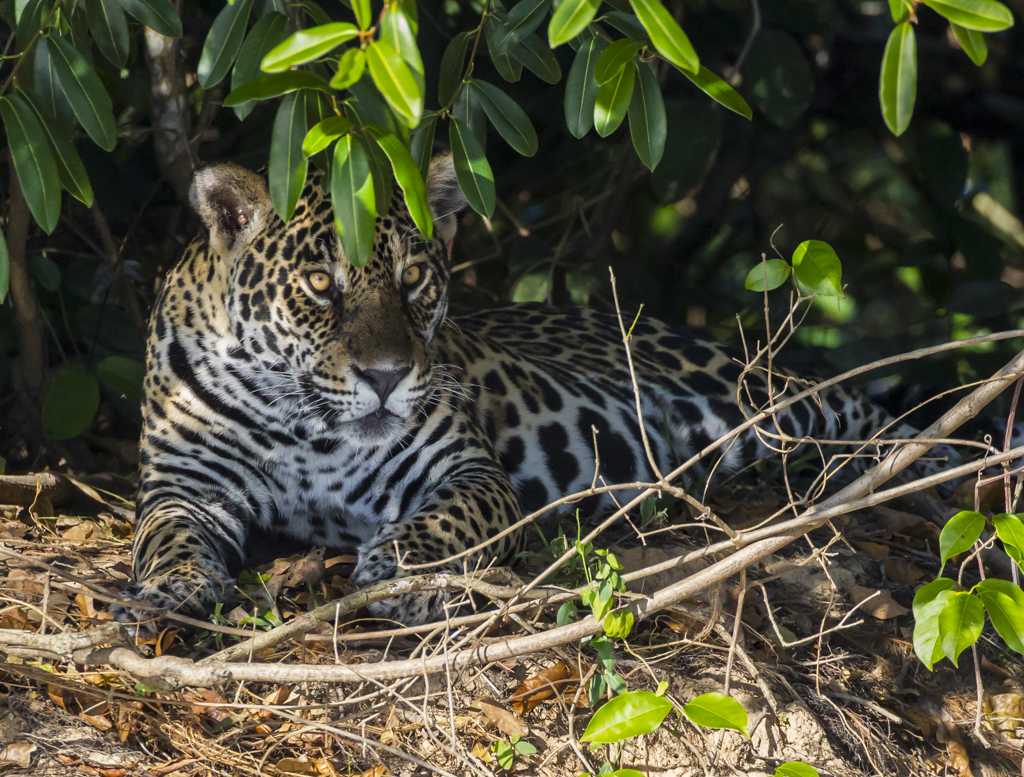
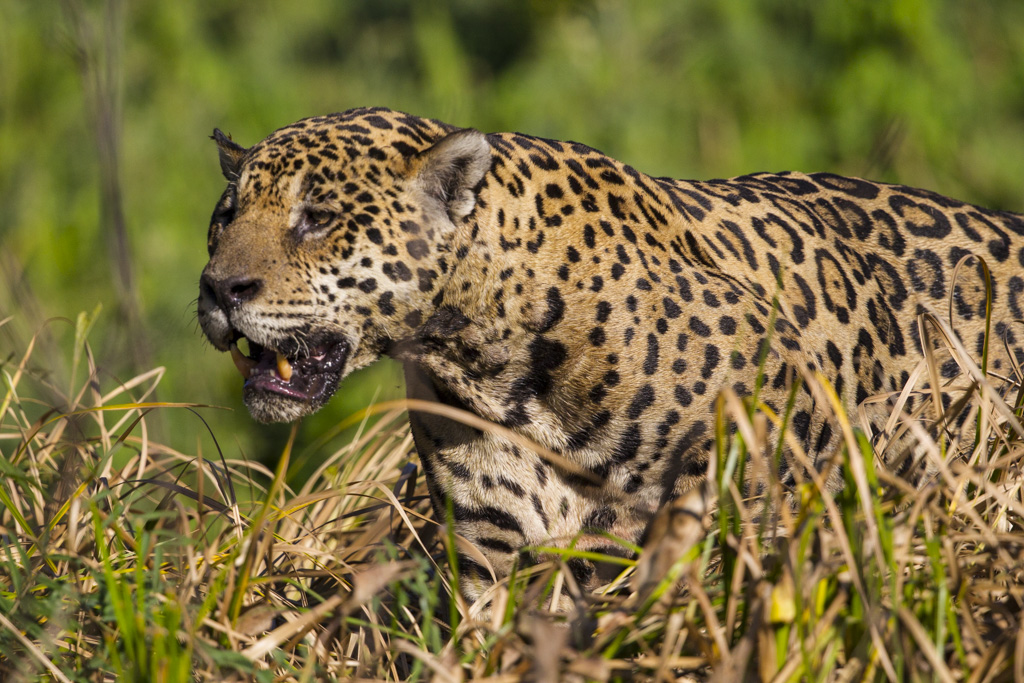
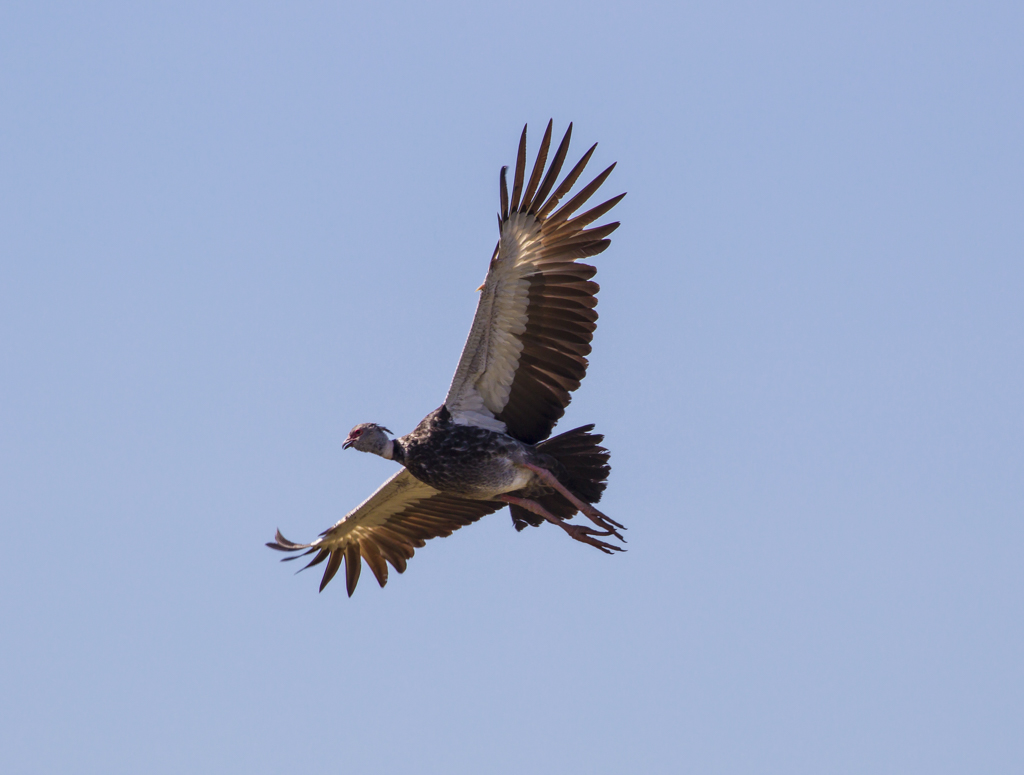
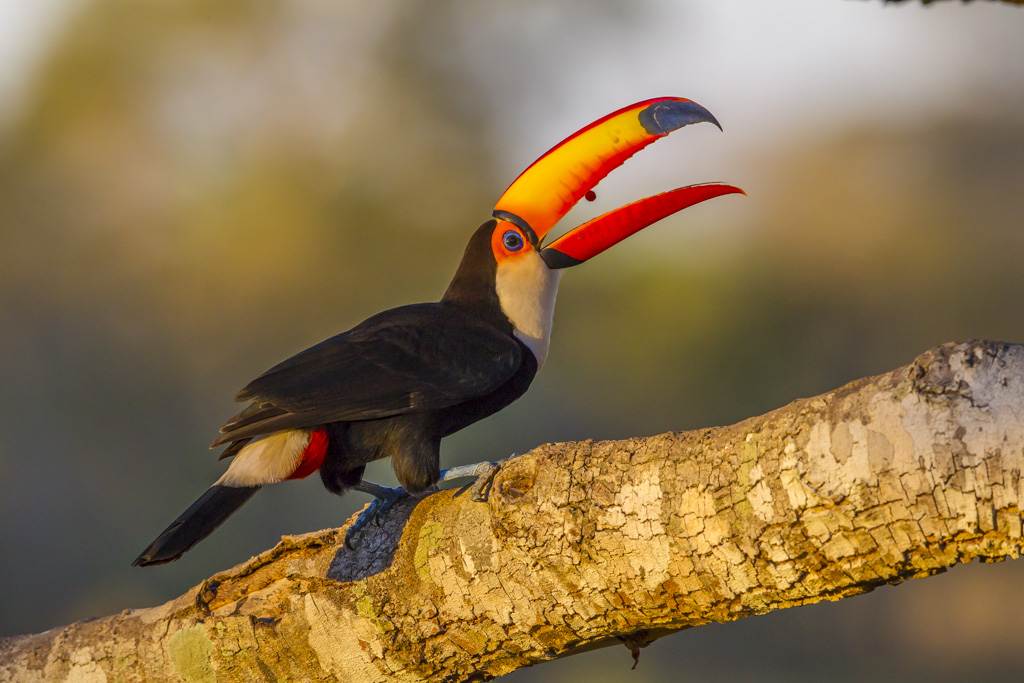
I’ve traveled to the Brazil’s Pantanal region several times to photograph jaguars, Toco toucans, giant anteaters, and other amazing wildlife. This part of the world reminds me to Tanzania. There’s wildlife at every turn and the photo opportunities are amazing.
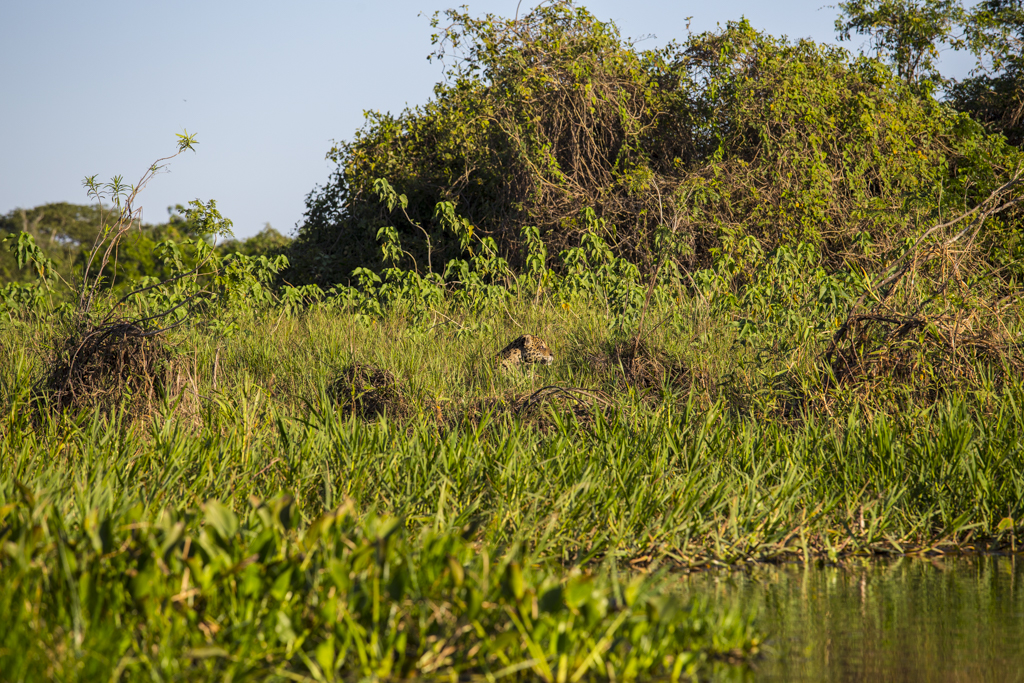
Jaguar, Mick the Jaguar, older male with wounded eye, Pantanal, Brazil, South America.
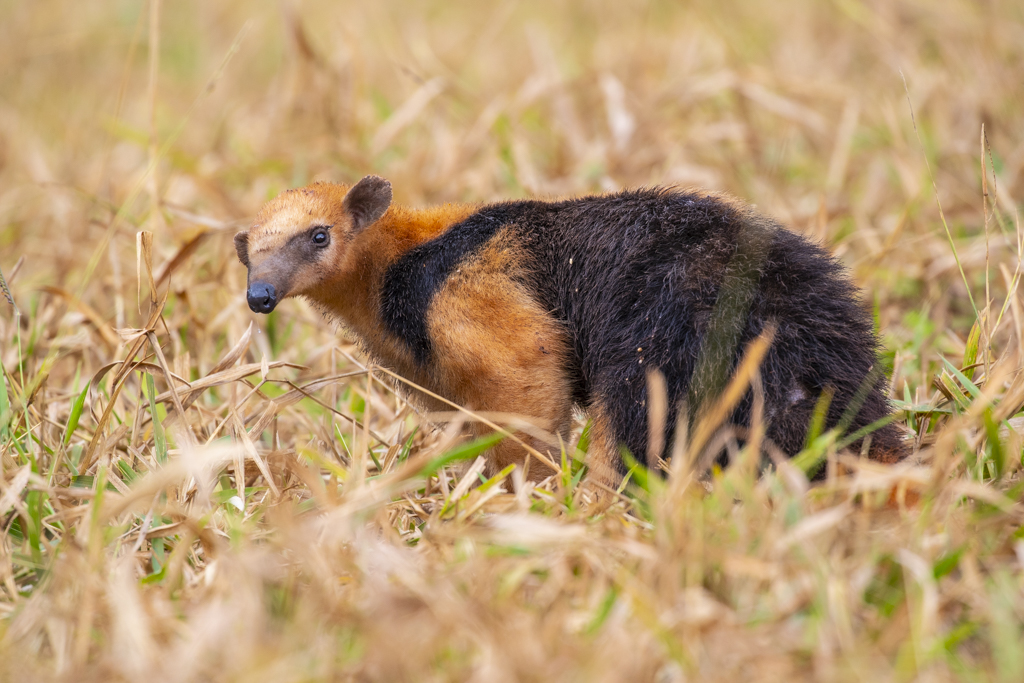
Southern Tamandua; Tamandua tetradactyla; lesser anteater; collared anteater; Mato Grosso de Sul; Southern Pantanal; Brazil
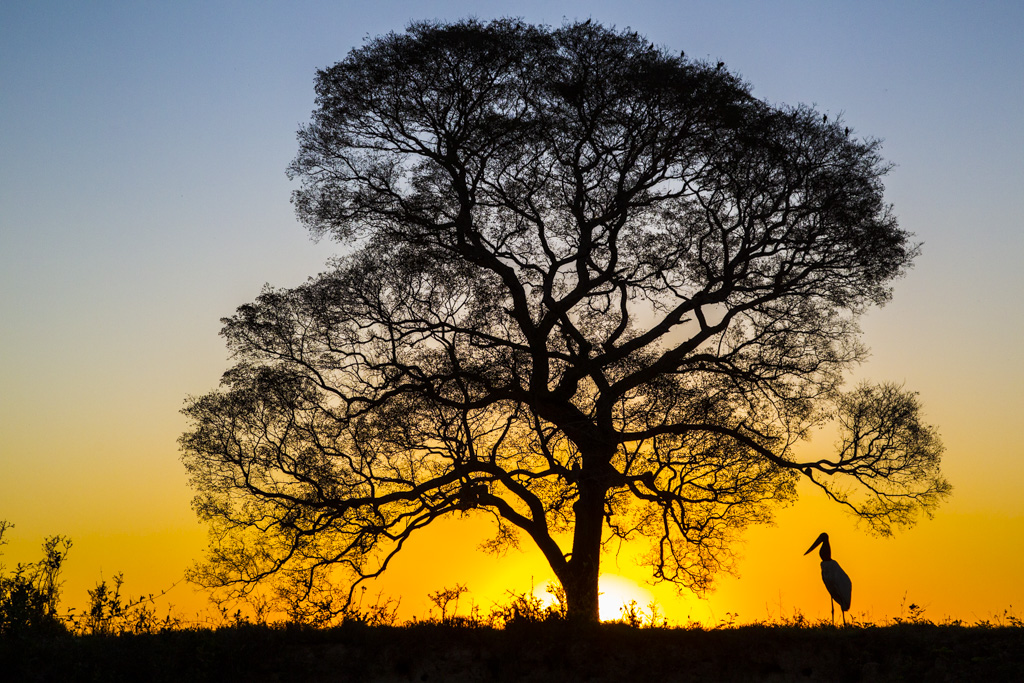
Sunset, Jabiru; Jabiru mycteria, silhouette, Pantanal, Brazil, South America
Toco Toucan, Ramphastos toco; feeding, Pantanal, Brazil, South America
During the summer of 2020 we started seeing news reports in the US about the horrible fires in the Pantanal. One especially heartbreaking photo showed a jaguar rescued from the flames in a rehab facility with bandaged paws.
Fellow photographers were sending me links to news reports. So I thought I’d send an email to Charles Munn, founder and owner of SouthWild. SouthWild is the tour company Strabo Photo Tour Collections uses to coordinate all my trips to Pantanal.
Here’s the update Charles Munn sent about the Pantanal:
“The pantanal is half the size of California. It is and always has been a fire-adapted ecosystem, designed to have periodic dry season fires, originally set by lightning prior to humans arriving 12,000 years ago, and then set every year or two or five by humans. The plants and animals evolved with periodic, widespread fires, for perhaps 100,000 years. The Pantanal had a longer, drier dry season this year than any time in the last 47 years. The extra dry year and the fires set by some ranchers here and there have caused about 25% of the Pantanal to burn. By early October, the fires were done and the first rains have started, thankfully. “A report from 3 weeks ago from two naturalist guides at different times in different boats ..(the guides who have guided for SouthWild) said that they racked up 18 good Jaguar sightings in a week. That is a high or extra high number of sightings. Yet another colleague had 11 Jaguar sightings in 2 days. All of these Jaguar results involved NO assistance from radio calls from other boats, because the pandemic has reduced boats in Jaguarland to the point where there is no radio system this season. There was a lot of fire in the heart of Jaguarland in August and September, but it is done now, and all of these Jaguar reports have come from AFTER the fires were over. None of our lodges in the Pantanal has had its birding trails or lodges affected by the fires. There were some fires near SWP lodge, but the fire was kept out of the forests that we use for birding. As tragic as the fires have been, they now are done, and it would appear that things will look pretty normal normal next year, that is assuming that rains that have started in Oct will intensify in Nov and continue for the normal rainy months of Dec, Jan, Feb, March.“
Charles Munn
“One more detail I should make clear: Most of Pantanal is …seasonally flooded (and then seasonally dried out) grasses.. not forest for decades, perhaps millennia, the Three Brothers River in the heart of Jaguarland has a thin ribbon of forest along 80% of the riverbank, and just grasses along the remaining 20%. where there is forest along the riverbank, it averages only 20 meters wide….almost nothing….. and in many places it is only 10 meters wide and then all the rest of the habitat behind this narrow gallery forest…for km and km…. is …grass….. Therefore, the fires were worse this year than in decades, but the Pantanal is designed to survive and bounce back from fire.“
Charles Munn
I hope Charles’s information adds to what you’ve read or seen in the US news. My hope is to one day return to the Pantanal and enjoy the fabulous photography and people in that area of the world.
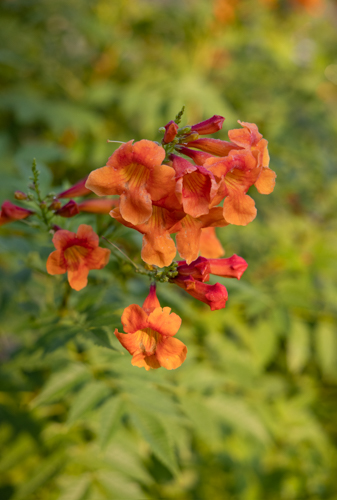
Blend of 10 images merged together in Photoshop to get the entire set of blooms in focus.
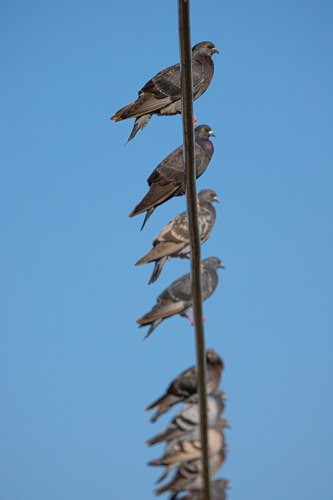
First photo in the series of Focus Bracketing. Notice the focus point is on the front flowers. Click through the series and you’ll see the focus point change to different flowers.
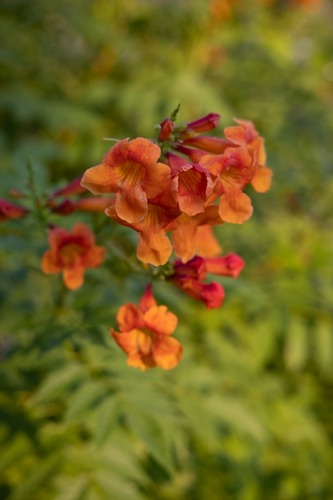
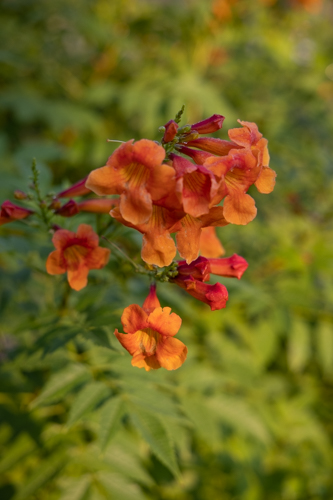
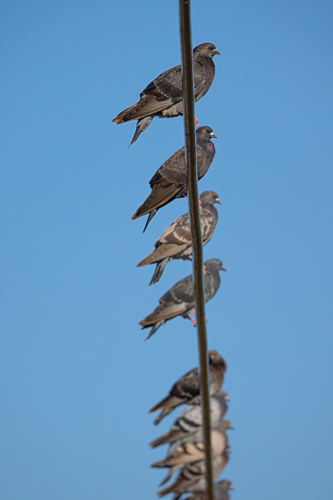
Second photo in the series. Notice the change in focus? It’s small.
Third photo in the series. Notice the change in focus? It’s small.
4th photo in the series. Notice the change in focus? It’s small.
5th photo in the series. Notice the change in focus? It’s small.
6th photo in the series. Notice the change in focus? It’s small.
7th photo in the series. Notice the change in focus? It’s small.
8th photo in the series. Notice the change in focus? It’s small.
9th photo in the series. Notice the change in focus? It’s small.
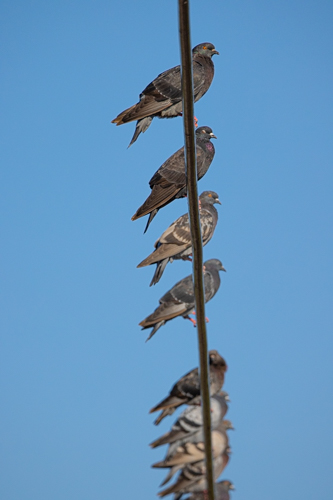
10th photo in the series. Notice the change in focus? It’s now on the back bloom at the bottom.
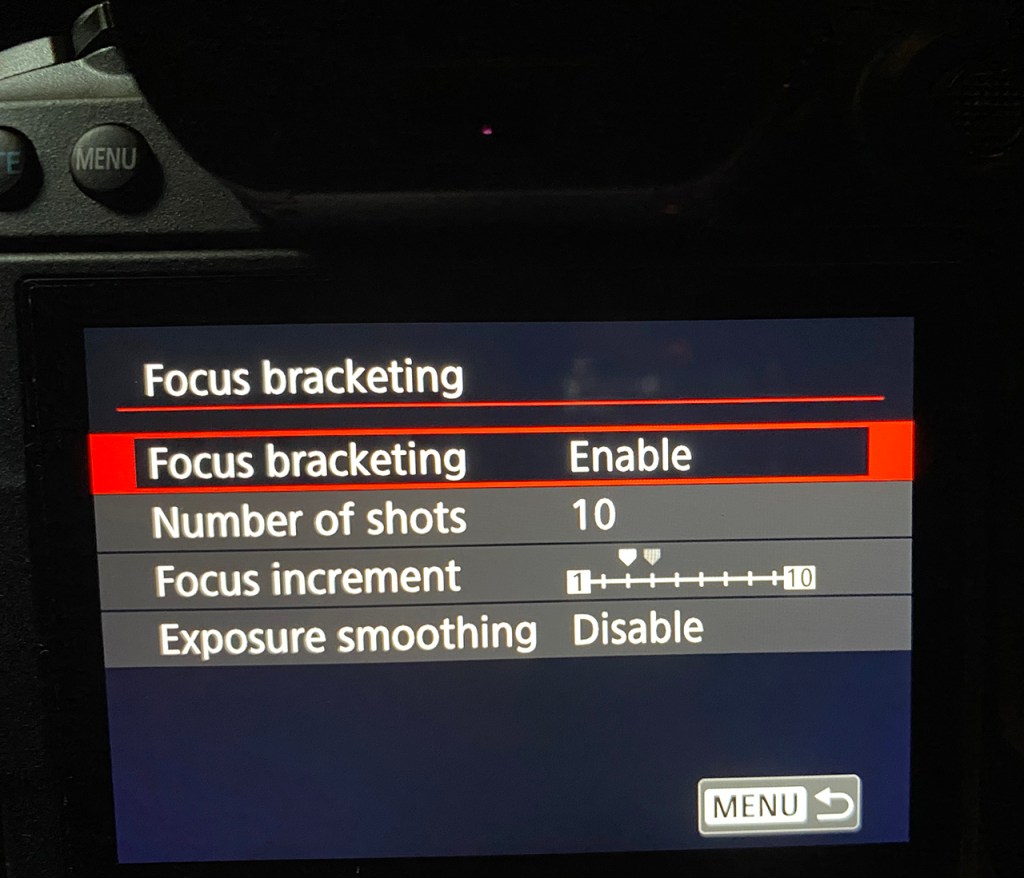
Here’s a view of my menu setting for this series of photos.
Photographers have fought against depth-of-field since the beginning. To get more depth of field, we have to use a smaller aperture and that means a slower shutter speed. It’s just the way photography works.
For years, we’ve been able to take photos of a subject, focus in different places, and then blend those photos later to increase our depth-of-field. Then about 10 years ago camera manufacturers started putting focus stacking in the camera. Today, Canon calls it focus bracketing in the Canon R5.
To activate focus bracketing on the R5, go to Shooting Menu 5. The menu then offers options such as how many photos to take and how far to focus into the scene.
A little icon shows on the shooting screen while Focus Bracketing is active. Push the shutter button and the camera rapidly fires a series of photos. It doesn’t blend the photos in camera but provides the RAW files for blending later. I use Photoshop to do my blending. (Instructions are below.)
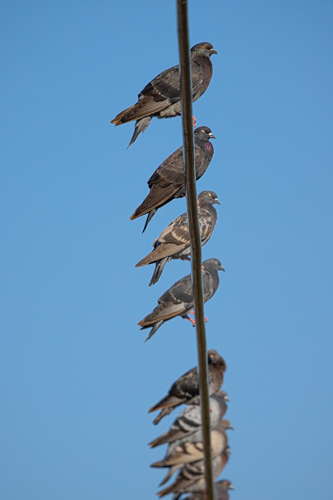
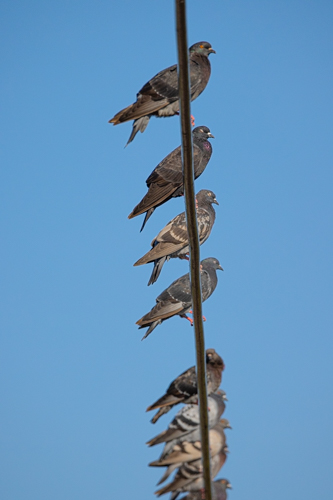
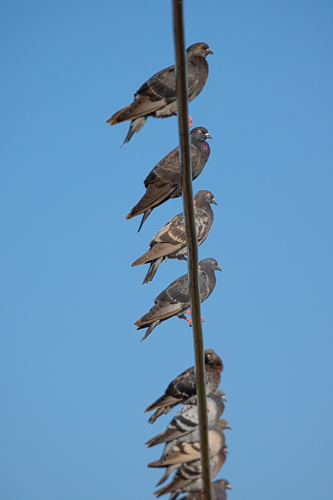
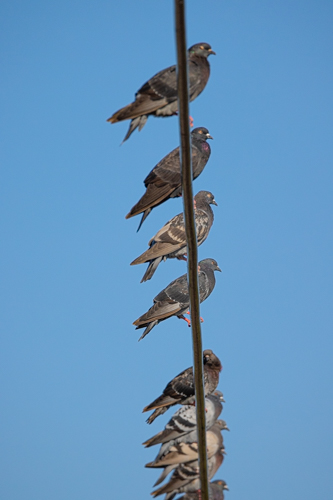
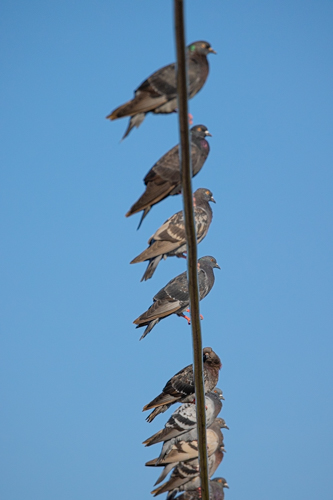
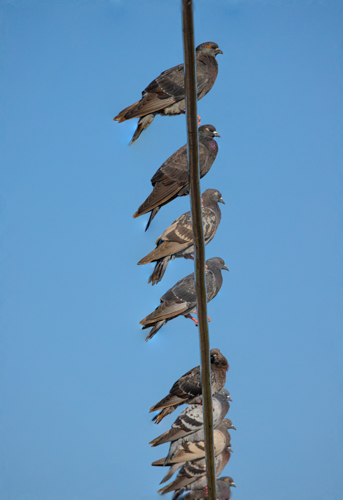
10 photos taken with Focus Bracketing on the Canon R5. Notice how the focus moves from bird to bird as I hold the camera and
Finished focus bracket of the pictures above.
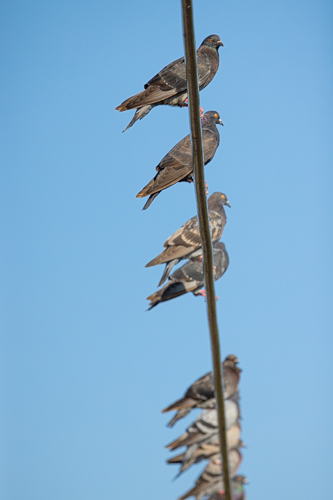
My before picture of the same scene. Taken at f/11 but notice the out-of-focus birds at the bottom of the picture.
Notice the tiny imperfections in the photo on the left. Look closely at the tails. See the little blue highlights? That’s where the birds moved their tails. Focus bracketing doesn’t work well on moving subjects.
My instructions for blending a focus bracket (1) Open all the photos in Photoshop in a Layer. In Bridge, highlight the photos then select Tools>Photoshop>Load Files into Photoshop Layers. In Lightroom, highlight the photos then select Photo>Edit In>Open in Layers in Photoshop; (2) Select all the photos once they are in the Layers Pallette; (3) Select Edit>Auto Align; (4) Select Edit>Auto Blend, (5) Select Layer>Flatten.
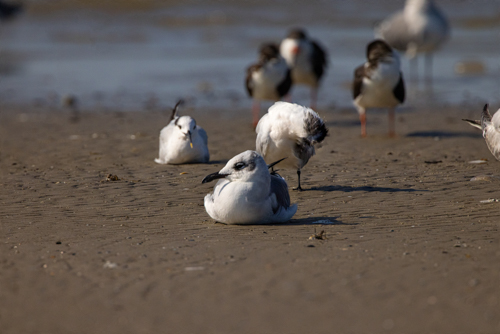
Here’s a focus bracket of a laughing gull with other shorebirds. Notice that the three birds are in focus.
Same shot without focus bracketing. Notice that the third bird is out-of-focus.
I suggest you focus a bit closer than needed for your first photo of the series. That way you get some foreground in focus.
Have you tried focus stacking or focus bracketing? Success?